
1. Introduzione
Thank you for choosing the JOOM JU011-12 Contactless Kitchen Faucet. This manual provides essential information for the safe installation, operation, and maintenance of your new kitchen faucet. Please read these instructions thoroughly before installation and keep them for future reference.
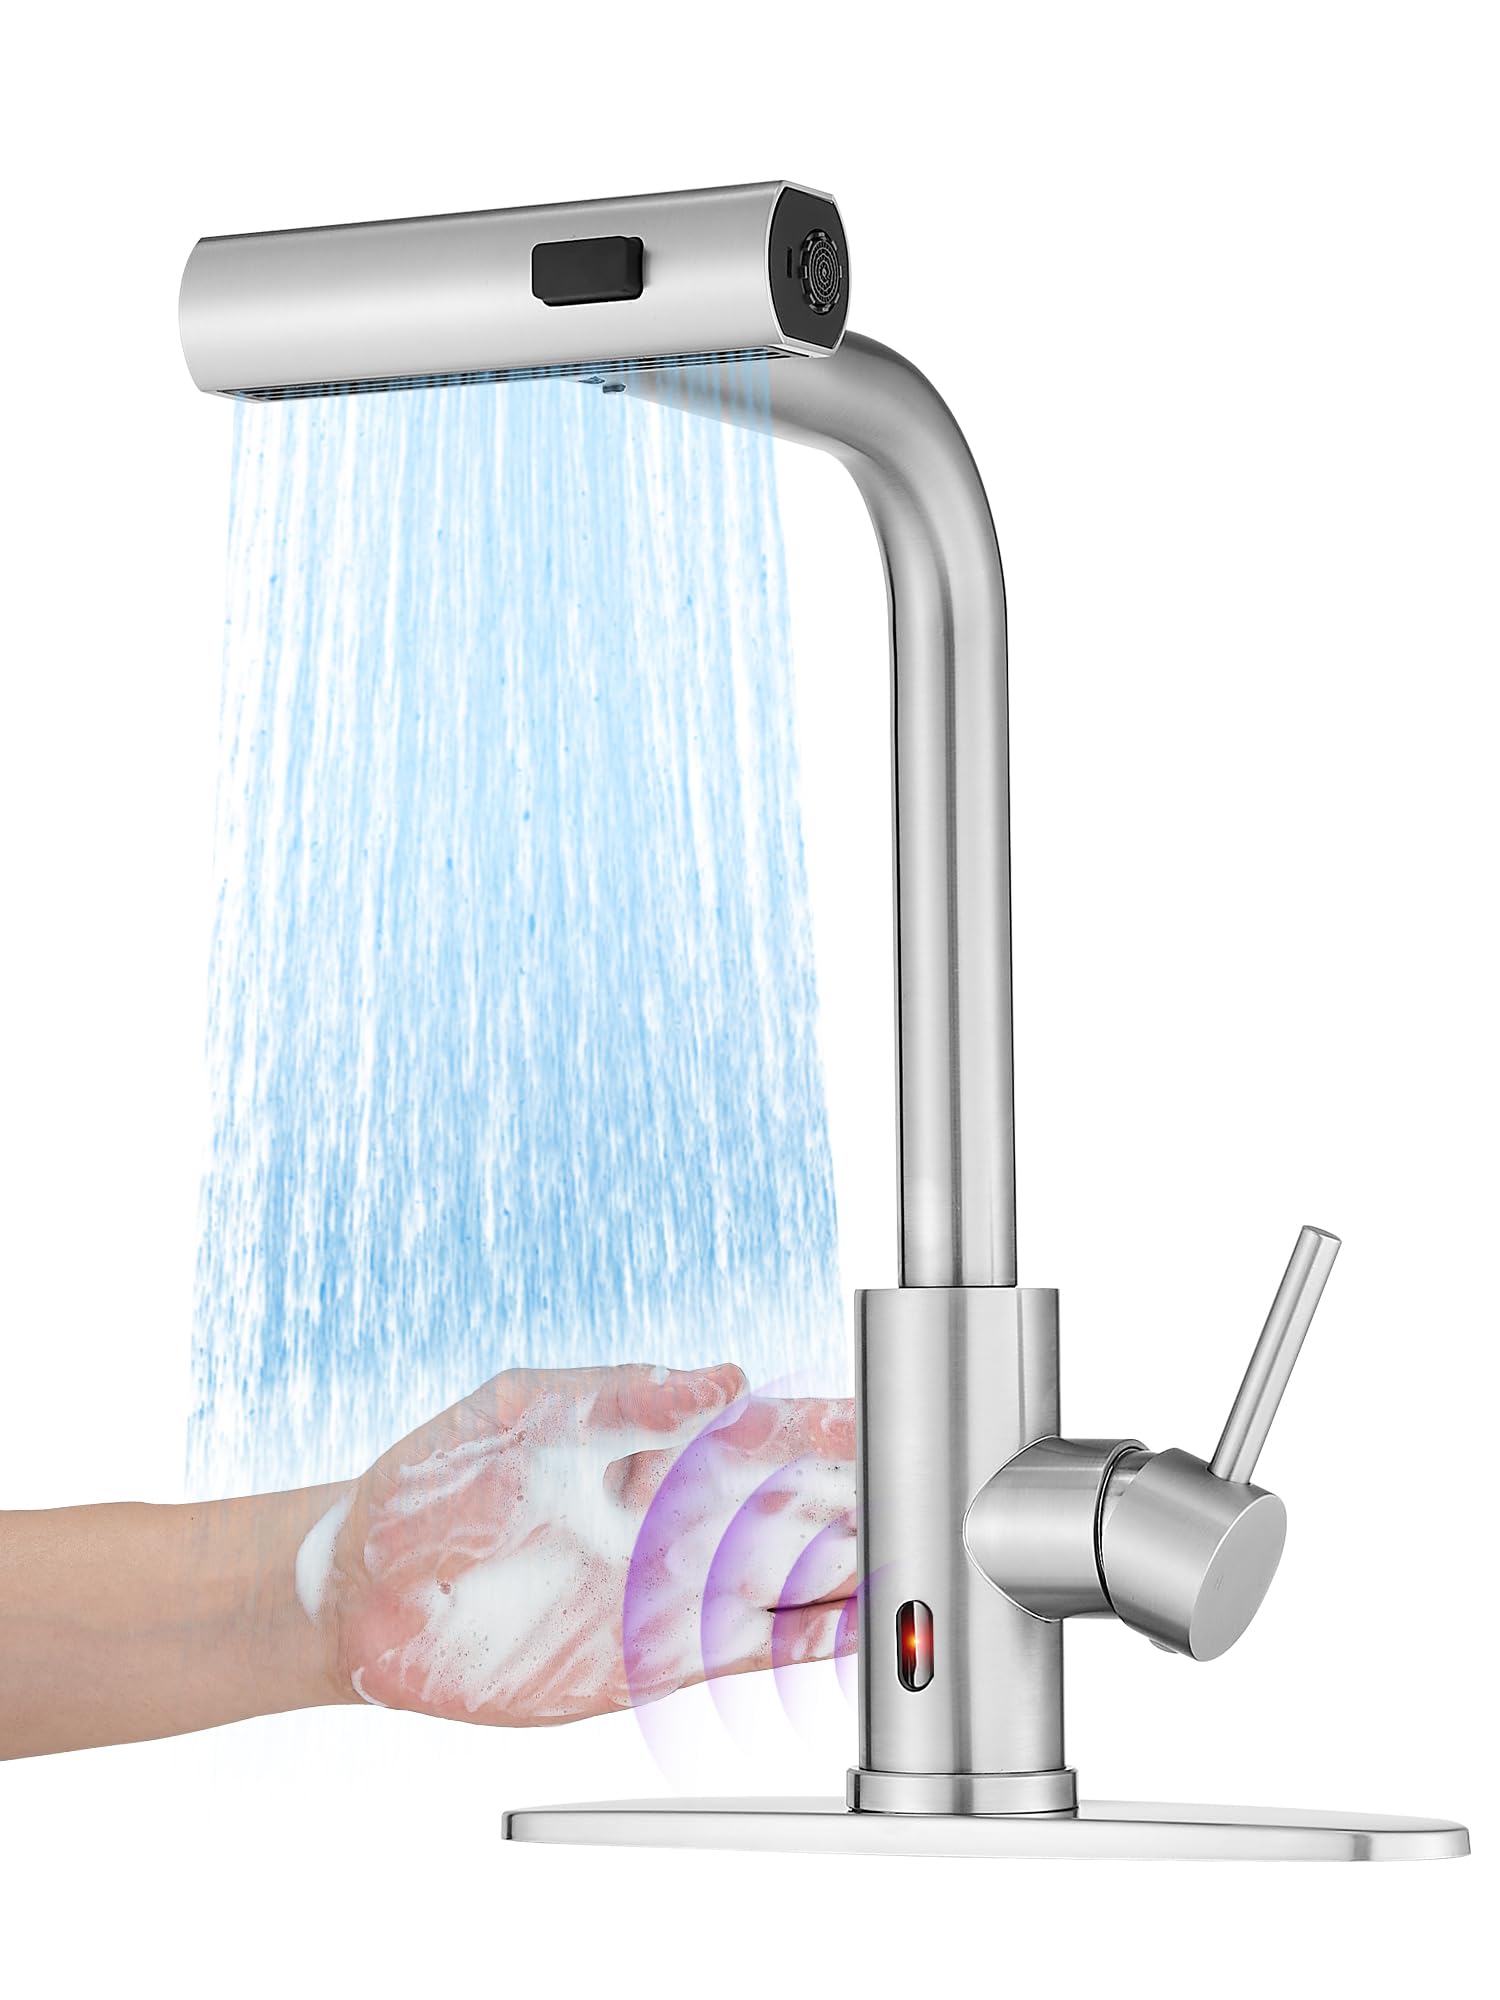
Image: The JOOM JU011-12 Contactless Kitchen Faucet, showcasing its modern design and brushed stainless steel finish.
2. Caratteristiche del prodotto
- Funzionamento senza contatto: Equipped with intelligent chips and a responsive sensor for hands-free water activation.
- 3-in-1 Multi-mode Sprayer: Features Stream, Broom, and Rain spray modes for versatile cleaning tasks.
- Spruzzatore a discesa: Includes a 24-inch braided hose with 360° rotation for extended reach and flexibility.
- Auto-Retraction Technology: Ensures the sprayer hose smoothly retracts back into place after use.
- Funzione cascata: Provides a unique cascade water flow option.
- Costruzione durevole: Made from high-quality stainless steel with a brushed finish.
- Controllo a maniglia singola: Consente di regolare facilmente la temperatura e il flusso dell'acqua.
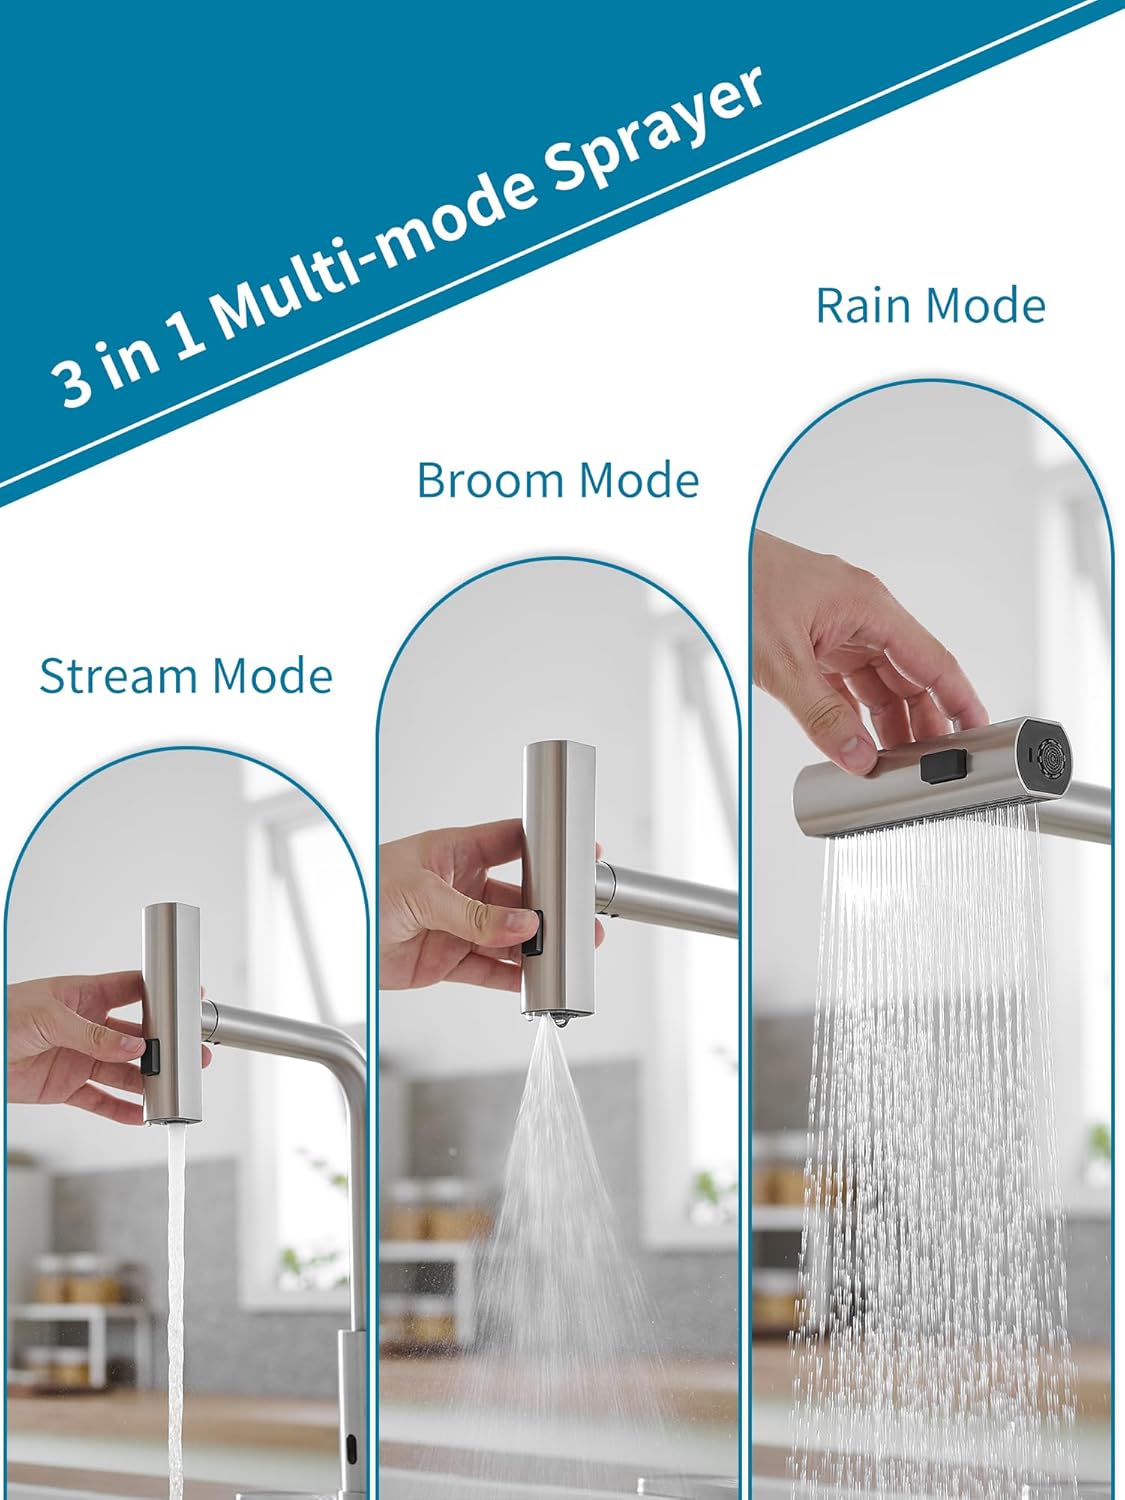
Image: The faucet's sprayer head demonstrating the three distinct water modes: Stream, Broom, and Rain.

Image: The pull-down sprayer extended from the faucet, highlighting the 24-inch braided hose and 360-degree swivel capability, along with the auto-retraction weight.

Immagine: un primo piano view of the faucet's intelligent chip sensor, indicating fast response for contactless operation.

Image: A hand activating the contactless sensor on the faucet, showing water flowing in response to the gesture.
3. Specifiche
| Marca | Gioia |
| Numero di modello | JU011-12 |
| Uso consigliato | Cucina |
| Tipo di montaggio | Montaggio sul ponte |
| Tipo di finitura | Spazzolato |
| Materiale | Acciaio inossidabile |
| Numero di maniglie | 1 |
| Caratteristiche speciali | Pull-down Sprayer, Contactless Sensor, Waterfall Function |
| Diametro del foro di montaggio | 3.2-3.5 cm (1-3/10" ~ 1-3/8") |
| Spessore massimo del piano di lavoro | 5 centimetri (2") |
| Hose Sizes Supported | M 10x1, G3/8 |

Image: Detailed diagram showing the faucet's dimensions in centimeters and inches, along with mounting hole diameter and maximum countertop thickness requirements.
4. Informazioni sulla sicurezza
- Chiudere sempre l'alimentazione idrica principale prima di iniziare qualsiasi operazione di installazione o manutenzione.
- Durante l'installazione, indossare adeguati dispositivi di protezione individuale, come occhiali e guanti di sicurezza.
- Assicurarsi che tutti i collegamenti siano ben saldi per evitare perdite. Non serrare eccessivamente.
- In caso di dubbi su qualsiasi fase del processo di installazione, consultare un idraulico qualificato.
- Tenere le parti piccole lontano dalla portata dei bambini per evitare rischi di soffocamento.
5. Guida all'installazione
Follow these steps for proper installation of your JOOM kitchen faucet:

Image: A four-panel diagram illustrating the initial installation steps: 1) Installing the nut kit from below, 2) Tightening the nut kit with a screwdriver, 3) Connecting hot and cold water pipes to the valve, and 4) Installing the hose load-bearing ball.
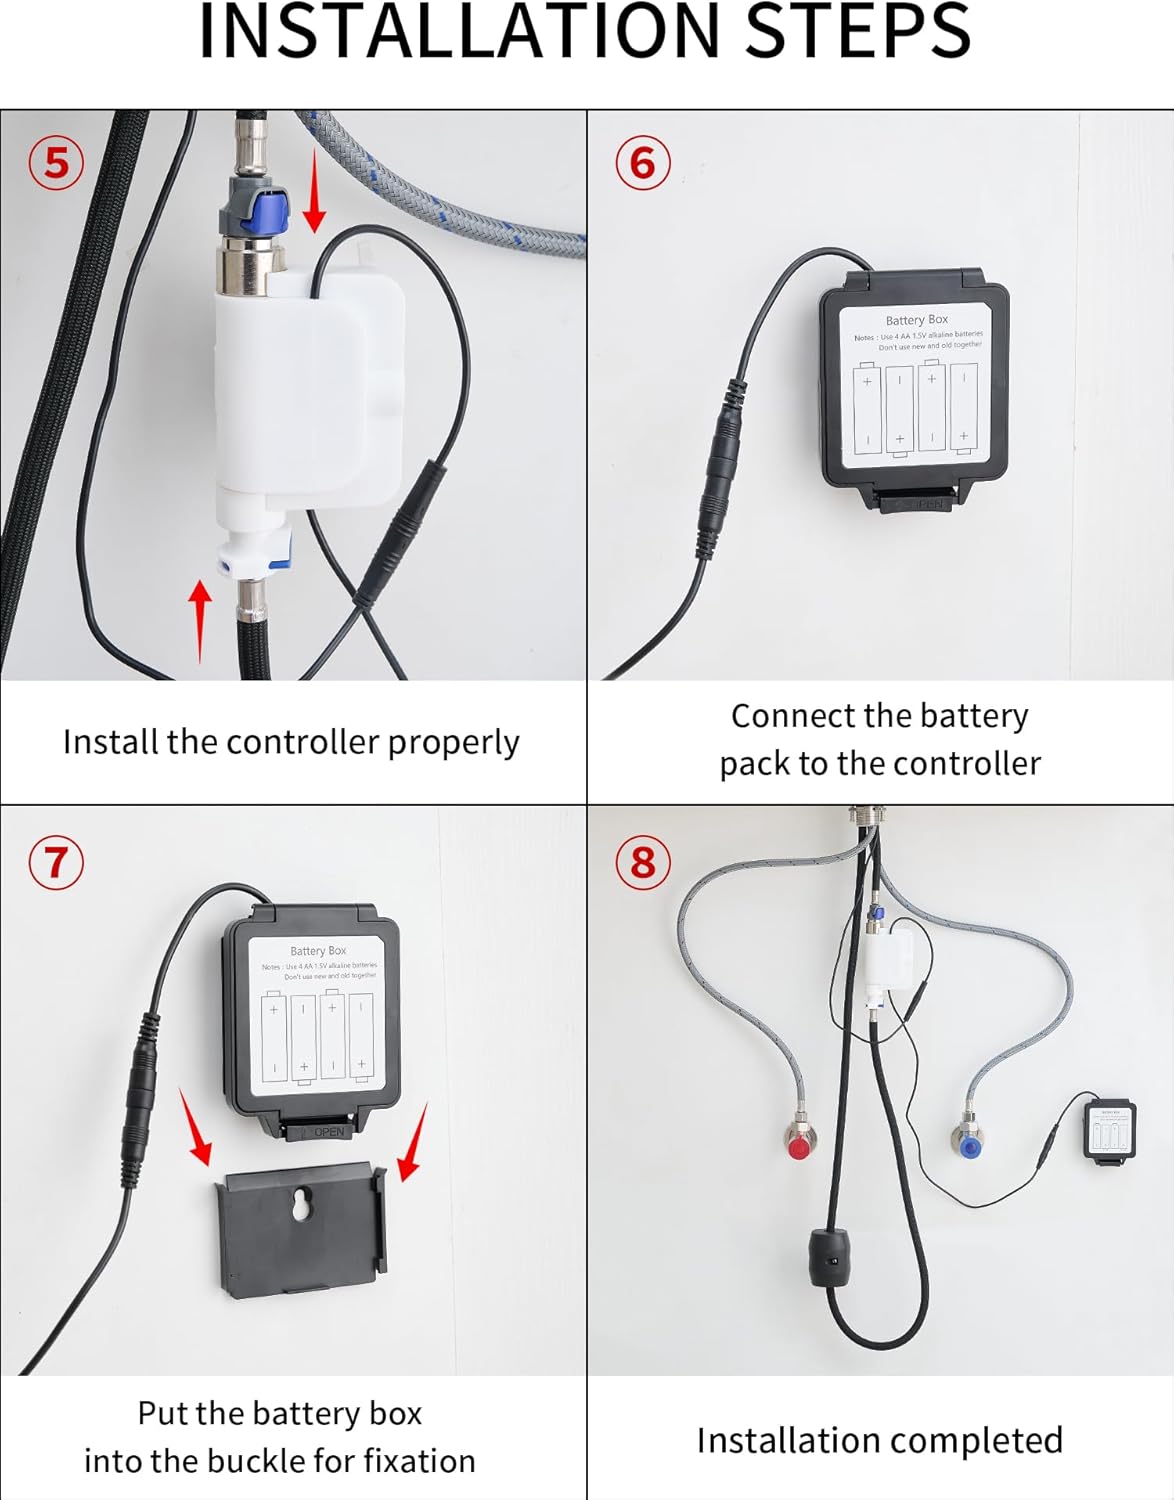
Image: A four-panel diagram illustrating the final installation steps: 5) Installing the controller, 6) Connecting the battery pack to the controller, 7) Securing the battery box into its buckle, and 8) A view of the completed installation under the sink.
- Preparare il foro di montaggio: Ensure your countertop has a suitable mounting hole (3.2-3.5 cm diameter) and is not thicker than 5 cm.
- Installare il rubinetto: Inserire il corpo del rubinetto nel foro di montaggio.
- Secure the Faucet (Step 1 & 2): From underneath the sink, install the nut kit onto the faucet shank and tighten it securely using a screwdriver until the faucet is stable.
- Connect Water Lines (Step 3): Connect the hot and cold water supply lines to the corresponding inlets on the faucet's valve. Ensure a tight, leak-free connection.
- Install Hose Load-Bearing Ball (Step 4): Attach the load-bearing ball to the pull-down hose underneath the sink. This provides the necessary weight for hose retraction.
- Install the Controller (Step 5): Mount the electronic controller unit in an accessible location under the sink.
- Connect Battery Pack (Step 6 & 7): Connect the battery pack to the controller. Insert the battery box into its designated buckle for fixation. Ensure batteries are correctly inserted (typically 4 AA batteries, not included).
- Test per perdite: Turn on the main water supply and check all connections for any leaks.
6. Funzionamento
- Funzionamento manuale della maniglia: Use the single handle to control water flow and temperature. Lift the handle to turn on/off water and move it left/right for hot/cold water.
- Contactless Sensor Operation: Wave your hand near the sensor located on the faucet body to activate or deactivate water flow. The intelligent chip ensures a fast response.
- Changing Sprayer Modes: Press the button on the sprayer head to cycle through the Stream, Broom, and Rain modes.
- Using the Pull-Down Sprayer: Gently pull the sprayer head from the spout for extended reach. The 24-inch braided hose and 360° rotation allow for flexible use. When finished, the auto-retraction technology will pull the hose back into place.
- Funzione cascata: The faucet also features a waterfall mode, providing a broad, gentle flow of water.

Image: A person using the pull-down sprayer to rinse fruits in a colander, demonstrating the practical application of the sprayer function.
7. Manutenzione e cura
- Pulizia: Clean the faucet regularly with a soft cloth and mild soap. Avoid abrasive cleaners, harsh chemicals, or scouring pads, as these can damage the brushed stainless steel finish.
- Manutenzione del sensore: Keep the sensor area clean and free from obstructions to ensure proper contactless operation.
- Pulizia dell'aeratore: Svitare e pulire periodicamente l'aeratore (se applicabile) per rimuovere i depositi minerali e mantenere un flusso d'acqua ottimale.
- Ispezione del tubo: Regularly check the pull-down hose for any signs of wear or damage.
- Sostituzione della batteria: If the contactless function becomes unresponsive or intermittent, replace the batteries in the battery pack.
8. Risoluzione Dei Problemi
| Problema | Possibile causa | Soluzione |
|---|---|---|
| Basso flusso d'acqua | Partially closed water supply valves, clogged aerator, debris in water lines. | Ensure hot and cold water supply valves are fully open. Clean or replace the aerator. Flush water lines. |
| Contactless sensor not working | Dead batteries, obstructed sensor, sensor malfunction. | Replace batteries in the battery pack. Clean the sensor area. If problem persists, contact customer support. |
| Perdite dai collegamenti | Loose connections, damaged O-rings/washers. | Tighten connections carefully. Inspect and replace any damaged O-rings or washers. |
| Sprayer hose does not retract fully | Obstruction under the sink, incorrect weight placement. | Clear any obstructions around the hose under the sink. Ensure the load-bearing ball is correctly positioned. |
9. Garanzia e supporto
This JOOM product is covered by a standard manufacturer's warranty. For specific warranty details, please refer to the documentation included with your purchase or contact JOOM customer service.
For technical support, replacement parts, or any questions regarding your JOOM JU011-12 faucet, please contact our customer support team through the retailer where you purchased the product or visit the official JOOM websito.