
1. Informazioni importanti sulla sicurezza
ATTENZIONE: Keep away from eyes. Do not ingest or inhale small parts. Clean product regularly. For adult supervision of children's use.
Le dichiarazioni relative agli integratori alimentari non sono state valutate dalla FDA e non intendono diagnosticare, trattare, curare o prevenire alcuna malattia o condizione di salute.
2. Contenuto della confezione
Your RESUXI Professional 5-in-1 Grooming Kit includes the following items:
- Main Hair Clipper
- Rifinitore di precisione con lama a T
- Rasoio elettrico a lamina
- Testina per rifinitore dei peli del naso
- Testina per regolabarba
- 8 Guide Combs for Hair Clipper (3mm, 6mm, 9mm, 12mm, 15mm, 18mm, 21mm, 25mm)
- 4 Guide Combs for T-Blade Trimmer (1.5mm, 3mm, 6mm, 9mm)
- 3 cavi di ricarica USB
- Spazzola per la pulizia
- Mantello da barbiere
- Copertura protettiva della lama

3. Prodotto finitoview
The RESUXI Professional 5-in-1 Grooming Kit provides versatile tools for various grooming needs. Each device is designed for efficiency and user comfort.
3.1 Main Hair Clipper
- Motore potente: Operates at up to 7500 RPM for efficient cutting without pulling hair.
- Lame affilate in acciaio inossidabile: Designed for precise, one-off trimming.
- Leva conica regolabile: 5-speed adjustment from 0.5mm to 3.5mm for customized cutting lengths.
- Pettini guida: Includes 8 combs for various hair lengths (3mm to 25mm).
- Display LCD digitale: Shows remaining charge, battery status, and oil reminder.

3.2 T-Blade Detail Trimmer
- Sharp T-Shaped Blade: Ideal for close trimming, outlining, and detailed work.
- Pettini guida: Includes 4 combs for specific trimming lengths (1.5mm, 3mm, 6mm, 9mm).
- Display LCD digitale: Shows remaining charge and battery status.
3.3 Electric Foil Shaver
- Intelligent Three Floating Shaving Heads: Si adatta ai contorni del viso per una rasatura precisa.
- Ultra-Thin Hypoallergenic Titanium Foil: Provides a smooth, bump-free, and ultra-close shave, suitable for sensitive skin.
- IPX6 impermeabile: The entire shaver body can be rinsed under water for easy cleaning.
- Display LCD digitale: Shows remaining charge and battery status.
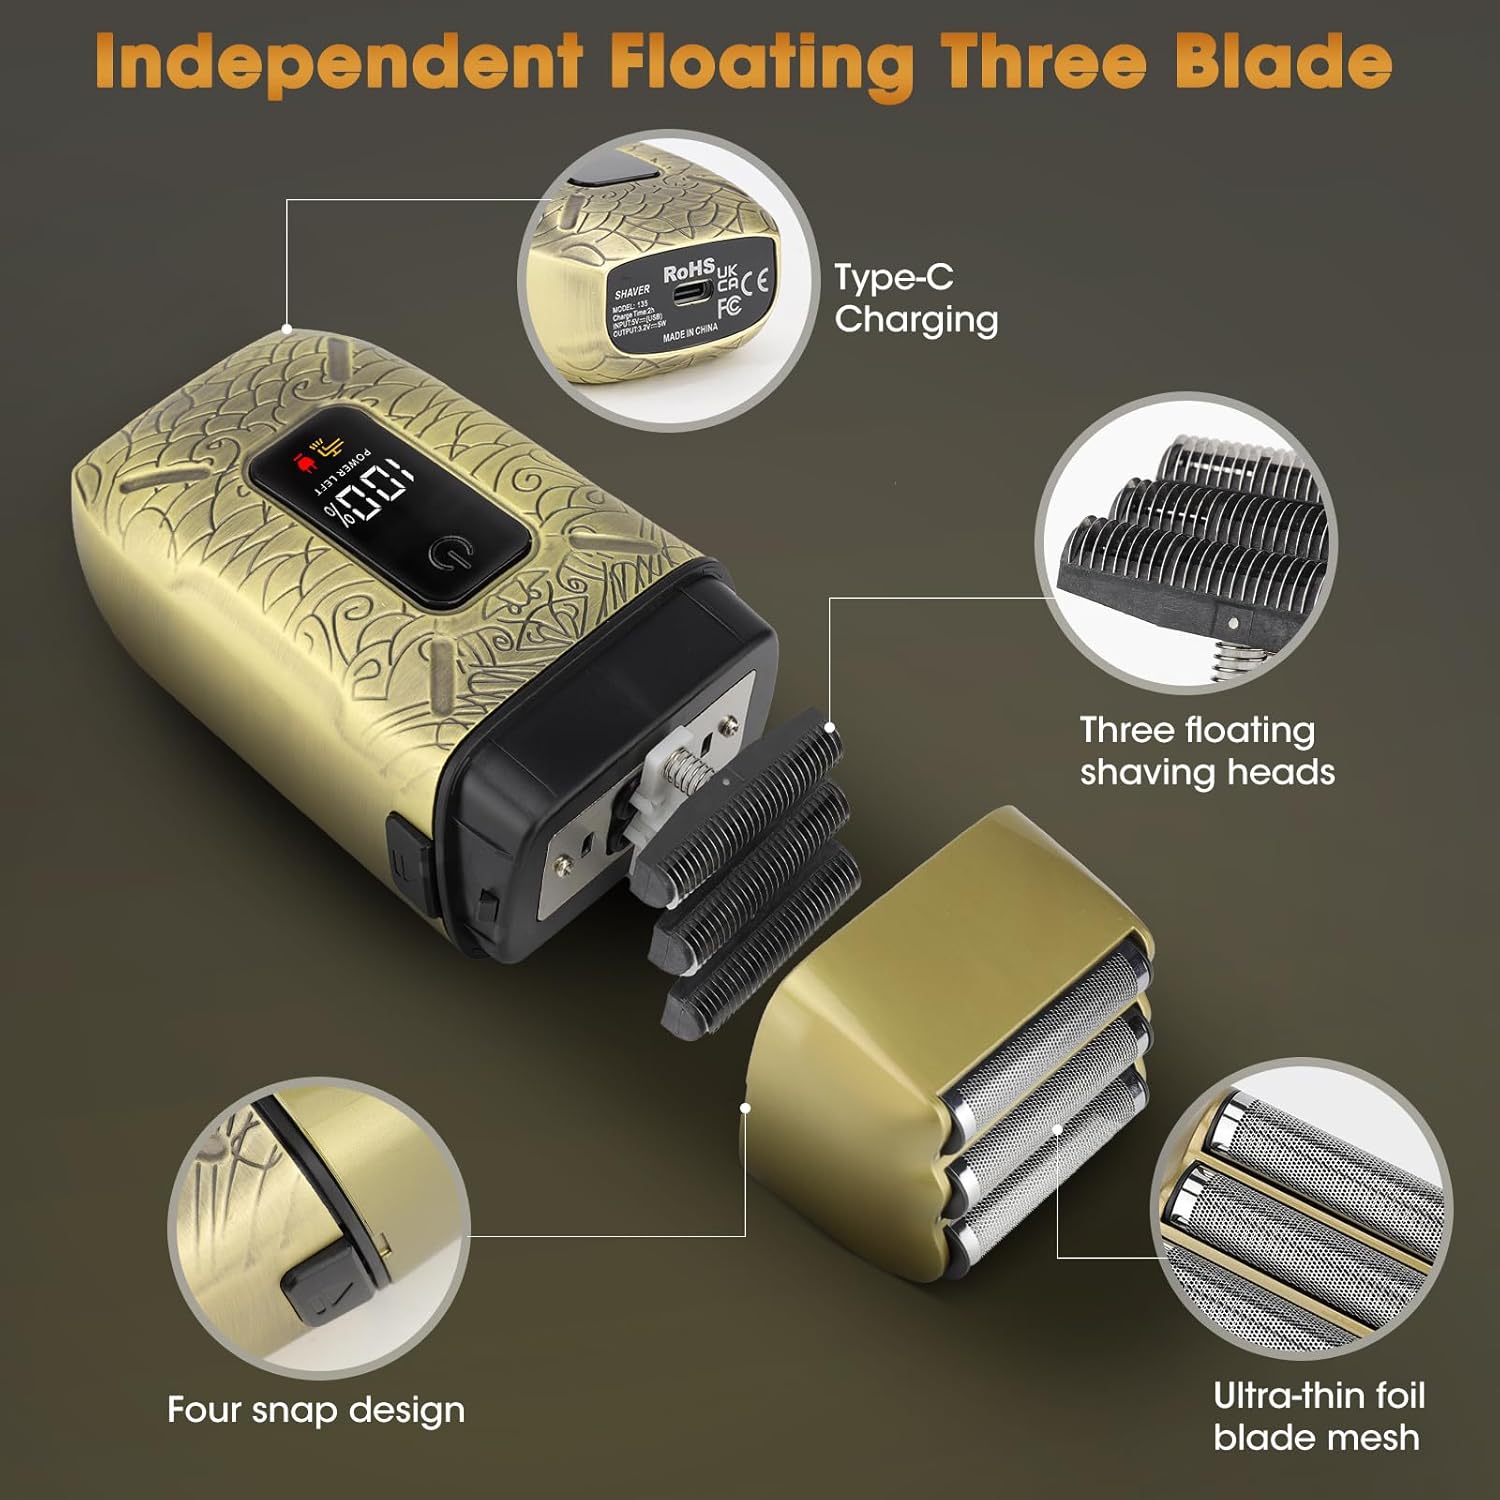
3.4 Nose Hair Trimmer Head & Beard Trimmer Head
- Interchangeable heads for specialized grooming tasks.

4. Configurazione e ricarica
4.1 Carica iniziale
- Prima del primo utilizzo, caricare completamente ciascun dispositivo.
- Connect the appropriate USB charging cable to the charging port of the hair clipper, T-blade trimmer, or electric shaver.
- Plug the other end of the USB cable into a compatible USB power source (e.g., laptop, power bank, USB charger, car charger).
- The LCD display on each device will indicate the charging status.
- Charging times: Hair Clipper (approx. 2.5 hours for 150 mins runtime), T-Blade Trimmer (approx. 2 hours for 180 mins runtime), Electric Shaver (approx. 2 hours for 90 mins runtime).

4.2 Montaggio/smontaggio delle testine e dei pettini guida
- For T-Blade Trimmer: To change between the T-blade, nose trimmer, or beard trimmer heads, gently twist and pull off the current head, then align and push on the desired head until it clicks into place.
- For Hair Clipper & T-Blade Trimmer Guide Combs: Select the desired guide comb. Align the comb with the blade and push it firmly until it snaps securely into position. To remove, gently lift the comb from the back and slide it off.

5. Istruzioni per l'uso
5.1 Utilizzo del tagliacapelli
- Assicurarsi che il tagliacapelli sia completamente carico.
- Applicare il pettine guida desiderato per la lunghezza dei capelli desiderata.
- Adjust the taper lever for fine-tuning the cutting length (0.5mm to 3.5mm).
- Premere il pulsante di accensione per accendere il tagliacapelli.
- Tenere il tagliacapelli con le lame rivolte verso l'alto e muoverlo nella direzione opposta a quella di crescita dei peli.
- Per risultati uniformi, utilizzare pennellate fluide e uniformi.
5.2 Using the T-Blade Detail Trimmer
- Assicurarsi che il rifinitore sia completamente carico.
- Attach the T-blade head. For specific lengths, attach a guide comb. For detailing or outlining, use without a comb.
- Premere il pulsante di accensione per accendere il rifinitore.
- For outlining, hold the trimmer at a slight angle and create sharp lines. For trimming, move against hair growth.
5.3 Using the Nose Hair Trimmer
- Ensure the trimmer base is fully charged.
- Applicare la testina del tagliacapelli per il naso.
- Premere il pulsante di accensione per accendere.
- Inserire delicatamente la punta del rifinitore nella narice o nel condotto uditivo. Non forzare.
- Muovi il tagliacapelli con movimenti circolari per tagliare i peli superflui.
5.4 Using the Electric Foil Shaver
- Assicurarsi che il rasoio sia completamente carico.
- Premere il pulsante di accensione per accendere il rasoio.
- Tieni il rasoio ad angolo retto rispetto alla pelle.
- Move the shaver in short, circular, or straight strokes against the direction of hair growth for a close shave.

6. Manutenzione
6.1 Pulizia
- After each use, turn off the device and remove any attached guide combs or heads.
- Use the provided cleaning brush to remove loose hairs from the blades and inside the device.
- For the electric shaver, the IPX6 waterproof design allows for rinsing the entire body under running water. Ensure it is completely dry before storage or next use.
- For the hair clipper and T-blade trimmer, wipe the body with a damp cloth. Do not submerge these devices in water.

6.2 Oiling Blades
- Regularly oil the blades of the hair clipper and T-blade trimmer to maintain optimal performance and longevity.
- The LCD display may provide a reminder to oil the blades.
- Apply a few drops of clipper oil (not included) to the blades after cleaning. Turn on the device for a few seconds to distribute the oil.
7. Risoluzione Dei Problemi
- Il dispositivo non si accende: Assicurarsi che il dispositivo sia completamente carico. Controllare il collegamento del cavo di ricarica.
- Scarsa prestazione di taglio / strappo dei peli: Clean the blades thoroughly to remove any trapped hair. Apply blade oil. Ensure the blades are not damaged.
- La batteria non mantiene la carica: Ensure the charging cable and adapter are functioning correctly. Allow for the full charging time as specified in Section 4.1.
- Irritazione della pelle dopo la rasatura: Ensure blades are clean. Use proper shaving technique. If irritation persists, discontinue use.
8. Specifiche
| Caratteristica | Specificazione |
|---|---|
| Marca | RESUXI |
| Nome del modello | RESUXI (Model 135) |
| Numero modello articolo | 135 |
| Tipo di batteria | Ioni di litio (1 inclusi) |
| Tempo di ricarica (Clipper) | 2.5 ore |
| Running Time (Clipper) | Fino a 150 minuti |
| Charging Time (Trimmer/Shaver) | 2 ore |
| Running Time (Trimmer) | Fino a 180 minuti |
| Running Time (Shaver) | Fino a 90 minuti |
| Velocità del motore | Fino a 7500 giri/min |
| Waterproof Rating (Shaver) | Grado di protezione IPX6 |
| Dimensioni del pacco | 9.57 x 7.68 x 3.43 pollici |
| Peso dell'articolo | 3.35 libbre |
| Produttore | RESUXI |
| ASIN | B0D3Q3SB22 |
9. Garanzia e supporto
For warranty information or technical support, please refer to the product packaging or contact RESUXI customer service directly. Contact details can typically be found on the manufacturer's official websito o tramite il tuo punto vendita.