1. Introduzione
Thank you for choosing the HMF 46126-15 Small Furniture Safe. This manual provides essential information for the proper installation, operation, and maintenance of your safe. Please read these instructions carefully before using the product to ensure optimal security and functionality. Keep this manual for future reference.
2. Informazioni sulla sicurezza
- Do not store the emergency keys inside the safe. Keep them in a secure, separate location known only to trusted individuals.
- Assicurarsi che la cassaforte sia posizionata su una superficie stabile e piana o fissata saldamente a una parete o al pavimento.
- Evitare di esporre la cassaforte a temperature estreme o a elevata umidità.
- Replace batteries promptly when the low battery warning indicator appears to prevent lockouts.
- Keep the safe away from children to prevent unauthorized access.
3. Contenuto della confezione
Si prega di controllare il pacco per assicurarsi che siano presenti tutti gli articoli:
- 1 x HMF 46126-15 Small Furniture Safe
- 2 chiavi di emergenza
- 2 x tasselli metallici
- 2 viti di montaggio
- 1 x Manuale utente (questo documento)
Nota: Per il funzionamento sono necessarie 4 batterie AA, non incluse nella confezione.
4. Prodotto finitoview
The HMF 46126-15 safe is designed for secure storage of valuables, cash, and documents. It features a robust steel construction and an electronic combination lock for reliable protection.
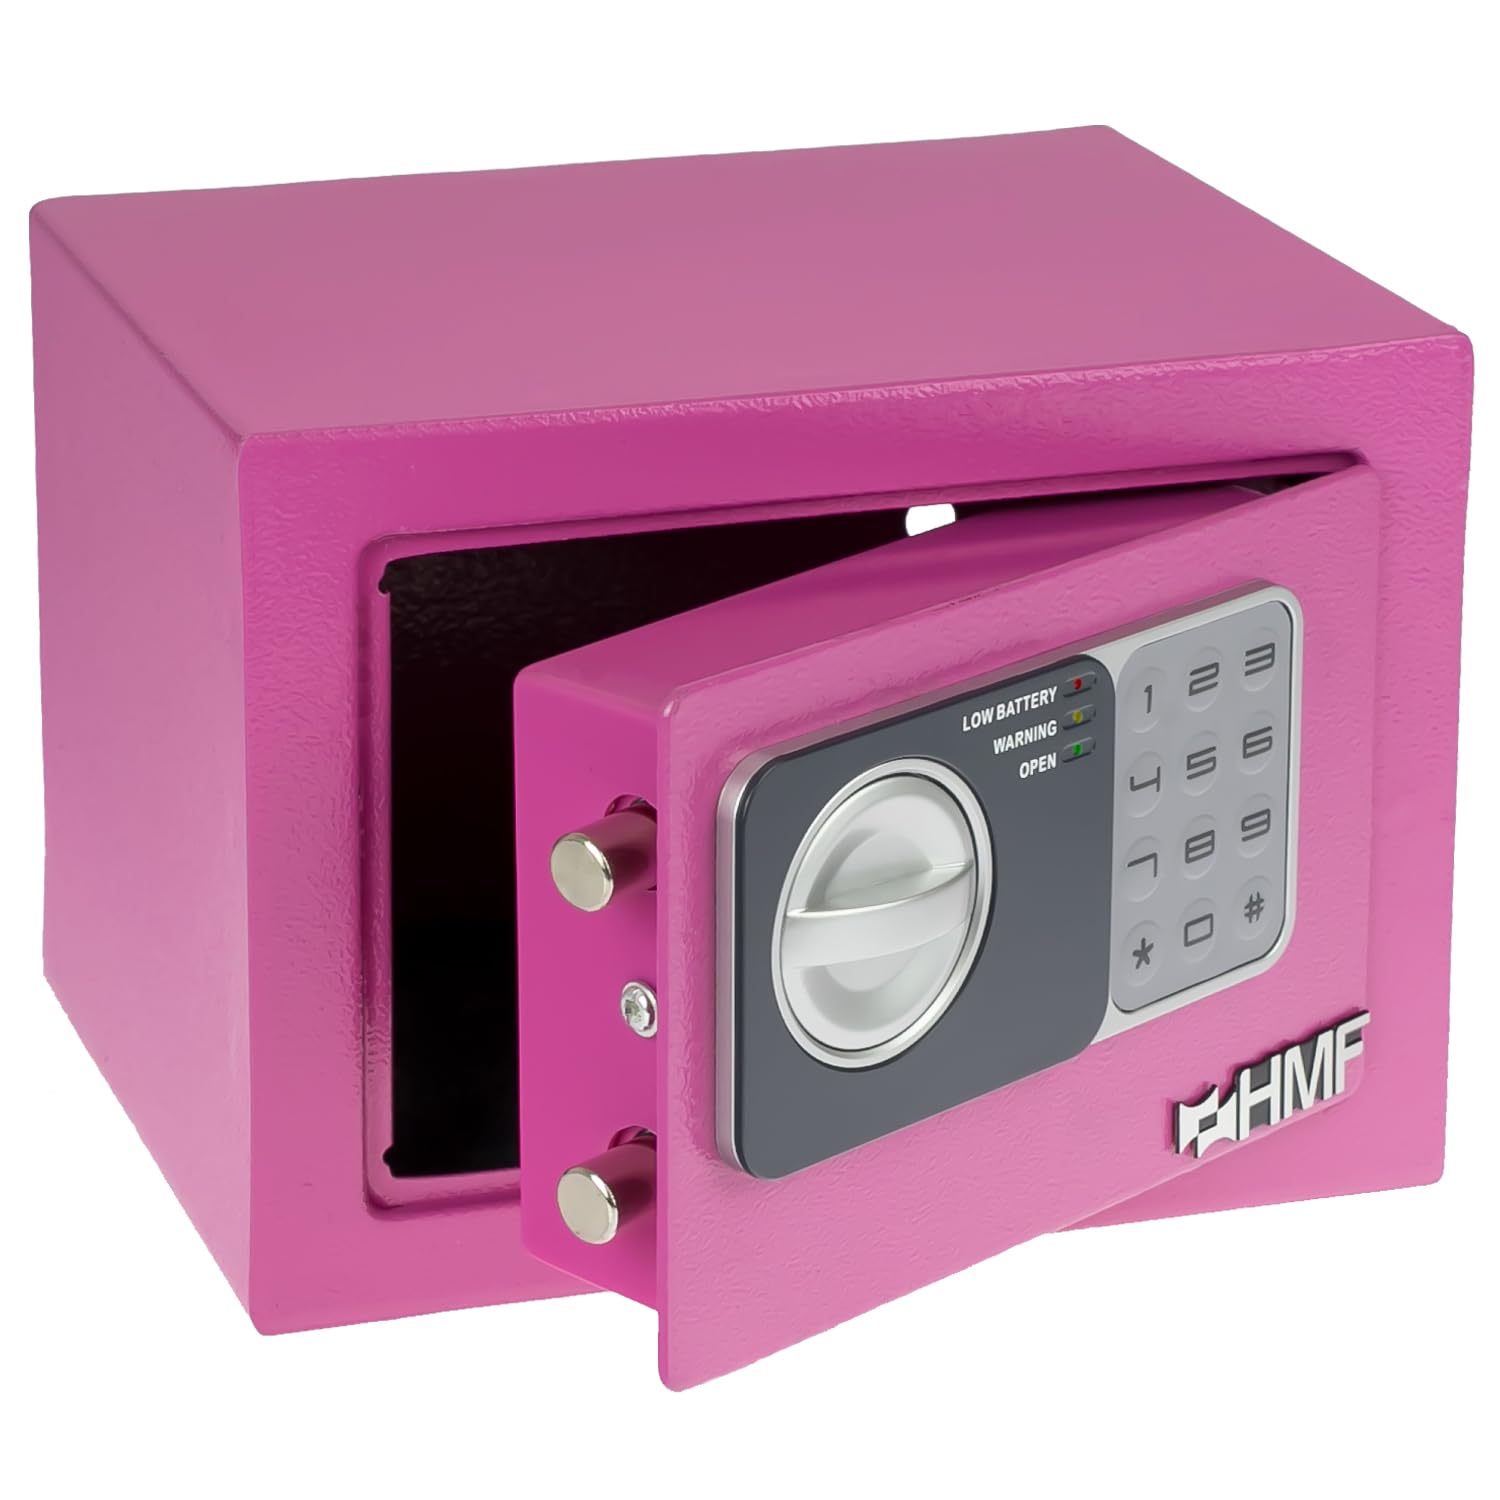
Image: The HMF 46126-15 safe in pink, showcasing its electronic keypad, rotary handle, and the emergency key slot. Insets show the open door, keypad operation, and emergency key usage.
Caratteristiche principali:
- Electronic Combination Lock: Programmable with a 3 to 8-digit PIN code.
- Emergency Key System: Two manual override keys for access in case of forgotten code or battery failure.
- Costruzione robusta: Single-walled steel body (1 mm thickness) and steel door (3 mm thickness) with double bolt lock.
- Concealed Hinges: Enhances security against forced entry.
- Capacità di montaggio: Pre-drilled holes for securing the safe to a wall or floor.
- Design compatto: Ideal for home, office, or hotel use.
5. Impostazione
5.1. Installazione della batteria
- Individuare il vano batterie all'interno dello sportello della cassaforte.
- Aprire il coperchio del vano batterie.
- Inserire 4 batterie AA, assicurandosi della corretta polarità (+/-).
- Close the battery compartment cover. The safe will emit a beep, indicating successful battery installation.
5.2. Setting the Initial PIN Code
The safe comes with a factory default code (usually 1-5-9 or 1-2-3-4-5-6). It is crucial to change this immediately.

Image: A hand interacting with the electronic keypad of the HMF safe, demonstrating button presses for code entry.
- Con la porta della cassaforte aperta, premere il pulsante rosso di reset situato sul lato interno della porta, vicino alla cerniera. Si sentirà un segnale acustico.
- Within 5 seconds, enter your new 3 to 8-digit PIN code on the keypad.
- Confirm the new code by pressing the "#" button. The safe will beep twice, indicating the new code is set.
- Prova il nuovo codice con la porta aperta prima di chiuderla.
5.3. Montaggio della cassaforte (facoltativo)
For enhanced security, the safe can be mounted to a wall or floor using the pre-drilled holes and included hardware.

Image: The rear of the HMF safe displaying the pre-drilled mounting holes, alongside the metal dowels and screws provided for installation.
- Scegliere una posizione adatta per il montaggio.
- Mark the drilling points through the pre-drilled holes on the back or bottom of the safe onto the wall or floor.
- Praticare i fori nei punti contrassegnati utilizzando una punta da trapano adeguata.
- Insert the metal dowels into the drilled holes.
- Align the safe with the dowels and secure it using the mounting screws.
6. Utilizzo della cassaforte
6.1. Opening the Safe with PIN Code
- Inserisci il codice PIN da 3 a 8 cifre sulla tastiera.
- Premere il tasto "#".
- Se il codice è corretto, la spia verde "OPEN" si illuminerà e verrà emesso un segnale acustico.
- Within 5 seconds, turn the rotary handle clockwise to open the door.
6.2. Chiusura della cassaforte
- Chiudi la porta della cassaforte.
- Turn the rotary handle counter-clockwise to engage the locking bolts.
6.3. Changing the PIN Code
You can change your PIN code at any time while the door is open.
- Con la porta della cassaforte aperta, premere il pulsante rosso di reset sul lato interno della porta.
- Enter your new 3 to 8-digit PIN code.
- Confirm the new code by pressing the "#" button.
- Verificare che il nuovo codice funzioni prima di chiudere la porta.
6.4. Apertura di emergenza
In case of forgotten PIN code or battery failure, use the emergency keys.

Image: The HMF safe with an emergency key inserted into the hidden lock, demonstrating the manual override function.
- Individuare la serratura di emergenza, solitamente nascosta dietro una piccola copertura sul pannello della tastiera.
- Togliere il coperchio.
- Inserire una delle chiavi di emergenza nella serratura e ruotarla in senso orario.
- While holding the key turned, rotate the main handle clockwise to open the safe.
- Once open, you can replace the batteries or reset the code.
7. Manutenzione
7.1. Sostituzione della batteria
The safe will indicate a low battery condition with a red "LOW BATTERY" light on the keypad. Replace batteries immediately to avoid being locked out.
- Open the safe using your PIN code or emergency key.
- Follow the steps in Section 5.1 to replace the 4 x AA batteries.
7.2. Pulizia
Pulisci l'esterno della cassaforte con un panno morbido eamp panno. Non utilizzare detergenti abrasivi o solventi, poiché potrebbero danneggiare la finitura o i componenti elettronici.
8. Risoluzione Dei Problemi
- La cassaforte non si apre con il codice PIN:
- Ensure batteries are not low. Replace if necessary.
- Reinserisci il codice con attenzione.
- Use the emergency key to open the safe and reset the PIN code.
- La tastiera non risponde:
- Controllare l'installazione delle batterie e sostituirle.
- If still unresponsive, use the emergency key to open.
- La porta non si chiude correttamente:
- Ensure no obstructions are preventing the door from fully closing.
- Check that the locking bolts are retracting fully when the handle is turned.
9. Specifiche

Image: A diagram illustrating the external and internal dimensions of the HMF 46126-15 safe.
| Caratteristica | Specificazione |
|---|---|
| Numero di modello | 46126-15 |
| Marca | HMF |
| Tipo di blocco | Serratura a combinazione elettronica con chiave di emergenza |
| Dimensioni esterne (L x A x P) | 23 x 17 x 17 cm (Depth including control panel: approx. 18 cm) |
| Dimensioni interne (L x A x P) | 22.5 x 16.5 x 16.5 cm (Suitable for DIN A5 documents) |
| Apertura porta (L x A) | Dimensioni: 16 x 12 cm |
| Capacità | 6 litri |
| Materiale | Acciaio legato |
| Body Wall Thickness | 1 millimetri |
| Spessore della porta | 3 millimetri |
| Peso | 2.55 kg |
| Colore | Rosa |
| Tipo di montaggio | Internal mounting, wall mounting (pre-drilled holes) |
| Fonte di alimentazione | 4 batterie AA (non incluse) |
10. Garanzia e supporto
For warranty information or technical support, please refer to the purchase documentation or contact HMF customer service directly. Contact details can typically be found on the manufacturer's official websito o sulla confezione del prodotto.