Soobest SO800E
Soobest 14.2" Large Display Digital Wall Clock User Manual
Model: SO800E
Introduzione
Thank you for choosing the Soobest 14.2" Large Display Digital Wall Clock. This versatile clock features a large LED screen, 8-in-1 color changing display, date, day of week, temperature, and timer functions. It is designed for easy readability and convenient operation with a remote control, making it ideal for various indoor settings including living rooms, bedrooms, offices, and gyms. This manual provides detailed instructions for setup, operation, and maintenance to ensure optimal performance and longevity of your device.

Image: The Soobest 14.2" Large Display Digital Wall Clock, showcasing its vibrant multi-color display and the included remote control.
Contenuto della confezione
Si prega di controllare attentamente il pacco per assicurarsi che tutti gli articoli siano presenti e in buone condizioni.
- 1 x Soobest 14.2" Large Display Digital Wall Clock
- 1 x telecomando
- 1 x adattatore di alimentazione (elettrico con cavo)
- 1 x Button Battery (for memory function, pre-installed)
- Mounting Hardware (Nails)
- Manuale dell'utente (questo documento)

Image: An illustration of all items included in the Soobest Digital Wall Clock package, including the clock, remote, power adapter, and manual.
Impostare
Collegamento di potenza
- Unpack the clock and all accessories from the box.
- Connect the power adapter cable to the "power in" port on the back of the clock.
- Collegare l'adattatore di alimentazione a una presa elettrica standard. Il display dell'orologio si illuminerà.
- The pre-installed button battery serves as a memory function, retaining time and alarm settings during power outages. It does not power the display.
Opzioni di montaggio
The clock can be mounted on a wall or placed on a tabletop.
- Wall Mount: Use the provided nails and the mounting holes on the back of the clock to secure it to a wall. Ensure the wall can support the clock's weight (approximately 1.34 pounds).
- Da tavolo: The clock can stand freely on a flat surface.

Image: Visual representation of the clock's dimensions and power connection, illustrating its suitability for wall mounting or tabletop use.
Istruzioni per l'uso
Informazioni di base sullo schermo
The large LED display shows the following information at a glance:
- Tempo: Large digits for hours and minutes, with smaller seconds display.
- Data: Mese e giorno.
- Giorno della settimana: Indicated by illuminated abbreviations (MON, TUE, etc.).
- Temperatura interna: Displayed in Fahrenheit (°F).
Utilizzo del telecomando
All settings and functions are easily controlled via the included remote control.
- Assicurarsi che il telecomando abbia una batteria funzionante.
- Point the remote control directly at the clock for optimal response.

Image: The clock displaying both time and timer modes, highlighting the seamless transition between them using the remote control.
Impostazione di ora e data
- Premere il tasto IMPOSTATO button on the remote control. The hour digits will flash.
- Utilizzare il SU/GIÙ frecce per regolare l'ora.
- Premere IMPOSTATO again to move to minutes, then date, month, and year, adjusting each with the SU/GIÙ frecce.
- Premere IMPOSTATO un'ultima volta per confermare tutte le impostazioni.
Display che cambia colore
The clock offers 8 RGB color modes: 4 fixed pure colors and 4 dynamic RGB color changes.
- Premere il tasto COLORE button on the remote control to cycle through the available color modes.
- Choose the color that best suits your environment or mood.

Immagine: Examples of the clock's diverse color display options, from solid colors to dynamic RGB changes.
Timer Function (Count Up/Count Down)
The clock can function as a timer, useful for kitchen, gym, or study activities.
- Premere il tasto MODALITÀ TIMER button on the remote control to switch to timer mode. The display will show "00:00".
- Setting Countdown: Use the number buttons on the remote to input the desired countdown time (e.g., "0500" for 5 minutes). Press AVVIO/ARRESTO per iniziare.
- Setting Count Up: In modalità timer, premere AVVIO/ARRESTO without setting a time to begin counting up from "00:00".
- When a countdown finishes, the clock will emit a crisp beep for 60 seconds.
- Premere MODALITÀ TEMPO to return to clock display.

Image: The clock functioning as a digital timer, demonstrating its utility in a home gym setting.
Auto Daylight Saving Time (DST)
If your region observes Daylight Saving Time, you can enable the auto DST feature.
- Premere il tasto Ora legale button on the remote control to toggle Auto DST ON or OFF.
- When ON, the clock will automatically adjust forward or backward by one hour at the appropriate times of the year.
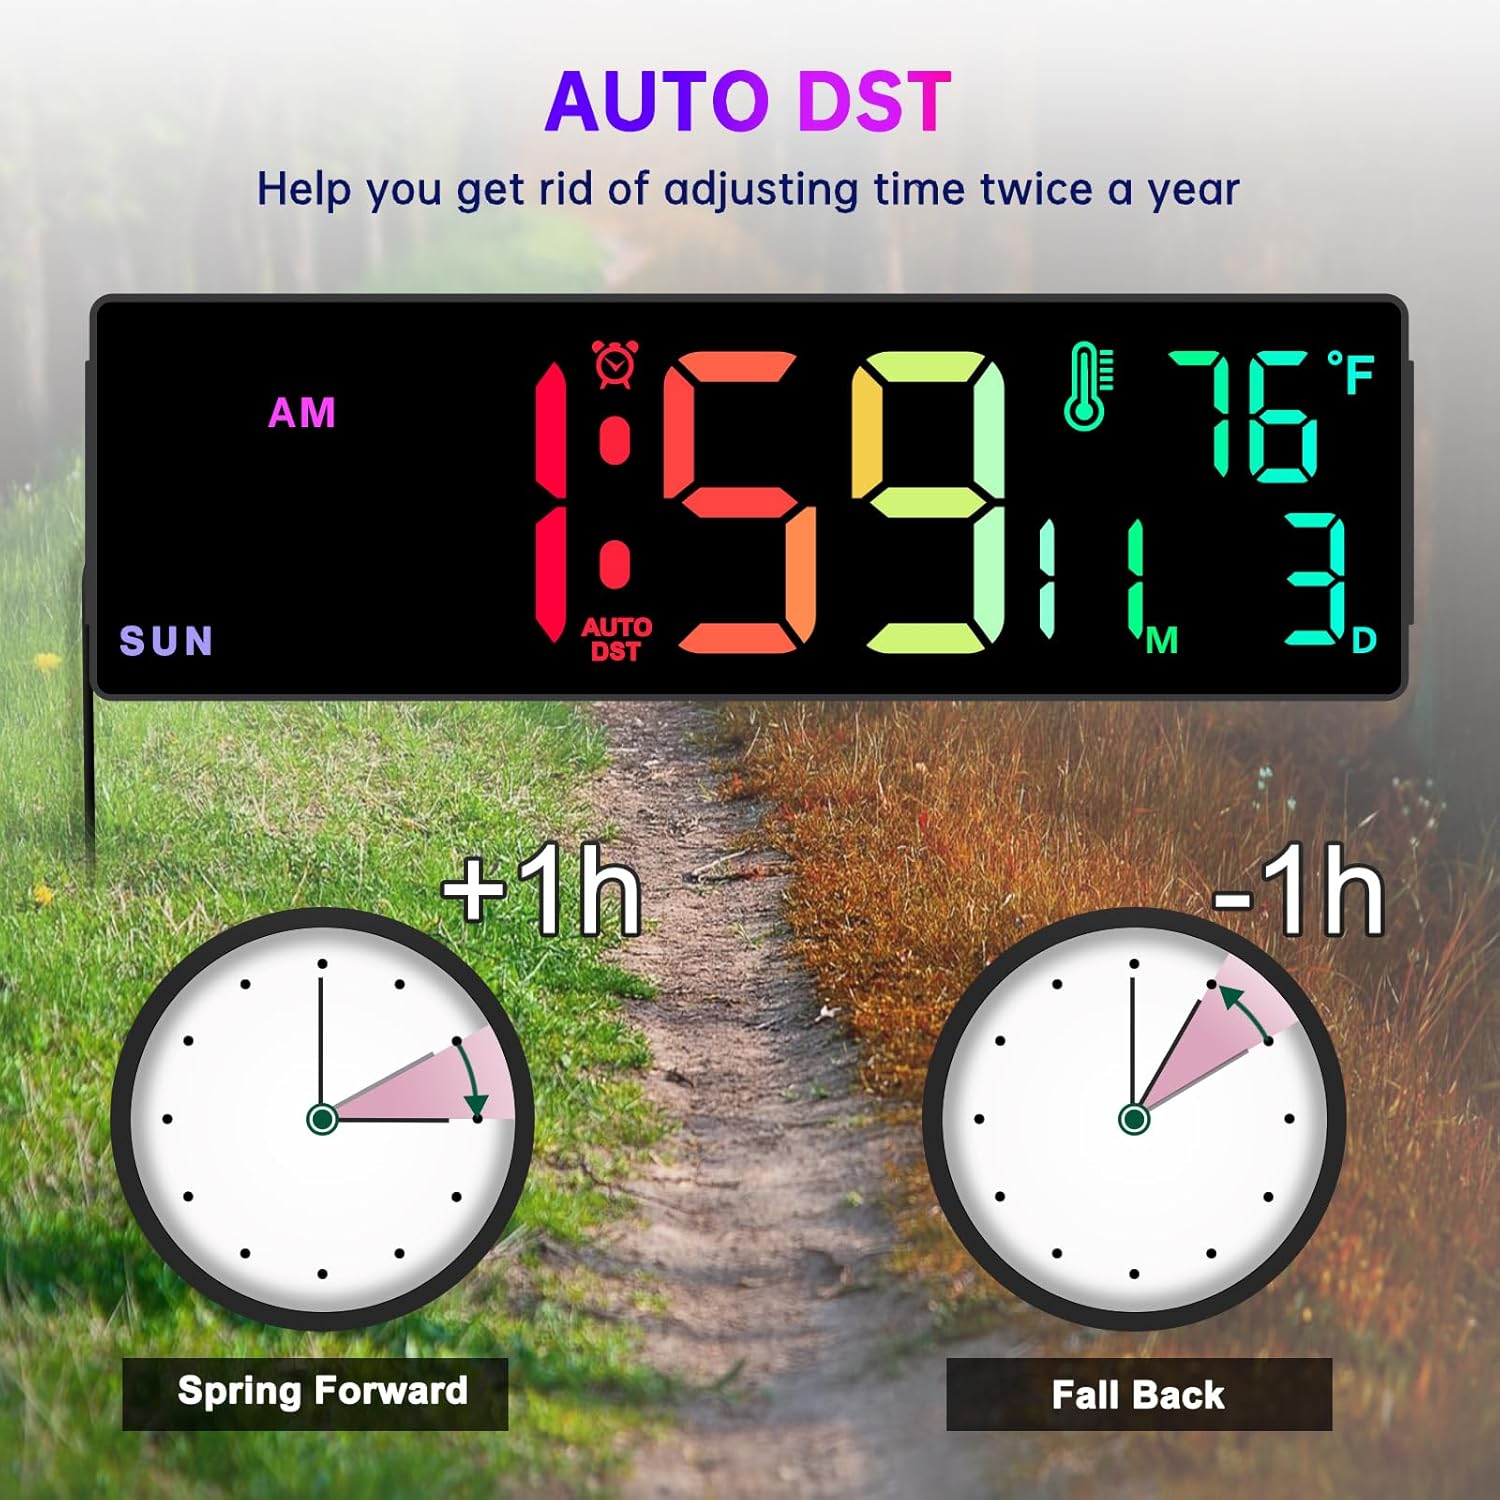
Image: A visual explanation of the Auto DST function, showing how the clock automatically adjusts for Daylight Saving Time.
Funzione dimmer
The clock features 5 levels of brightness to suit different lighting conditions and preferences.
- Premere il tasto DIMENSIONATORE button on the remote control to cycle through the 5 brightness levels.
- Adjust the brightness to prevent the display from being too bright, especially in dark rooms or at night.
Time Format Switch (12/24 Hour)
You can switch between 12-hour (AM/PM) and 24-hour (military) time formats.
- Premere il tasto 12/24H button on the remote control to toggle between the two formats.
Manutenzione
- Pulizia: Use a soft, dry cloth to wipe the clock's surface. Do not use abrasive cleaners or solvents, as they may damage the display or casing.
- Energia: Always ensure the clock is connected to a stable power source.
- Sostituzione della batteria (telecomando): If the remote control becomes unresponsive, replace its battery. Refer to the remote control's markings for the correct battery type.
- Batteria di memoria: The internal button battery for memory function typically lasts for a long time. If you notice settings are not retained after a power outage, it may need replacement by a qualified technician.
Risoluzione dei problemi
| Problema | Possibile causa | Soluzione |
|---|---|---|
| Il display dell'orologio è spento. | Nessuna connessione di alimentazione o alimentazione fuoritage. | Ensure the power adapter is securely plugged into the clock and a working electrical outlet. Check the power outlet with another device. |
| Telecomando non funzionante. | Remote battery is dead or incorrect orientation. Obstruction between remote and clock. | Replace the remote control battery. Ensure there are no obstructions and point the remote directly at the clock. |
| Time/Date/Day is incorrect. | Not set correctly or Auto DST issue. | Follow the "Setting Time and Date" instructions. Verify Auto DST setting is correct for your region. |
| Il display è troppo luminoso/scurato. | Dimmer setting is not adjusted. | Utilizzare il DIMENSIONATORE button on the remote to adjust brightness levels. |
| La lettura della temperatura sembra imprecisa. | L'orologio deve essere posizionato vicino a una fonte di calore/presa d'aria o alla luce diretta del sole. | Relocate the clock to an area with stable ambient temperature. Note that minor variations compared to other thermometers are normal. |
Specifiche
- Marca: Soobest
- Modello: SO800E
- Tipo di visualizzazione: LED digitale
- Dimensioni dello schermo: 14.2 pollici (diagonale)
- Altezza cifre: Approximately 3.1 inches (main time digits)
- Dimensioni del prodotto: 13.1" (L) x 4.1" (A) x 1.1" (P)
- Fonte di energia: Elettrico con cavo (adattatore CA incluso)
- Batteria di backup: 1 x Lithium Metal battery (included, for memory function only)
- Caratteristiche: Time, Date, Day of Week, Indoor Temperature, Timer (Count Up/Down), 8 RGB Color Modes, 5-Level Dimmer, Auto DST, 12/24H Format.
- Tipo di montaggio: Montaggio a parete / da tavolo
- Materiale: Plastica
- Peso dell'articolo: 1.34 libbre
Garanzia e supporto
The Soobest 14.2" Large Display Digital Wall Clock comes with a Garanzia di 6 mesi dalla data di acquisto, coprendo i difetti di fabbricazione.
For technical support, warranty claims, or any questions regarding your product, please contact Soobest customer service. Refer to the contact information provided on the product packaging or the official Soobest websito.
Si prega di conservare la ricevuta d'acquisto come prova d'acquisto ai fini della garanzia.
Ask a question about this manual
Ask about setup, troubleshooting, compatibility, parts, safety, or missing instructions. Manuals+ will review the question and use this page’s manual context to help answer it.