
1. Introduzione
This manual provides detailed instructions for the installation, operation, and maintenance of your BN-LINK U211A Countdown Timer Switch. This device is designed to automate the shut-off of lights and exhaust fans, contributing to energy savings and convenience. Please read this manual thoroughly before installation and use.
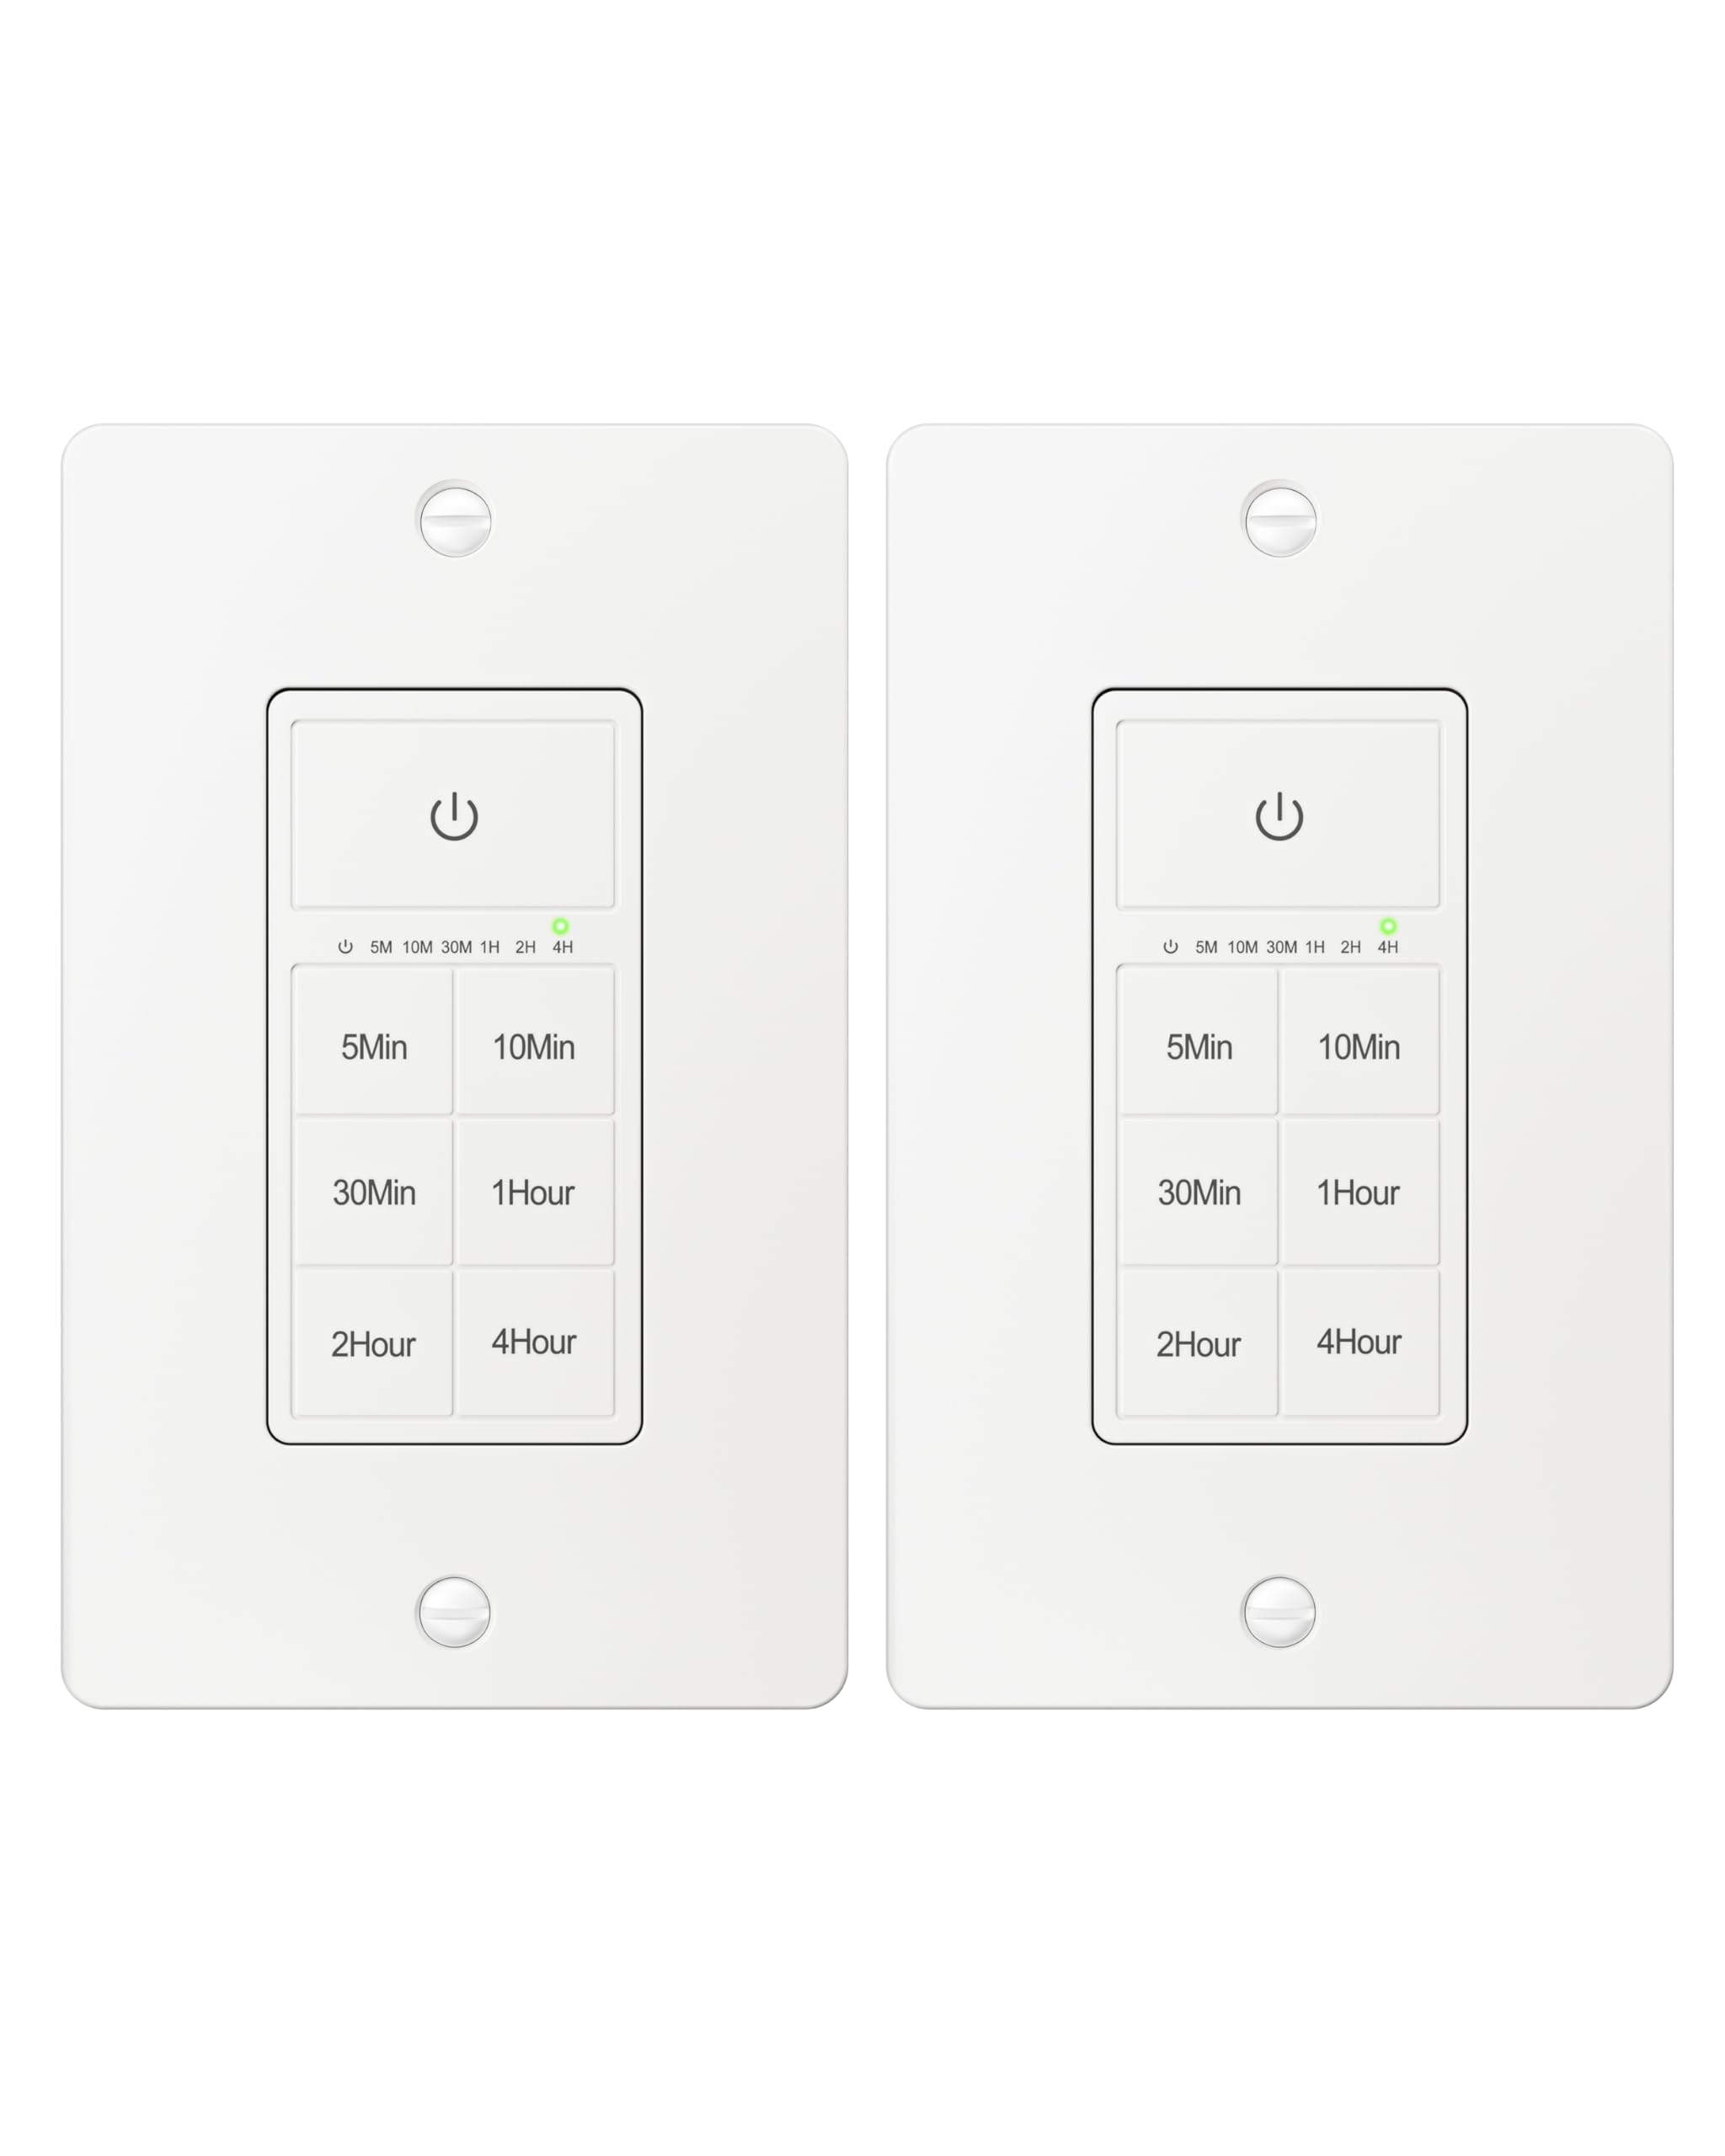
Figure 1: BN-LINK U211A Countdown Timer Switch
2. Informazioni sulla sicurezza
- Installazione professionale consigliata: For your safety, it is highly recommended to have a qualified electrician install this product.
- Disconnessione dell'alimentazione: Always cut off power at the circuit breaker before attempting any installation, wiring, or maintenance to prevent electric shock.
- Cavo neutro richiesto: This timer switch requires a neutral wire for proper operation. Ensure your wall box has a neutral wire before proceeding with installation.
- Single Pole Only: This switch is designed for single-pole applications only. It is not intended for use in 3-way applications where multiple switches control the same outlet.
- Solo per uso interno: Questo prodotto è destinato esclusivamente all'uso in ambienti interni.
- Capacità di carico: Do not exceed the maximum load capacity: 15A/1875W Resistive or General Purpose, 10A/1250W Ballast or Tungsten, ½ HP. Exceeding these limits can cause damage to the switch and connected devices, and poses a fire hazard.
3. Contenuto della confezione
Verifica che tutti gli articoli siano presenti nel tuo pacco:
- BN-LINK U211A Countdown Timer Switch
- Piastra a muro
- Viti di montaggio
- Wire Nuts (Orange Twist Connectors)

Figure 2: Included components and size details
4. Installazione
Per una corretta installazione, seguire attentamente questi passaggi:
- Tagliare la potenza: Turn off the main power at the circuit breaker for the switch location you will be working on.
- Uninstall Current Switch: Carefully remove the existing wall plate and switch from the wall box.
- Identificare i fili: Identify the wires in your wall box: hot (line), load, neutral, and ground. A neutral wire is required.
- Collegare i fili: Use the included orange twist connectors to connect the wires from the wall box to the corresponding wires on the timer switch. Ensure connections are secure.
- Collegare il filo bianco from the timer to the filo neutro nella scatola a muro.
- Collegare il filo nero from the timer to the hot (line) wire nella scatola a muro.
- Collegare il filo rosso from the timer to the filo di carico nella scatola a muro.
- Collegare il filo verde from the timer to the filo di terra nella scatola a muro.
- Interruttore sicuro: Gently push all connected wires and the timer switch into the wall box. Secure the timer switch to the wall box using the provided mounting screws.
- Installa la piastra a muro: Attach the decorative wall plate over the installed timer switch.
- Ripristina alimentazione: Riattivare la corrente tramite l'interruttore automatico.
- Inizializzare: The timer will initialize. Wait for all indicator lights to go out, signaling that initialization is complete.

Figura 3: Schema elettrico
Video 1: BN-LINK Countdown Timer Switch Installation and Operation Guide. This video demonstrates the installation process and how to use the timer's countdown functions.
5. Funzionamento
The BN-LINK U211A Countdown Timer Switch features a touch ON/OFF button and multiple preset countdown options.

Figura 4: Caratteristiche dell'interruttore del timer
Setting a Countdown Timer
- Press the button corresponding to your desired countdown duration (5 min, 10 min, 30 min, 60 min, 2 hours, or 4 hours).
- An LED indicator above the selected time will illuminate, confirming the countdown is active. The connected device (light or fan) will remain on for the selected duration and then automatically turn off.
- If you select a different countdown option while one is already active, the timer will reset to the newly selected duration.
- Pressing the same countdown button while it is active will not restart the countdown. To restart, first press the power button to turn the unit off, then press the desired countdown option again.
Manual ON/OFF and Always ON Mode
- To turn ON (Always ON Mode): If the unit is off, press the main power button (with the power symbol) once. The connected device will turn on and stay on indefinitely.
- Per spegnere: If the unit is in Always ON mode or a countdown is running, press the main power button once to turn the connected device off.
- Override Countdown: If a countdown is active, pressing the main power button once will turn the device off. Pressing it again will enter Always ON mode.
6. Specifiche
| Caratteristica | Specificazione |
|---|---|
| Modello | U211A |
| Modalità di funzionamento | Automatico |
| Valutazione attuale | 15 Amps |
| Volume di eserciziotage | 125 Volt |
| Cosatage | 1875 Watt |
| Metodo di controllo | Tocco |
| Tipo di interruttore | Toggle (Push Button Actuator) |
| Tipo di circuito | 1 vie |
| Tipo di montaggio | Montaggio a parete |
| Dimensioni (L x P x A) | 4.2 x 1.8 x 2 pollici |
| Materiale | Plastic (body), Copper, Brass (contacts) |
| Colore | Bianco |
| Valutazione della temperatura | Da 5°F a 122°F |
| Certificazioni | ETL quotato |
7. Risoluzione Dei Problemi
If you encounter issues with your BN-LINK U211A Countdown Timer Switch, refer to the following common solutions:
- L'interruttore non risponde:
- Assicurarsi che l'alimentazione elettrica venga ripristinata all'interruttore automatico.
- Verificare che tutti i collegamenti dei cavi siano sicuri e corretti secondo le istruzioni di installazione.
- Check if the connected load exceeds the maximum wattage o ampera.
- Countdown Not Starting/Resetting:
- To restart a countdown, first press the main power button to turn the unit off, then select your desired countdown time again.
- If switching between countdowns, the new countdown will start from its full duration.
- Lights/Fan Remain On Indefinitely:
- The switch might be in "Always ON" mode. Press the main power button once to turn it off, or select a countdown duration.
- Funzionamento intermittente:
- Ensure the neutral wire connection is solid. A loose neutral wire can cause erratic behavior.
- Confirm the switch is not installed in a 3-way circuit.
Per ulteriore assistenza, contattare l'assistenza clienti BN-LINK.
8. Garanzia e supporto
BN-LINK products are designed for ease of use and quality. This product is ETL Listed, ensuring it meets recognized safety standards.
For information regarding product warranty, returns, or technical support, please refer to the documentation included with your purchase or visit the official BN-LINK website. You may also contact BN-LINK customer service directly for assistance.
Politica di ritorno: The buybox winner offers a 30-day return policy for refund or replacement.