1. Introduzione
The MUSE M-179 P Alarm Clock Radio is designed to provide reliable timekeeping and audio entertainment. This device features an FM PLL radio with the capacity to store 20 preset stations. It includes a time projection function, allowing you to adjust both the angle and rotation of the projected image for optimal viewing. As an alarm clock, it offers a dual alarm system, enabling you to wake up to either your preferred radio station or a standard buzzer. Additional functions include a snooze feature for extra sleep and a sleep timer for falling asleep to music.
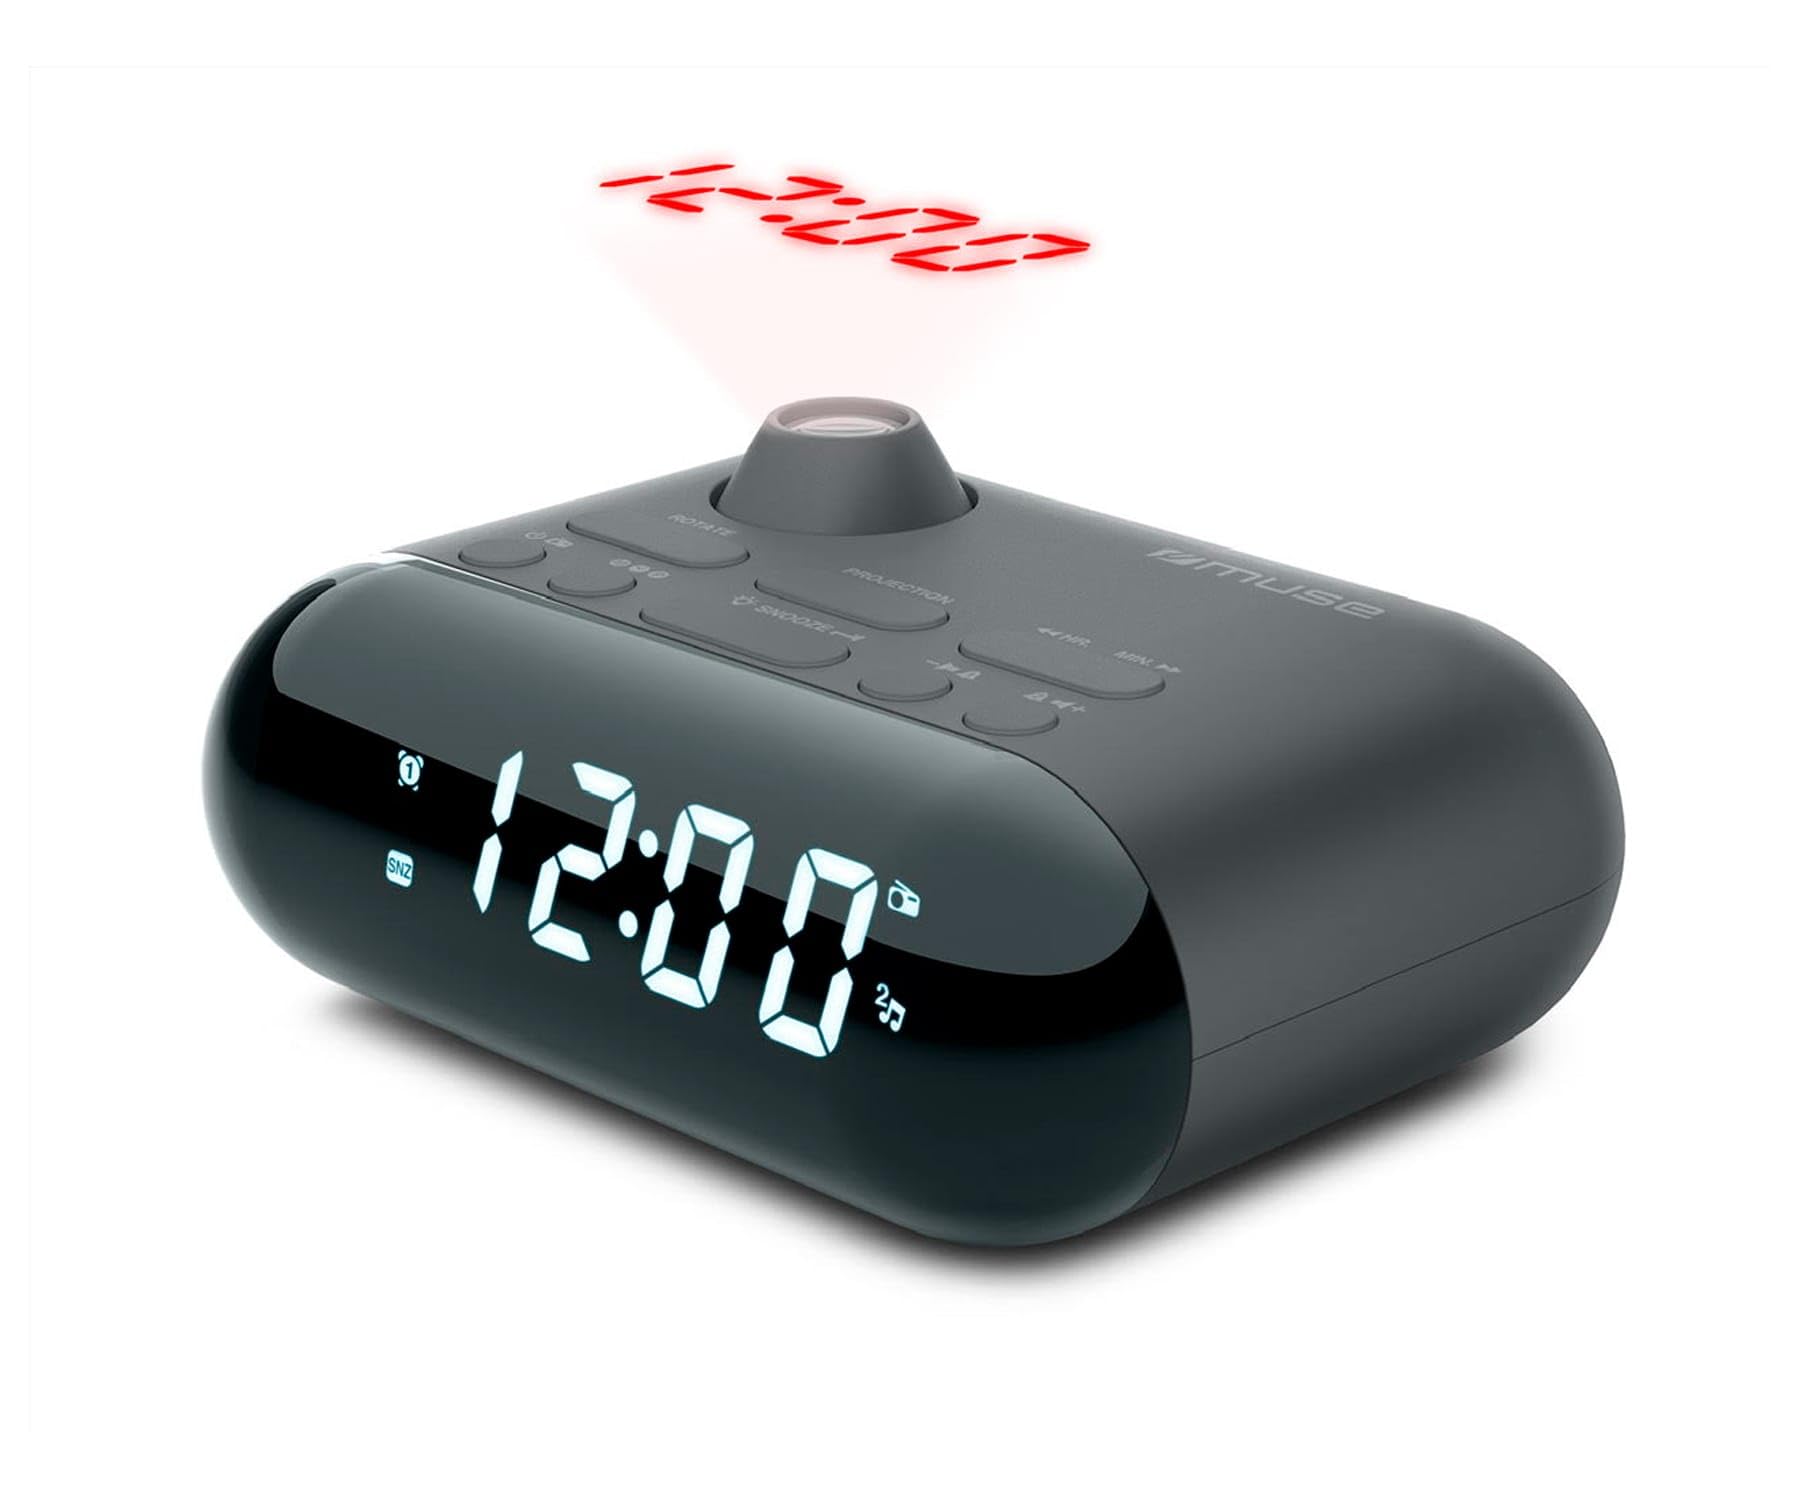
Image showing the front of the MUSE M-179 P Alarm Clock Radio, featuring the LED display and control buttons.
2. Istruzioni di sicurezza
- Leggere attentamente tutte le istruzioni prima di utilizzare il dispositivo.
- Conservare questo manuale per riferimento futuro.
- Non esporre l'unità a gocciolamenti o spruzzi d'acqua.
- Assicurare una ventilazione adeguata; non ostruire le aperture di ventilazione.
- Non posizionare l'unità vicino a fonti di calore quali radiatori, bocchette di riscaldamento, stufe o altri apparecchi (inclusi amplificatori) che producono calore.
- Utilizzare solo gli accessori specificati dal produttore.
- Smaltire le batterie usate in modo responsabile secondo le normative locali.
- Non tentare di smontare o modificare l'unità. Per qualsiasi intervento di assistenza, rivolgersi a personale qualificato.
3. Contenuto della confezione
Si prega di verificare che i seguenti articoli siano inclusi nel pacchetto:
- MUSE M-179 P Alarm Clock Radio Unit
- 1 x AA Battery (for backup or primary power, depending on model)
- Manuale dell'utente (questo documento)
4. Caratteristiche del prodotto
- Alarm Clock Radio: Integrated alarm and radio functions.
- Proiezione temporale: Projects the current time onto a wall or ceiling.
- Doppio allarme: Impostare due allarmi indipendenti.
- Opzioni di riattivazione: Choose to wake up to FM radio or a buzzer sound.
- Radio FM PLL: Digital tuning for stable radio reception.
- 20 FM Presets: Store up to 20 of your favorite FM radio stations.
- Funzione snooze: Temporarily pause the alarm.
- Sveglia: Fall asleep to radio with automatic shut-off.
- Orologio incorporato: Cronometraggio preciso.
- Design portatile: Compatto e facile da spostare.
5. Controlli e display
The MUSE M-179 P features an intuitive layout for easy operation. While specific button labels may vary, common controls include:
- Display a LED: Mostra l'ora corrente, lo stato della sveglia e la frequenza radio.
- Pulsante di impostazione dell'ora: For adjusting hours and minutes.
- Alarm 1/Alarm 2 Buttons: To set and activate individual alarms.
- Snooze/Sleep Button: Activates snooze or sets the sleep timer.
- Radio/Tuning Buttons: For scanning and selecting radio stations.
- Controllo del volume: Regola l'uscita audio.
- Projector On/Off & Adjustment: Controls the time projection feature.
6. Impostazione
6.1. Collegamento elettrico
- Open the battery compartment, usually located on the bottom or back of the unit.
- Insert 1 AA battery, ensuring correct polarity (+/-). This battery powers the unit.
- Chiudere bene il vano batterie.
6.2. Impostazione iniziale dell'ora
- When the unit is first powered on, the display may flash or show a default time.
- Premere e tenere premuto il tasto IMPOSTAZIONE DELL'ORA button (or similar) until the hour digits begin to flash.
- Utilizzare il ORA E MINUTO buttons (or tuning buttons) to adjust the hour. Pay attention to AM/PM indicators if present.
- Premere IMPOSTAZIONE DELL'ORA di nuovo per confermare l'ora e passare alla regolazione dei minuti.
- Adjust the minutes using the appropriate buttons.
- Premere IMPOSTAZIONE DELL'ORA one last time to save the current time.
7. Istruzioni per l'uso
7.1. Impostazione degli allarmi
The M-179 P features two independent alarms (Alarm 1 and Alarm 2).
- Premere e tenere premuto il tasto ALLARME 1 finché le cifre dell'ora della sveglia non lampeggiano.
- Utilizzare il ORA E MINUTO pulsanti per impostare l'orario desiderato per la sveglia.
- Premere ALLARME 1 again to confirm the time and select the wake-up source (radio or buzzer). Use the tuning buttons to toggle between options.
- Premere ALLARME 1 once more to save the settings. The alarm indicator will light up on the display.
- Ripetere il processo per ALLARME 2 utilizzando il ALLARME 2 pulsante.
7.2. Utilizzo della radio FM
- Premere il tasto RADIO ACCESA/SPENTA pulsante per accendere la radio.
- Utilizzare il SINTONIA +/- pulsanti per regolare manualmente la frequenza.
- Per eseguire la scansione automatica delle stazioni, tenere premuto il tasto SINTONIA +/- button. The radio will stop at the next strong signal.
- Per salvare una stazione preimpostata: sintonizzarsi sulla stazione desiderata, quindi tenere premuto il tasto PRESET pulsante (o MEM). The preset number will flash. Use SINTONIA +/- per selezionare un numero preimpostato (1-20), quindi premere PRESET di nuovo per salvare.
- Per richiamare una stazione preimpostata: premere il tasto PRESET ripetutamente il pulsante per scorrere le stazioni salvate.
- Regolare il volume utilizzando il VOLUME +/- pulsanti.
7.3. Proiezione temporale
- Individuare il PROIETTORE ACCESO/SPENTO switch or button. Turn it on to activate the time projection.
- Adjust the projection angle by physically rotating the projector lens housing.
- Se disponibile, usa il ROTAZIONE DELL'IMMAGINE button or dial to flip the projected time display 180 degrees for optimal viewing on a ceiling or wall.
- Adjust the focus of the projected image by rotating the focus ring around the projector lens.
7.4. Funzione snooze
Quando suona un allarme, premere il tasto POSTICIPARE button. The alarm will temporarily stop and sound again after a few minutes (typically 5-9 minutes, depending on the model's default setting).
7.5. Timer di spegnimento
- Mentre la radio è in riproduzione, premere il tasto SONNO pulsante.
- Premere ripetutamente il tasto SONNO button to cycle through available sleep timer durations (e.g., 90, 60, 30, 15 minutes, or OFF).
- La radio si spegnerà automaticamente dopo il periodo di tempo selezionato.
8. Manutenzione
8.1. Pulizia
- Pulire l'unità con un panno morbido e asciutto.
- Non utilizzare detergenti abrasivi, cere o solventi.
8.2. Sostituzione della batteria
- When the display dims or the unit malfunctions, it may be time to replace the battery.
- Open the battery compartment and replace the old AA battery with a new one, observing correct polarity.
- Dispose of the old battery according to local environmental regulations.
9. Risoluzione Dei Problemi
| Problema | Possibile causa | Soluzione |
|---|---|---|
| L'unità non si accende. | La batteria è scarica o non è inserita correttamente. | Sostituire la batteria o controllare la polarità. |
| Ricezione radiofonica scadente. | Antenna non estesa o area con segnale debole. | Estendere completamente l'antenna FM. Riposizionare l'unità per una ricezione migliore. |
| L'allarme non suona. | Allarme non attivato o impostato in modo errato. | Ensure alarm is set and activated (alarm indicator visible). Check alarm volume. |
| La proiezione temporale è sfocata. | Messa a fuoco non regolata. | Ruotare l'anello di messa a fuoco sull'obiettivo del proiettore finché l'immagine non diventa nitida. |
| Projected time is upside down. | Image rotation needs adjustment. | Press the IMAGE ROTATION button or adjust the dial to flip the display. |
10. Specifiche
- Marca: MUSA
- Numero modello: M-179 P
- Fonte di energia: Battery powered (1 AA battery required)
- Tipo di visualizzazione: GUIDATO
- Tecnologia di connettività: Auxiliary (3.5 mm Audio Interface)
- Tipo di sintonizzatore: FM
- Bande radio supportate: FM
- Caratteristiche speciali: Built-in clock, Portable
- Dimensioni del prodotto (L x P x A): Dimensioni: 15 cm x 12.4 cm x 6.8 cm
- Livello di resistenza all'acqua: Waterproof (Note: This specification should be interpreted with caution for electronic devices. Avoid direct exposure to water.)
- Materiale interno: Plastica
- Utilizzi consigliati: Per uso interno
- Compatible Devices (Auxiliary): Headphones, Speaker, MP3 player, Laptop
11. Garanzia e supporto
This product is covered by a standard manufacturer's warranty. For detailed warranty information, please refer to the warranty card included in your product packaging or visit the official MUSE website. For technical support, troubleshooting assistance, or to inquire about spare parts, please contact MUSE customer service through their official channels.
Si prega di conservare la prova d'acquisto per eventuali reclami in garanzia.