Introduzione
Welcome to your new SHPAI 12'x14' Patio Sun Room Kit. This manual provides essential information for the safe assembly, operation, and maintenance of your sunroom. Please read all instructions carefully before beginning assembly and retain this manual for future reference.
Informazioni sulla sicurezza
Linee guida generali sulla sicurezza
- Segui sempre attentamente le istruzioni di montaggio.
- Use appropriate tools and ensure the installation surface is stable before beginning.
- Be cautious when handling polycarbonate panels to prevent breakage or injury.
- Do not exceed the maximum recommended weight capacity for the structure.
- Always secure the sunroom to a stable foundation to prevent tipping or collapse, especially in windy or rainy conditions.
Caratteristiche del prodotto
Key Features of Your SHPAI Sunroom
- Utilizzo versatile: The SHPAI sunroom is suitable for various outdoor activities, including leisure, entertainment, and sunbathing, enhancing your outdoor living experience.
- Interni spaziosi: Designed to provide a private and ample space for relaxation and enjoyment.
- Robusta struttura in alluminio: Features a powder-coated aluminum frame for maximum scratch and corrosion resistance. Pre-drilled plates allow for secure anchoring to concrete or other sturdy surfaces, improving stability in adverse weather.
- Detachable PC Screens & Shelf: Polycarbonate (PC) screens offer enhanced privacy and superior resistance to wind and rain. Their detachable design allows for flexible use, and a dedicated shelf is provided for convenient storage of dismantled panels.
- Breathable Mesh Screens: Integrated mesh screens promote air circulation, keeping the interior fresh and preventing mosquito intrusion, contributing to a more comfortable living space.
- Comode porte scorrevoli: Equipped with double sliding doors at both the front and side for easy opening and closing, facilitating seamless integration between indoor and outdoor spaces. The side door can be installed on either the left or right side.
- Sloped Drainage System: A unique sloped roof design with an integrated drainage system efficiently guides rainwater and accumulated snow into a drainage ditch, preventing water buildup.
- Extra Support Pole: Includes an additional support pole to enhance stability and increase snow load resistance, particularly useful during strong winds and heavy snowfall.
Installazione e assemblaggio
Lista di controllo pre-assemblaggio
- Verificare che tutti i pezzi siano presenti secondo la lista di imballaggio.
- Ensure the installation surface (patio, deck) is flat and level to prevent alignment issues.
- Gather necessary tools: 13mm ratchet, 24" extender rod (for roof), Allen wrench with handle, power screwdriver (for footings).
- It is recommended to have at least two people for assembly, especially for handling larger components like columns and beams.
Passaggi di montaggioview
The assembly process typically involves attaching the wall-mounted frame to your existing structure, erecting the support posts, installing the roof panels, and then fitting the wall panels and doors. Refer to the detailed instruction manual provided with your kit for step-by-step guidance.
Suggerimenti importanti per il montaggio:
- When attaching initial frame components, insert screws loosely at first. This allows for adjustments and clearance for subsequent screws.
- Loosely attach roof components before securing them fully to facilitate easier alignment.
- Ensure corner posts are vertically straight using a level before installing wall panels to avoid misalignment.
- When inserting polycarbonate sheets, slightly loosen bolts along the slats for easier installation.
- For roof panels, if sliding is difficult, consider carefully trimming a small edge of the Y1 panel (approximately 1/2" in from the side and 4 inches down on the bottom) to allow it to slide over the previous part from a perpendicular orientation. This should not affect weatherproofing or stability.
Dimensioni del prodotto

Figure 1: Overall dimensions of the SHPAI 12'x14' Wall-Mounted Sunroom. Dimensions are approximately 139.8 x 167.6 x 100.3 inches (L x W x H).
Design a parete

Figure 2: Detail of the wall support connector and pre-drilled holes, illustrating how the sunroom attaches securely against an existing wall.
Anchoring Plate

Figure 3: Illustration of the robust pre-drilled anchoring plates designed for securing the sunroom to a stable foundation, ensuring stability.
Istruzioni per l'uso
Porte scorrevoli
Your sunroom is equipped with double sliding doors at both the front and side. To open, gently slide the door along its track. Ensure the track is clear of debris for smooth operation. The side door can be configured for left or right opening during assembly.

Figura 4: View of the sunroom's double sliding doors, highlighting the handles and smooth track for easy access.
Detachable Windows and Mesh Screens
The polycarbonate windows are detachable, allowing for customization of privacy and ventilation. To detach, locate the latching system and carefully disengage. When removed, the breathable mesh screens promote air circulation and keep insects out. Reattach the windows by aligning them with the frame and securing the latches.

Figure 5: Illustration of how to detach the polycarbonate windows and the benefit of breathable mesh screens for air circulation.
Manutenzione
Cura di routine
- Pulizia: Regularly clean the polycarbonate panels and aluminum frame with mild soap and water. Avoid abrasive cleaners or tools that could scratch surfaces.
- Sistema di drenaggio: Periodically inspect the sloped drainage system for any blockages (leaves, debris) and clear them to ensure efficient water runoff.
- Binari scorrevoli: Keep the sliding door tracks clean and free of dirt or small stones to ensure smooth operation. Lubricate if necessary with a silicone-based spray.
- Integrità strutturale: Annually check all bolts and connections for tightness. Re-tighten as needed to maintain structural stability.
PC Panel Storage
When not in use, detached polycarbonate panels can be conveniently stored on the provided storage shelves. Ensure panels are clean and dry before storage to prevent mildew or damage.
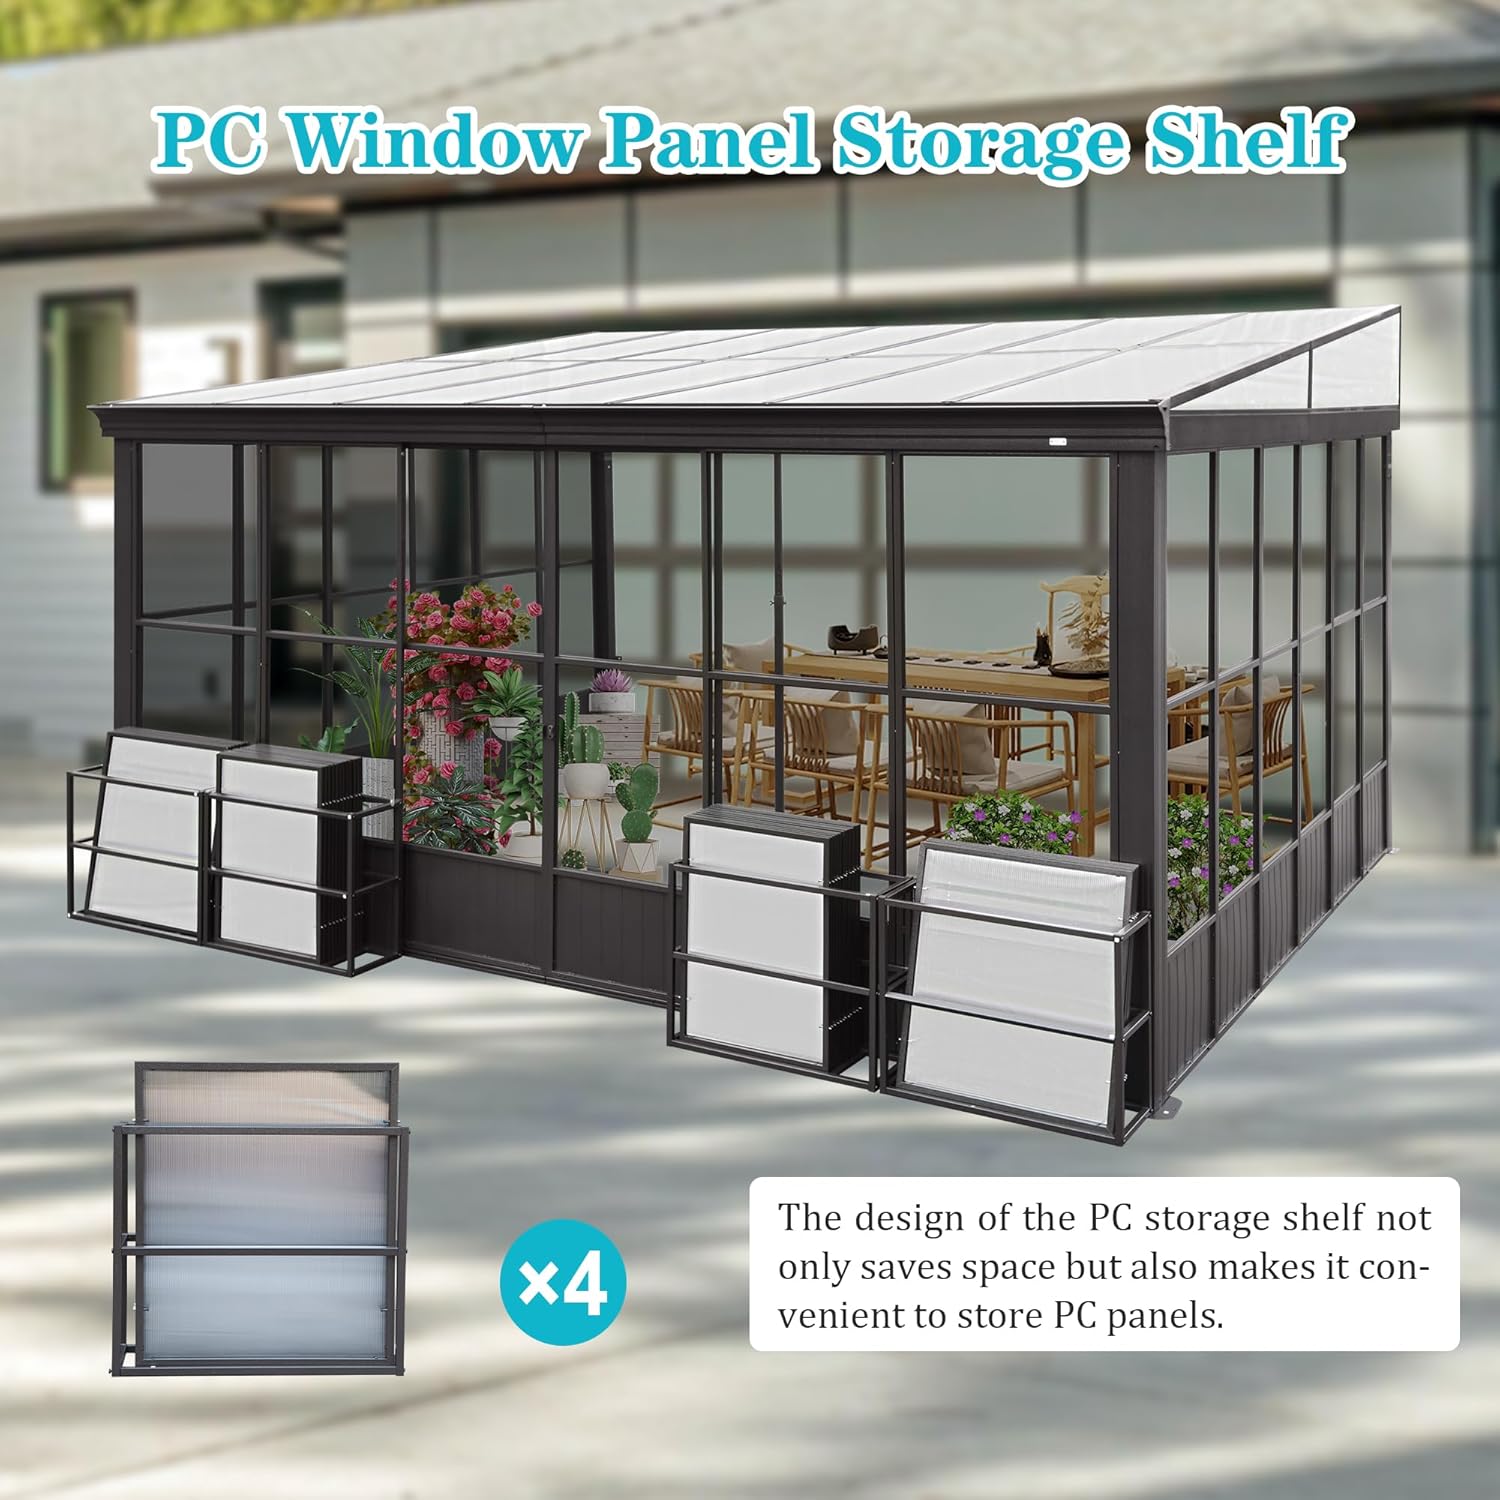
Figure 6: The dedicated PC window panel storage shelf, designed for convenient and space-saving storage of detached panels.
Sistema di drenaggio

Figure 7: The integrated sloped drainage system, designed to prevent water accumulation on the roof and direct it away from the sunroom.
Risoluzione dei problemi
Problemi comuni e soluzioni
| Problema | Possibile causa | Soluzione |
|---|---|---|
| Difficulty with panel alignment during assembly | Uneven ground/deck, bolts overtightened prematurely, or components not level. | Ensure the base surface is level. Loosen all bolts slightly before final tightening. Use a level to verify vertical straightness of posts. |
| Perdita d'acqua | Improper sealing, loose connections, or blocked drainage system. | Check all seals and connections for proper fit. Apply waterproof silicone sealant to any gaps if necessary. Clear any debris from the drainage system. |
| Le porte scorrevoli si bloccano o sono difficili da spostare | Debris in the track, lack of lubrication, or misalignment. | Clean the sliding tracks thoroughly. Apply a silicone-based lubricant to the tracks. Check door alignment and adjust if needed. |
Specifiche
| Caratteristica | Dettaglio |
|---|---|
| Marca | SHPAI |
| Numero di modello | SP-SR1649 |
| Materiale | Aluminum Frame + PC Roof |
| Stile | Modern, Classic |
| Peso dell'articolo | 513 libbre |
| Materiale del telaio | Alluminio |
| Livello di resistenza all'acqua | Resistente all'acqua |
| Forma | Rettangolare |
| Protezione UV | 99% UV-proof, UPF 50+ |
| Assemblaggio richiesto | SÌ |
| Colore | Dark Brown with PC Roof |
| Superficie del pavimento | 168 piedi quadrati |
| Dimensioni del prodotto (L x P x A) | 139.8 x 167.6 x 100.3 pollici |
Garanzia e supporto
Informazioni sulla garanzia
SHPAI products are manufactured to high-quality standards. For specific warranty details regarding your 12'x14' Patio Sun Room Kit, please refer to the warranty card included in your product packaging or contact SHPAI customer service directly. Keep your purchase receipt as proof of purchase.
Assistenza clienti
Should you have any questions, require assistance with assembly, or encounter any issues not covered in this manual, please contact SHPAI customer support. Contact information can typically be found on the product packaging or the official SHPAI websito.