
1. Introduzione
This manual provides detailed instructions for the installation, operation, and maintenance of the Novastar TU15PRO LED Vision Controller. Please read this manual thoroughly before using the device to ensure proper and safe operation. The TU15PRO is designed for controlling LED displays, offering robust performance and versatile connectivity.
2. Informazioni sulla sicurezza
- Alimentazione elettrica: Use only the specified power adapter (AC100-240V 50/60Hz). Ensure the power source is stable and matches the device's requirements.
- Ambiente: Operate the device in a dry, well-ventilated area. Avoid exposure to extreme temperatures, humidity, dust, or direct sunlight.
- Gestione: Do not drop, disassemble, or modify the device. Refer all servicing to qualified personnel.
- cavi: Ensure all cables are securely connected. Avoid placing heavy objects on cables or bending them sharply.
- Pulizia: Scollegare l'alimentazione prima della pulizia. Utilizzare un panno morbido e asciutto. Non utilizzare detergenti liquidi o spray.
3. Contenuto della confezione
Si prega di controllare il contenuto della confezione al momento del disimballaggio. Se qualche articolo risulta mancante o danneggiato, contattare immediatamente il venditore.
- Novastar TU15PRO LED Vision Controller
- Adattatore di alimentazione
- Cavo USB
- Manuale dell'utente (questo documento)
4. Prodotto finitoview
The Novastar TU15PRO is a compact and powerful LED vision controller designed for various display applications. It features multiple input and output ports for flexible connectivity.
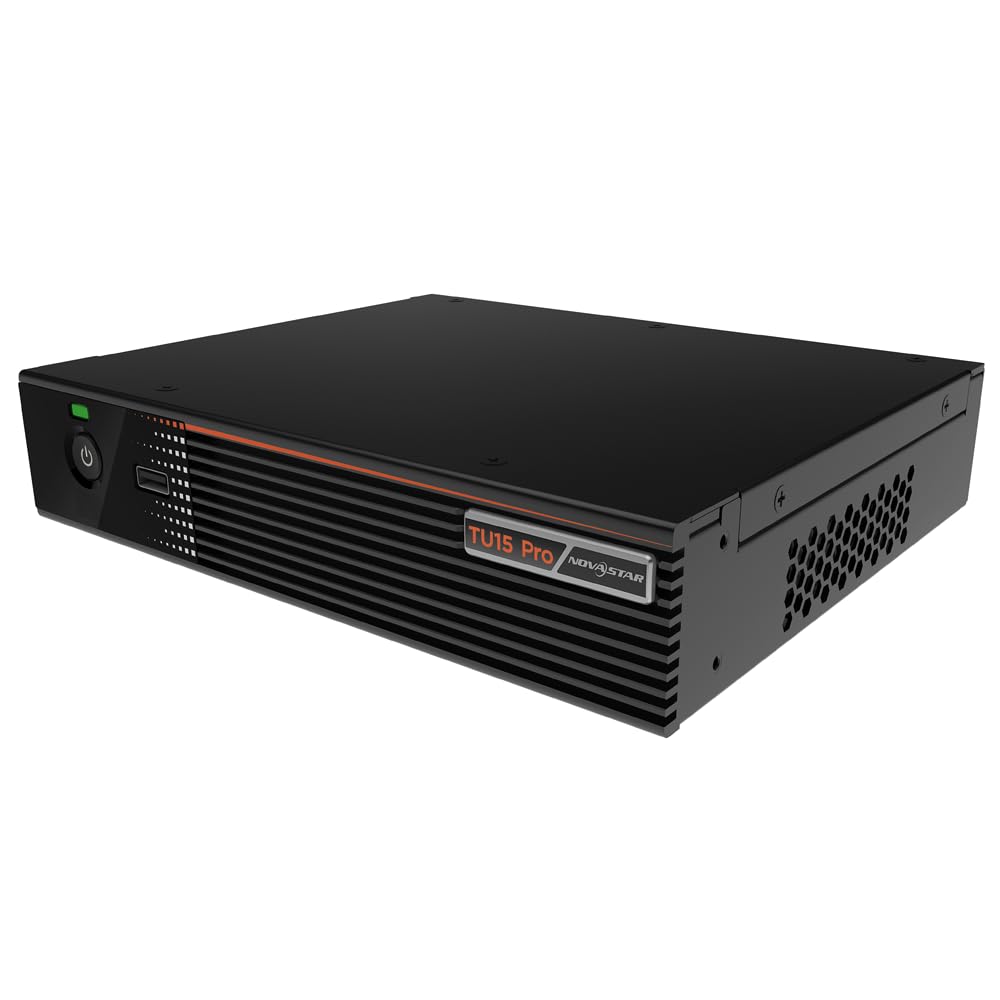
Figura 4.1: Angolato view of the Novastar TU15PRO LED Vision Controller, highlighting the rear panel with various input and output ports.

Figura 4.2: Dall'alto verso il basso view of the Novastar TU15PRO, showing the front panel with power button and USB port, and a detailed view delle connessioni del pannello posteriore.
4.1. Pannello frontale
- Pulsante di accensione: Utilizzato per accendere o spegnere il dispositivo.
- Porta USB 2.0: For connecting USB devices, such as a mouse or keyboard for control, or for firmware updates.
4.2. Pannello posteriore
- WIFI-AP (1, 2): Wi-Fi Access Point antennas for wireless control or network extension.
- WIFI-STA: Wi-Fi Station antenna for connecting the device to an existing Wi-Fi network.
- SENSORE: Port for connecting an external sensor.
- IR / I/O G RELAY: Input/Output General Purpose Relay terminal block for external control signals.
- ETHERNET: Ethernet port for network connection and control.
- USB 2.0 (x2): Additional USB ports for peripherals or data transfer.
- INGRESSO HDMI (x2): HDMI input ports for video sources.
- USCITA HDMI: HDMI output port for monitoring or cascading.
- SPDIF: Uscita audio digitale.
- AUDIO 12V === 3A: Porta di ingresso alimentazione (CC 12 V, 3 A).
5. Impostazione
- Disimballare: Carefully remove the TU15PRO controller from its packaging.
- Collegare le antenne: Attach the Wi-Fi antennas to the WIFI-AP and WIFI-STA ports on the rear panel.
- Collega la sorgente video: Connect your video source (e.g., computer, media player) to one of the HDMI IN ports using an HDMI cable.
- Connect to LED Display: Connect the controller's Network Ports (1-4) to your LED display receiving cards using Ethernet cables.
- Connetti alimentazione: Collegare l'adattatore di alimentazione fornito al AUDIO 12V === 3A port and then plug it into a power outlet.
- Accensione: Premere il pulsante di accensione sul pannello frontale per accendere il dispositivo.
- Network Configuration (Optional): For network control, connect an Ethernet cable to the ETHERNET port or configure Wi-Fi settings.
6. Istruzioni per l'uso
Once the device is set up, you can begin operating it. Detailed operation typically involves using dedicated software on a connected computer or through a web interfaccia.
- Installazione del software: Install the Novastar control software on your computer. Refer to the software's documentation for installation and usage.
- Riconoscimento del dispositivo: Ensure the software recognizes the TU15PRO controller. This may require network configuration or direct USB connection.
- Configurazione dello schermo: Configure your LED screen parameters within the software, including resolution, cabinet layout, and connection method.
- Selezione della sorgente di ingresso: Select the desired HDMI input source within the control software.
- Contenuto visualizzato: Use the software to manage and display content on your LED screen.
7. Manutenzione
- Pulizia regolare: Keep the device free from dust. Use a soft, dry cloth to wipe the exterior. Do not use harsh chemicals or abrasive materials.
- Ventilazione: Assicurarsi che le aperture di ventilazione non siano bloccate per evitare il surriscaldamento.
- Aggiornamenti del firmware: Periodically check the Novastar official website for firmware updates to ensure optimal performance and access to new features. Follow the update instructions carefully.
- Gestione dei cavi: Keep cables organized and free from kinks or damage to prevent signal loss or power issues.
8. Risoluzione Dei Problemi
- Nessun potere:
- Verificare che l'adattatore di alimentazione sia collegato saldamente sia al dispositivo sia alla presa di corrente.
- Verificare che la presa di corrente funzioni.
- Nessuna uscita di visualizzazione:
- Ensure HDMI input source is active and correctly connected.
- Verify Ethernet cables to the LED display are properly connected.
- Check screen configuration in the control software.
- Device Not Recognized by Software:
- Confirm network settings (IP address, subnet mask) are correct if using Ethernet.
- Ensure USB cable is connected if using direct USB control.
- Disattivare temporaneamente il firewall o il software antivirus per verificare la presenza di interferenze.
- Segnale intermittente:
- Controllare che tutti i collegamenti dei cavi non siano allentati o danneggiati.
- Ensure cables are of appropriate quality and length for the signal type.
9. Specifiche
| Caratteristica | Descrizione |
|---|---|
| Marca | Nuova stella |
| Modello | TU15PRO |
| Potenza in ingresso | AC100-240V 50 / 60Hz |
| Body Size (L×W×H) | 211.7 mm × 185.0 mm × 50.6 mm |
| Control Dots | 2,600,000 |
| Output LAN | Network Port × 4 |
| Max Output Width | 4096 pixel |
| Altezza massima di uscita | 1920 pixel |
| ASIN | B0D791C3C7 |
10. Garanzia e supporto
For warranty information and technical support, please refer to the official Novastar webo contattare il rivenditore autorizzato. Conservare la ricevuta d'acquisto come prova d'acquisto per eventuali reclami in garanzia.
Risorse online: For the latest drivers, software, and additional documentation, please visit the official Novastar support page.