1. Introduzione
This manual provides comprehensive instructions for the setup, operation, and maintenance of your AR9ON INet 3+ Remote Control. Please read this manual carefully before using the device to ensure proper functionality and longevity.

Figura 1: Angolato view of the AR9ON INet 3+ Remote Control, showcasinil suo design ergonomico e la disposizione dei pulsanti.
2. Impostazione
2.1 Installazione della batteria
The remote control requires batteries for operation. Follow these steps to install or replace the batteries:
- Individuare il vano batterie sul retro del telecomando.
- If present, gently pull the clear plastic tab protruding from the bottom of the remote. This tab is a battery insulator and must be removed for the remote to function.
- Press down on the latch or slide the battery cover in the direction indicated by an arrow (if present) to open the compartment.
- Insert new batteries, ensuring the correct polarity (+ and -) as indicated inside the compartment.
- Chiudere bene il coperchio della batteria finché non scatta in posizione.
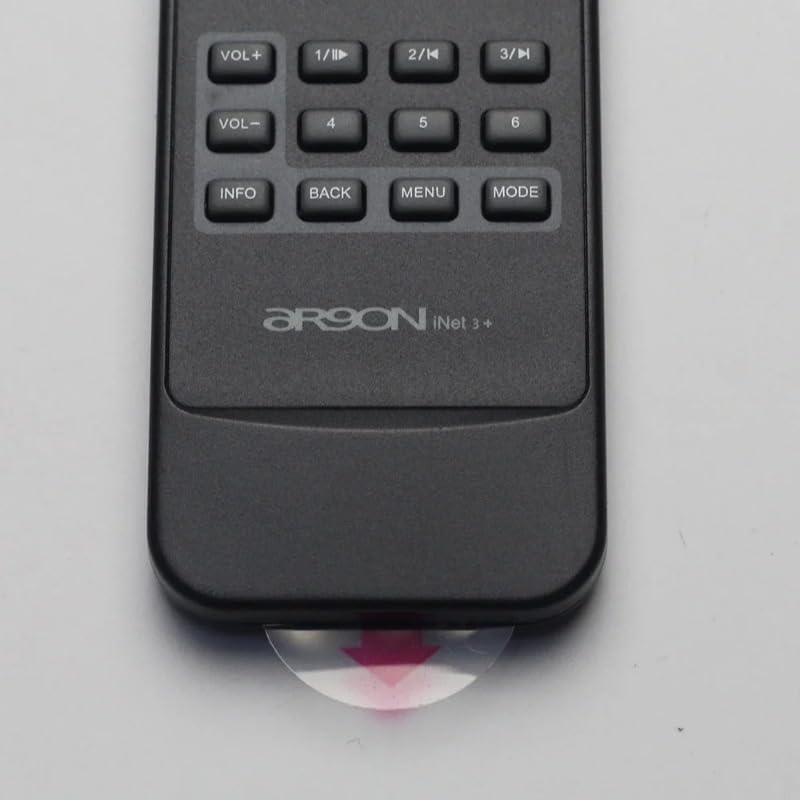
Figure 2: Clear plastic tab (battery insulator) to be removed from the bottom of the remote.
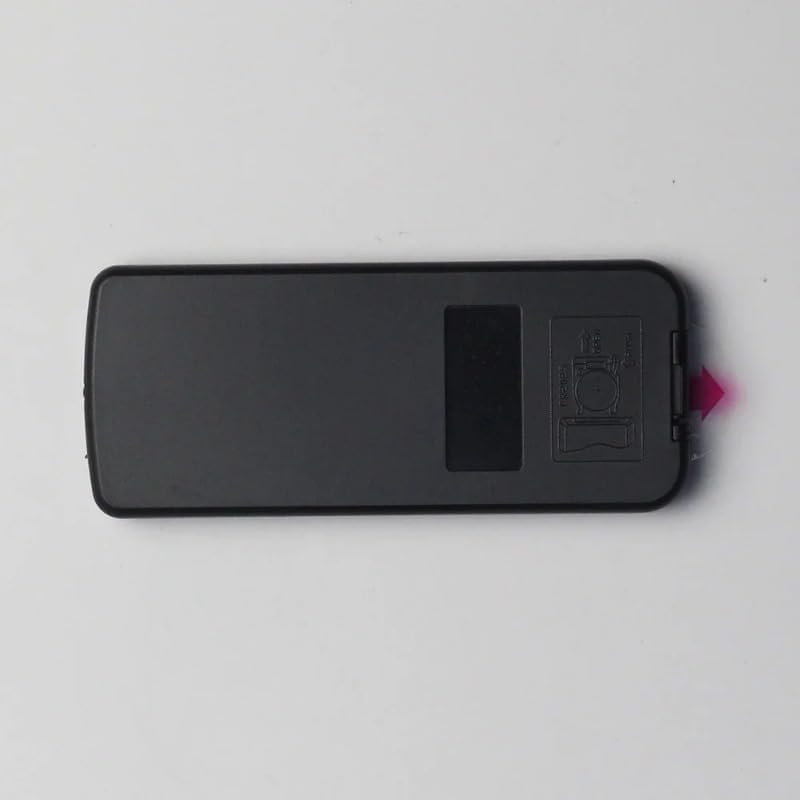
Figura 3: Posteriore view del telecomando, evidenziando il coperchio del vano batterie.
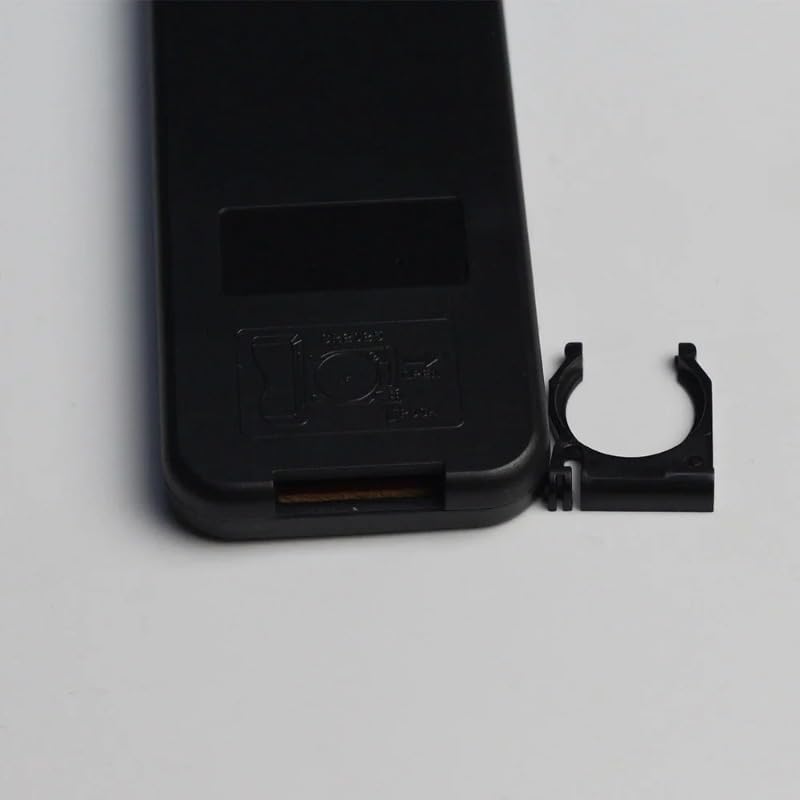
Figure 4: Battery compartment with cover removed, showing the internal battery clip.
3. Istruzioni per l'uso
The AR9ON INet 3+ Remote Control features an intuitive button layout for easy navigation and control of your compatible device. Refer to the diagram below for button identification and their primary functions.
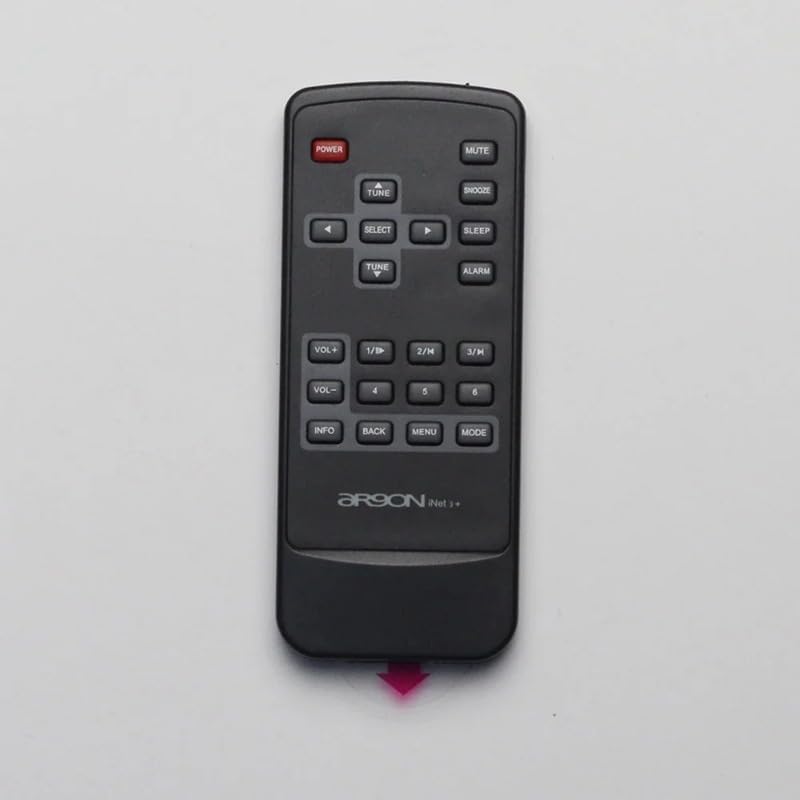
Figura 5: Dall'alto verso il basso view del telecomando, che descrive in dettaglio la funzione di ciascun pulsante.
3.1 Funzioni dei pulsanti
- POTENZA (pulsante rosso): Accende o spegne il dispositivo connesso.
- MUTO: Attiva o disattiva l'audio.
- SONNO: Activates or deactivates the snooze function for alarms.
- SONNO: Imposta un timer di sospensione per il dispositivo.
- ALLARME: Accede alle impostazioni dell'allarme.
- VOL+ / VOL-: Aumenta o diminuisce il livello del volume.
- 1/II, 2/K, 3/H: Function buttons, often used for specific modes or quick access.
- 4 aprile, 5 aprile, 6 aprile: Number buttons for direct input or selection.
- INFORMAZIONI: Visualizza informazioni sulla traccia corrente, sulla stazione o sullo stato del sistema.
- INDIETRO: Ritorna al menu o alla schermata precedente.
- MENU: Opens the main menu of the connected device.
- DIREZIONI: Switches between different operating modes (e.g., Radio, Bluetooth, Aux).
- TUNE (Up/Down Arrows): Navigates through radio frequencies, tracks, or menu options.
- SELEZIONARE: Conferma una selezione o accede a un sottomenu.
4. Manutenzione
4.1 Pulizia
Per pulire il telecomando, utilizzare un panno morbido e asciutto. Per lo sporco ostinato, utilizzare un panno leggermente dampPulisci il panno con acqua o un detergente delicato e non abrasivo. Non utilizzare prodotti chimici aggressivi o materiali abrasivi, poiché potrebbero danneggiare la superficie.
4.2 Sostituzione della batteria
Replace batteries when the remote's response becomes sluggish or it stops functioning. Refer to Section 2.1 for battery installation instructions. Always dispose of used batteries responsibly according to local regulations.
5. Risoluzione Dei Problemi
- Il telecomando non risponde:
- Check if the plastic battery insulator tab has been removed.
- Assicurarsi che le batterie siano inserite con la polarità corretta.
- Sostituire le vecchie batterie con quelle nuove.
- Assicurarsi che non vi siano ostacoli tra il telecomando e il sensore del dispositivo.
- Gamma limitata:
- Sostituire le batterie.
- Ensure the remote is pointed directly at the device's sensor.
- Ridurre le interferenze provenienti da altri dispositivi elettronici.
6. Specifiche
| Caratteristica | Dettaglio |
|---|---|
| Marca | Generic (Manufacturer: TUCUS) |
| Numero di modello | DVT-4F98AEFC7A28645BD21E85D33A80939C |
| Tipo di controllore | Controllo dei pulsanti |
| Caratteristica speciale | Ergonomic |
| Quantità del pacchetto dell'articolo | 1 |
| ASIN | B0D799TNWS |
| Data prima disponibilità | 17 giugno 2024 |
7. Garanzia e supporto
For warranty information and technical support, please refer to the documentation provided with your original product purchase or contact the seller directly. Keep your purchase receipt as proof of purchase.