1. Introduzione
This manual provides essential instructions for the safe and effective operation, setup, and maintenance of your Longer RAY5 20W Laser Engraver Machine. The RAY5 20W is a high-precision laser engraving and cutting tool designed for various materials, featuring a 20W laser module, a 3.5-inch touch screen, and multiple connectivity options. This bundle includes an Air Assist Kit to enhance cutting and engraving performance.
Si prega di leggere attentamente il presente manuale prima di utilizzare la macchina per garantirne un utilizzo corretto e per evitare danni o lesioni.
2. Informazioni sulla sicurezza
Operating a laser engraver involves inherent risks. Adhere to all safety precautions to prevent accidents and ensure personal safety.
- Protezione degli occhi: Always wear certified laser safety goggles when the machine is operating. Never look directly at the laser beam or its reflection.
- Ventilazione: Operate the machine in a well-ventilated area or use an appropriate fume extraction system. Laser engraving and cutting can produce smoke, fumes, and potentially harmful particles.
- Rischio di incendio: Keep a fire extinguisher nearby. Do not leave the machine unattended during operation, especially when cutting flammable materials. Ensure the work area is clear of combustible materials.
- Sicurezza dei materiali: Only engrave or cut materials approved for laser processing. Avoid materials that produce toxic fumes or catch fire easily (e.g., PVC, certain plastics).
- Bambini e animali domestici: Tenere bambini e animali domestici lontani dalla macchina in funzione.
- Arresto di emergenza: Familiarizzare con la posizione e il funzionamento del pulsante di arresto di emergenza.
- Alimentazione elettrica: Utilizzare solo l'adattatore di alimentazione fornito e assicurarsi che sia collegato a una presa di corrente dotata di messa a terra.
3. Contenuto della confezione
Verifica che tutti i componenti siano presenti nel tuo pacchetto:
- Longer RAY5 20W Laser Engraver Machine (main frame, laser module)
- Air Assist Kit (air pump, air nozzle, tubing, connectors)
- Adattatore di alimentazione e cavo
- Cavo USB
- Carta TF
- Occhiali di sicurezza laser
- Manuale dell'utente (questo documento)
- Kit di strumenti di base per l'assemblaggio
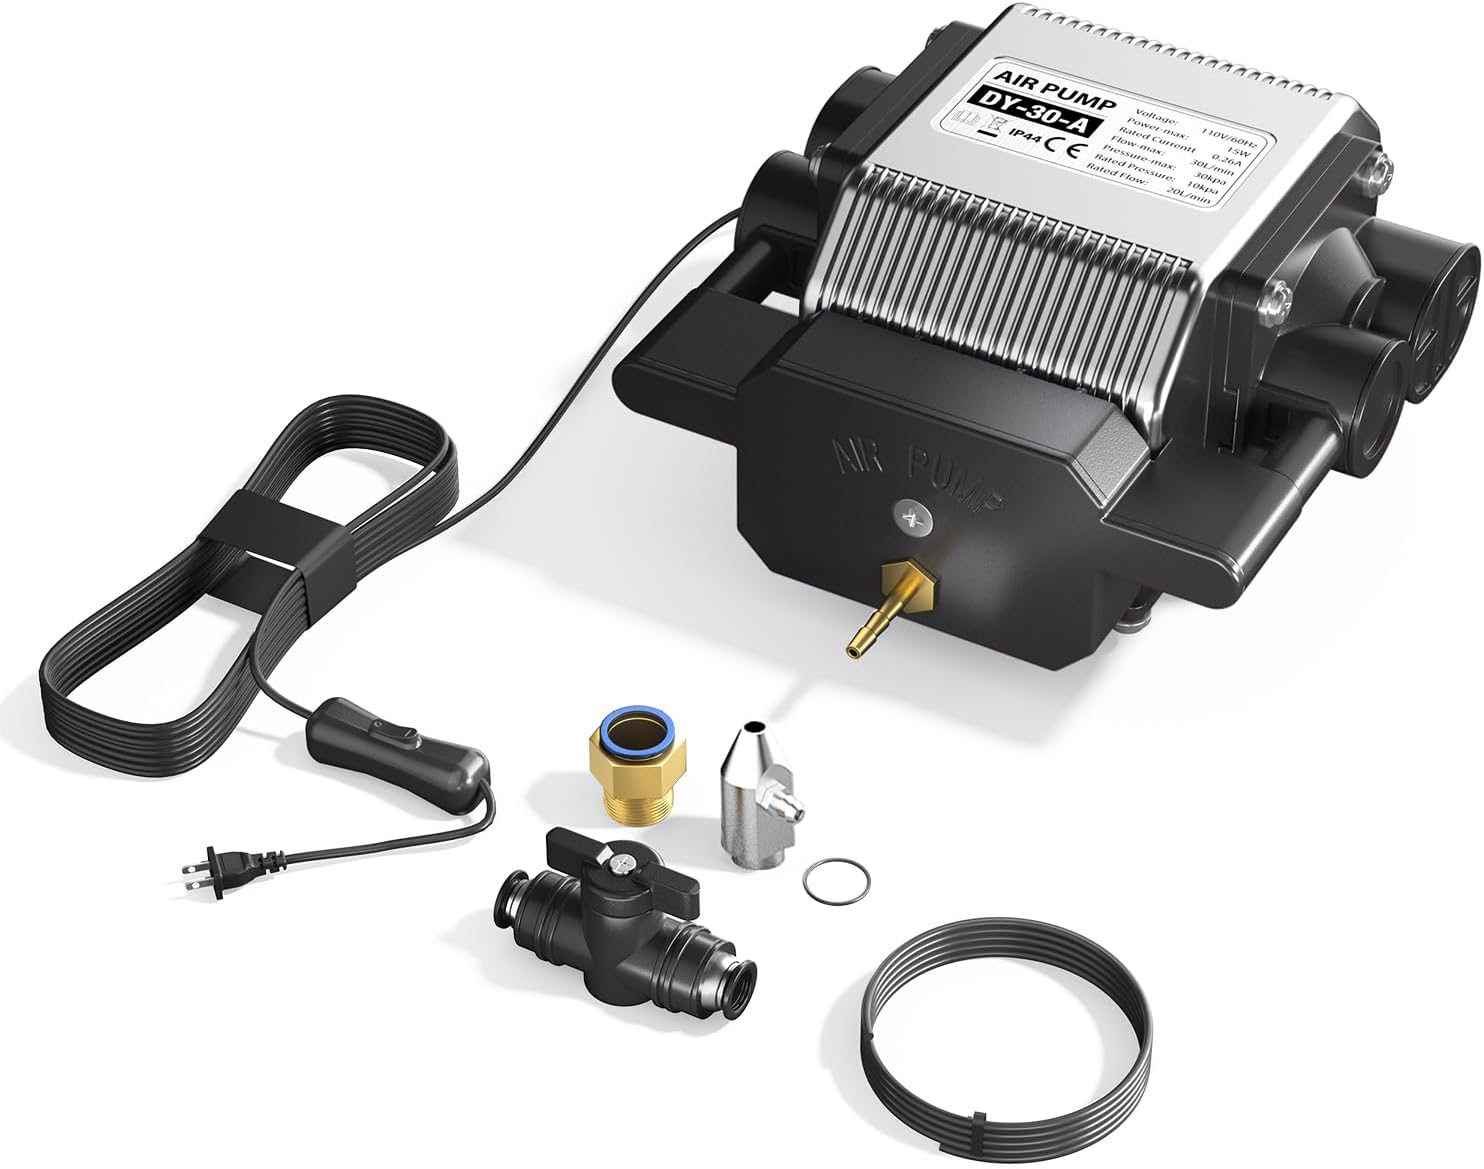
Image: Air Assist Kit components, including the air pump, tubing, and various connectors.
4. Installazione e assemblaggio
Follow these general steps for setting up your laser engraver. Refer to the separate assembly guide for detailed instructions on frame construction.
- Assemblaggio del telaio: Assemble the main frame components according to the dedicated assembly guide. Ensure all screws are tightened securely.
- Installazione del modulo laser: Mount the 20W laser module onto the gantry. Connect the laser module cable to the control board.
- Air Assist Kit Installation:
- Attach the air nozzle to the laser module.
- Connect the air tubing from the air nozzle to the air pump.
- Position the air pump in a stable location near the engraver.
- Connessioni via cavo: Connect the power adapter to the machine and a grounded power outlet. Connect the USB cable to your computer if using a wired connection.
- Installazione del software: Install the recommended engraving software (LaserGRBL or LightBurn) on your computer. Drivers may be required for USB connection.

Immagine: Primo piano view of the laser module, highlighting the attachment point for the air assist nozzle.
5. Istruzioni per l'uso
5.1 Accensione e spegnimento
- Accensione: Connect the power cable and press the power button on the machine. The touch screen will illuminate.
- Spegni: Press and hold the power button or use the software interface to shut down the machine safely. Disconnect power only after the machine has fully powered down.
5.2 Modalità di connettività
The RAY5 20W supports four connection modes:
- Connessione USB: Connect the machine to your computer via the provided USB cable.
- Carta TF: Carica codice G files directly onto a TF card and insert it into the machine's slot for offline operation.
- Connessione wifi: Connect the machine to your local Wi-Fi network for wireless control via a computer or mobile device.
- Controllo APP: Use the dedicated mobile application for remote control and monitoring.
5.3 Material Preparation and Focusing
- Materiale sicuro: Place your material on the work bed and secure it to prevent movement during operation.
- Metti a fuoco il laser: Adjust the laser module's height until the laser spot is at its smallest and most intense point on the material surface. This ensures optimal engraving and cutting quality.
5.4 Avvio di un lavoro di incisione/taglio
- Preparazione del progetto: Create or load your design in LaserGRBL or LightBurn.
- Impostazioni dei parametri: Adjust engraving/cutting parameters such as laser power, speed, and passes based on the material type and desired outcome. The RAY5 20W offers high precision and speeds up to 10000mm/min.
- Enable Air Assist: If cutting or engraving materials that produce significant smoke or require cleaner edges, turn on the Air Assist pump. Adjust airflow as needed (10-30L/min).
- Inizia il lavoro: Initiate the job from the software or directly from the 3.5-inch touch screen if using a TF card. Monitor the process closely.
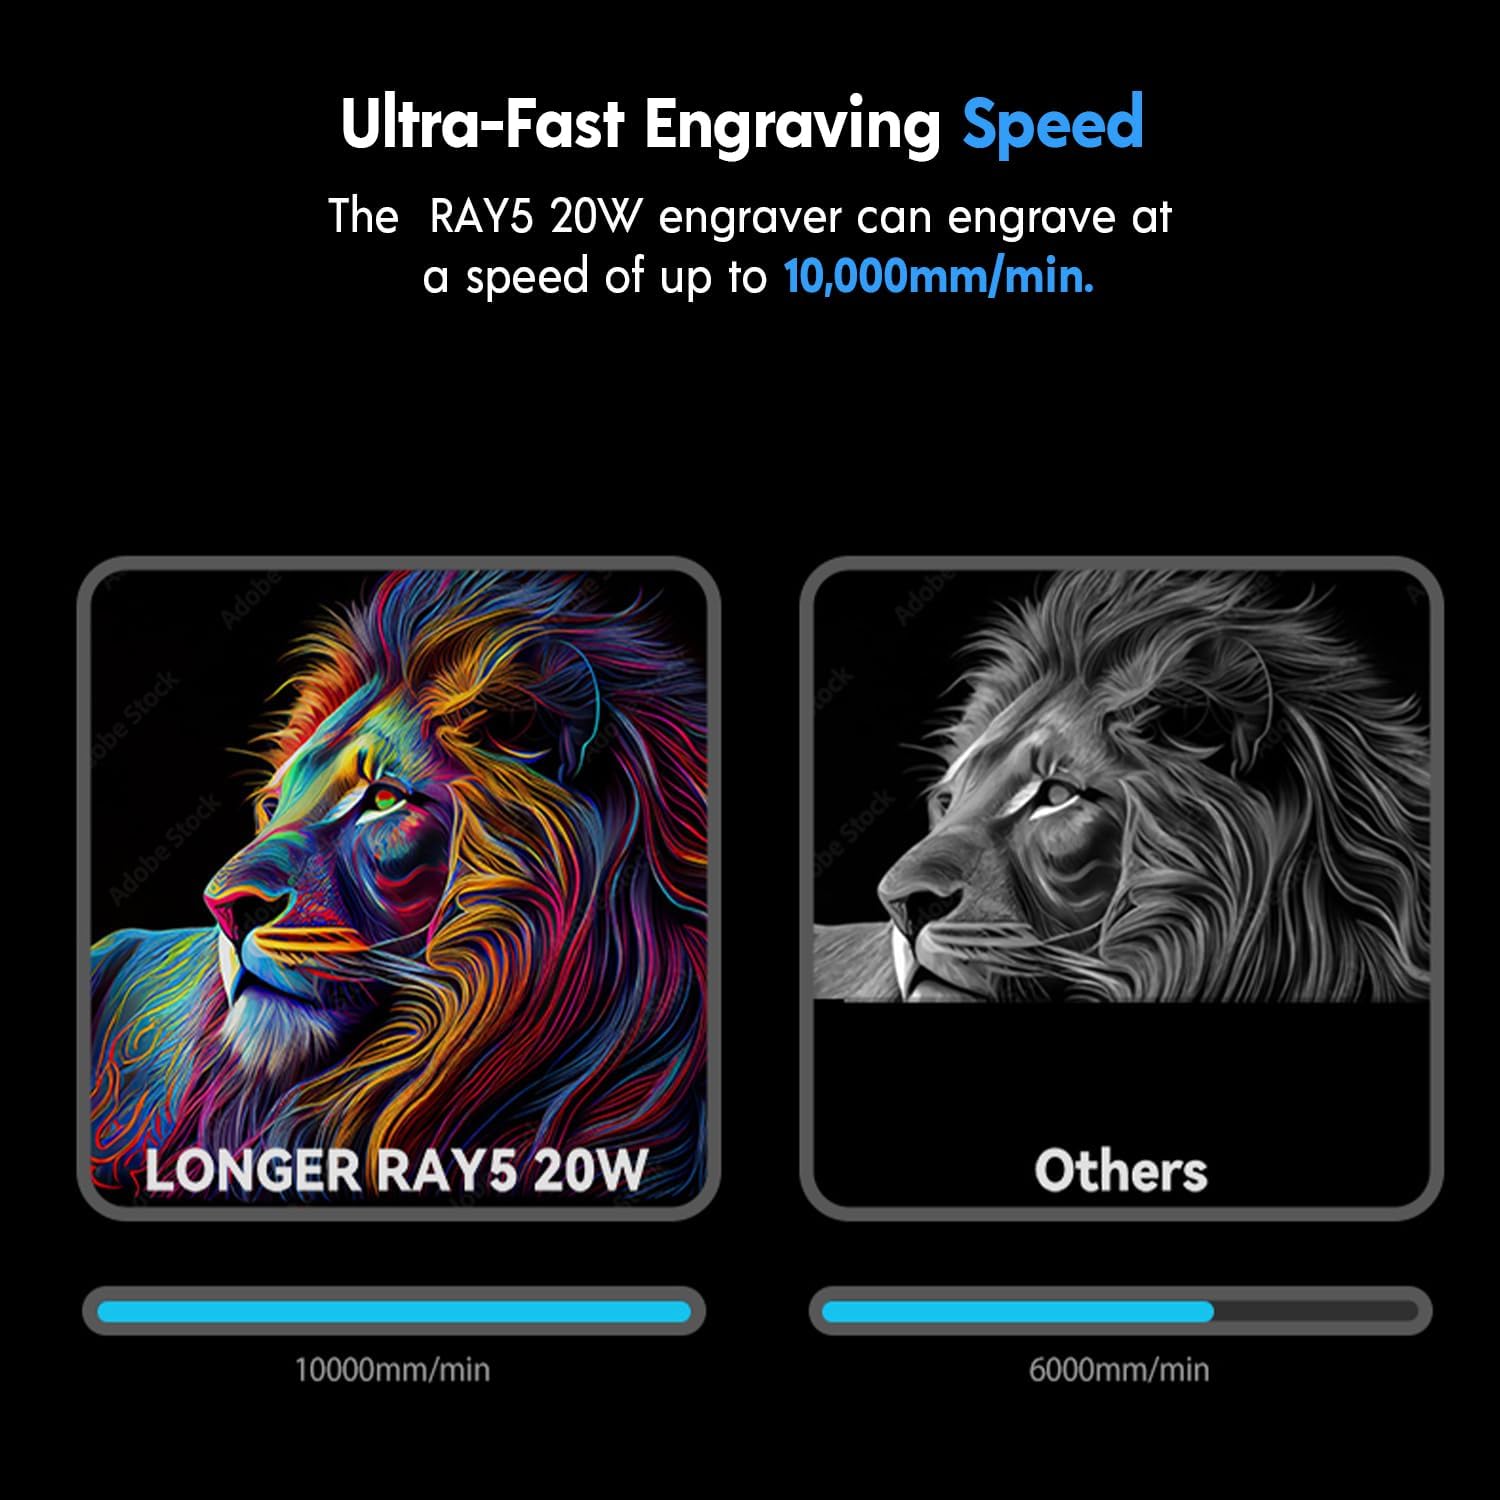
Image: The RAY5 20W laser engraver can achieve engraving speeds of up to 10,000mm/min.

Image: Comparison demonstrating the improved cutting and engraving quality with the Air Assist Kit, resulting in less yellowing and cleaner edges.

Immagine: Examples showcasing the machine's capability for rare color engraving on different materials.
6. Manutenzione
Una manutenzione regolare garantisce prestazioni ottimali e prolunga la durata del tuo incisore laser.
- Pulisci la lente laser: Periodically clean the laser lens with a lint-free cloth and isopropyl alcohol to remove dust and debris. A dirty lens can reduce laser power and engraving quality.
- Area di lavoro pulita: Keep the work bed and surrounding area clean from debris and residue.
- Ispezionare cinghie e guide: Check the tension of the timing belts and ensure the linear rails are clean and free of obstructions. Lubricate rails if necessary according to manufacturer guidelines.
- Filtro della pompa dell'aria: If your air pump has a filter, clean or replace it as recommended to maintain optimal airflow.
7. Risoluzione Dei Problemi
Fare riferimento a questa sezione per soluzioni a problemi comuni:
| Problema | Possibile causa | Soluzione |
|---|---|---|
| Il laser non si accende o ha un'uscita debole | Lente sporca, messa a fuoco errata, impostazione di bassa potenza, cavo allentato. | Clean the laser lens. Re-focus the laser. Increase laser power in software. Check all cable connections. |
| Scarsa qualità di incisione/taglio | Incorrect speed/power settings, material not flat, dirty lens, no air assist. | Adjust speed and power settings. Ensure material is flat and secured. Clean laser lens. Activate Air Assist for cutting. |
| La macchina non si connette al computer/APP | Incorrect cable, driver issue, wrong WiFi settings. | Ensure correct USB cable is used. Reinstall drivers. Verify WiFi credentials and network connection. |
| Air Assist not working | Air pump not powered, tubing disconnected, clogged nozzle. | Check air pump power. Ensure tubing is securely connected. Clean the air nozzle. |
8. Specifiche
- Modello: RAY5 20W più lungo
- Potenza laser: 20W (uscita ottica)
- Dimensioni del punto laser: 0.08 x 0.1mm (Compressed Beam)
- Maximum Engraving Speed: Fino a 10000 mm/min
- Connettività: USB, scheda TF, Wi-Fi, APP
- Schermo tattile: Schermo touch a colori da 3.5 pollici
- Software compatibile: LaserGRBL, LightBurn
- Cutting Capability (with Air Assist):
- Wood: Up to 25mm
- Acrylic: Up to 35mm
- Stainless Steel: Up to 0.05mm (0.002")
- Materiali incisibili: Wood, Acrylic, Metal (coloring), Glass, Leather, Paper, Plastics, etc.
- Air Assist Kit: Adjustable Airflow 10-30L/min

Image: The RAY5 20W laser module features 0.01mm height accuracy and demonstrates cutting capabilities for various materials like pine, acrylic, and stainless steel.

Image: The RAY5 20W engraver is equipped with a powerful 32-bit chipset for smooth operation.
9. Garanzia e supporto
For warranty information, technical support, or service inquiries, please refer to the official Longer website or contact Longer customer service directly. Keep your purchase receipt as proof of purchase.
Ufficiale Websito: www.longer3d.com