
1. Introduzione
This manual provides essential information for the safe and effective operation of your Pretul NL-12P Rechargeable Green Laser Level. Please read these instructions thoroughly before first use and keep them for future reference. This device is designed for precise leveling and alignment tasks in various applications.
2. Istruzioni di sicurezza
ATTENZIONE: Radiazioni laser. Evitare l'esposizione diretta degli occhi.
- Non fissare direttamente il raggio laser.
- Non puntare il raggio laser verso persone o animali.
- Non utilizzare il dispositivo in atmosfere esplosive.
- Tenere il dispositivo fuori dalla portata dei bambini.
- Use only the charger provided with the device.
- Do not attempt to modify or disassemble the laser level. This can lead to hazardous laser exposure and voids the warranty.
- Assicurarsi che l'area di lavoro sia libera da ostacoli e potenziali pericoli.
3. Contenuto della confezione
Verificare che tutti gli articoli siano presenti nel pacco:
- Pretul NL-12P Laser Level
- Batteria agli ioni di litio
- Caricabatterie
- Base Magnetica
- Montaggio a parete
- Quick-Release Tripod
- Custodia per il trasporto

Figure 3.1: Included accessories: carrying case and quick-release tripod.
4. Prodotto finitoview
Familiarize yourself with the components of your Pretul NL-12P laser level:

Figure 4.1: Key components of the Pretul NL-12P Laser Level.
- Finestre di uscita laser: Emette raggi laser verdi.
- Base magnetica: Consente un fissaggio sicuro alle superfici metalliche.
- Batteria agli ioni di litio: Rechargeable power source for the device.
- On/Off Knob: Controls the power and locking mechanism.
- Quick-Release Tripod: Provides a stable base for the laser level.
- Livella a bolla: Assists in manual leveling when self-leveling is not active.
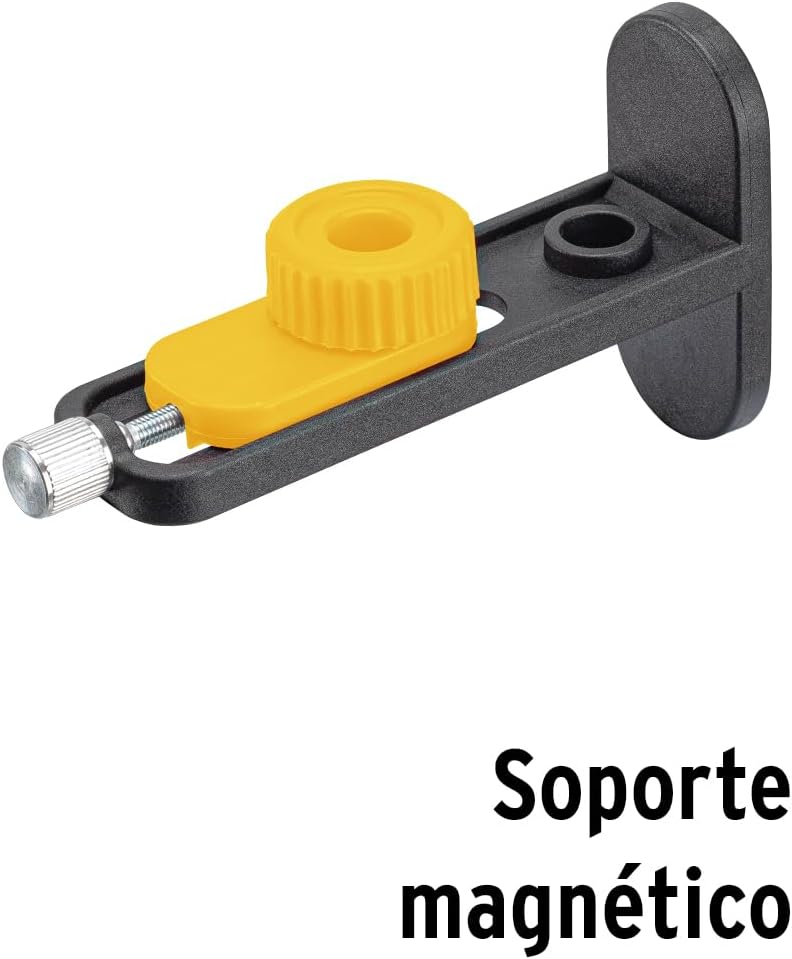
Figura 4.2: lato view showing the magnetic base.

Figura 4.3: Indietro view of the laser level.
5. Impostazione
5.1 Caricamento della batteria
Before first use, fully charge the Li-ion battery. Connect the charger to the laser level and plug it into a power outlet. The charging indicator will show the charging status. Once fully charged, disconnect the charger.
5.2 Attaching the Tripod and Magnetic Base
The laser level can be mounted on the quick-release tripod or attached to metallic surfaces using the magnetic base.
- For Tripod: Screw the laser level onto the 1/4" thread of the quick-release tripod. Adjust the tripod legs for stability.
- For Magnetic Base: Attach the magnetic base to the bottom of the laser level. The base can then be secured to suitable metallic surfaces.
Figure 5.1: Laser level with magnetic base.
6. Funzionamento
6.1 Accensione/spegnimento e autolivellamento
- To power on the device and activate self-leveling mode, rotate the On/Off knob to the unlocked position. The laser lines will automatically level within ±3°. If the device is outside this range, the laser lines will flash to indicate it cannot self-level.
- To power off, rotate the On/Off knob to the locked position. This also locks the pendulum for safe transport.
6.2 Commutazione delle linee laser
The NL-12P projects 12 lines (3 x 360° planes). Use the control buttons on the top of the device to switch between horizontal and vertical lines:
- Press the 'H' button to activate/deactivate horizontal laser lines.
- Press the 'V' button to activate/deactivate vertical laser lines.
- Multiple lines can be active simultaneously.
6.3 Modalità manuale (pendolo bloccato)
For projecting lines at an angle, you can use the manual mode:
- With the device powered off (knob in locked position), press and hold the 'H' or 'V' button for a few seconds to activate the laser lines in manual mode.
- In this mode, the self-leveling function is deactivated, and the laser lines can be projected at any angle. The lines will not flash.
- To exit manual mode, turn the device off using the On/Off knob.
Video 6.1: Demonstration of Pretul NL-12P Laser Level features, including setup and operation of laser lines.
7. Manutenzione
- Pulizia: Utilizzare un morbido, damp cloth to clean the device. Do not use abrasive cleaners or solvents. Keep the laser output windows clean for optimal performance.
- Cura della batteria: Store the battery in a cool, dry place. If storing for extended periods, charge the battery every 3-6 months to maintain its lifespan.
- Magazzinaggio: When not in use, store the laser level in its carrying case in a dry, dust-free environment. Ensure the pendulum is locked before storage or transport.
8. Risoluzione Dei Problemi
| Problema | Possibile causa | Soluzione |
|---|---|---|
| Le linee laser lampeggiano. | Il dispositivo è al di fuori del suo intervallo di autolivellamento (±3°). | Posizionare il livello laser su una superficie più piana. |
| Le linee laser sono deboli o non visibili. | Batteria scarica o luce ambientale intensa. | Recharge the battery. Use the laser level in a less brightly lit environment or use a laser receiver (sold separately) for outdoor use. |
| Il dispositivo non si accende. | La batteria è scarica o non è inserita correttamente. | Ensure the battery is charged and correctly inserted. Check the On/Off knob is in the unlocked position. |
| Laser lines are not level in self-leveling mode. | Device is damaged or requires calibration. | Contattare l'assistenza clienti per ricevere assistenza. Non tentare di riparare il prodotto da soli. |
9. Specifiche
| Caratteristica | Dettaglio |
|---|---|
| Modello | NL-12P |
| Marca | prezzo |
| Colore laser | Green (4X greater visibility than red laser) |
| Numero di linee | 12 lines (3 x 360° planes) |
| Gamma di autolivellamento | ± 3° |
| Tolleranza | 0.2 mm/metro |
| Allineare | Fino a 25 metri |
| Fonte di alimentazione | Batteria ricaricabile Li-ion |
| Materiale | Plastica, Acrilonitrile Butadiene Stirene (ABS) |
| Colore | Giallo |
| Dimensioni del prodotto | 12 cm (lunghezza) x 10 cm (larghezza) |
| Peso dell'articolo | 1 chilogrammo |
| Grado di protezione IP | IP54 (Splash Resistant, Protected against limited dust ingress) |
| Elementi inclusi | Charger, Wall mount, Magnetic base, Laser level, Case, Li-ion battery, Quick-release tripod |

Figure 9.1: IP54 Protection Rating details.
Figura 9.2: Confezione del prodotto che evidenzia le caratteristiche e le specifiche principali.
For additional information and videos, please visit: Truper Product Page
10. Garanzia e supporto
Grupo Truper offers a comprehensive warranty covering over 25,000 accessories and spare parts, with minimal or no labor cost. There are 177 service centers in Mexico and 15 Latin American countries. No purchase receipt is required to validate the warranty.
For warranty claims or technical support, please contact your local Pretul service center or visit the official Pretul websito per ulteriori informazioni.
For more information about Pretul products, visit the Pretul Store on Amazon.