
1. Prodotto finitoview
The AVINIA Digital Kitchen Timer is a versatile and easy-to-use device designed for various timing needs, including cooking, studying, fitness, and classroom activities. It features a large LED display, magnetic backing, and adjustable settings for volume and brightness.

Immagine: Frontale view of the AVINIA Digital Kitchen Timer in Starry Blue, displaying '99:55' minutes and seconds.
2. Impostazione
2.1 Installazione della batteria
The AVINIA Digital Kitchen Timer requires 3 AAA batteries (included). To install or replace batteries:
- Gently open the battery compartment cover located on the back of the timer.
- Inserire 3 batterie AAA, assicurandosi della corretta polarità (+/-).
- Chiudere saldamente il coperchio del vano batterie.

Image: Close-up of the back of the AVINIA Digital Kitchen Timer showing the battery compartment open with three AAA batteries being inserted.
2.2 Accensione iniziale
After battery installation, the timer display should automatically activate. If not, gently twist the outer ring to wake up the display.
3. Istruzioni per l'uso
3.1 Impostazione del timer (conto alla rovescia)
Per impostare un conto alla rovescia:
- Ensure the timer display is active.
- Rotate the outer ring clockwise to increase the time or counter-clockwise to decrease it. The timer supports a range from 0 to 99 minutes and 99 seconds.
- Press the central button once to start the countdown.
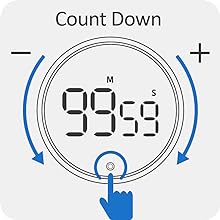
Image: Diagram showing the timer's outer ring being rotated to set the countdown time, with a central button to start/stop.
3.2 Countup Functionality
To use the countup feature:
- Ensure the timer is reset to '00:00'. If not, press and hold the central button to reset.
- Press the central button once to start counting up from '00:00'.
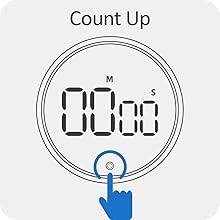
Image: Diagram showing the timer displaying '00:00' and a hand pressing the central button to initiate countup.
3.3 Pause/Stop and Reset
- To pause or stop an active timer (countdown or countup), press the central button once.
- To resume a paused timer, press the central button again.
- To reset the timer to '00:00', press and hold the central button for a few seconds.
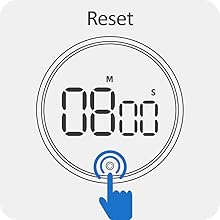
Image: Diagram showing the timer displaying a time and a hand pressing and holding the central button to reset.
3.4 Regolazione del volume
The timer offers three alarm volume levels: silent, low, and loud (up to 90dB). A switch on the back of the timer allows you to select your preferred volume setting.
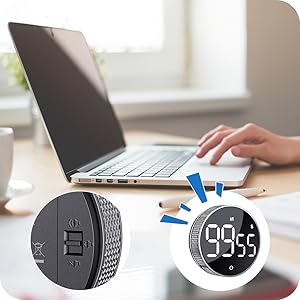
Image: Close-up of the back of the AVINIA Digital Kitchen Timer highlighting the three-level volume switch.
3.5 Regolazione della luminosità
The timer features three brightness levels: constant brightness, dim mode, and light off. Use the switch on the back of the timer to adjust the display brightness according to ambient light conditions and to conserve battery life.
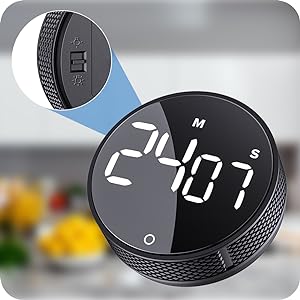
Image: Close-up of the back of the AVINIA Digital Kitchen Timer highlighting the three-level brightness switch.
3.6 Attacco magnetico
The timer is equipped with strong magnets on its back, allowing it to be firmly attached to metal surfaces such as refrigerators, ovens, or whiteboards for convenient, one-handed operation.
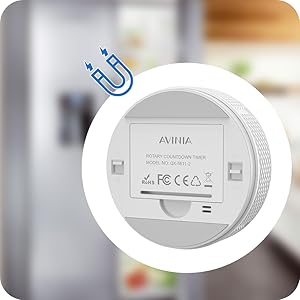
Image: The back of the AVINIA Digital Kitchen Timer with its magnetic base shown attached to a metallic surface.
3.7 Applicazioni
The AVINIA Digital Kitchen Timer is suitable for a variety of uses:
- Cucina: Perfect for cooking, baking, and grilling to prevent over- or under-cooking.
- Study/Classroom: Helps students and children manage time, balance learning and play, and focus during study sessions.
- Fitness: Ideal for timing workouts, exercise routines, and gym sessions.
- Riunioni: Keep track of meeting durations.
- Compiti giornalieri: Useful for tasks like brushing teeth, facial routines, or any activity requiring timed intervals.

Image: The AVINIA Digital Kitchen Timer centrally placed, surrounded by images depicting its use in a kitchen, for homework, during fitness, for facial care, and for brushing teeth.
3.8 Video ufficiale del prodotto
Video: An official product video from AVINIA Direct demonstrating the features and usage of the AVINIA Kitchen Timer, including its magnetic digital display and rechargeable capabilities.
4. Manutenzione
4.1 Sostituzione della batteria
When the display dims significantly or the timer stops functioning, it is time to replace the 3 AAA batteries. Follow the steps in Section 2.1 for proper battery replacement.
4.2 Pulizia
Per pulire il timer, strofinarlo con un panno morbido e asciutto. Non utilizzare detergenti abrasivi né immergere il dispositivo in acqua.
5. Risoluzione Dei Problemi
- Display not active: Ensure batteries are correctly installed and charged. Gently twist the outer ring to activate the display.
- Timer not adjusting: The outer ring only adjusts time when the timer is paused or reset to '00:00'. If the timer is running, it will not adjust.
- L'allarme non suona: Check the volume switch on the back of the timer. Ensure it is not set to silent mode.
- Schermo troppo scuro/luminoso: Adjust the brightness switch on the back of the timer to your desired level.
6. Specifiche
- Numero modello: PW-003
- Marca: AVINIA
- Colore: Blu stellato
- Materiale: Plastica
- Dimensioni del prodotto: 1.18"P x 3.15"L x 3.15"A
- Peso dell'articolo: 2.82 once (80 grammi)
- Fonte di energia: 3 batterie AAA (incluse)
- Intervallo di tempo: 0-99 minuti, 0-99 secondi
- Dimensioni dello schermo: 1.18 pollici
7. Garanzia e supporto
Each AVINIA Digital Kitchen Timer comes with a full-year quality guarantee from the manufacturer. For support or warranty claims, please contact AVINIA Direct through your purchase platform or refer to the contact information provided with your product packaging.