
1. Prodotto finitoview
The DEWALT 20V MAX XR 1/2 Inch Brushless Cordless Hammer Drill is designed for demanding drilling and fastening applications. This kit includes the DCD1007WW1 hammer drill, an 8AH battery, and a charger, providing a powerful and efficient solution for various tasks in wood, metal, and concrete.
Le caratteristiche principali includono:
- Elevata coppia in uscita: Delivers 2,100 in-lbs. of max torque for heavy-duty applications.
- Efficient Drilling: Capable of up to 275 holes per charge (with DCB2108 battery and 7/8" diameter auger in 1-1/2" thick fir).
- ANTI-ROTATION System: Automatically shuts down the tool if excessive rotational motion is detected, enhancing user control and safety.
- Design compatto: Shortest length DEWALT premium 3-speed drill for improved maneuverability in tight spaces.
- 3-Speed High-Performance Transmission: All-metal transmission optimizes runtime and performance.
- Pivoting 3-Position LED: Illuminates dim work areas for better visibility.
- Nitro-Carburized Metal Chuck: 1/2 inch ratcheting chuck with carbide inserts ensures strong bit retention.
- TOOL CONNECT Chip Ready: Allows tracking and management within the TOOL CONNECT system (chip sold separately).
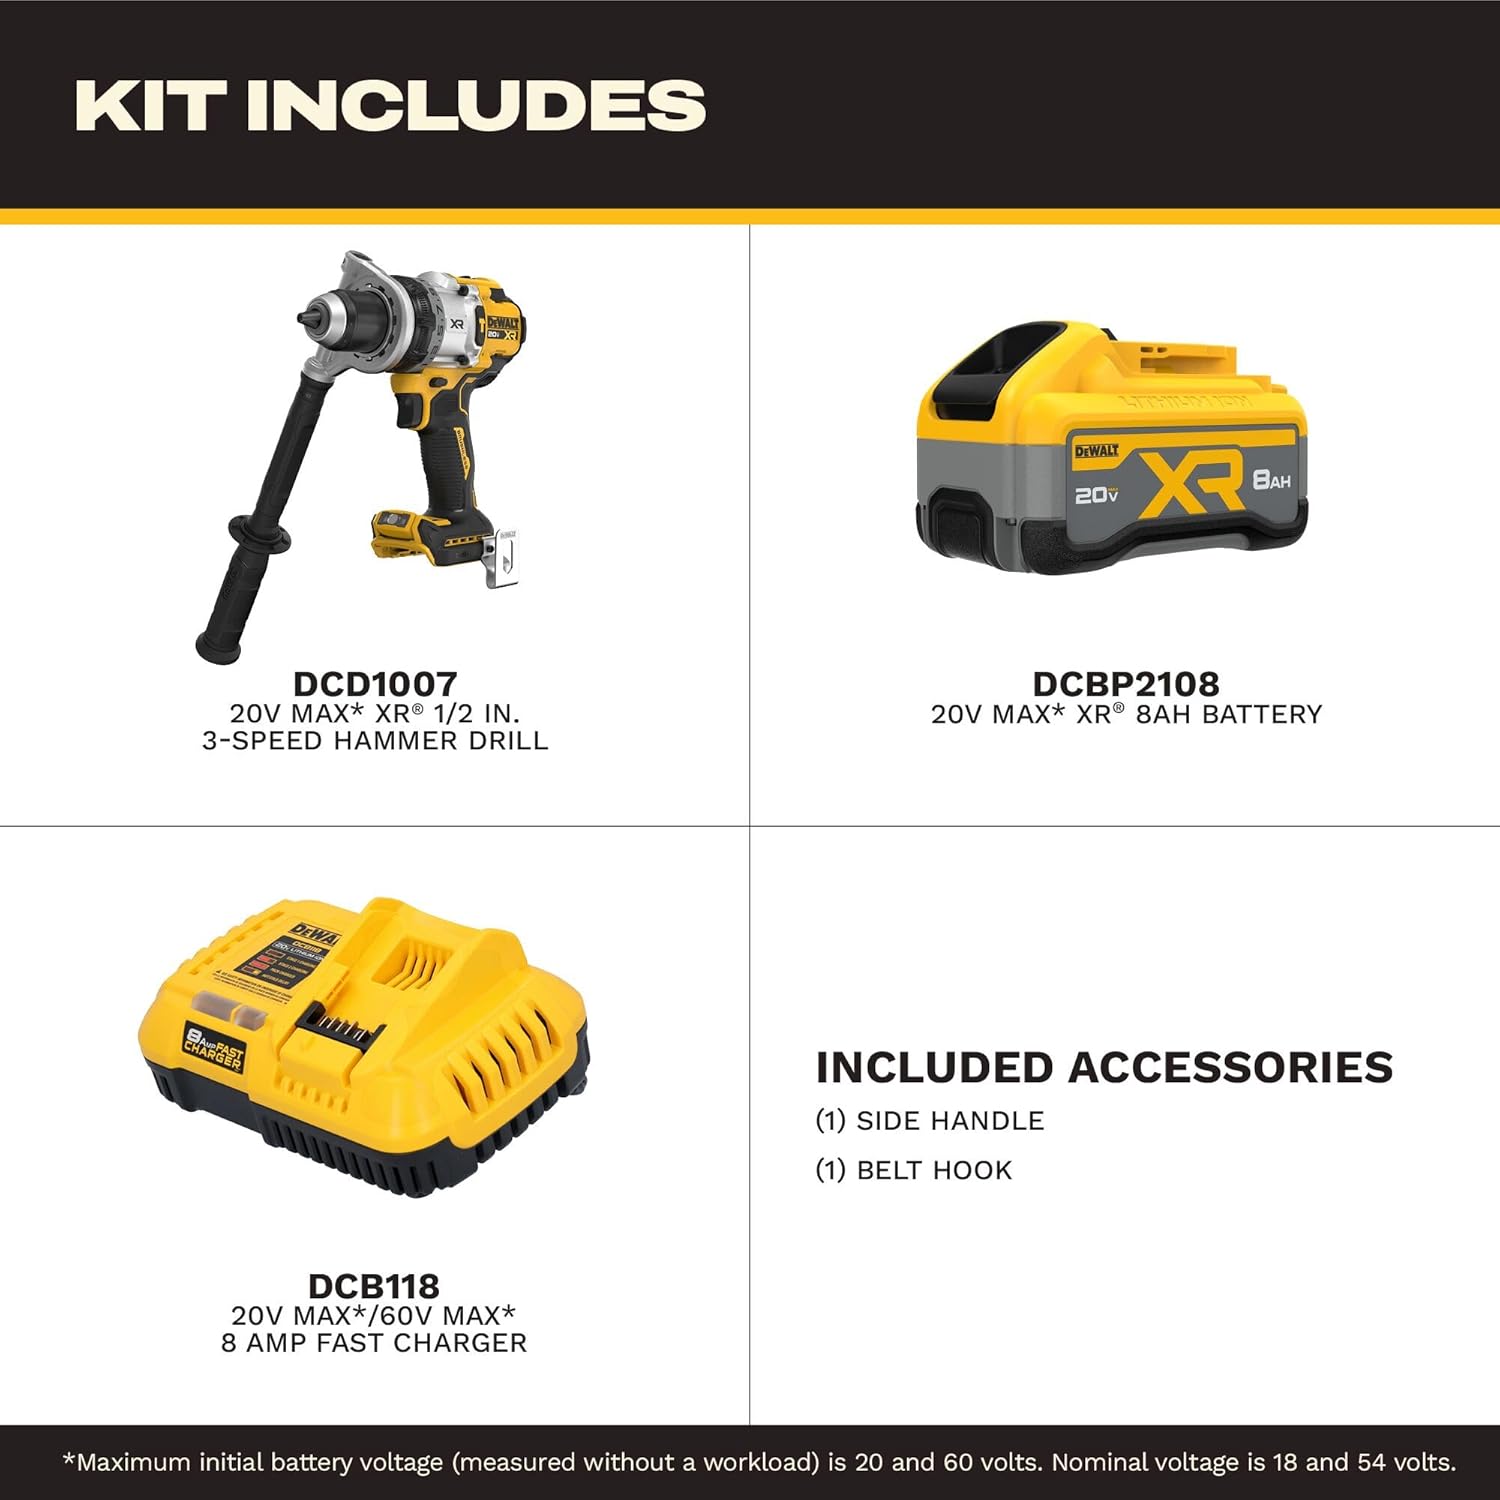
Image: The DEWALT DCD1007WW1 Hammer Drill Kit includes the drill, an 8AH battery, a charger, a side handle, and a belt hook.
2. Istruzioni di sicurezza
Always follow basic safety precautions to reduce the risk of fire, electric shock, and personal injury when using power tools. Read all instructions before operating this product.
- Indossare dispositivi di protezione individuale (DPI) adeguati, come occhiali di sicurezza, protezioni acustiche e guanti.
- Assicuratevi che l'area di lavoro sia pulita e ben illuminata. Le aree disordinate o buie favoriscono gli incidenti.
- Non utilizzare utensili elettrici in atmosfere esplosive, ad esempio in presenza di liquidi, gas o polveri infiammabili.
- Tenere lontani bambini e astanti mentre si utilizza un elettroutensile. Le distrazioni possono causare la perdita del controllo.
- Utilizzare l'utensile corretto per l'applicazione desiderata. Non forzare l'utensile.
- Scollegare la batteria dall'utensile prima di effettuare qualsiasi regolazione, cambiare accessori o riporre l'utensile.
- Conservare gli attrezzi inattivi fuori dalla portata dei bambini e di altre persone non addestrate.
- Mantenete gli utensili con cura. Controllate che non vi siano disallineamenti o inceppamenti delle parti mobili, rotture di componenti e qualsiasi altra condizione che possa compromettere il funzionamento dell'utensile.
- Utilizzare solo batterie e caricabatterie specificati dal produttore.
3. Installazione e assemblaggio
3.1 Fissaggio della maniglia laterale
The adjustable side handle provides additional control and stability, especially during high-torque applications or when using larger drill bits.
- Allentare la maniglia laterale ruotandola in senso antiorario.
- Slide the handle onto the front of the drill housing, positioning it to your preferred angle for optimal grip and control.
- Stringere la maniglia ruotandola in senso orario fino a quando non è fissata.

Image: A user attaching the side handle to the DEWALT hammer drill for enhanced control.
3.2 Installazione/rimozione del pacco batteria
To install the battery pack, align it with the tool's battery port and slide it in until it clicks securely into place. To remove, press the release button on the battery pack and slide it out.
Video: Official DEWALT video demonstrating the DCD1007 Hammer Drill, including battery installation and removal.
3.3 Caricamento della batteria
Connect the charger to a standard power outlet. Insert the battery pack into the charger. The indicator light on the charger will show the charging status. Refer to the charger's specific manual for detailed charging instructions and indicator light meanings.
4. Istruzioni per l'uso
4.1 Selecting Speed and Mode
The hammer drill features a 3-speed transmission and multiple operating modes (drilling, hammer drilling, driving). Use the gear selector switch on top of the drill to choose the desired speed (1, 2, or 3). Rotate the collar near the chuck to select the operating mode.
- Velocità 1 (bassa): For high torque applications, driving fasteners, or drilling large diameter holes.
- Velocità 2 (Media): For general drilling and fastening.
- Velocità 3 (Alta): For high-speed drilling in smaller diameters.
- Modalità di perforazione: Per forare legno, metallo e plastica.
- Modalità trapano a percussione: For drilling in masonry and concrete.
- Modalità di guida: For driving screws with clutch settings.

Image: Diagram highlighting the 3-speed transmission and other features of the DEWALT hammer drill.
4.2 Installazione di punte da trapano/accessori
To install a drill bit or accessory, twist the chuck counter-clockwise to open the jaws. Insert the bit fully into the chuck and then twist clockwise to tighten securely. Ensure the bit is centered and firmly gripped before operation.
4.3 Utilizzo della luce di lavoro a LED
The integrated LED light can be activated by pressing the button near the base of the handle. It features a 3-position pivot to direct light where needed, improving visibility in dark work areas. The light can also be set to a 20-minute timer for use as a work light.
4.4 ANTI-ROTATION System
The PERFORM & PROTECT ANTI-ROTATION system is a safety feature that senses the rotational motion of the tool. If the tool binds up and experiences excessive rotation, the system will automatically shut it down to prevent injury. This system is particularly useful in high-torque situations where kickback can occur.

Immagine: un primo piano view of the "ANTI-ROTATION" indicator on the DEWALT hammer drill, which illuminates when the system is active or has engaged.
5. Manutenzione
Una manutenzione regolare garantisce prestazioni ottimali e prolunga la durata del tuo utensile.
- Pulizia: Mantenere pulite le fessure di ventilazione dell'utensile per evitare il surriscaldamento. Utilizzare una spazzola morbida o un panno asciutto per rimuovere polvere e detriti. Non utilizzare acqua o detergenti chimici.
- Manutenzione del mandrino: Periodically clean the chuck jaws to ensure proper bit gripping.
- Cura della batteria: Conservare le batterie in un luogo fresco e asciutto, lontano dalla luce solare diretta e da temperature estreme. Non conservare le batterie scariche per periodi prolungati.
- Ispezione: Regularly inspect the tool for any damaged parts, loose screws, or worn components. Replace damaged parts immediately.
- Lubrificazione: Questo utensile è lubrificato in fabbrica e non richiede ulteriore lubrificazione.
6. Risoluzione Dei Problemi
| Problema | Possibile causa | Soluzione |
|---|---|---|
| Lo strumento non si avvia. | Batteria non carica o installata in modo errato. | Caricare completamente la batteria. Assicurarsi che la batteria sia inserita correttamente. |
| Potenza o prestazioni ridotte. | Low battery charge; incorrect speed/mode setting; dull bit. | Recharge battery. Select appropriate speed and mode. Replace or sharpen bit. |
| Tool stops unexpectedly (ANTI-ROTATION engaged). | Excessive rotational motion detected (kickback). | Release trigger, reposition tool, and restart. Ensure proper grip and technique. |
| Il mandrino non tiene saldamente la punta. | Chuck jaws are dirty or worn; bit shank is damaged. | Clean chuck jaws. Use bits with clean, undamaged shanks. If problem persists, chuck may need service. |
| Surriscaldamento. | Fessure di ventilazione bloccate; uso intenso e continuo. | Clear ventilation slots. Allow tool to cool down. Reduce load or use intermittently. |
7. Specifiche
| Caratteristica | Dettaglio |
|---|---|
| Marca | DEWALT |
| Numero di modello | DCD1007WW1 |
| Fonte di alimentazione | Alimentato a batteria |
| Voltage | 20V MAX* (Nominal 18V) |
| Capacità della batteria | 8 Ah (incluso) |
| Massima velocità di rotazione | 2000 giri al minuto |
| Coppia massima | 2100 pollici-libbra |
| Numero di velocità | 3 |
| Dimensioni del mandrino | 1/2 pollici |
| Tipo di trapano | Trapano a percussione |
| Tipo di motore | Senza spazzole |
| Dimensioni (L x P x A) | 15.5 cm L x 11.6 cm P x 12 cm A |
8. Garanzia e supporto
This DEWALT product is covered by a Manufacturer Warranty. For specific details regarding warranty coverage, limitations, and how to make a claim, please refer to the official warranty documentation included with your product or visit the DEWALT websito.
For further assistance, technical support, or to download the complete user guide in PDF format, please visit the official DEWALT support page or contact customer service.
Download User Guide (PDF): Clicca qui