Aheaplus L Shaped Desk with Power Outlet and LED Strip
Aheaplus L Shaped Desk with Power Outlet and LED Strip - User Manual
Model: L Shaped Desk with Power Outlet and LED Strip
1. Introduzione
Thank you for choosing the Aheaplus L Shaped Desk. This manual provides essential information for the safe assembly, operation, and maintenance of your new desk. Please read these instructions carefully before beginning assembly and retain them for future reference.
2. Informazioni sulla sicurezza
ATTENZIONE: la mancata osservanza di queste istruzioni di sicurezza può causare lesioni o danni al prodotto.
- Handle all components with care to avoid sharp edges.
- Tenere le parti di piccole dimensioni e i materiali di imballaggio fuori dalla portata dei bambini.
- Do not attempt to lift or move the assembled desk without assistance to prevent personal injury or damage.
- Assicurarsi che tutte le viti e gli elementi di fissaggio siano ben serrati prima dell'uso. Controllare periodicamente e serrare nuovamente se necessario.
- Non sovraccaricare la scrivania o gli scaffali oltre la loro capacità di peso indicata.
- Posizionare la scrivania su una superficie piana per garantirne la stabilità.
- Keep liquids away from the power outlet and LED strip to prevent electrical hazards.
3. Contenuto della confezione
Prima del montaggio, verificare che tutti i componenti elencati di seguito siano presenti e integri. Se alcuni componenti risultano mancanti o danneggiati, contattare l'assistenza clienti.
- Desk components (tabletops, shelves, frame parts)
- Supporto per monitor
- Supporto CPU
- 2 Tessuto File Cassetti
- Power Outlet Unit (3 AC outlets + 2 USB ports)
- LED Light Strip with remote control
- Ferramenta di montaggio (viti, bulloni, dadi, ecc.)
- Attrezzi di montaggio (chiave a brugola, cacciavite, ecc.)
- Manuale di istruzioni
4. Istruzioni di montaggio
This L-shaped desk features a reversible design, allowing you to configure the long and short sides to either the left or right, adapting to your space requirements. Detailed step-by-step assembly instructions are provided in the separate assembly guide included in your package. Please follow the numbered steps carefully.
Suggerimenti per l'assemblaggio delle chiavi:
- Disporre tutti i componenti su una superficie morbida e pulita per evitare graffi.
- Identify each part using the labels provided in the assembly guide.
- Do not fully tighten all screws until the entire structure is assembled, then tighten them securely.
- Ensure the reversible sections are oriented correctly for your desired left or right configuration before final tightening.
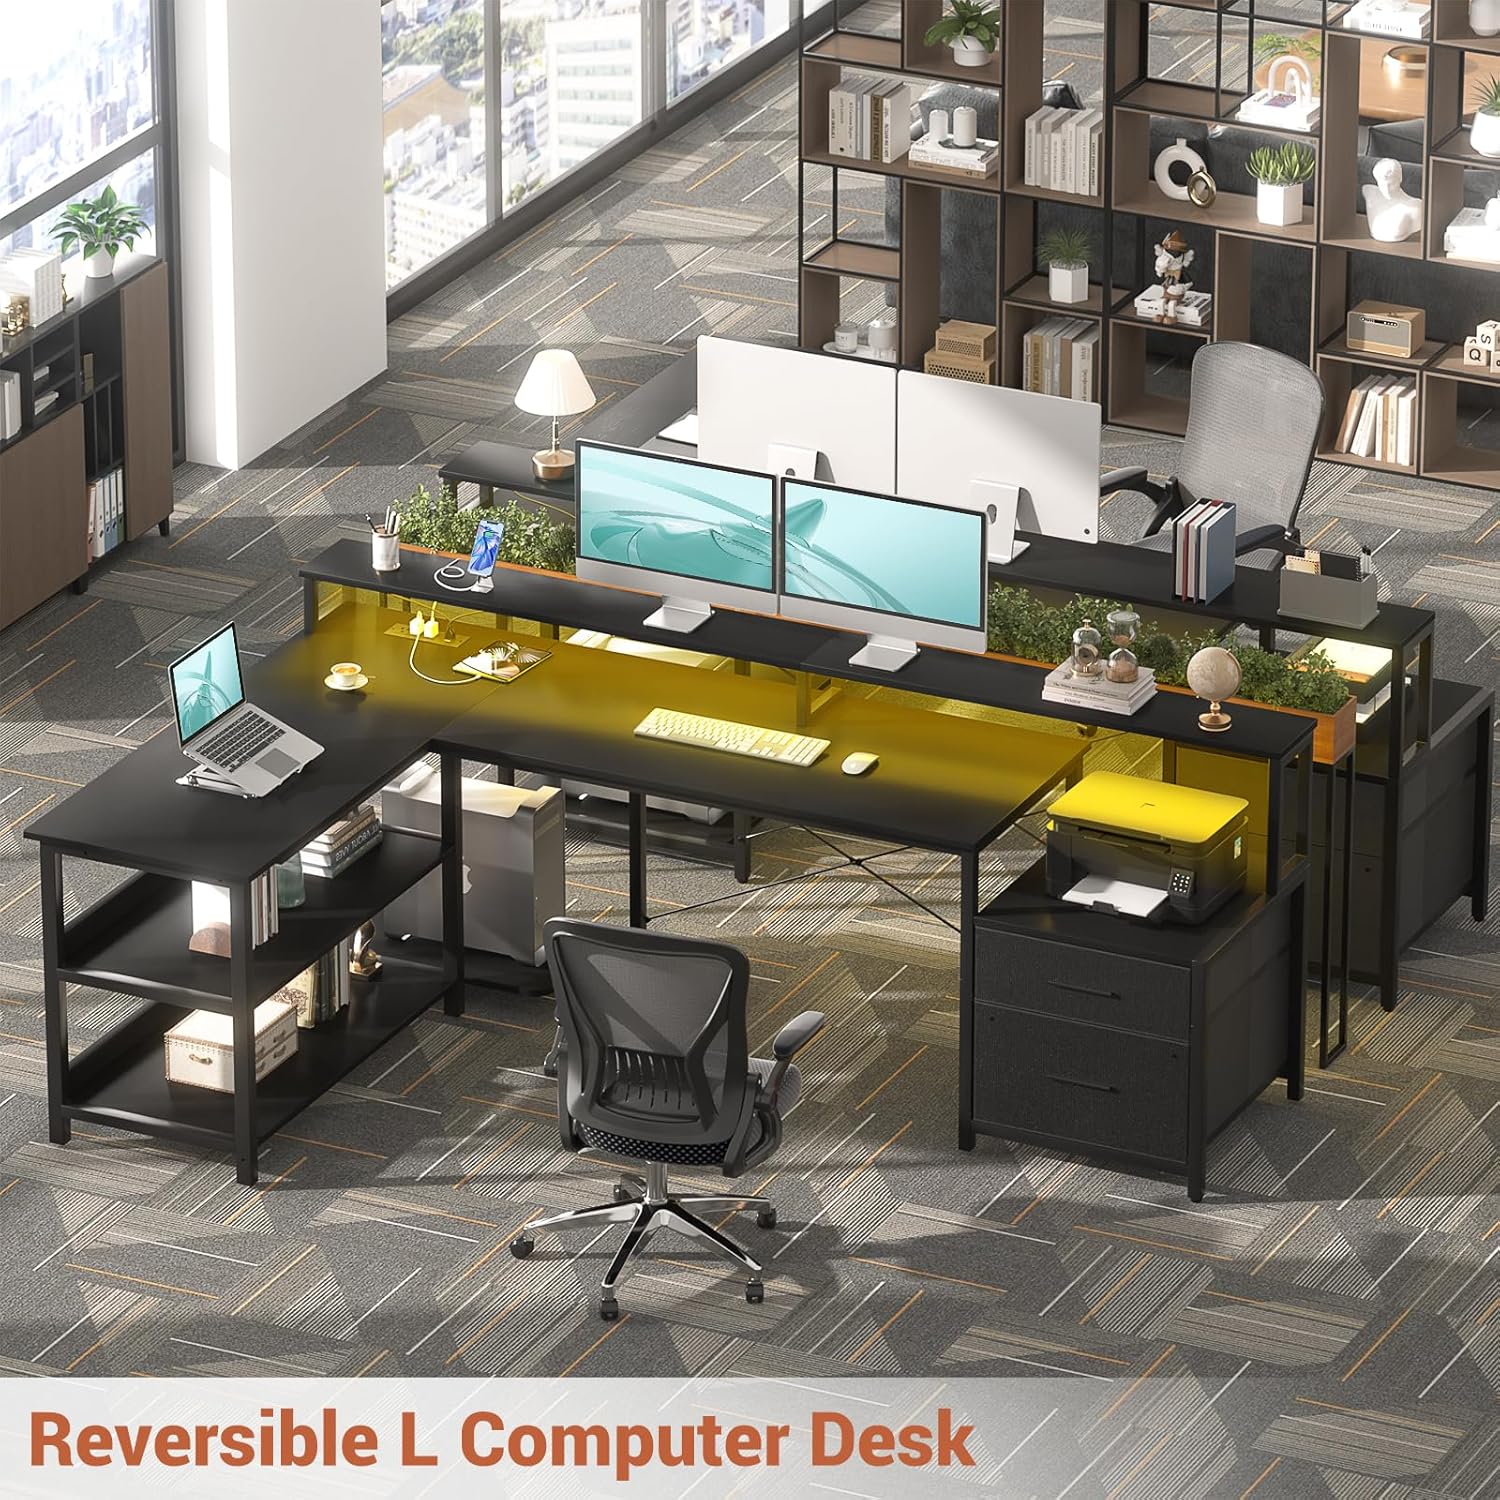
Image: Reversible L-shaped desk configuration options.
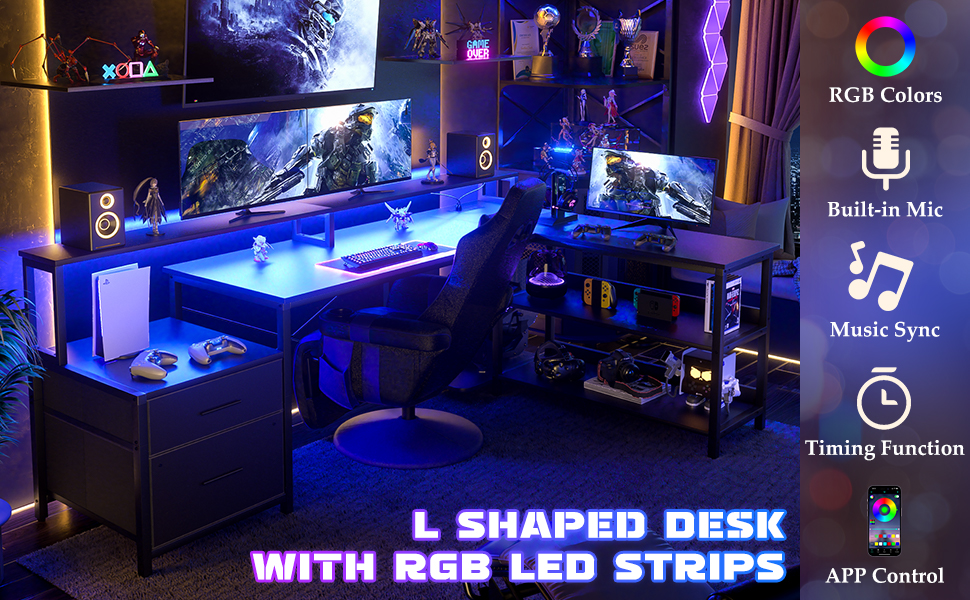
Image: Desk dimensions and reversible installation options.
5. Funzionalità finiteview
5.1 Presa di corrente integrata
The desk includes a built-in power strip with 3 standard AC outlets and 2 USB charging ports. This provides convenient access to power for your electronic devices directly on your desktop.
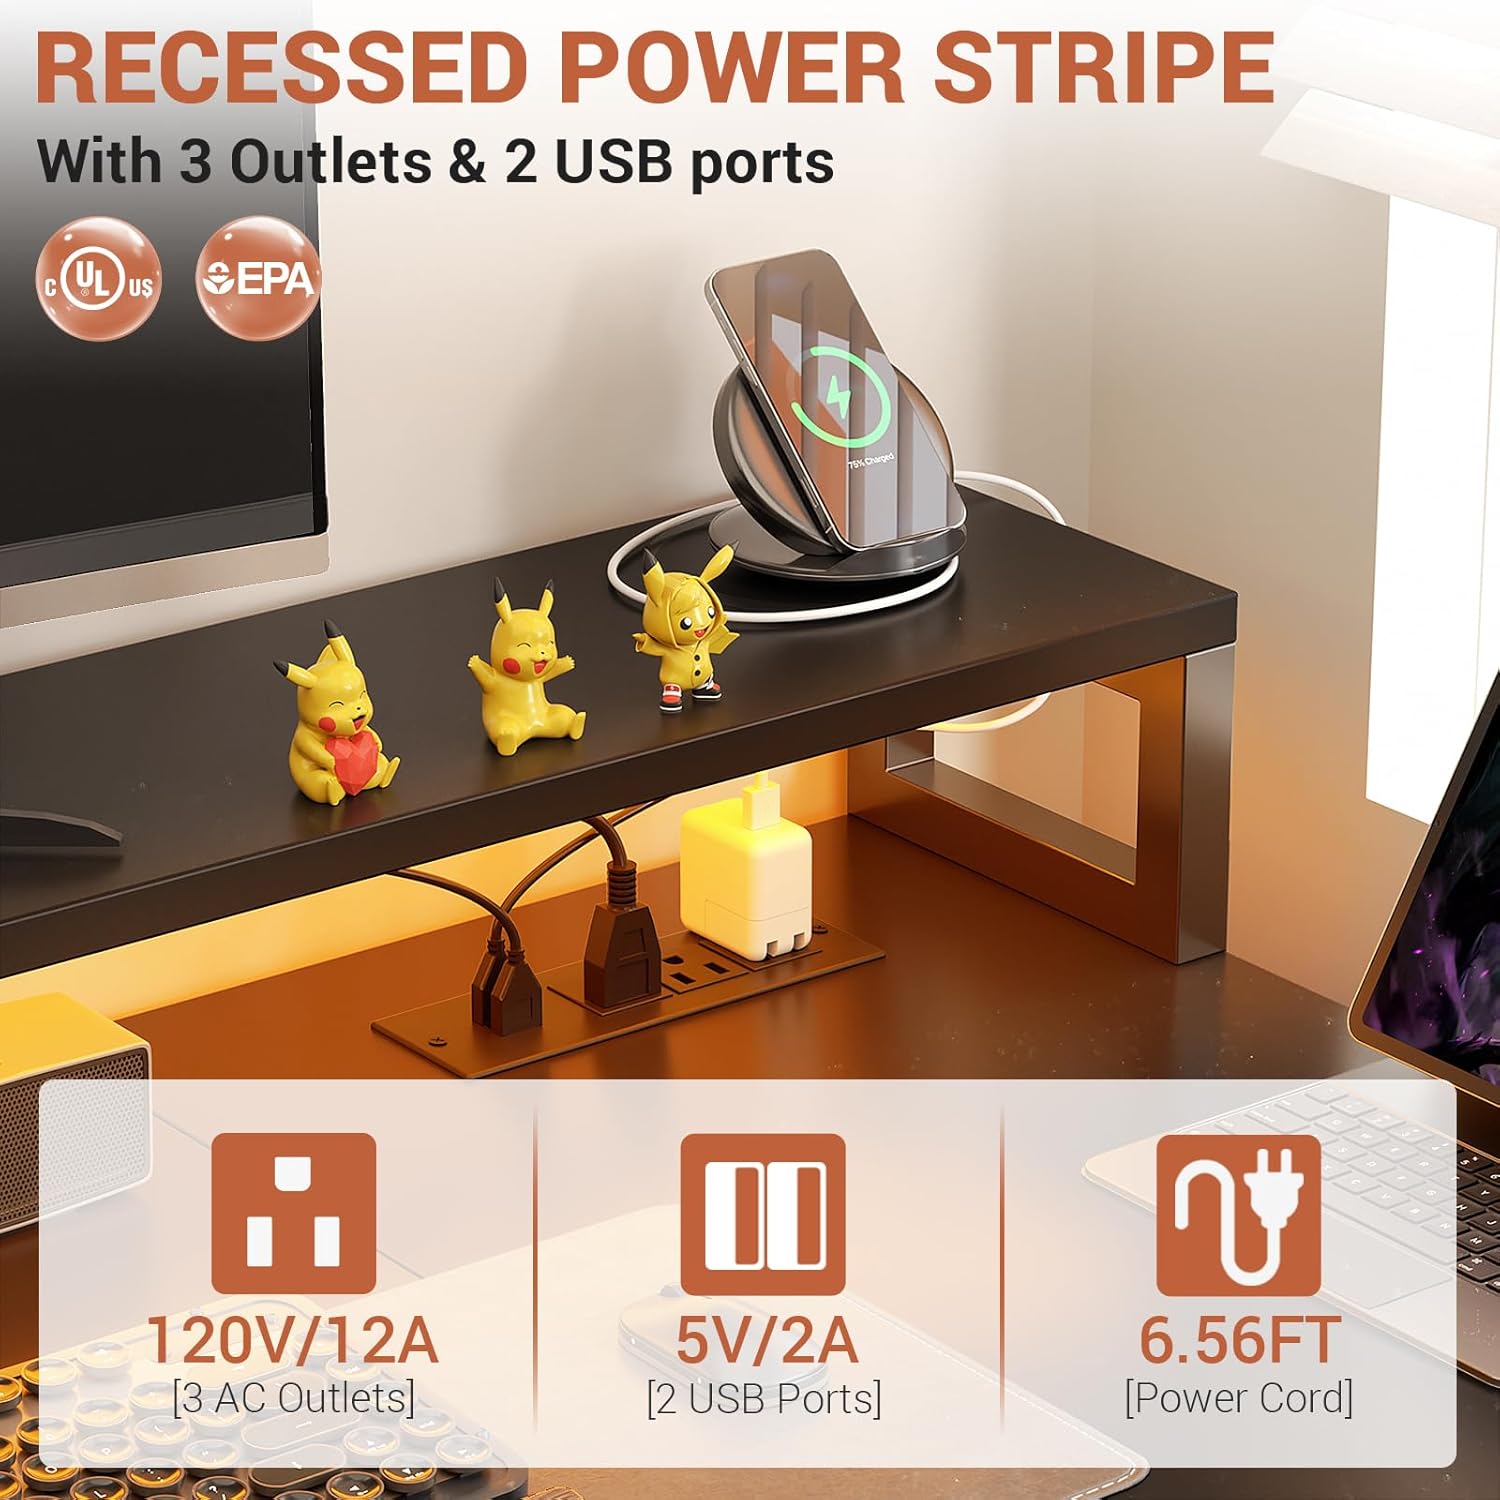
Image: Recessed power strip with AC and USB ports.
Striscia luminosa LED RGB 5.2
Enhance your workspace ambiance with the integrated RGB LED light strip. It offers over 60,000 colors and multiple modes, controllable via a smart app or the included remote. The music sync function allows the lights to change with audio rhythms.

Image: L-shaped desk with RGB LED lighting.
5.3 Ample soluzioni di archiviazione
The desk is designed with various storage options to keep your workspace organized:
- 2 Tessuto File Cassetti: Ideal for storing documents and office supplies.
- 2-Tier Under Storage Shelves: Provides space for books, decor, or other items.
- Mobiletto stampante: A dedicated space for your printer.
- Supporto CPU: Keeps your computer tower off the floor.

Image: Flexible storage options including fabric drawers and printer stand.
5.4 Long Monitor Stand
The elevated monitor stand helps maintain correct posture by raising your screens to an ergonomic viewing height, reducing neck and spine strain. It also creates additional storage space underneath.
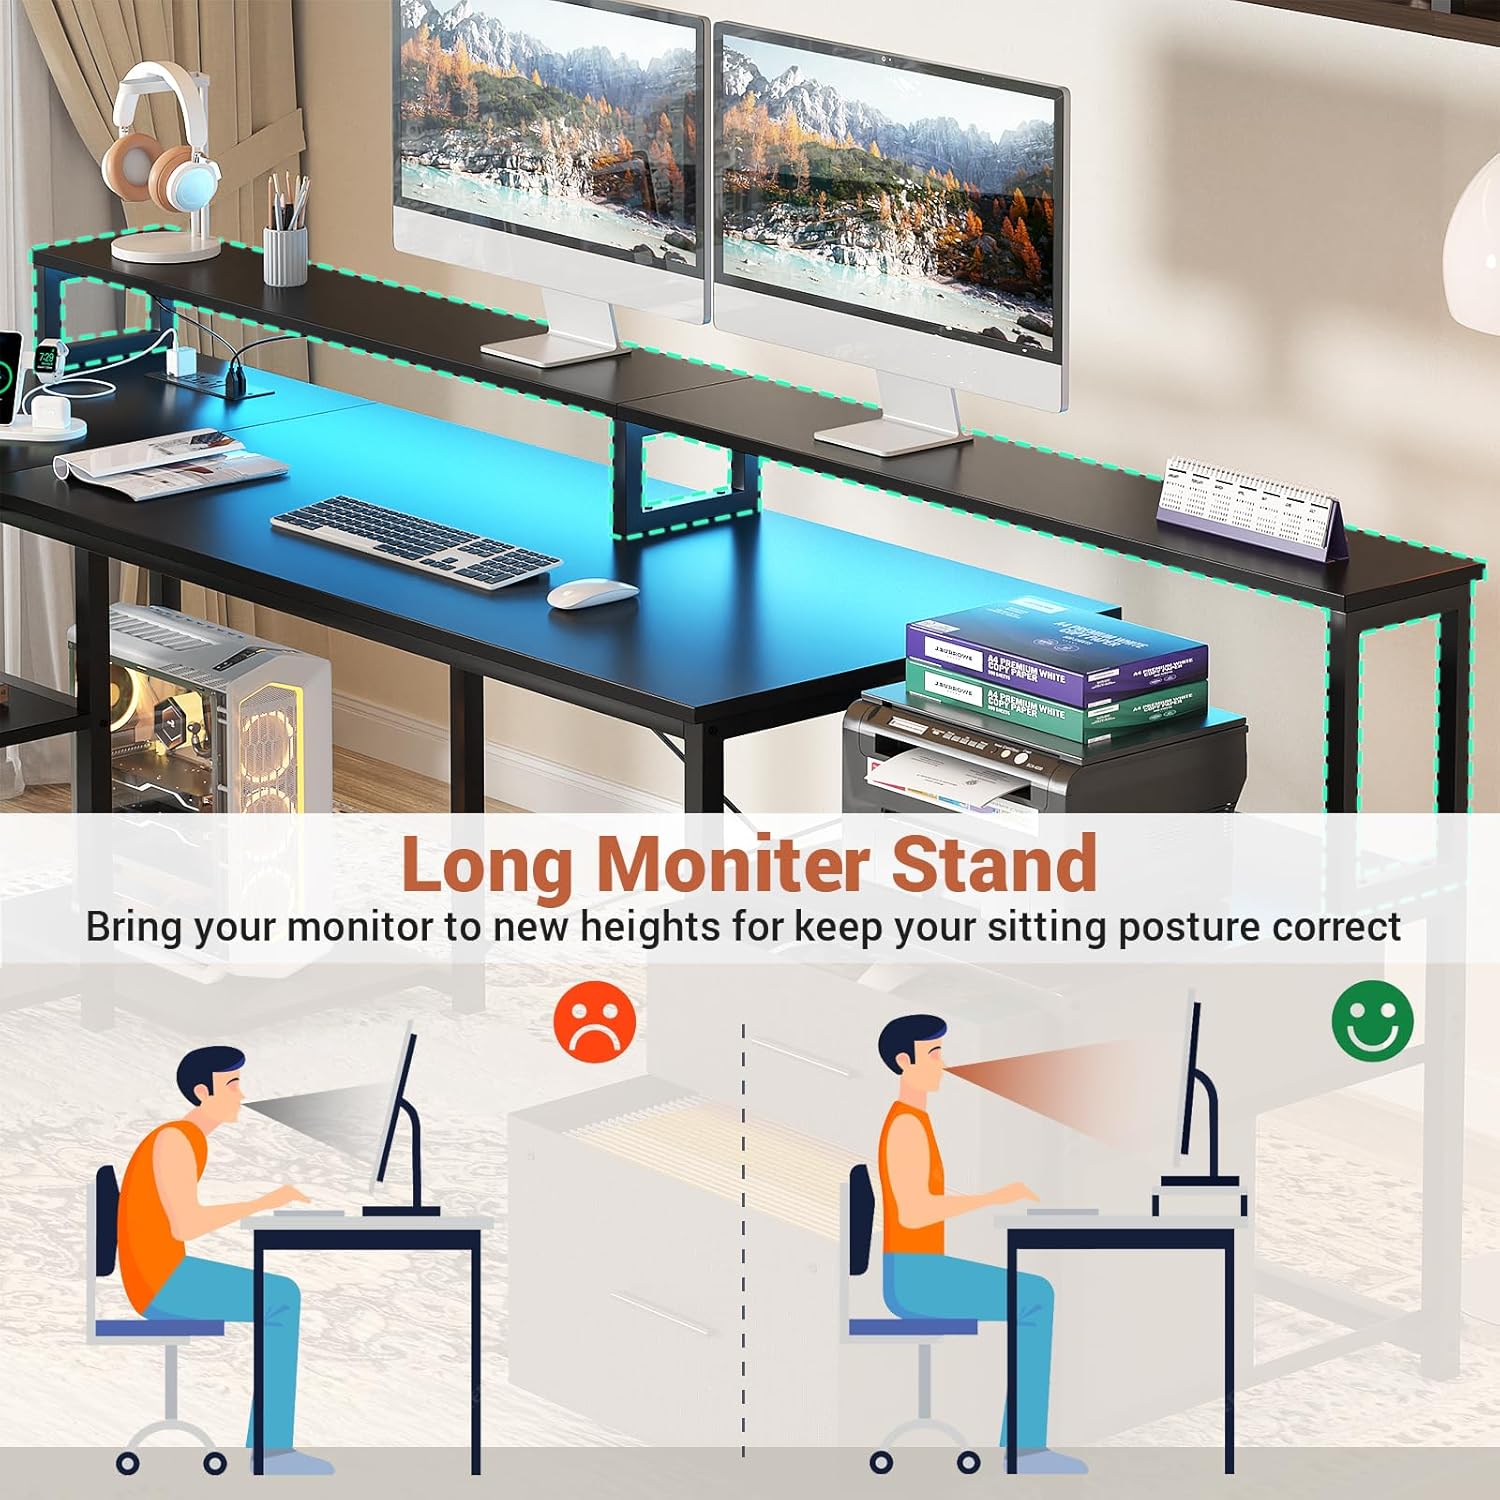
Image: Benefits of the long monitor stand for ergonomic posture.
6. Istruzioni per l'uso
6.1 Utilizzo della presa di corrente
Once the desk is assembled and plugged into a wall outlet, the integrated power strip is ready for use. Simply plug your devices into the 3 AC outlets or use the 2 USB ports for charging compatible devices.
- Ensure the power cord is fully inserted into a grounded wall outlet.
- Do not exceed the maximum electrical load capacity of the power strip (120V/12A for AC, 5V/2A for USB).
6.2 Controllo delle luci LED
The LED light strip can be controlled via the included remote control or a compatible smart application on your mobile device.
- Telecomando: Use the remote to power on/off, change colors, adjust brightness, select modes, and activate the music sync function.
- Applicazione intelligente: Download the recommended app (refer to the LED strip's specific instructions for app name and pairing process) to access advanced features, custom color settings, and scheduling.
7. Manutenzione e cura
- Pulizia: Pulisci le superfici della scrivania con un panno morbido eamp panno. Evitare prodotti chimici aggressivi o detergenti abrasivi che potrebbero danneggiare la finitura.
- Spolverare: Regularly dust the desk and LED strip to maintain optimal appearance and performance.
- Elementi di fissaggio: Controllare periodicamente tutte le viti e i bulloni per assicurarsi che siano ben serrati. Serrarli nuovamente se necessario per mantenere la stabilità.
- Componenti elettrici: Keep the power outlet and LED strip dry. If any electrical component appears damaged, discontinue use and contact customer support.
8. Risoluzione Dei Problemi
8.1 Le luci LED non funzionano
- Controlla la potenza: Ensure the LED strip is properly connected to its power source and the desk's power outlet is functioning.
- Batteria remota: Replace the battery in the remote control if it's unresponsive.
- Connessione all'app: If using the app, verify Bluetooth or Wi-Fi connection and re-pair if necessary.
8.2 Prese di corrente non funzionanti
- Controllare la presa a muro: Ensure the desk's main power cord is securely plugged into a working wall outlet. Test the wall outlet with another device.
- Sovraccarico: Disconnect some devices to check if the power strip was overloaded.
- Reset: Some power strips have a reset button; check if yours does and press it.
8.3 Instabilità della scrivania
- Superficie piana: Assicurarsi che la scrivania sia posizionata su una superficie piana e orizzontale.
- Stringere i dispositivi di fissaggio: Serrare nuovamente tutte le viti e i bulloni di montaggio.
- Piedini regolabili: If applicable, adjust the leveling feet at the bottom of the desk legs to compensate for uneven floors.
9. Specifiche
| Marca | Aheaplus |
| Modello | L Shaped Desk with Power Outlet and LED Strip |
| Forma | Forma a L. |
| Dimensioni del prodotto | 73"P x 39.4"L x 35"A |
| Colore | Nero |
| Tipo di materiale superiore | Legno ingegnerizzato |
| Materiale di base | Metallo |
| Caratteristiche speciali | Built-In USB Outlet, LED Lights, Reversible, File Drawer, Monitor Stand |
| Presa elettrica | 3 AC Outlets, 2 USB Ports (5V/2A) |
| Luci LED | RGB, App/Remote Control, Music Sync |
| Numero di cassetti | 2 (Fabric File Cassetti) |
| Numero di ripiani | 2 (Under Storage Shelves) |
10. Garanzia e assistenza clienti
Aheaplus is committed to providing high-quality products. For warranty information, missing parts, damaged items, or any other inquiries, please refer to the warranty card included in your package or contact Aheaplus customer support directly through the retailer's platform or the official Aheaplus websito. Quando contatti l'assistenza, tieni a portata di mano i dettagli dell'acquisto e le informazioni sul modello.