1. Introduzione e oltreview
The Dyeetic Portable Car Jump Starter with Air Compressor is a versatile emergency device designed to provide reliable power for jump-starting vehicles and inflating tires. This all-in-one unit combines a powerful 5000A peak current jump starter with a 150PSI air compressor, making it an essential tool for roadside emergencies and outdoor activities.
It is compatible with 12V vehicles, including cars, SUVs, trucks, motorcycles, boats, ATVs, and RVs, capable of starting up to 10.0L gas and 8.0L diesel engines. The integrated smart digital display provides real-time information, while multiple safety protections ensure secure operation. This manual provides detailed instructions for setup, operation, and maintenance to ensure optimal performance and longevity of your device.
2. Cosa c'è nella scatola
Upon opening your Dyeetic Portable Car Jump Starter with Air Compressor package, you should find the following items:
- 1 x 5000A Jump Starter with 150PSI Air Compressor
- 1 x tubo flessibile della pompa dell'aria
- 4 x Gas Nozzles (various adapters for different inflatables)
- 1 x Extended Smart Jumper Cables
- 1 x USB-A to C Cable (Note: Wall adapter not included)
- 1 x custodia portatile
- 1 x Manuale utente

Figure 2.1: All components included in the Dyeetic Portable Car Jump Starter with Air Compressor package.
3. Caratteristiche del prodotto
3.1. Powerful 5000A Peak Current Jump Starter
This portable jump starter delivers a robust 5000A peak current, capable of starting 12V batteries in a wide range of vehicles. It supports engines up to 10.0L for gasoline and 8.0L for diesel, ensuring you're prepared for most vehicle types.
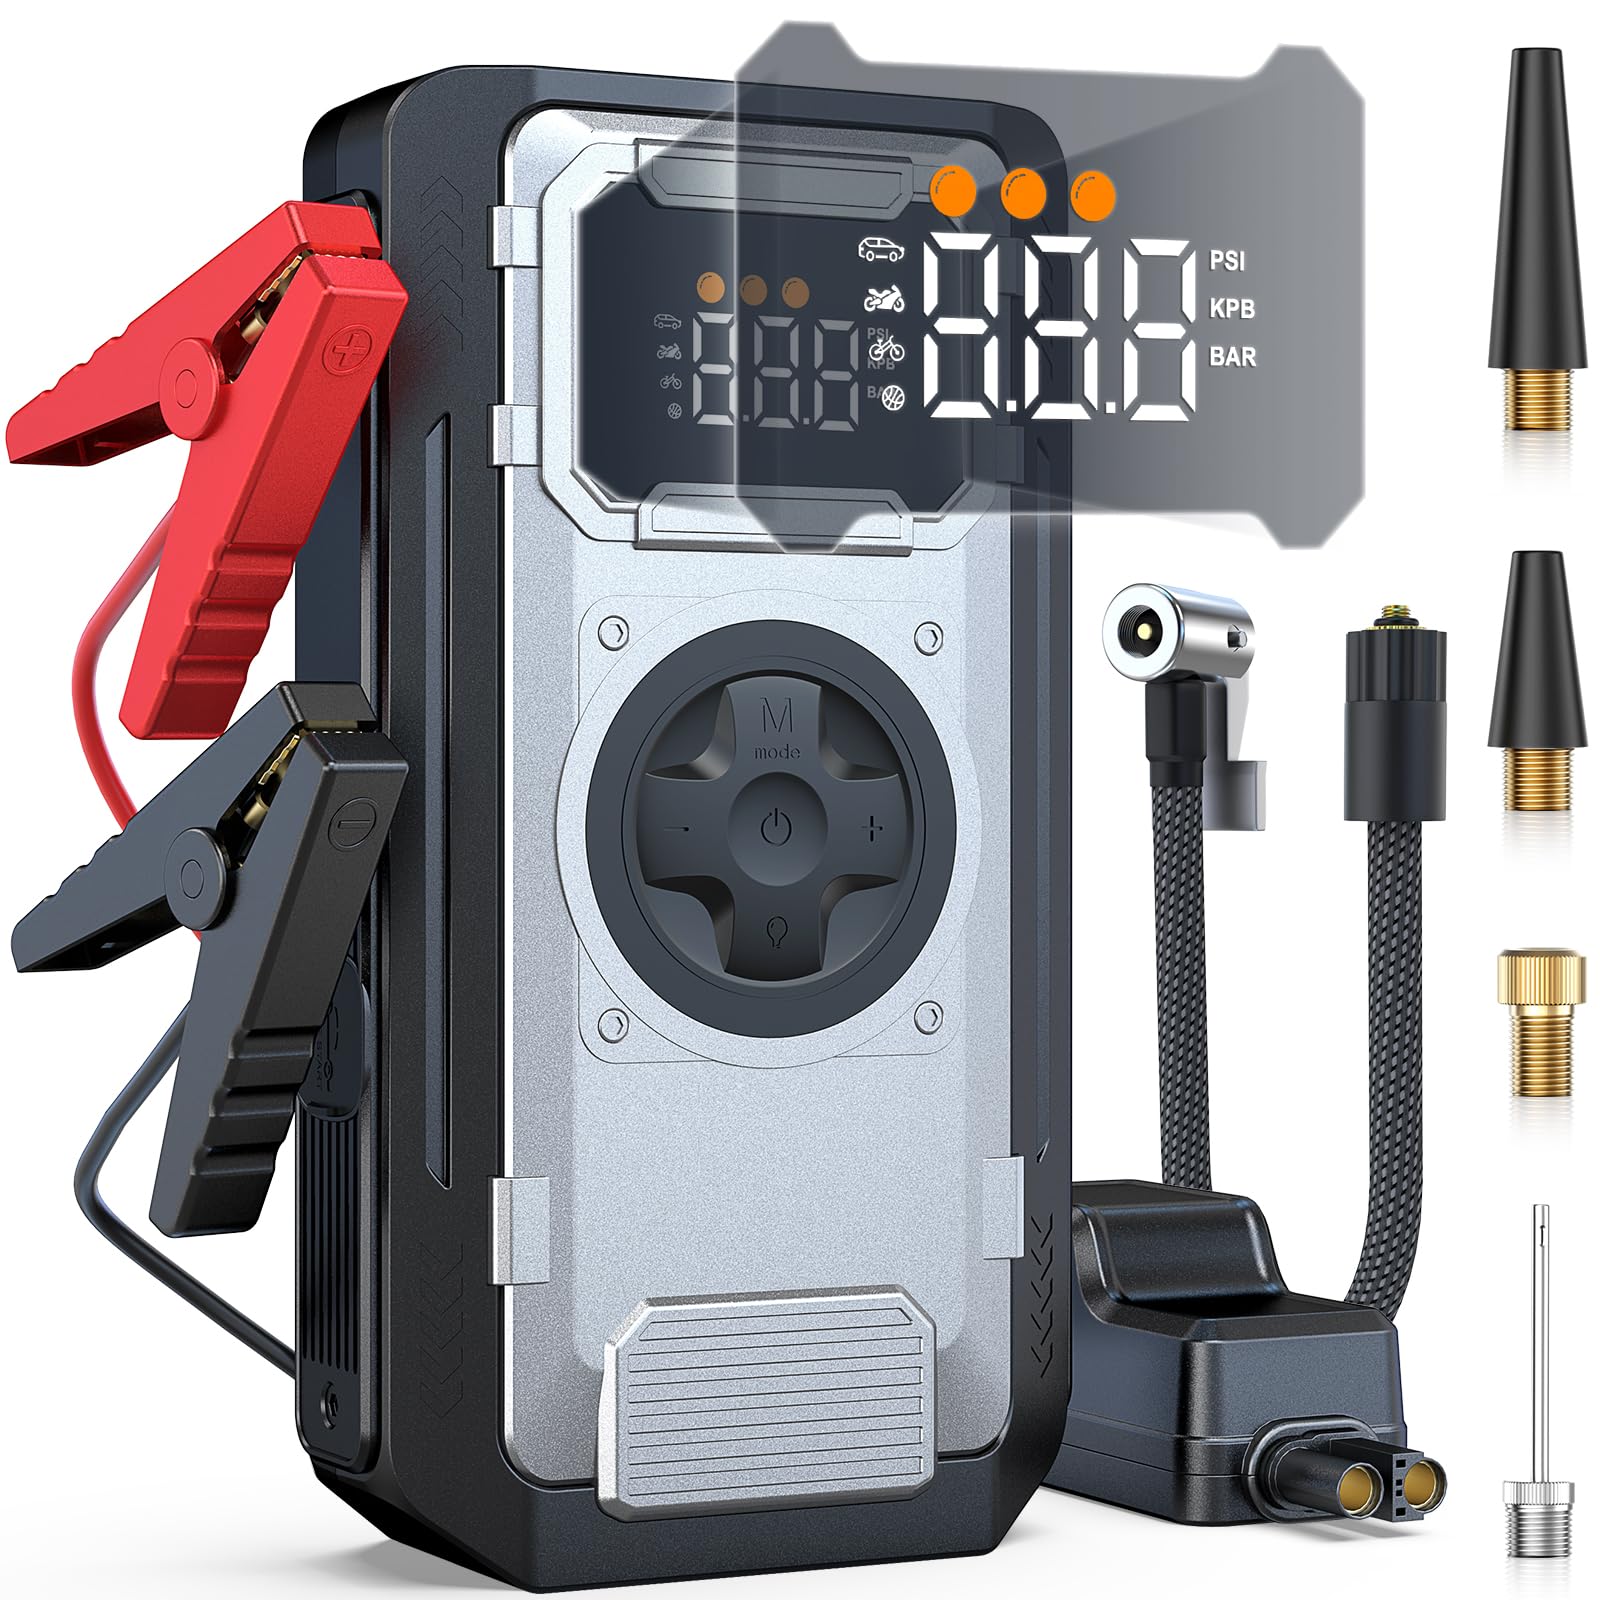
Figure 3.1: The Dyeetic Jump Starter unit with jumper cables connected, highlighting its 5000A peak current capability.
3.2. Built-in 150PSI Air Compressor
Equipped with an integrated air compressor, air hose, and four nozzle adapters, this device can easily inflate car tires, bicycles, sports balls, and other inflatables up to 150PSI. It's a true all-in-one solution for emergency roadside assistance.

Figure 3.2: The unit inflating a car tire, demonstrating its 150PSI air compressor function.
3.3. Large Smart Digital Display
The extra-large digital screen clearly shows the battery percentage, current air pressure, and real-time operation status. This intuitive display ensures easy monitoring and control during use.

Figura 3.3: dettagliata view dello schermo LCD e dei pulsanti di controllo.
3.4. 10-in-1 Smart Protection
This advanced unit automatically activates 10 upgraded safety protections, including over-current, reverse polarity, short-circuit, over-voltage, and more. These features ensure safe and reliable operation every time.

Figure 3.4: Visual representation of the 10 leading safety protections.
3.5. 2-Year Standby Time
Engineered with ultra-low power consumption, the device boasts a 24-month (2-year) standby time on a full charge, ensuring it's ready when you need it most.

Figure 3.5: The unit highlighting its 2-year standby capability.
3.6. Extreme Environment Operation
Designed to withstand extreme temperatures, this lithium jump starter operates reliably from -4°F (-20°C) to 140°F (60°C), providing peace of mind in various climates.

Figure 3.6: The device's ability to function in extreme hot and cold conditions.
4. Impostazione
4.1. Ricarica iniziale
Before first use, fully charge the jump starter. Connect the provided USB-A to C cable to the unit's USB-C input port and a suitable USB wall adapter (not included). The digital display will show the charging progress.
4.2. Connecting Jumper Cables
Open the protective flap on the side of the jump starter. Insert the smart jumper cable connector firmly into the designated port. The indicator light on the smart clamp will flash red and green, indicating it's in standby mode.
4.3. Collegamento del tubo dell'aria
Screw the air pump hose securely into the inflation port located on the top of the jump starter unit.
5. Istruzioni per l'uso
5.1. Avviamento di emergenza di un veicolo
- Assicurarsi che l'avviatore di emergenza sia carico almeno al 50%.
- Connect the smart jumper cables to the jump starter unit. The indicator light on the smart clamp lampeggerà in rosso e verde.
- Attaccare il rosso (+) clamp al terminale positivo (+) della batteria del veicolo.
- Attaccare il nero (-) clamp al terminale negativo (-) della batteria del veicolo.
- Una volta collegato correttamente, la spia luminosa sullo smart clamp will turn solid green, indicating it's ready to jump.
- Avvia il veicolo.
- Immediately after the vehicle starts, remove the black (-) clamp prima, poi il rosso (+) clamp.
- Disconnect the smart jumper cables from the jump starter unit.
5.2. Inflating Tires and Other Items
- Assicurarsi che l'avviatore di emergenza sia sufficientemente carico.
- Connect the air pump hose to the inflation port on the unit.
- Attach the appropriate nozzle adapter to the air hose, then connect it to the item to be inflated (e.g., tire valve stem).
- Power on the unit by pressing the power button. The digital display will activate.
- Press the 'M' (Mode) button to cycle through preset inflation modes (car, motorcycle, bicycle, ball) or select manual mode.
- Use the '+' and '-' buttons to adjust the desired pressure (PSI, Bar, KPA, or KG/CM²). You can change units by holding down the 'M' button.
- Press the start button (often the power button or a dedicated play/pause icon) to begin inflation.
- The air compressor will automatically stop once the preset pressure is reached.
- Disconnect the air hose from the item and the unit.

Figure 5.1: The unit inflating a car tire, demonstrating its 150PSI air compressor function.
5.3. Using the Emergency Flashlight
The unit features a multi-mode LED flashlight for various situations:
- Press and hold the light button to turn on the flashlight in solid illumination mode.
- Press the light button again for strobe mode.
- Press the light button a third time for SOS mode.
- Press and hold the light button to turn off the flashlight.

Figure 5.2: The unit's flashlight demonstrating its various modes.
5.4. Utilizzo come Power Bank
The jump starter can also function as a portable power bank to charge your electronic devices:
- Open the protective flap on the side of the unit to access the USB-A output ports.
- Connect your device's charging cable to one of the USB-A output ports.
- L'avviatore di emergenza inizierà automaticamente a caricare il tuo dispositivo.

Figure 5.3: The unit functioning as a power bank for mobile devices.
6. Manutenzione
6.1. Ricarica
To ensure optimal performance and extend battery life, recharge the unit after each use. If not used regularly, recharge the device every 3-6 months to maintain its charge and prevent deep discharge.
6.2. Conservazione
Store the jump starter in its portable carrying case in a cool, dry place, away from direct sunlight, moisture, and extreme temperatures. Keep out of reach of children.
6.3. Pulizia
Wipe the unit with a soft, dry cloth. Do not use abrasive cleaners or solvents, as these may damage the device. Ensure all ports are clean and free of debris.
7. Risoluzione Dei Problemi
7.1. Il dispositivo non si accende
- Check the battery level on the digital display. If low, recharge the unit fully.
- Assicurarsi che il pulsante di accensione sia premuto e tenuto premuto per alcuni secondi.
7.2. Vehicle Not Starting with Jump Starter
- Verify the jump starter is sufficiently charged (at least 50%).
- Ensure the smart jumper cables are securely connected to the jump starter port.
- Check that the red (+) clamp is connected to the positive (+) battery terminal and the black (-) clamp al terminale negativo (-) della batteria.
- Confirm the indicator light on the smart clamp is solid green. If it's flashing red/green, recheck connections or clean battery terminals.
- If the vehicle still doesn't start after a few attempts, there might be a larger issue with the vehicle's battery or engine. Consult a professional mechanic.
7.3. Tire Not Inflating
- Ensure the air pump hose is securely screwed into the unit's inflation port.
- Check that the nozzle adapter is correctly attached to the air hose and the item's valve stem.
- Verify that the desired pressure is set on the digital display and the compressor is activated.
- If the unit stops prematurely, check for leaks in the hose or connections.
8. Specifiche
| Caratteristica | Specificazione |
|---|---|
| Marca | Colorante |
| Modello | W240 |
| Peso dell'articolo | 2.86 libbre |
| Dimensioni del pacco | 9.06 x 5.31 x 4.09 pollici |
| Batterie | Sono necessarie 1 batterie da 12 V |
| Amprabbia | 5000 Amps |
| Composizione delle celle della batteria | Ioni di litio |
| Voltage | 12 Volt |
| Tipo di servizio del veicolo | Lawn Mower (and other 12V vehicles) |
| Capacità della batteria | 21800 milioneamp Ore |
9. Garanzia e supporto
The Dyeetic Portable Car Jump Starter with Air Compressor is backed by a 3-year warranty, ensuring your peace of mind against manufacturing defects. Additionally, lifetime technical support is provided to assist you with any questions or issues you may encounter during the product's lifespan.
For warranty claims or technical assistance, please refer to the contact information provided in your product packaging or visit the official Dyeetic websito.