1. Introduzione
This manual provides essential information for the installation and maintenance of your Karlak Filter for Smartmi Smart Toilet Toilet Seat Cover Core. This filter is specifically designed for Smartmi smart toilets, including standard, warm air, washing and drying, S, and Pro models. It effectively filters impurities above 5 microns, contributing to improved water sanitation.
2. Prodotto finitoview
The Karlak Filter utilizes high-quality PP filter cotton to remove various impurities from water. Each package contains three filter elements and a special wrench for easy replacement.

Image 2.1: Three Karlak 3 Spiral filter elements.

Image 2.2: Package contents showing three filter elements and the included special wrench.
The PP filter cotton is designed to capture impurities such as sediment, rust, insect eggs, red worms, suspended solids, and impurity hair, ensuring cleaner water for your smart toilet.

Image 2.3: Illustration of impurities filtered by the PP filter cotton.
3. Specifiche
- Pressione massima: 0.75 MPa
- Temperatura applicabile: da 4℃ a 40℃
- Spiral Filter Element Size: 14.6 cm (5.7 in) height x 5.5 cm (2.2 in) width
- Capacità di filtrazione: Filters impurities above 5 microns
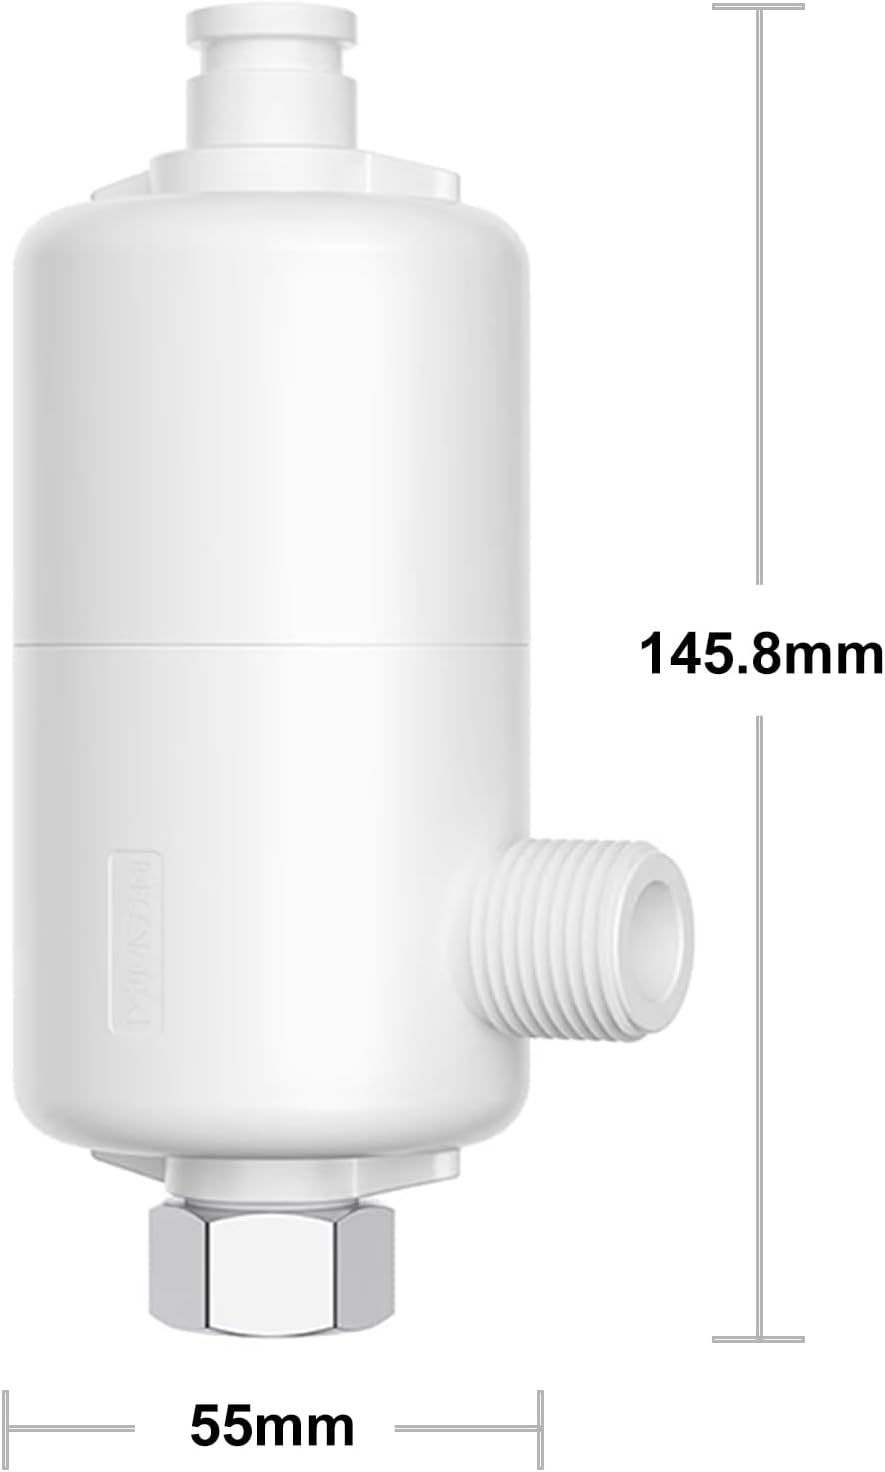
Image 3.1: Detailed dimensions of the spiral filter element.

Image 3.2: The filter is designed to withstand a maximum water pressure of 0.75 MPa.
4. Installazione
Before proceeding with installation, identify the filter style compatible with your Smartmi smart toilet. This manual provides detailed steps for the Spiral Style filter. If your toilet uses a 'Card Deduction' style filter, please refer to your toilet's specific manual or seek professional assistance.

Image 4.1: Identifying filter element styles (Card Deduction vs. Spiral Style).
4.1. Spiral Style Installation Method
- Step 1: Prepare for Replacement
Turn off the water supply to the toilet. Use the included special wrench to hold the screw filter box cover. Turn the cover counterclockwise to open the filter box.

Image 4.2: Opening the filter box.
- Step 2: Replace Filter Element
Carefully pull out the old inner filter core. Insert the new inner filter core into the filter box. Fasten the filter element box cover and tighten it clockwise using the wrench until secure.

Image 4.3: Replacing the filter core and securing the cover.
After installation, slowly turn on the water supply and check for any leaks. If leaks occur, ensure all connections are properly tightened.
5. Manutenzione
To ensure optimal performance and water quality, it is recommended to replace the inner filter element every 6 months. Regular replacement helps maintain the filter's effectiveness in removing impurities.
6. Risoluzione Dei Problemi
As a consumable item, the primary troubleshooting step for this filter is replacement. If you experience reduced water flow or notice a decrease in water quality, it is likely time to replace the filter element.
- Flusso d'acqua ridotto: Check if the filter element is clogged. Replace if necessary.
- Impurità visibili: If impurities are visible in the water, the filter element may be exhausted. Replace immediately.
7. Garanzia e supporto
For information regarding product warranty or technical support, please contact the seller or manufacturer directly. Keep your purchase receipt for warranty claims.