1. Introduzione
Welcome to the user manual for your Emerson CKSS7071 Sunrise Smartset Alarm Clock Radio. This device is designed to enhance your daily routine with its unique features, including a sunrise simulation, soothing sound options, Bluetooth connectivity, and an 8-color dimmable LED display. Please read this manual thoroughly to understand the full functionality and ensure proper use and care of your new alarm clock radio.
1 video: Sopraview of the Emerson CKSS7071 Sunrise Smartset Alarm Clock Radio. This video demonstrates the key features and design of the product.
2. Informazioni importanti sulla sicurezza
- Leggere tutte le istruzioni prima di mettere in funzione l'apparecchio.
- Conservare queste istruzioni per riferimento futuro.
- Non utilizzare questo apparecchio vicino all'acqua.
- Pulire solo con un panno asciutto.
- Non ostruire le aperture di ventilazione. Installare secondo le istruzioni del produttore.
- Non installare vicino a fonti di calore come radiatori, bocchette di riscaldamento, stufe o altri apparecchi (inclusi amplificatori) che producono calore.
- Proteggere il cavo di alimentazione per evitare che venga calpestato o schiacciato, in particolare in corrispondenza delle spine, delle prese di corrente e del punto in cui esce dall'apparecchio.
- Utilizzare solo accessori/componenti specificati dal produttore.
- Scollegare l'apparecchio durante i temporali o quando non viene utilizzato per lunghi periodi di tempo.
- Affidare tutti gli interventi di assistenza a personale di assistenza qualificato. L'assistenza è richiesta quando l'apparecchio è stato danneggiato in qualsiasi modo, ad esempio se il cavo di alimentazione o la spina sono danneggiati, se è stato versato del liquido o sono caduti degli oggetti nell'apparecchio, se l'apparecchio è stato esposto a pioggia o umidità, se non funziona normalmente o se è caduto.
3. Contenuto della confezione
Verificare che tutti gli articoli siano presenti all'apertura della confezione:
- Emerson CKSS7071 Sunrise Smartset Alarm Clock Radio
- Adattatore di alimentazione CA.
- Manuale d'uso
4. Prodotto finitoview
4.1 Front View

Immagine 1: Davanti view of the alarm clock, featuring the digital time display and the sunrise simulation light panel.
The front of the unit features the main 1.2-inch LED time display and the large circular light panel for sunrise simulation and ambient lighting. Indicators for AM/PM, Alarm 1/2, and Bluetooth status are also visible.
4.2 Lato View (Controlli)
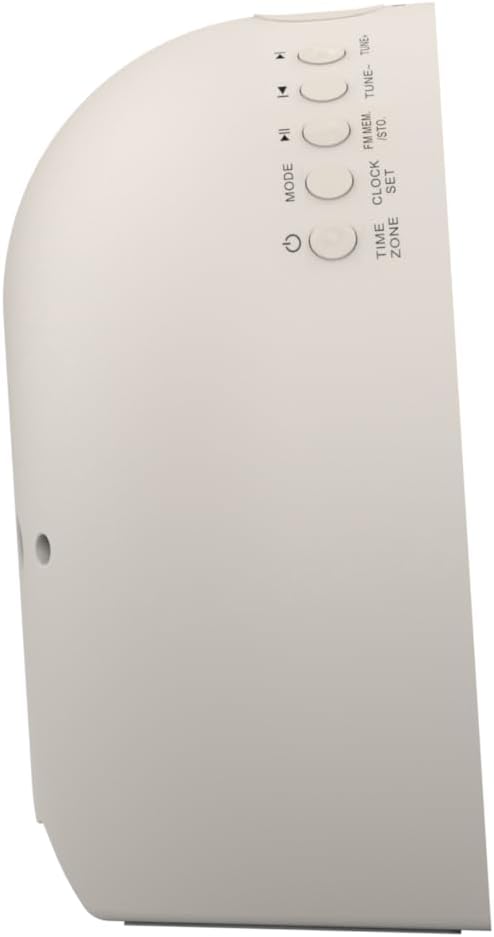
Immagine 2: Lato view della sveglia, evidenziando i pulsanti di controllo per le varie funzioni.
The side panel houses the primary control buttons, including Power, Mode, Clock Set, Time Zone, Tune/Skip, and Volume controls. These buttons are used for setting time, alarms, and navigating audio functions.
4.3 Posteriore View

Immagine 3: Posteriore view of the alarm clock, showing the speaker grille and power connection port.
The rear of the unit features the main speaker grille and the power input port for connecting the AC adapter.
5. Impostazione
5.1 Collegamento di alimentazione
- Plug the AC power adapter into the DC IN jack located on the back of the unit.
- Plug the other end of the adapter into a standard wall outlet (AC 100-240V, 50/60Hz).
- L'unità si accenderà automaticamente.
5.2 SmartSet Automatic Time Setting
The SmartSet system automatically sets the correct time and date as soon as you plug in the unit. It also maintains time and alarm settings during power disruptions or outages, provided the button cell battery is installed.
5.3 Installazione della batteria di backup
A button cell battery (CR2032, included) is required for battery backup. This ensures that time and alarm settings are retained during a power outage.
- Individuare il vano batterie nella parte inferiore dell'unità.
- Aprire il coperchio del vano batterie.
- Insert one CR2032 button cell battery, ensuring the correct polarity (+/-).
- Chiudere saldamente il coperchio del vano batterie.
6. Istruzioni per l'uso
6.1 Setting the Clock Manually
- Premere e tenere premuto il tasto SET OROLOGIO pulsante. Le cifre dell'ora lampeggeranno.
- Utilizzare il ACCORDO -/+ pulsanti per regolare l'ora. Premere SET OROLOGIO per confermare.
- Le cifre dei minuti lampeggeranno. Utilizzare il ACCORDO -/+ pulsanti per regolare i minuti. Premere SET OROLOGIO per confermare.
- Continuare questa procedura per impostare anno, mese e giorno.
- Premere SET OROLOGIO di nuovo per uscire dalla modalità di impostazione dell'ora.
6.2 Impostazione degli allarmi (allarme 1 e allarme 2)
The unit features dual alarms. Follow these steps for each alarm:
- Premere e tenere premuto il tasto ALLARME 1 or ALLARME 2 pulsante. Le cifre dell'ora della sveglia lampeggeranno.
- Utilizzare il ACCORDO -/+ pulsanti per regolare l'ora della sveglia. Premere i rispettivi ALLARME pulsante per confermare.
- Le cifre dei minuti della sveglia lampeggeranno. Utilizzare il ACCORDO -/+ pulsanti per regolare i minuti della sveglia. Premere i rispettivi ALLARME pulsante per confermare.
- Select the alarm source (Buzzer, FM Radio, or Soothing Sound). Press the respective ALLARME pulsante per confermare.
- Regolare il volume della sveglia utilizzando il VOL-/+ buttons. Press the respective ALLARME pulsante per confermare.
- The alarm is now set. The alarm indicator (AL1 or AL2) will appear on the display.
6.3 Simulazione dell'alba
The sunrise simulation feature gradually brightens the light panel before your set alarm time, mimicking a natural sunrise to gently wake you.
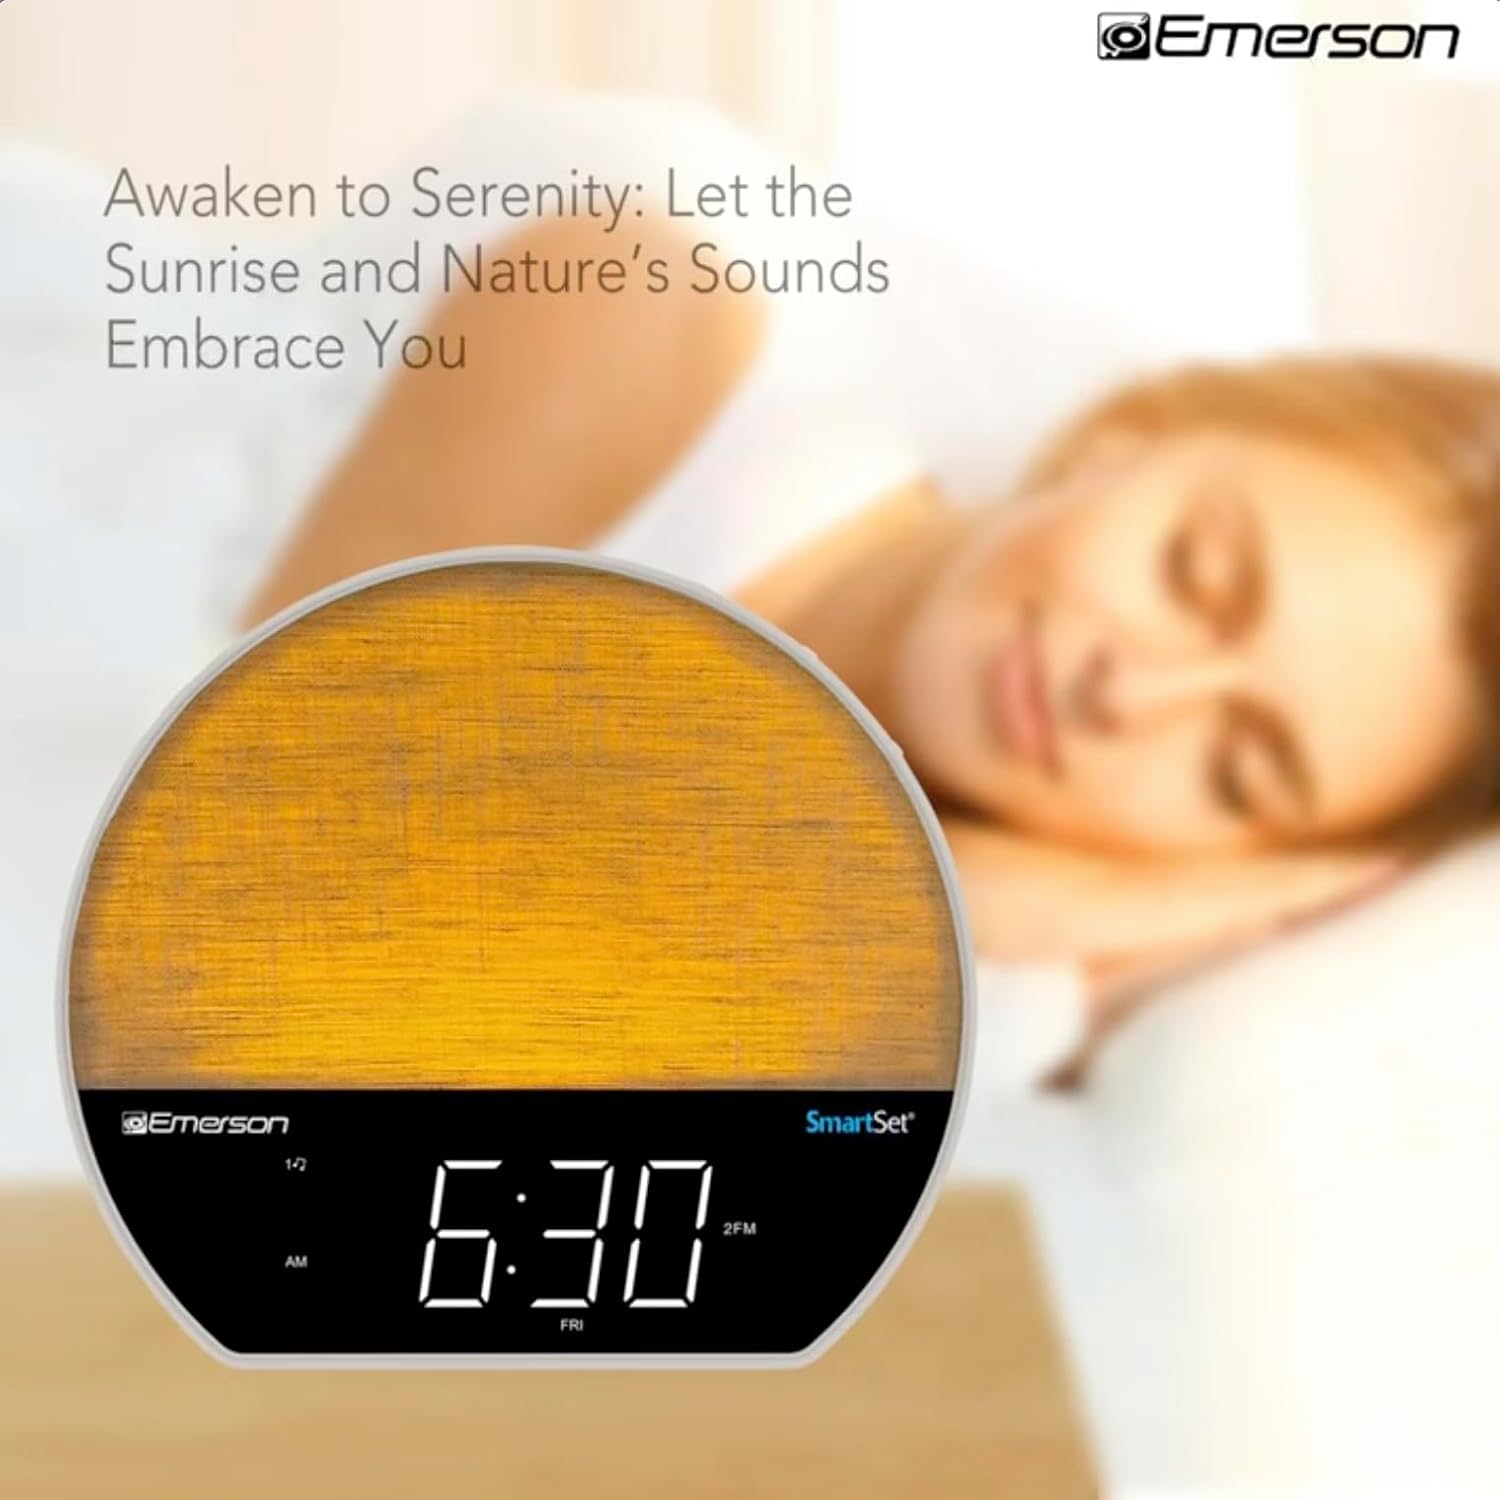
Immagine 4: The alarm clock simulating a sunrise with a warm, increasing intensità luminosa.
To activate, ensure the sunrise option is selected during alarm setup. The light will begin to brighten 30 minutes before the alarm sounds.
6.4 Soothing Sounds and White Noise
The unit includes 6 soothing sounds and white noise to help with relaxation or waking up.
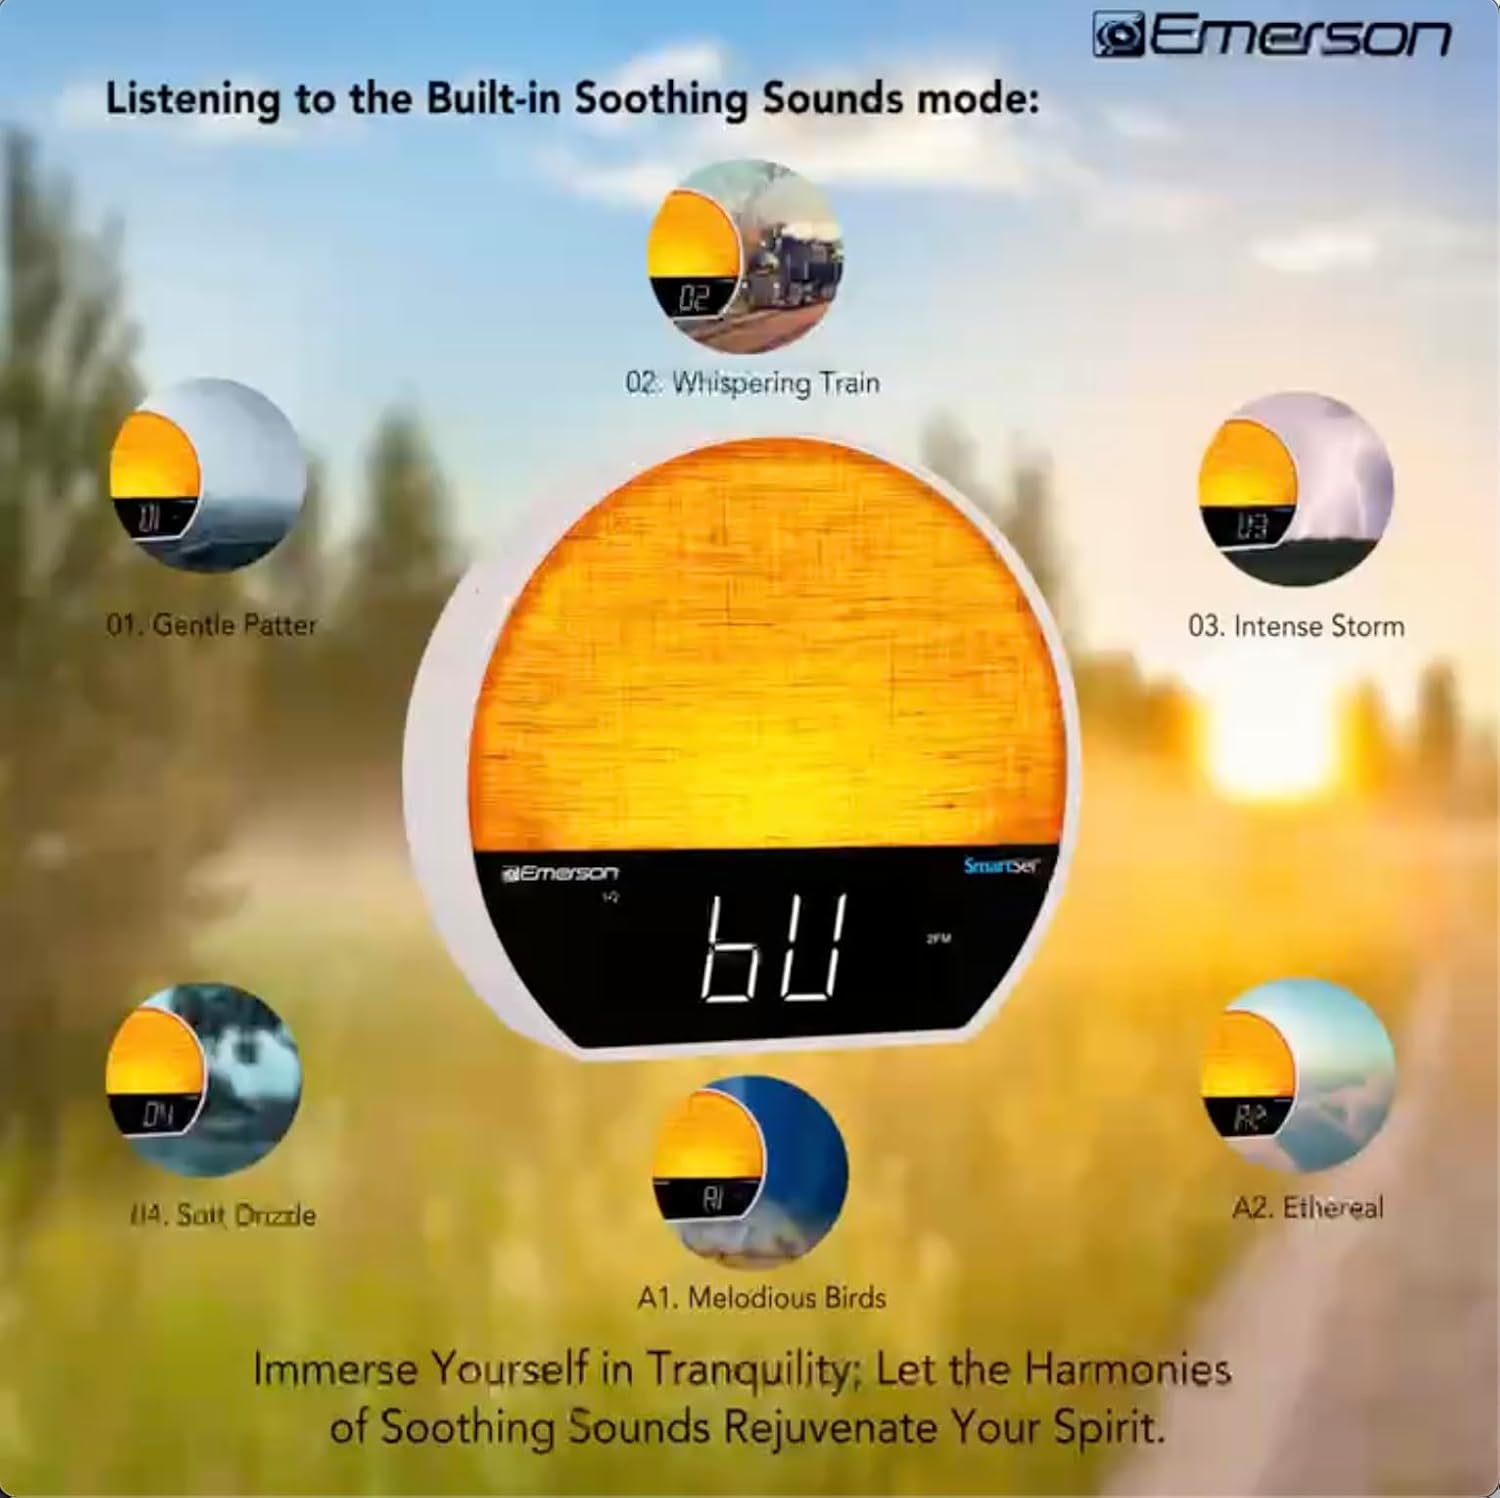
Immagine 5: Visual representation of the six soothing sound modes available on the alarm clock.
- Premere il tasto MODALITÀ button repeatedly until the Soothing Sound mode is selected.
- Utilizzare il ACCORDO -/+ buttons to cycle through the available sounds (e.g., Gentle Patter, Whispering Train, Intense Storm, Soft Drizzle, Melodious Birds, Ethereal, White Noise).
- Regolare il volume utilizzando il VOL-/+ pulsanti.
6.5 Funzione altoparlante Bluetooth
Collega il tuo smartphone o un altro dispositivo abilitato Bluetooth per riprodurre l'audio in streaming in modalità wireless.

Immagine 6: The alarm clock in Bluetooth mode, paired with a mobile device for audio streaming.
- Premere il tasto MODALITÀ button until 'BT' appears on the display, indicating Bluetooth mode.
- On your device, enable Bluetooth and search for 'Emerson CKSS7071'.
- Select the device to pair. A confirmation tone will sound upon successful pairing.
- You can now play audio from your device through the alarm clock's speaker.
6.6 Funzionamento della radio FM
Sintonizzati sulle tue stazioni radio FM preferite.
- Premere il tasto MODALITÀ finché sul display non appare la scritta "FM".
- Premere il tasto ACCORDO -/+ buttons briefly to manually tune to a station.
- Premere e tenere premuto il tasto ACCORDO -/+ pulsanti per cercare automaticamente la stazione disponibile successiva.
- Per salvare una stazione, tenere premuto il tasto FM MEM finché il numero preimpostato non lampeggia. Utilizzare ACCORDO -/+ per selezionare un numero preimpostato, quindi premere FM MEM di nuovo per salvare.
6.7 LED Decor and Dimmer Control
Customize the ambient light with 8 different colors and adjust the brightness.

Immagine 7: The alarm clock demonstrating its 8-color dimmable LED decor options.
- Premere il tasto LEGGERO button to cycle through the 8 available colors or turn the light off.
- To adjust the brightness of the LED decor light, press and hold the LEGGERO button. The brightness will cycle through 5 levels. Release the button at your desired brightness.
6.8 Controllo del dimmer del display
Adjust the brightness of the 1.2-inch LED time display.

Immagine 8: The alarm clock illustrating the five distinct levels of display luminescence.
Premere il tasto DIMENSIONATORE button (often combined with another function, refer to button labels) to cycle through 4 levels of display brightness (Bright, Moderate, Dim, Faint).
6.9 Timer di spegnimento
Set a timer for the audio to automatically turn off after a specified duration.

Immagine 9: The alarm clock set for a sunset sleep timer, providing a harmonious end to the day.
- While audio is playing (FM or Soothing Sound), press the SONNO pulsante.
- Premere ripetutamente il tasto SONNO button to cycle through available sleep timer durations (e.g., 15, 30, 60, 90 minutes, or OFF).
- The audio will automatically turn off after the selected time.
6.10 Funzione posticipa
Quando suona un allarme, premere il tasto POSTICIPARE button (usually a large button on top) to temporarily silence the alarm for a few minutes. The alarm will sound again after the snooze period.
7. Manutenzione
7.1 Pulizia
- Scollegare sempre l'unità dalla presa di corrente prima di pulirla.
- Per pulire le superfici esterne utilizzare un panno morbido e asciutto.
- Do not use liquid cleaners, abrasive cleaners, or chemical sprays, as these may damage the finish.
7.2 Sostituzione della batteria
Se le impostazioni dell'ora e della sveglia non vengono mantenute durante uno spegnimentotage, the button cell backup battery may need to be replaced. Follow the instructions in section 5.3 to replace the CR2032 battery.
8. Risoluzione Dei Problemi
| Problema | Possibile causa | Soluzione |
|---|---|---|
| L'unità non si accende. | Adattatore di alimentazione non collegato o difettoso. | Assicurarsi che l'adattatore CA sia collegato saldamente all'unità e a una presa a muro funzionante. |
| Impostazioni di ora/sveglia perse dopo lo spegnimentotage. | La batteria di backup è scarica o non è installata. | Install or replace the CR2032 button cell battery (see section 5.3). |
| L'allarme non suona. | La sveglia non è attivata o il volume è troppo basso. | Ensure the alarm is set and activated (AL1/AL2 indicator on). Increase alarm volume. |
| Il dispositivo Bluetooth non riesce ad associarsi. | Unit not in Bluetooth mode or device too far. | Ensure the unit is in Bluetooth mode ('BT' displayed). Move your device closer to the unit. Try unpairing and re-pairing. |
| Scarsa ricezione radio FM. | Antenna non estesa o interferenza. | Extend the FM wire antenna fully and reposition it for better reception. Avoid placing near other electronic devices. |
| Il display è troppo luminoso/scurato. | L'impostazione del dimmer del display necessita di regolazione. | Premere il tasto DIMENSIONATORE button to cycle through brightness levels (see section 6.8). |
9. Specifiche
| Caratteristica | Dettaglio |
|---|---|
| Numero di modello | Numero di modello: CKSS7071 |
| Fonte di alimentazione | CA 100-240 V, 50/60 Hz (tramite adattatore CA) |
| Batteria di backup | 1 x CR2032 Button Cell Battery (included) |
| Tipo di visualizzazione | Display LED da 1.2 pollici |
| Versione Bluetooth | V5.4 |
| Suoni rilassanti | 6 Nature Sounds + White Noise |
| LED Decor Colors | 8 Dimmable Colors |
| Dimensioni del prodotto (L x P x A) | 7.09" x 3.15" x 6.37" |
| Peso | Non specificato |
10. Informazioni sulla garanzia
Emerson products are manufactured to the highest quality standards. This product is covered by a limited warranty against defects in materials and workmanship for a period of one (1) year from the original date of purchase. This warranty does not cover damage caused by misuse, accident, unauthorized modification, or normal wear and tear. Proof of purchase is required for all warranty claims. Please retain your receipt.
11. Assistenza clienti
If you have any questions, require assistance, or experience issues with your Emerson CKSS7071 Sunrise Smartset Alarm Clock Radio, please contact our customer support team.
- Websito: Visita il sito ufficiale di Emerson websito per FAQ e risorse di supporto.
- E-mail: Fare riferimento alla confezione del prodotto o al sito ufficiale websito per contattare via email il servizio clienti.
- Telefono: Fare riferimento alla confezione del prodotto o al sito ufficiale websito per i numeri di telefono del servizio clienti.
Please have your model number (CKSS7071) and proof of purchase ready when contacting support.