1. Introduzione
This manual provides essential information for the safe and efficient operation of your ZLPOWER 8000W Solar Hybrid Inverter, Model GS-8KW-III. This low-frequency, split-phase pure sine wave inverter is designed to convert 48V DC power to 110/240V AC, featuring a built-in 2 MPPT solar charger controller for off-grid applications. Please read this manual thoroughly before installation and use.
2. Informazioni sulla sicurezza
Always prioritize safety during installation and operation. Failure to follow these instructions may result in electric shock, fire, or serious injury.
- Ensure all power sources (AC grid, solar panels, batteries) are disconnected before performing any wiring or maintenance.
- Only qualified personnel should install and service this inverter.
- Non utilizzare l'inverter se è danneggiato o sembra non funzionare correttamente.
- Installare l'inverter in un'area ben ventilata, lontano da materiali infiammabili e umidità.
- Garantire la corretta messa a terra dell'inverter.
- Indossare dispositivi di protezione individuale (DPI) adeguati, tra cui guanti isolanti e protezioni per gli occhi.
3. Prodotto finitoview
The ZLPOWER 8000W Solar Hybrid Inverter is a robust solution for various power needs, offering high efficiency and multiple protection features.
3.1 Caratteristiche principali
- 8000W pure sine wave output (24000W peak)
- 48V DC to settable 110/240V AC split-phase output (50/60 Hz)
- Built-in 2 x 80A MPPT solar charge controllers (Max charging current 200A)
- Compatible with various battery types: AGM, GEL, lead acid, lithium-ion, and LiFePO4
- Automatic Generator Start (AGS) function
- Multiple protection systems: over/low voltage, over-temperature, overload, short circuit
- Integrated Wi-Fi for mobile monitoring
3.2 Inverter Components and Specifications
Below are visual representations of the inverter and its key features.
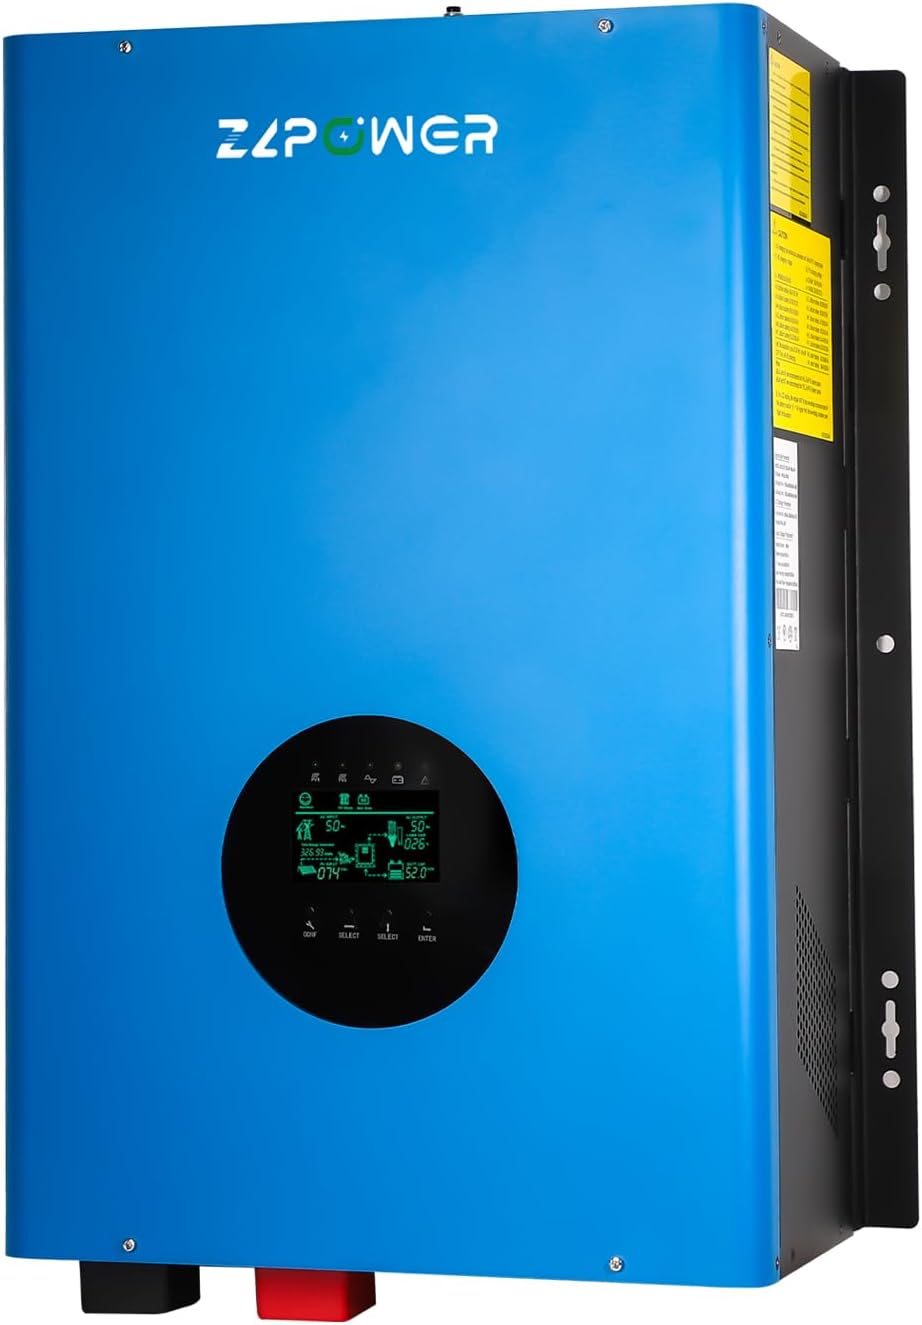
Figura 3.1: Fronte view of the ZLPOWER 8000W Solar Hybrid Inverter, showcasingrazie al suo design elegante e al display LCD integrato.

Figure 3.2: The inverter integrated into a solar power system, highlighting its 100% pure copper transformer for enhanced performance and durability.
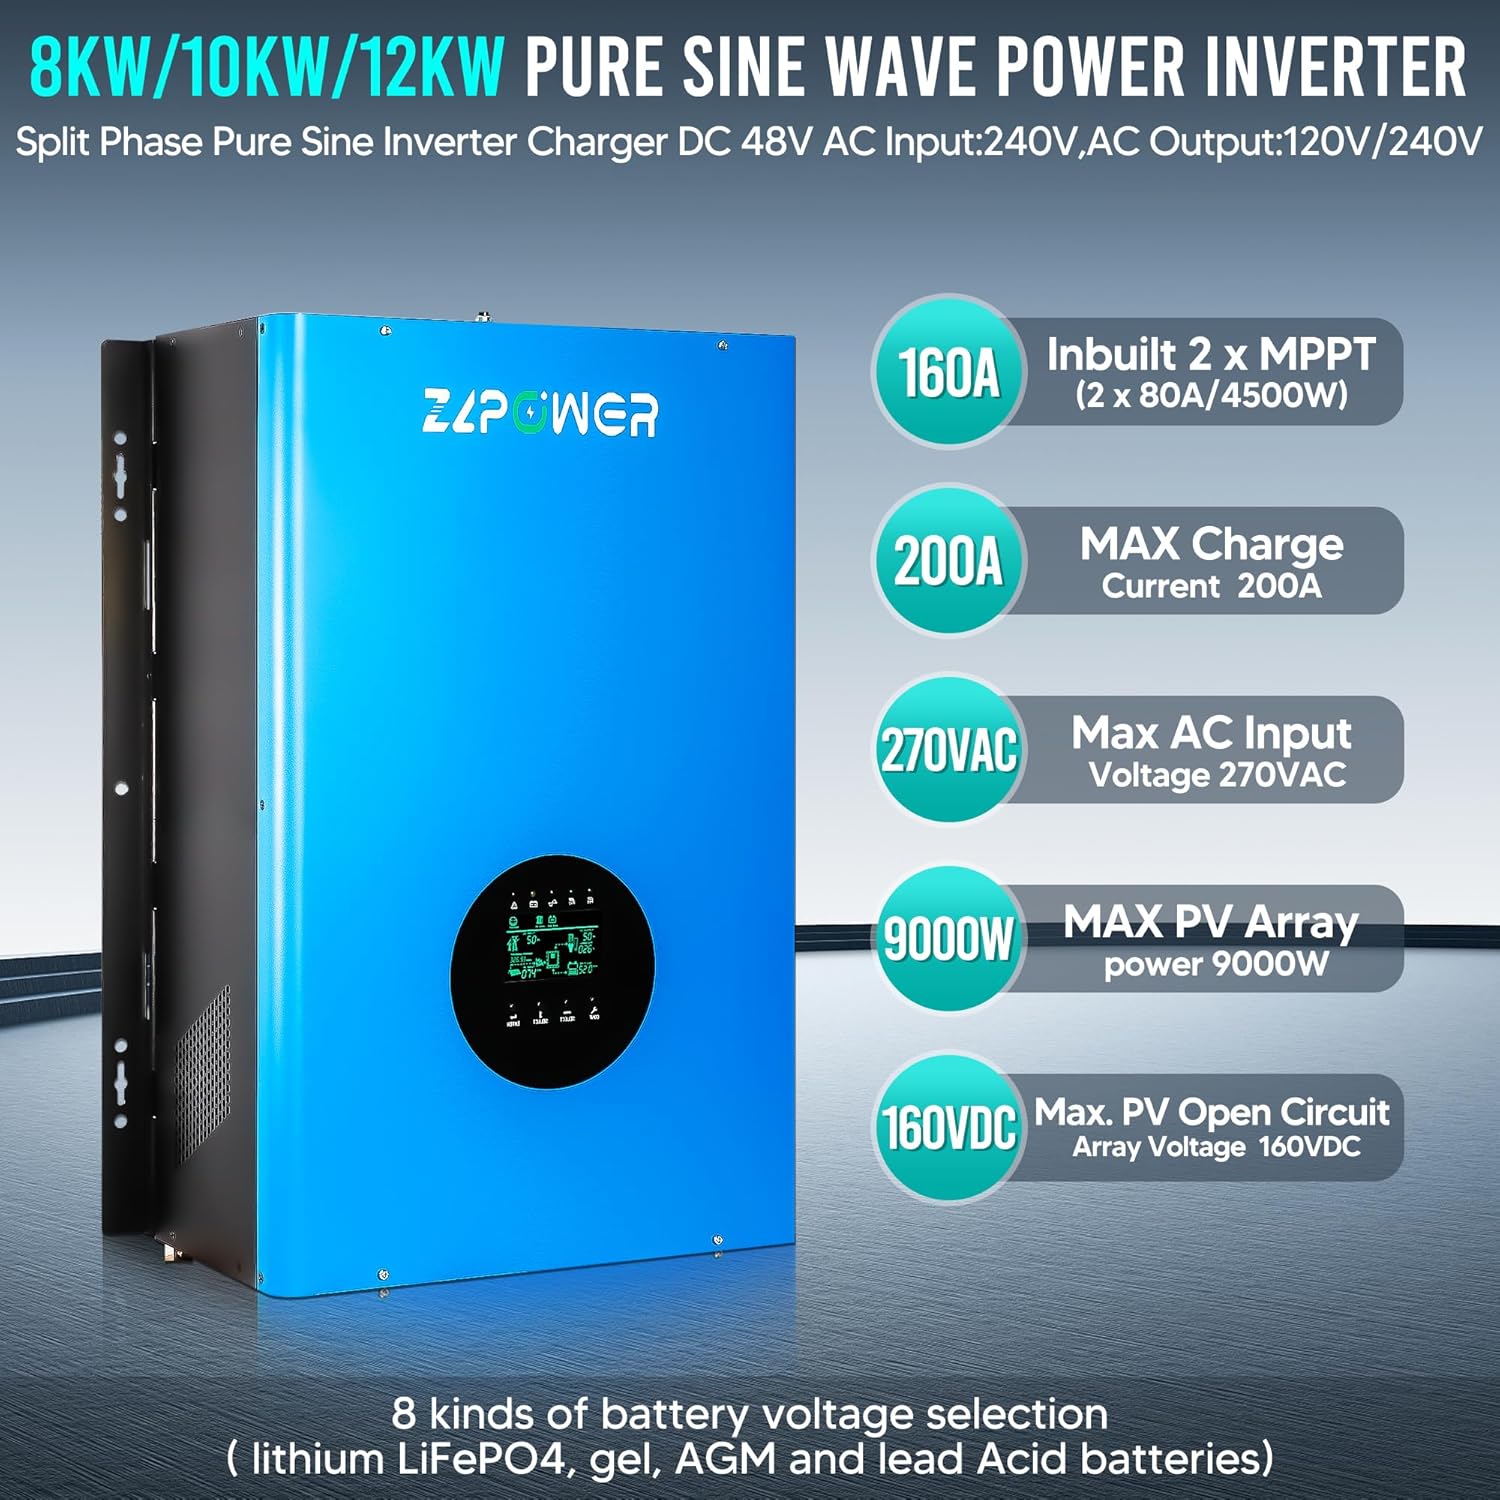
Figura 3.3: Oltreview of the inverter's key technical specifications, such as 160A Inbuilt 2x MPPT, 200A Max Charge Current, 270VAC Max AC Input, 9000W Max PV Array Power, and 160VDC Max PV Open Circuit Array Voltage.

Figure 3.4: The inverter features multiple intelligent protection systems, including safeguards against short circuit, over-temperature, low voltage, oltre-voltagee sovraccarico.

Figure 3.5: A typical application diagram demonstrating how the inverter connects to solar panels, an AC generator, a battery bank, and various electric loads.

Figure 3.6: The inverter is compatible with a wide range of 48V battery types, including LiFePO4, Flooded, AGM, Sealed Lead Acid, GEL, and Lithium-Ion batteries. For gel or deep cycle batteries, avoid using ordinary lead-acid batteries in solar energy systems to prevent damage. Ensure battery capacity is more than 200AH.

Figura 3.7: dettagliata view of the inverter's wiring terminals, including Battery Positive/Negative, Terminal block, AC input/output switch, Grounding terminal, RS-232, CAN/RS485/USB ports, Remote switch, and DC/AC FAN connections.
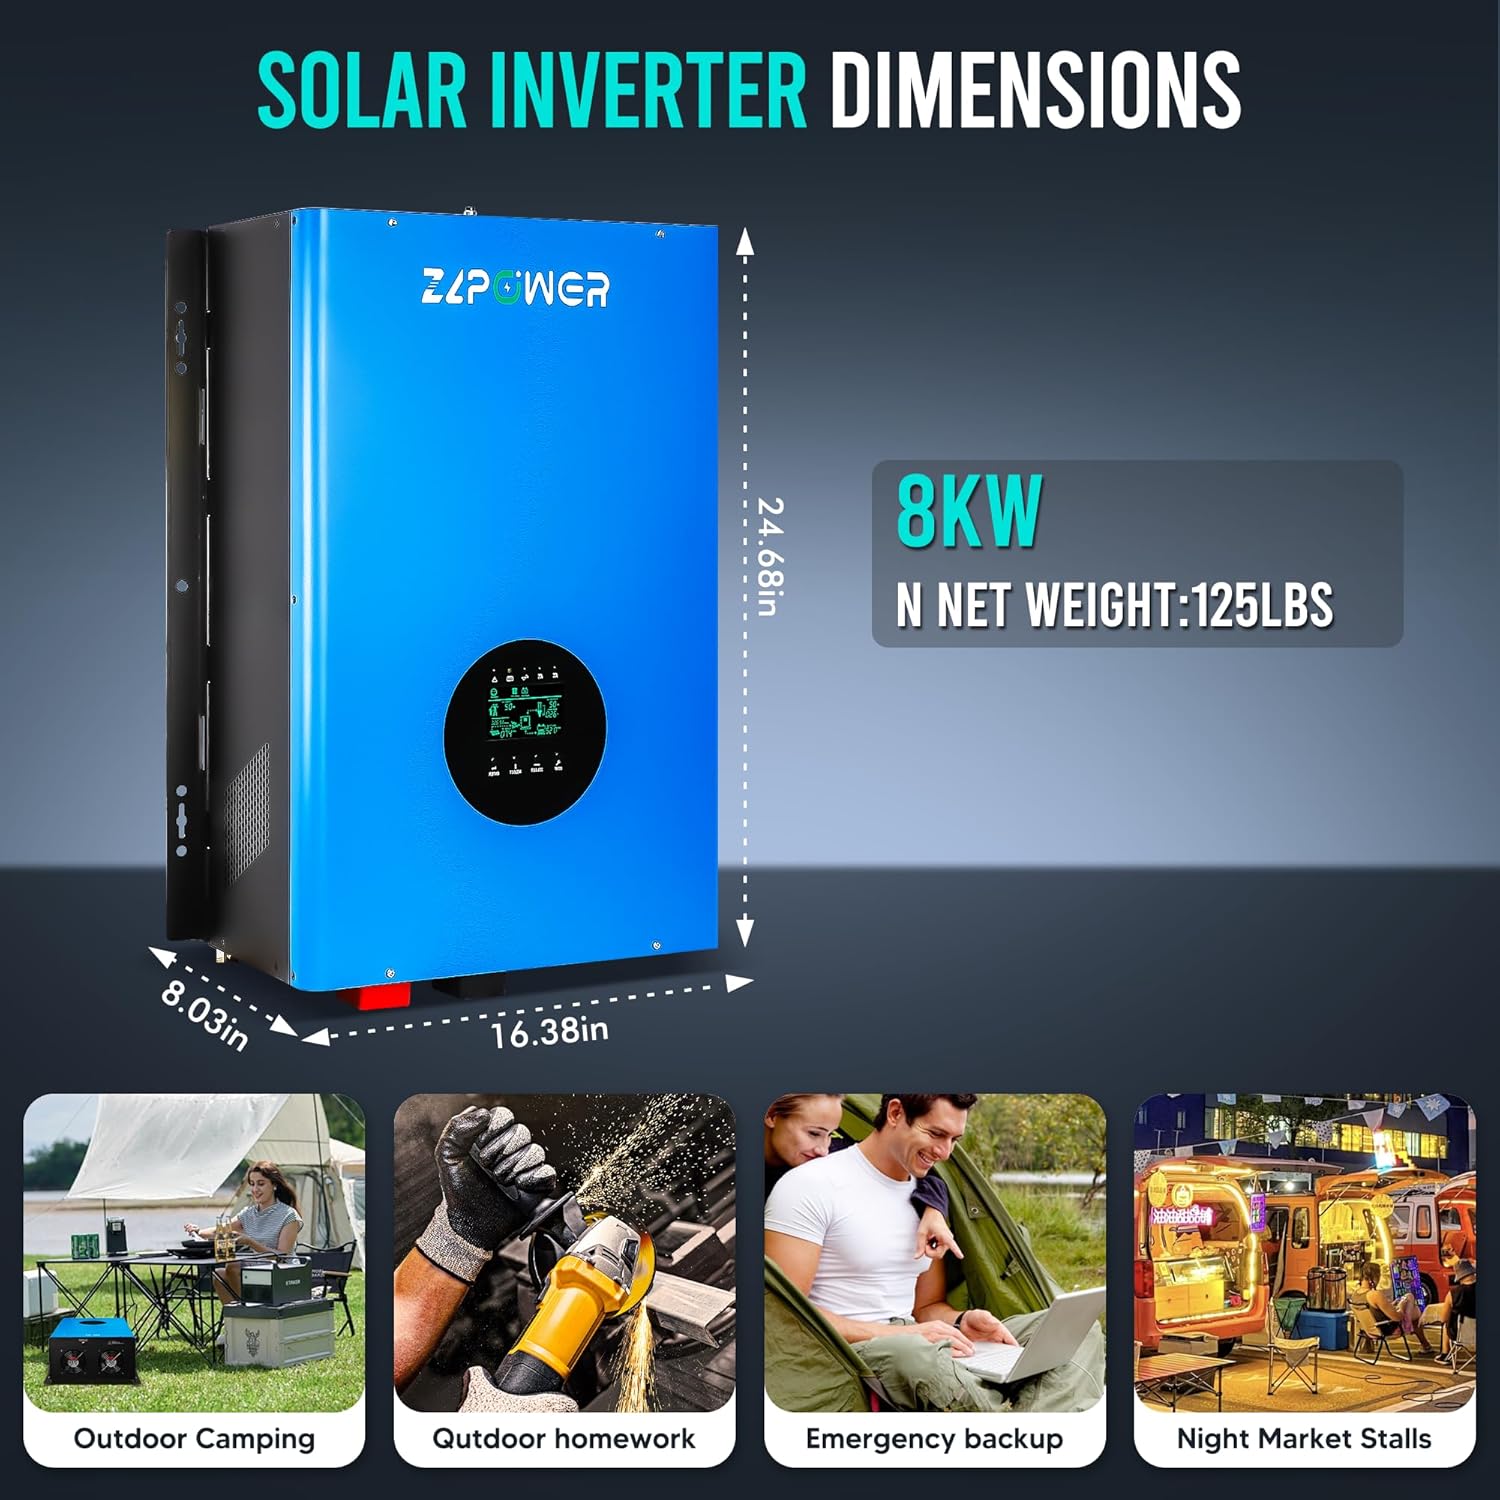
Figure 3.8: Physical dimensions (24.68in H x 16.38in W x 8.03in D) and net weight (125lbs) of the 8KW inverter, along with examples of its versatile applications.

Figure 3.9: The LCD screen display provides real-time operational data and features built-in Wi-Fi for convenient mobile monitoring.
4. Configurazione e installazione
Proper installation is crucial for the inverter's performance and safety. Refer to the wiring diagram (Figure 3.7) and the following steps.
4.1 Disimballaggio e ispezione iniziale
Video 4.1: This video demonstrates the unboxing process of the inverter, showing how to safely remove it from its packaging and prepare it for installation.
4.2 Collegamento della batteria
Connect the battery to the inverter's battery terminals. Ensure the positive terminal of the battery is connected to the positive terminal of the inverter, and the negative to the negative. Use appropriate gauge cables and tighten all connections securely. It is recommended to install a breaker on the positive line for safety.
4.3 Cablaggio di ingresso e uscita CA
Rimuovere il casing to access the input and output ports. Connect the AC power cable to the AC input terminal of the inverter. Then, connect the AC power cable to the AC output terminal. Pay close attention to connecting the live wire to the live terminal and the neutral wire to the neutral terminal. Do not reverse these connections. Ensure all wiring is secure and correct before proceeding.
Video 4.2: This video provides a step-by-step guide on wiring the inverter, including battery connections, AC input, AC output, and grounding. It emphasizes correct polarity and secure connections.
4.4 Messa a terra
Connect the ground wire to the designated ground terminal on the inverter. This is a critical safety step to prevent electrical hazards.
4.5 Collegamento del cavo di comunicazione
Locate the communication ports (RS485 or CAN) on both the inverter and your lithium battery. Connect one end of the communication cable to the inverter's communication port and the other end to the battery's communication port. Ensure the connections are secure and the polarity matches.
5. Istruzioni per l'uso
Once installed, follow these steps to power on and operate your inverter.
5.1 Accensione
- Ensure all wiring is correctly installed and secure.
- Turn on the battery power switch.
- Accendere l'interruttore automatico per l'ingresso CA.
- Turn on the inverter power switch. The LCD screen should illuminate, indicating the inverter is operational.
Video 5.1: This video demonstrates the inverter in operation, showing its integration with solar panels and battery storage, and how it supplies power to connected loads.
5.2 LCD Screen Display and Settings
The LCD screen provides real-time status and allows for configuration adjustments. Use the 'CONF', 'SELECT', and 'ENTER' buttons to navigate the menu.
Video 5.2: A detailed explanation of the inverter's LCD screen, demonstrating how to read various parameters such as AC input/output, battery voltage, solar energy input, and load status. It also shows how to switch between grid and battery power modes.
5.3 Collegamento dei carichi
After the inverter is powered on and stable, you can connect your electrical loads to the AC output. The inverter is capable of powering various household appliances, including refrigerators and fans.
Video 5.3: This video illustrates the inverter's capability to power common household appliances like a fan and a refrigerator, demonstrating its practical application.
6. Manutenzione
Una manutenzione regolare garantisce la longevità e le prestazioni ottimali del vostro inverter.
- Pulizia: Keep the inverter's vents and fans clear of dust and debris to ensure proper cooling. Use a soft, dry cloth for cleaning.
- Verifiche della connessione: Periodically inspect all electrical connections (battery, AC input/output, ground) for tightness and signs of corrosion. Tighten any loose connections.
- Stato della batteria: Monitorare il voltage and charge status via the LCD display or mobile app. Ensure batteries are maintained according to their manufacturer's guidelines.
- Condizioni ambientali: Ensure the inverter remains in a dry, cool, and well-ventilated environment.
7. Risoluzione Dei Problemi
Questa sezione fornisce indicazioni per i problemi più comuni. Per problemi più complessi, contattare l'assistenza tecnica.
| Problema | Possibile causa | Soluzione |
|---|---|---|
| L'inverter non si accende | Nessuna alimentazione della batteria; collegamenti della batteria allentati; interruttore dell'inverter spento. | Controllare il volume della batteriatage; assicurarsi che i collegamenti della batteria siano saldi; accendere l'interruttore dell'inverter. |
| Nessuna uscita CA | Overload; short circuit; AC output switch off; low battery voltage. | Reduce load; check for short circuits; turn on AC output switch; charge batteries. |
| I pannelli solari non caricano le batterie | Insufficient sunlight; PV input switch off; faulty PV connection. | Check sunlight conditions; ensure PV input switch is on; verify PV wiring. |
| Rumori o odori insoliti | Guasto interno; surriscaldamento. | Immediately disconnect power and contact technical support. |
8. Specifiche
| Specificazione | Valore |
|---|---|
| Nome del modello | GS-8KW-III |
| Cosatage | 8000 watt |
| Fonte di alimentazione | Alimentato a energia solare e a batteria |
| Usi consigliati | Home, Office, Household appliances, Workshop, Industrial use |
| Marca | ZLP POWER |
| Numero modello articolo | GS-8KW-III |
9. Garanzia e supporto
ZLPOWER stands behind its products with a 12-month warranty guarantee e offerte supporto tecnico a vita. If you encounter any issues during setup, operation, or have questions, please do not hesitate to contact ZLPOWER customer service for assistance. We are committed to providing prompt and professional support.