1. Introduzione
Thank you for choosing the ACEZUK 7000A Car Jump Starter & 150PSI Air Compressor. This device is a versatile tool designed for emergency vehicle jump-starting, tire inflation, and as a portable power bank. Please read this manual thoroughly before use to ensure safe and optimal operation. Keep this manual for future reference.

Image 1.1: The ACEZUK 7000A Car Jump Starter and Air Compressor, ready for use with jumper cables.
2. Istruzioni di sicurezza
Per evitare lesioni o danni al dispositivo e al veicolo, osservare sempre le seguenti precauzioni di sicurezza:
- Do not operate the jump starter if the battery clamps o i cavi sono danneggiati.
- Ensure proper polarity when connecting the jumper cables to the vehicle battery (red to positive, black to negative). Reverse polarity can cause sparks and damage.
- Non avviare una batteria congelata con i cavi.
- Tenere il dispositivo lontano dalla portata dei bambini.
- Non esporre il dispositivo alla pioggia o a temperature estreme.
- Evitare il cortocircuito della batteria clamps.
- Indossare protezioni per gli occhi quando si lavora con le batterie dei veicoli.
- Non utilizzare il compressore d'aria per più di 10 minuti ininterrottamente per evitare il surriscaldamento. Lasciarlo raffreddare tra un utilizzo e l'altro.
- Conservare il dispositivo in un luogo fresco e asciutto quando non viene utilizzato.

Image 2.1: The smart jumper cables feature 8 protection mechanisms for safe operation, including protection against overheating, overcharging, over-discharge, overcurrent, overvoltage, cortocircuiti, inversione di polarità e anti-interferenza.
3. Contenuto della confezione
Verificare che tutti gli articoli siano presenti nel pacco:
- Avviatore di emergenza e compressore d'aria ACEZUK
- Cavi per ponticelli intelligenti
- Tubo dell'aria
- Cavo di ricarica USB di tipo C.
- Various Nozzle Adapters (for balls, bicycles, inflatable toys)
- Borsa portaoggetti
- Manuale dell'utente (questo documento)

Image 3.1: The complete package contents, including the main unit, jumper cables, air hose, charging cable, various adapters, and a storage bag.
4. Prodotto finitoview
Familiarize yourself with the components and controls of your ACEZUK device.
4.1 Unità principale
- Schermo LCD da 3.4": Mostra il livello della batteria, la pressione degli pneumatici e le modalità operative.
- Pulsanti di controllo: M (Mode), OK (Power/Confirm), +/-(Adjust Pressure), Light (LED).
- Porta di avvio rapido: Per collegare cavi di avviamento intelligenti.
- Porta del tubo dell'aria: Per collegare il tubo dell'aria.
- Porte di uscita USB (x2): Per caricare dispositivi esterni.
- Type-C Input Port (x1): Per caricare l'unità di avviamento di emergenza.
- Luce LED: Torcia integrata con più modalità.

Image 4.1: The control panel of the ACEZUK device, highlighting the LCD display and function buttons.

Image 4.2: The device's display provides real-time information on battery level and tire pressure.
5. Impostazione
5.1 Ricarica del dispositivo
Before first use, fully charge the ACEZUK jump starter. Connect the provided USB Type-C cable to the device's Type-C input port and a suitable USB power adapter (not included). The LCD display will show the charging status. A full charge is indicated when the battery icon is full.
Important: Ensure the device is fully charged before attempting to jump-start a vehicle.
6. Istruzioni per l'uso
6.1 Avviamento di emergenza di un veicolo
- Assicurarsi che l'avviatore di emergenza sia carico almeno al 50%.
- Spegnere il motore del veicolo e tutti gli accessori.
- Insert the smart jumper cable plug into the jump start port on the ACEZUK unit.
- Collegare il rosso (+) clamp al terminale positivo della batteria del veicolo.
- Collegare il nero (-) clamp al terminale negativo della batteria del veicolo.
- Once connected, the smart cable indicator light will show its status. If it's green, it's safe to proceed. If it's red or flashing, check connections and battery status.
- Avviare il motore del veicolo.
- Once the engine starts, immediately remove the jumper cables from the vehicle battery (black first, then red), and then disconnect the cable from the jump starter unit.
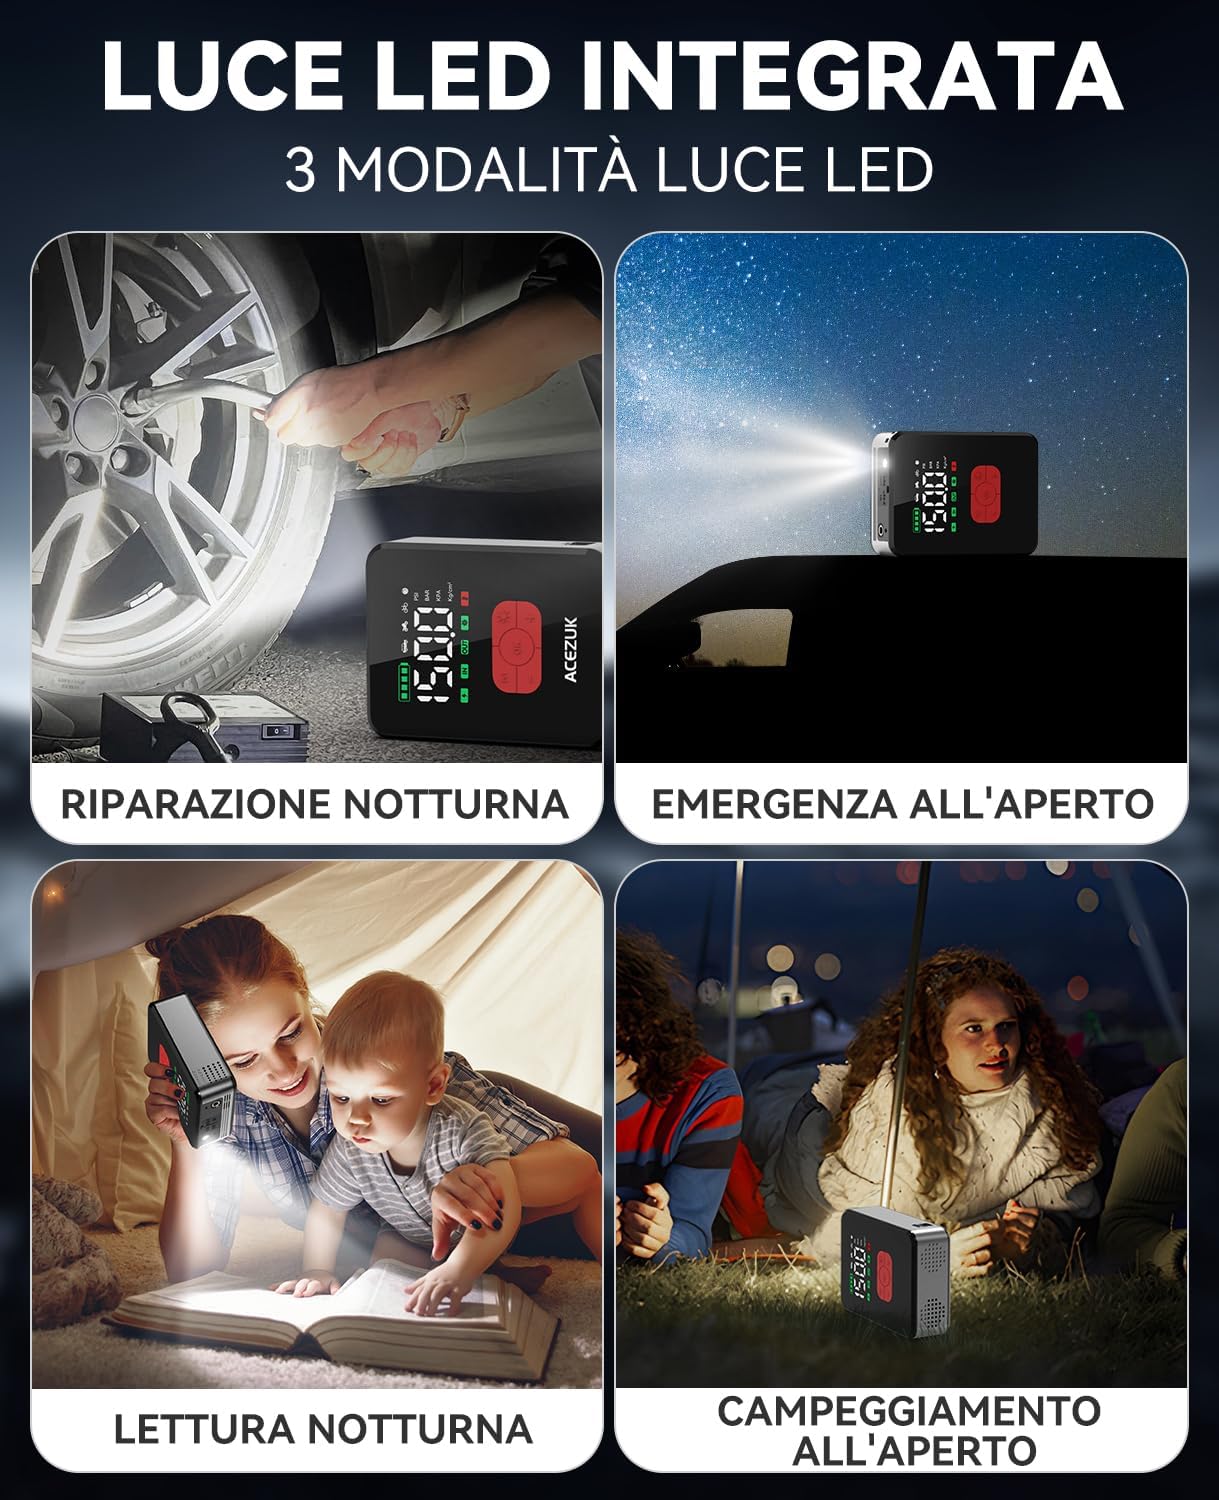
Image 6.1: The jump starter connected to a car battery, illustrating the correct setup for jump-starting.
6.2 Utilizzo del compressore d'aria
- Connect the air hose to the air hose port on the ACEZUK unit.
- Attach the other end of the air hose to the tire valve or use the appropriate nozzle adapter for other inflatables.
- Press the "OK" button briefly to turn on the compressor. The LCD will display the current pressure.
- Press the "M" button to cycle through inflation modes (Car, Motorcycle, Bicycle, Ball, Manual). Each mode has a preset pressure range.
- Use the "+" and "-" buttons to adjust the target pressure. Press briefly to change by small increments, or long-press for rapid adjustment.
- Press the "OK" button to start inflation. The compressor will automatically stop once the target pressure is reached.
- Disconnect the air hose from the tire/inflatable and the unit.
Note: Do not operate the compressor for more than 10 minutes continuously. Allow a 10-minute cool-down period after each 10 minutes of use.

Image 6.2: The device actively inflating a car tire using its integrated air compressor function.

Image 6.3: Step-by-step guide for using the air compressor to inflate a tire.

Immagine 6.4: Passoview of preset inflation modes and their respective pressure ranges.
6.3 Utilizzo della luce LED
The integrated LED light has three modes: Bright, Strobe, and SOS.
- Press the Light button briefly to turn on the LED light (Bright mode).
- Press again to cycle through Strobe mode.
- Premere una terza volta per la modalità SOS.
- Premere una quarta volta per spegnere la luce LED.
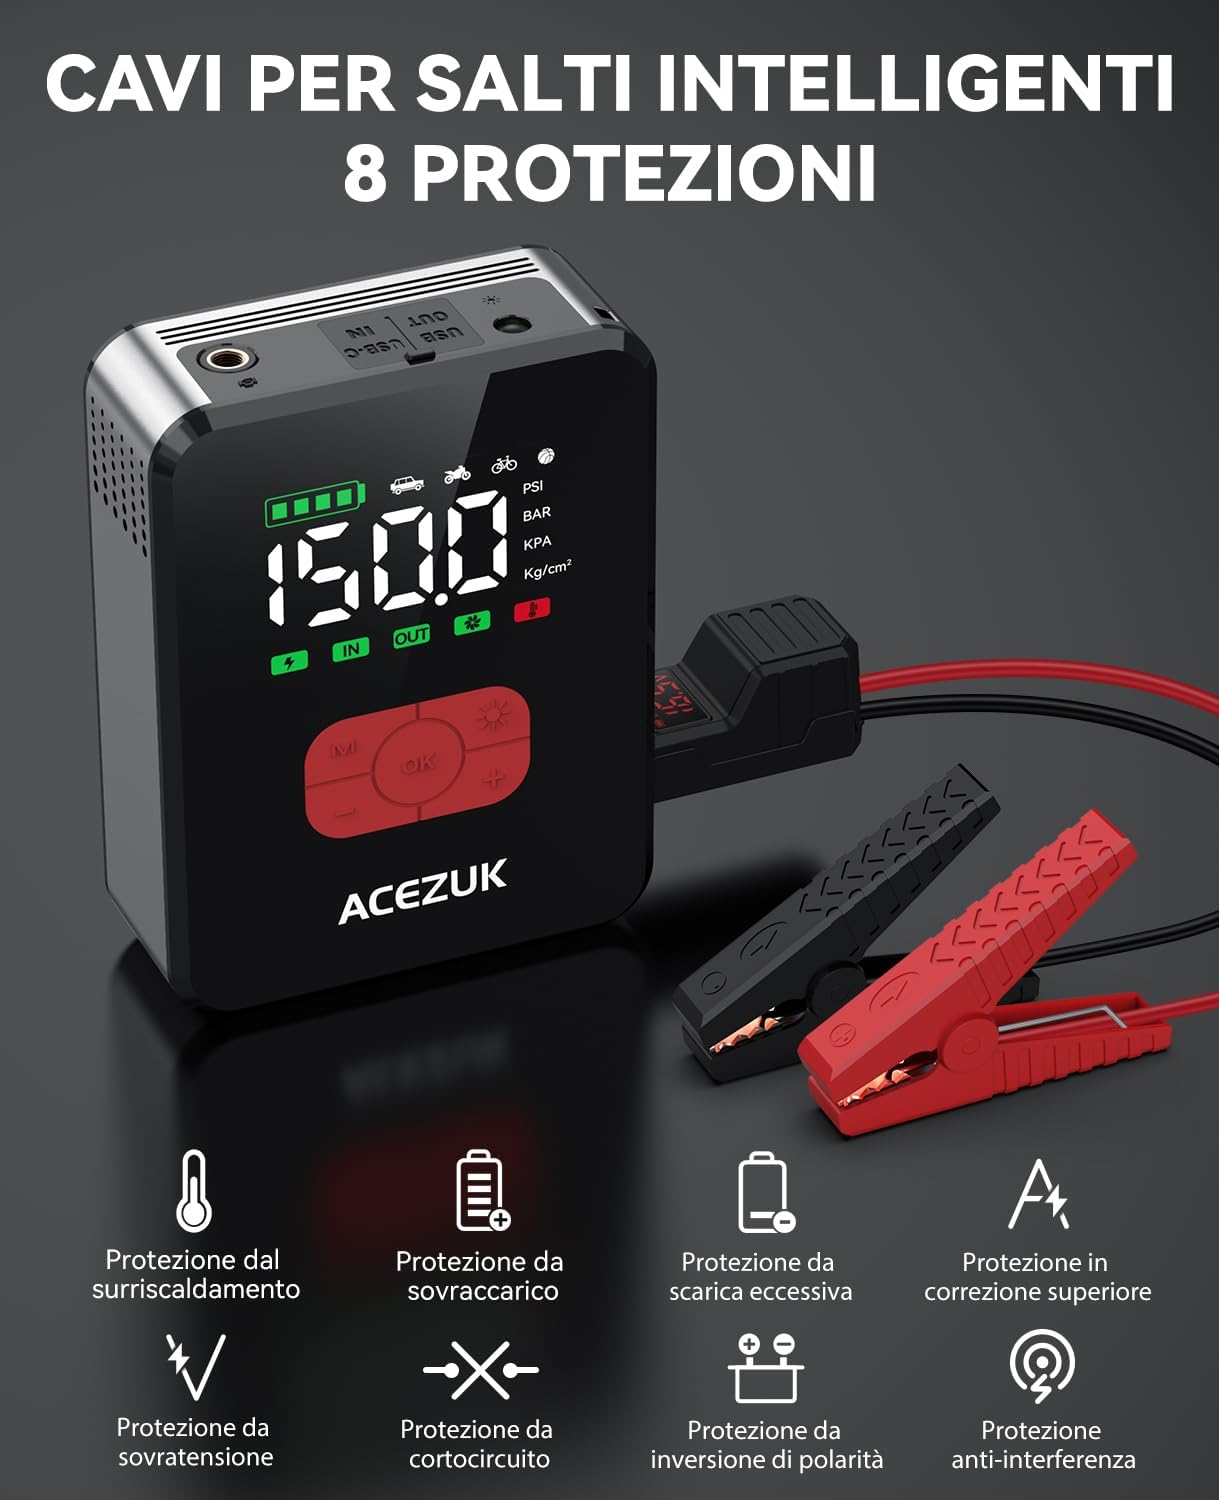
Immagine 6.5: Es.amples of the LED light's utility in various situations, including night repairs and outdoor activities.
6.4 Utilizzo come Power Bank
The device can charge other electronic devices via its USB output ports.
- Connect your electronic device (smartphone, tablet, etc.) to one of the USB output ports using a compatible USB cable.
- The ACEZUK unit will automatically begin charging your device.

Image 6.6: The device functioning as a portable power bank, charging various electronic gadgets.
7. Manutenzione
- Clean the device with a dry, soft cloth. Do not use harsh chemicals or abrasive cleaners.
- Ricaricare il dispositivo ogni 3-6 mesi, anche se non lo si utilizza, per preservare la salute della batteria.
- Conservare il dispositivo in un ambiente fresco e asciutto, lontano dalla luce solare diretta e da temperature estreme.
- Inspect jumper cables and air hose for any damage before each use.
8. Risoluzione Dei Problemi
| Problema | Possibile causa | Soluzione |
|---|---|---|
| Il veicolo non si avvia dopo l'avviamento di emergenza. | Low charge on jump starter; incorrect cable connection; vehicle battery severely damaged; other vehicle issues. | Ensure jump starter is fully charged. Check cable connections for correct polarity. If issues persist, consult a mechanic. |
| Il compressore d'aria non si gonfia. | Air hose not properly connected; target pressure not set; device not turned on; hose or nozzle leak. | Ensure all connections are secure. Set target pressure and press OK to start. Check for leaks in the hose or nozzle. |
| Il display LCD è vuoto. | Device is off; battery is completely drained. | Press the OK button to turn on. Charge the device if the battery is drained. |
| Il dispositivo non carica i dispositivi esterni. | Device battery low; incorrect USB cable; external device issue. | Charge the ACEZUK unit. Use a different USB cable or try another external device. |
9. Specifiche
| Caratteristica | Dettaglio |
|---|---|
| Marca | ACEZUK |
| Numero di modello | Numero di modello: M06 |
| Corrente di picco | 7000A |
| Pressione del compressore d'aria | Fino a 150 PSI |
| Tipo di batteria | Agli ioni di litio |
| Voltage | 12 Volt |
| Tipi di veicoli compatibili | Tutti i motori a gas, fino ai motori diesel da 12 litri |
| Luce LED | 600 Lumens, 3 Modes (Bright, Strobe, SOS) |
| Display | LCD da 3.4" |
| Peso | 1200 grammi |
| Uscita USB | 2 porte |
| Ingresso di tipo C | 1 porta |
10. Garanzia e supporto
ACEZUK products come with a standard manufacturer's warranty. For specific warranty details, please refer to the warranty card included in your package or contact ACEZUK customer support.
If you encounter any issues or have questions regarding your product, please contact our customer support team through the retailer where you purchased the product or visit the official ACEZUK websito per le informazioni di contatto.
Conservare la prova d'acquisto per eventuali richieste di garanzia.