
1. Prodotto finitoview
The REDTIGER F7N Pro is a high-performance dual dash camera system designed to record both front and rear views of your vehicle. It features 4K UHD front recording, 1080P FHD rear recording, a STARVIS 2 sensor for enhanced night vision, built-in Wi-Fi, and GPS functionality. A 64GB memory card is included for immediate use.
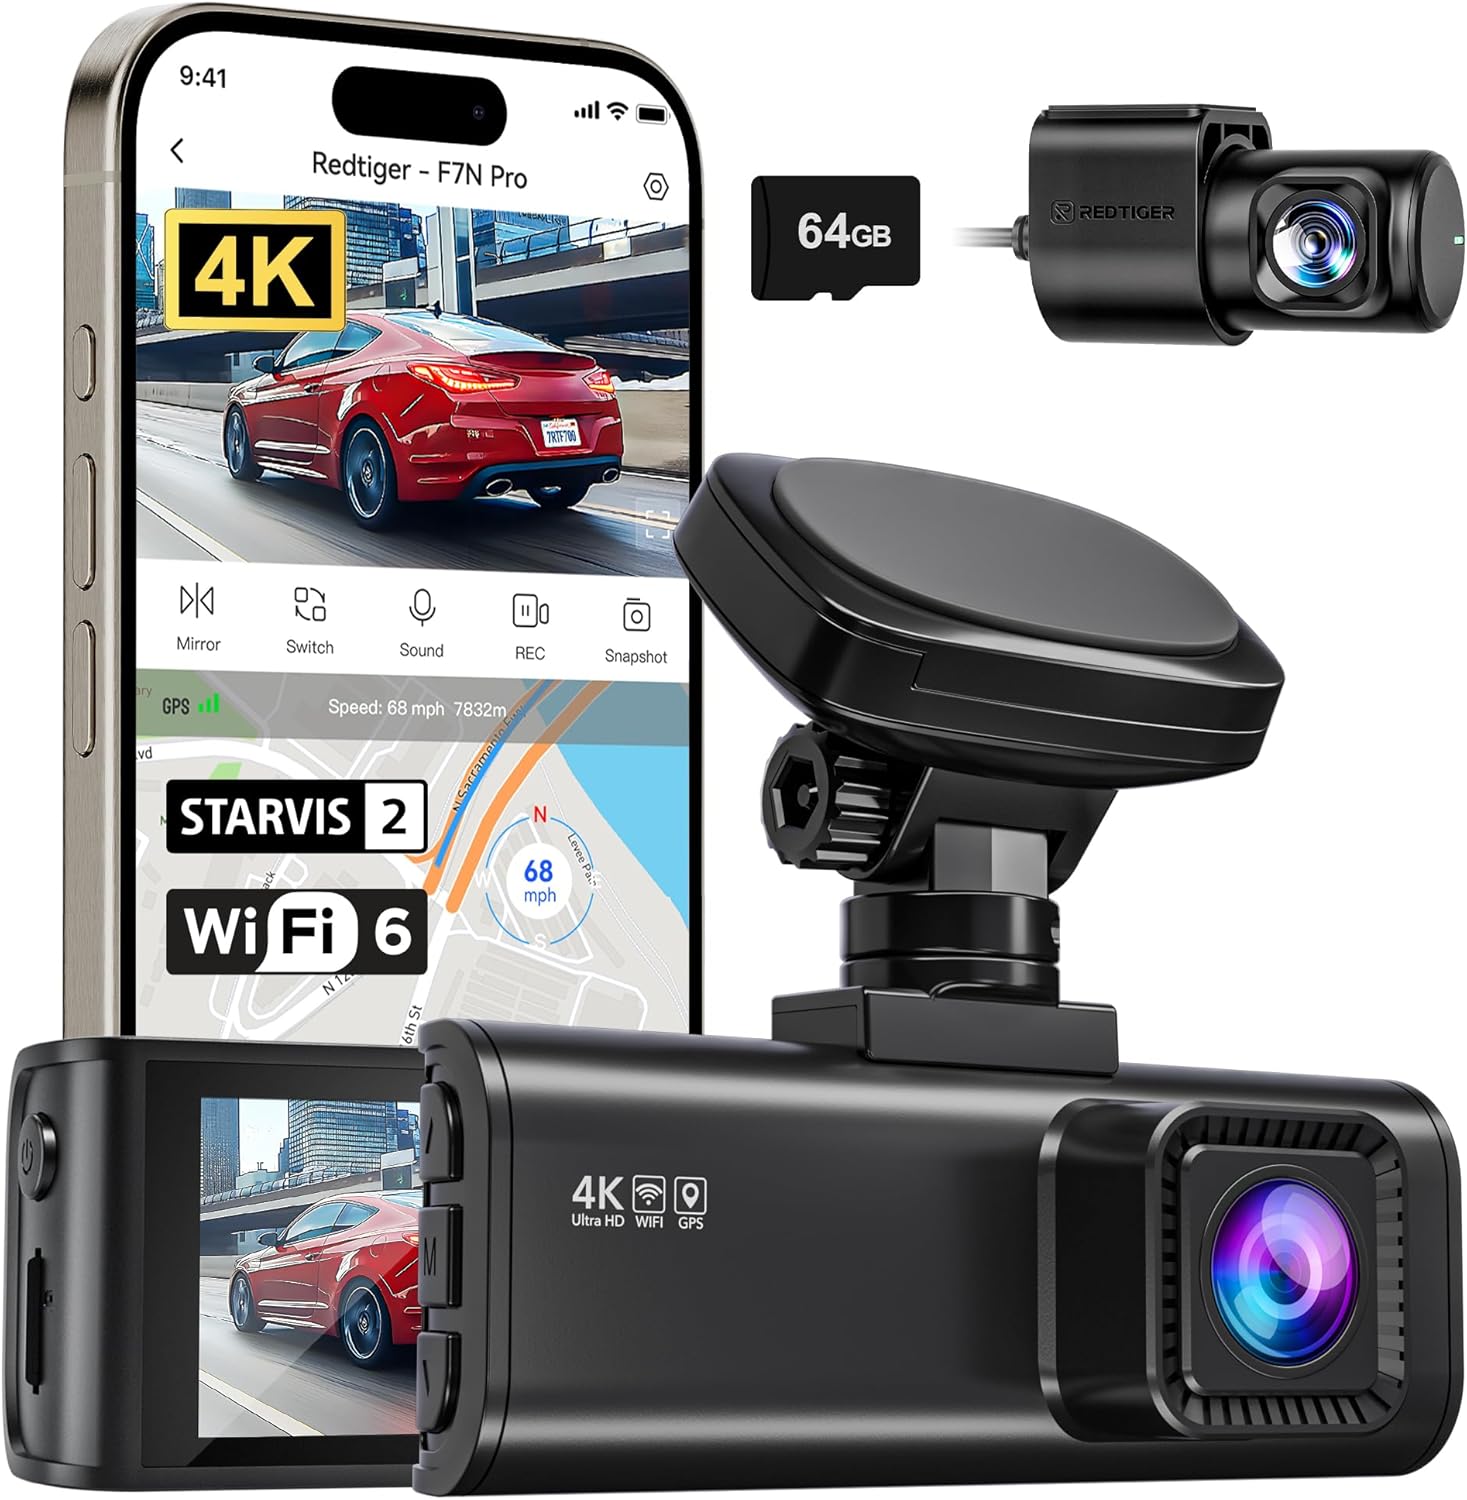
Immagine 1.1: Passoview of the REDTIGER F7N Pro Dash Camera and its accessories, including the main unit, rear camera, CPL lens, and a 64GB SD card.
2. Contenuto della confezione
Si prega di verificare che tutti gli articoli siano presenti nel pacco:
- REDTIGER F7N Pro Front Dash Camera
- Telecamera posteriore
- Lente polarizzante circolare (CPL)
- Scheda di memoria 64GB
- Cavo di alimentazione
- Staffa di fissaggio
- Manuale d'uso
3. Configurazione e installazione
3.1. Inserimento della scheda di memoria
- Assicurarsi che la dashcam sia spenta.
- Locate the memory card slot on the side of the front camera unit.
- Insert the included 64GB memory card (or another compatible card up to 256GB) into the slot until it clicks into place.
- Per rimuoverla, spingere delicatamente la scheda finché non scatta fuori.
3.2. CPL Lens Installation
The Circular Polarizing Lens (CPL) helps reduce glare and reflections from the windshield and road surface, improving video clarity.
- Align the CPL lens with the front camera lens.
- Gently twist the CPL lens clockwise until it is securely attached.
- Adjust the CPL lens rotation while viewing the live feed on the camera screen or app to minimize glare.

Image 3.2: The Circular Polarizing Lens (CPL) accessory, designed to reduce glare and reflections.
3.3. Montaggio della fotocamera anteriore
The dash camera uses a dashboard mount with a removable rotating bracket.
- Clean the chosen area on your dashboard or windshield thoroughly.
- Attach the mounting bracket to the front camera unit.
- Rimuovere la pellicola protettiva dal cuscinetto adesivo sulla staffa.
- Firmly press the bracket onto the desired location, ensuring a clear view della strada.
- Adjust the camera angle using the rotating bracket for optimal front recording. The camera can be detached from the bracket without removing the adhesive tape.

Image 3.3: The removable rotating bracket, allowing multi-angle adjustment and easy detachment of the camera.
3.4. Installazione della telecamera posteriore
- Montare la telecamera posteriore sul lunotto posteriore utilizzando il suo cuscinetto adesivo, assicurandosi che sia ben visibile view.
- Route the rear camera cable to the front camera unit, tucking it neatly along the vehicle's interior trim.
- Connect the rear camera cable to the designated port on the front camera.
3.5. Collegamento elettrico
- Connect the power cable to the front camera's power input port.
- Collegare l'altra estremità del cavo di alimentazione alla presa di corrente da 12 V del veicolo (presa accendisigari).
- La telecamera si accenderà automaticamente e inizierà a registrare quando si accende il motore del veicolo.
4. Istruzioni per l'uso
4.1. Registrazione di base
The REDTIGER F7N Pro automatically starts recording when powered on. It records simultaneously from the front camera (4K UHD, 3840x2160P) and the rear camera (1080P FHD, 1920x1080P), capturing a wide 170° front and 140° rear field of view.

Image 4.1: Illustration of the dash camera's dual recording capability, capturing 4K resolution from the front and 1080P from the rear.
4.2. Registrazione in loop e sensore G
The camera utilizes loop recording, continuously overwriting the oldest files when the memory card is full to ensure uninterrupted recording. The built-in G-sensor detects sudden impacts or collisions. When an event is detected, the current footage is automatically locked and saved to a protected folder, preventing it from being overwritten by loop recording.
4.3. Night Vision Technology
Equipped with a STARVIS 2 image sensor and WDR/HDR technologies, the F7N Pro delivers clear and detailed video even in low-light conditions. The large F1.5 (front) and F1.8 (rear) aperture combination with 6-layer optical lenses enhances light intake, improving clarity and color contrast during nighttime recording.

Image 4.3: Visual representation of the dash camera's advanced night vision capabilities, highlighting the STARVIS 2 sensor, WDR/HDR, and large aperture lenses.
4.4. Monitoraggio del parcheggio 24 ore su 24
The F7N Pro offers 24-hour parking monitoring modes to protect your vehicle when parked. Note: A hardwire kit (ASIN: B09WCTZ3Y8) is required for continuous parking monitoring.
- Modalità sensore G: When the vehicle is parked, the built-in G-sensor automatically triggers a 15-second video recording and locks it if an impact is detected.
- Time-lapse Recording Mode: This mode continuously records at a low frame rate, consuming less power, to monitor the vehicle for potential damage or theft over 24 hours.

Image 4.4: Explanation of the 24-hour parking monitoring feature, illustrating G-sensor mode and time-lapse recording. A hardwire kit is noted as required.
4.5. GPS integrato
The integrated GPS module provides precise location, speed, and route information, which is embedded into the video files. Questi dati possono essere riviewed during playback on the camera or via the REDTIGER APP, offering verifiable evidence in case of an incident.

Image 4.5: Display of the GPS route and speed tracking functionality, showing synchronized location, speed, and date information within video playback.
4.6. Wi-Fi Connectivity and REDTIGER APP
The F7N Pro features built-in 5.8GHz Wi-Fi 6, allowing you to connect your Android or iOS smartphone to the camera via the REDTIGER APP. This enables wireless control, live view, video playback, download, and sharing of recorded footage. The app also supports OTA (Over-The-Air) firmware updates.

Image 4.6: Illustration of the built-in 5.8GHz Wi-Fi 6 and GPS features, demonstrating connectivity with the REDTIGER app for camera settings, playback, download, and GPS route viewing.
5. Manutenzione
5.1. Gestione della scheda di memoria
- Regularly format the memory card (at least once a month) within the camera's settings to ensure optimal performance and prevent data corruption.
- Use high-endurance Class 10 or U3 microSD cards for reliable recording. The camera supports up to 256GB.
5.2. Pulizia
- Utilizzare un panno morbido e asciutto per pulire le lenti e lo schermo della fotocamera. Evitare materiali abrasivi o detergenti chimici.
- Ensure the mounting area is clean and free of debris for secure attachment.
6. Risoluzione Dei Problemi
If you encounter issues with your REDTIGER F7N Pro, please refer to the following common solutions:
- La fotocamera non si accende: Check the power cable connection to both the camera and the vehicle's power outlet. Ensure the vehicle's ignition is on.
- Problemi di registrazione: Format the memory card. Ensure the memory card is inserted correctly and is not full (loop recording should prevent this, but corruption can occur). Try a different compatible memory card.
- Scarsa qualità video: Clean the camera lenses. Ensure the CPL lens is correctly adjusted to reduce glare. Check camera settings for resolution.
- Problemi di connessione Wi-Fi: Ensure Wi-Fi is enabled on the camera and your smartphone. Restart both devices. Reinstall the REDTIGER APP.
- Il GPS non traccia: Assicurarsi che la fotocamera abbia una visuale chiara view of the sky. Allow a few minutes for the GPS signal to acquire.
- Il monitor di parcheggio non funziona: Verify that a hardwire kit is correctly installed and connected. Check parking monitor settings in the camera menu.
7. Specifiche
| Marca | TIGRE ROSSE |
| Nome del modello | F7N Pro |
| Risoluzione video frontale | 4K (3840 x 2160 pixel) |
| Risoluzione video posteriore | 1080P (1920 x 1080 pixel) |
| Sensore di immagine | STELLA VIS 2 |
| Front Field Of View | 170 gradi |
| Rear Field Of View | 140 gradi |
| Tecnologia di connettività | Wi-Fi (5.8GHz Wi-Fi 6) |
| Caratteristiche speciali | Built-In GPS, Built-In Microphone, Compact Design, G-Sensor, Loop Recording, Low Light, Motion Sensing, Night Vision, Parking Assistant, Wide Dynamic Range, Wide-Angle View Lente |
| Componenti inclusi | Memory Card (64GB included, supports up to 256GB) |
| Tipo di montaggio | Supporto per cruscotto |
| Colore | Nero |
8. Garanzia e supporto
For warranty information and technical support, please refer to the official REDTIGER weboppure contatta direttamente il servizio clienti. Conserva la ricevuta d'acquisto come prova d'acquisto.


