1. Introduzione e oltreview
The Telwin Drive 1800 Kompressor is a compact, multi-functional 12V lithium emergency starter designed for various vehicles including motorcycles, cars, campers, marine engines, and vans. This device integrates an air compressor for tire inflation, a power bank for electronic device charging, and a high-intensity LED light. It utilizes high-efficiency LiPo lithium batteries for quick and complete charging, ensuring a compact and lightweight design. This manual provides essential information for the safe and effective use of your device.
2. Informazioni sulla sicurezza
Leggere tutte le avvertenze e le istruzioni di sicurezza prima di utilizzare questo prodotto. La mancata osservanza di queste istruzioni può causare scosse elettriche, incendi e/o lesioni gravi.
- Protezione degli occhi: Indossare sempre una protezione per gli occhi quando si lavora con le batterie.
- Ventilazione: Ensure adequate ventilation when charging or jump-starting to prevent accumulation of explosive gases.
- Acido della batteria: Battery acid is corrosive. If contact occurs, flush immediately with water and seek medical attention.
- Scintille e fiamme: Tenere scintille, fiamme e materiali fumanti lontani dalla batteria e dall'avviatore di emergenza.
- Frozen Batteries: Non tentare mai di avviare una batteria congelata.
- Bambini: Tenere il dispositivo fuori dalla portata dei bambini.
- Sovrainflazione: Do not over-inflate tires or other items. Follow manufacturer's recommended pressure.
- Calore: The compressor and hose may become hot during prolonged use. Allow to cool before handling.
- Ricarica: Use only the provided charging cable. Do not expose the device to rain or wet conditions.
3. Contenuto della confezione
Verificare che tutti gli articoli siano presenti nel pacco:
- Telwin Drive 1800 Kompressor Unit
- Starting Cables (Jump Start Clamps)
- Cavo di ricarica USB-C
- Tubo dell'aria rimovibile
- 3 ugelli di gonfiaggio
- Custodia di stoccaggio

Figure 3.1: Included accessories for the Telwin Drive 1800 Kompressor.
4. Caratteristiche e componenti del prodotto
Familiarize yourself with the main components of your Telwin Drive 1800 Kompressor.

Figura 4.1: Fronte view of the Telwin Drive 1800 Kompressor.

Figura 4.2: Posteriore view with charging and output ports.

Figura 4.3: dettagliata view del pannello di controllo.
- Schermo LCD: Shows inflation modes, pressure readings, and battery status.
- Pulsanti di controllo: Power, mode selection, pressure adjustment (+/-), and LED light activation.
- Porta di avvio rapido: For connecting the jump start cables.
- USB-A Output (OUT: 5V==2.4A): Per caricare dispositivi elettronici.
- USB-C Input (IN: 5V==2A): For charging the Telwin Drive 1800 Kompressor unit.
- Collegamento del tubo dell'aria: For attaching the removable air hose.
- Luce LED: High-intensity light with multiple operating modes.
5. Impostazione
5.1 Carica iniziale
Before first use, fully charge the Telwin Drive 1800 Kompressor. Connect the provided USB-C charging cable to the USB-C input port on the device and to a suitable USB power adapter (not included). The LCD display will indicate charging status. Charging time may vary.
5.2 Collegamento del tubo dell'aria
To use the compressor function, securely screw the removable air hose into the designated port on the device. Ensure a tight connection to prevent air leakage.
6. Istruzioni per l'uso
6.1 Avviamento di emergenza di un veicolo
- Ensure the Telwin Drive 1800 Kompressor is sufficiently charged.
- Spegnere il motore del veicolo e tutti gli accessori.
- Collegare il ROSSO positivo (+) clamp al terminale positivo (+) della batteria del veicolo.
- Collegare il NERO negativo (-) clamp to a metal part of the vehicle's chassis, away from the battery and fuel lines. Do not connect directly to the negative battery terminal unless specified by the vehicle manufacturer.
- Garantire il clampsiano fissati saldamente e non si tocchino tra loro.
- Turn on the Telwin Drive 1800 Kompressor.
- Avviare il veicolo. Se non si avvia immediatamente, attendere 30 secondi e riprovare. Non avviare il motore per più di 3 secondi per tentativo.
- Una volta avviato il veicolo, scollegare immediatamente il NERO negativo (-) clamp prima, poi il ROSSO positivo (+) clamp.

Figure 6.1: Jump starting a vehicle using the Telwin Drive 1800 Kompressor.
6.2 Utilizzo del compressore d'aria
- Ensure the air hose is securely attached to the device.
- Select the appropriate inflation nozzle and attach it to the air hose.
- Connect the nozzle to the item to be inflated (e.g., tire valve).
- Turn on the Telwin Drive 1800 Kompressor.
- Use the mode button to select the desired inflation mode (car, SUV, bicycle, inflatables, custom).
- Use the +/- buttons to set the target pressure. The LCD display will show the current and target pressure.
- Press the power button to start inflation. The compressor will automatically stop when the target pressure is reached.
- Scollegare l'ugello e il tubo dell'aria.
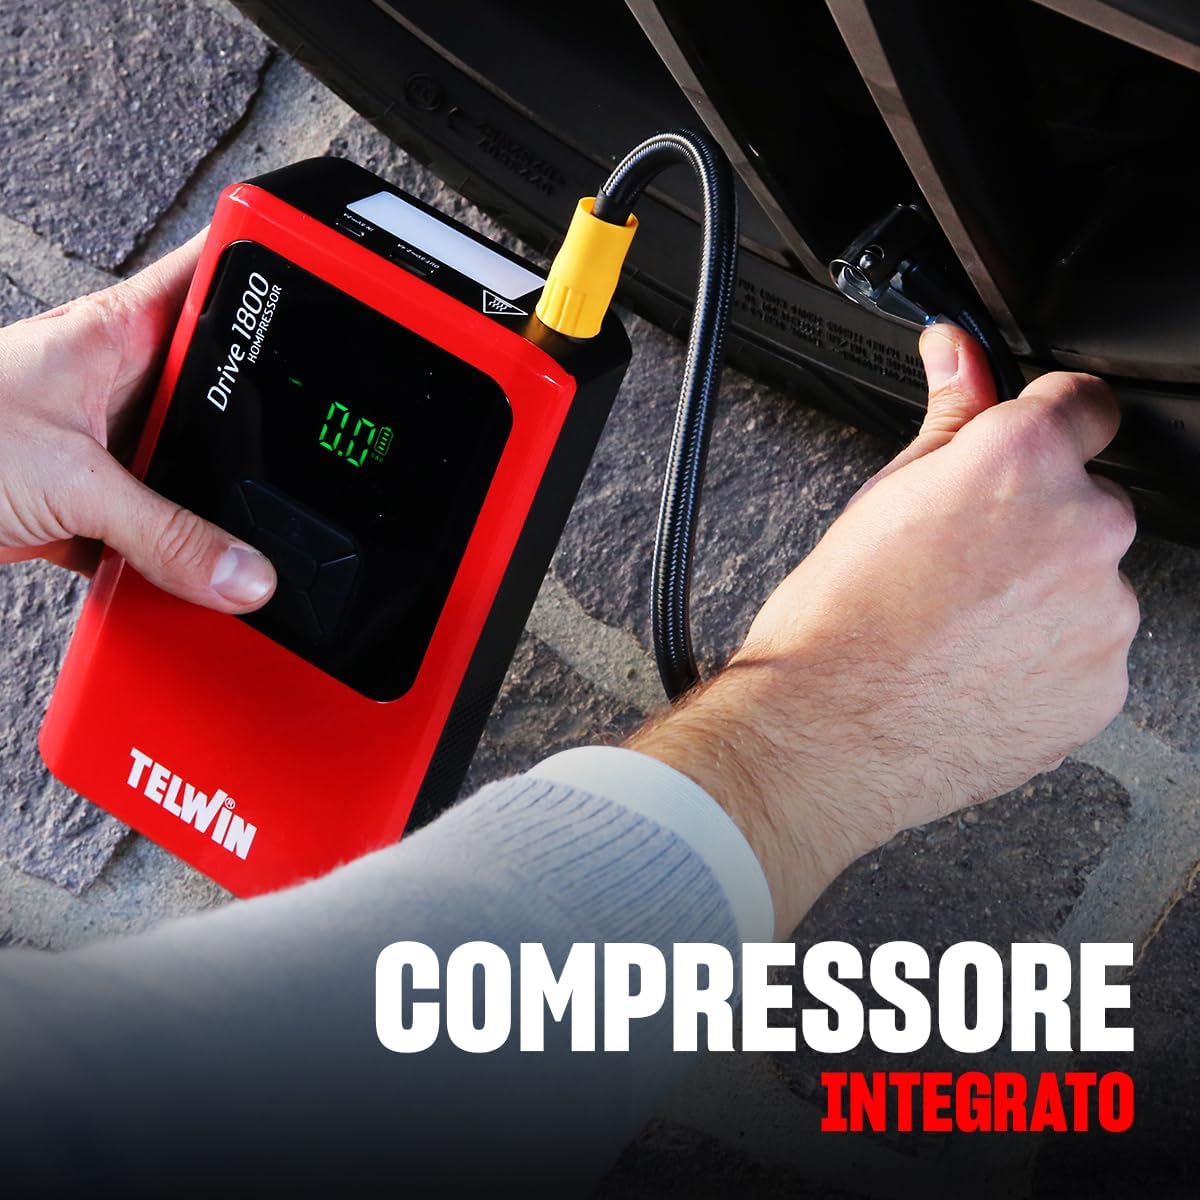
Figure 6.2: Inflating a car tire with the integrated compressor.
6.3 Utilizzo come Power Bank
To charge electronic devices, connect your device's USB charging cable to the USB-A output port (OUT: 5V==2.4A) on the Telwin Drive 1800 Kompressor. The device will automatically begin charging.
6.4 Utilizzo della luce LED
Press the dedicated light button on the control panel to cycle through the LED light modes:
- Luce fissa: Per l'illuminazione generale.
- Luce stroboscopica: Per segnalare o attirare l'attenzione.
- S.O.S. Mode: Flashes the international S.O.S. signal.
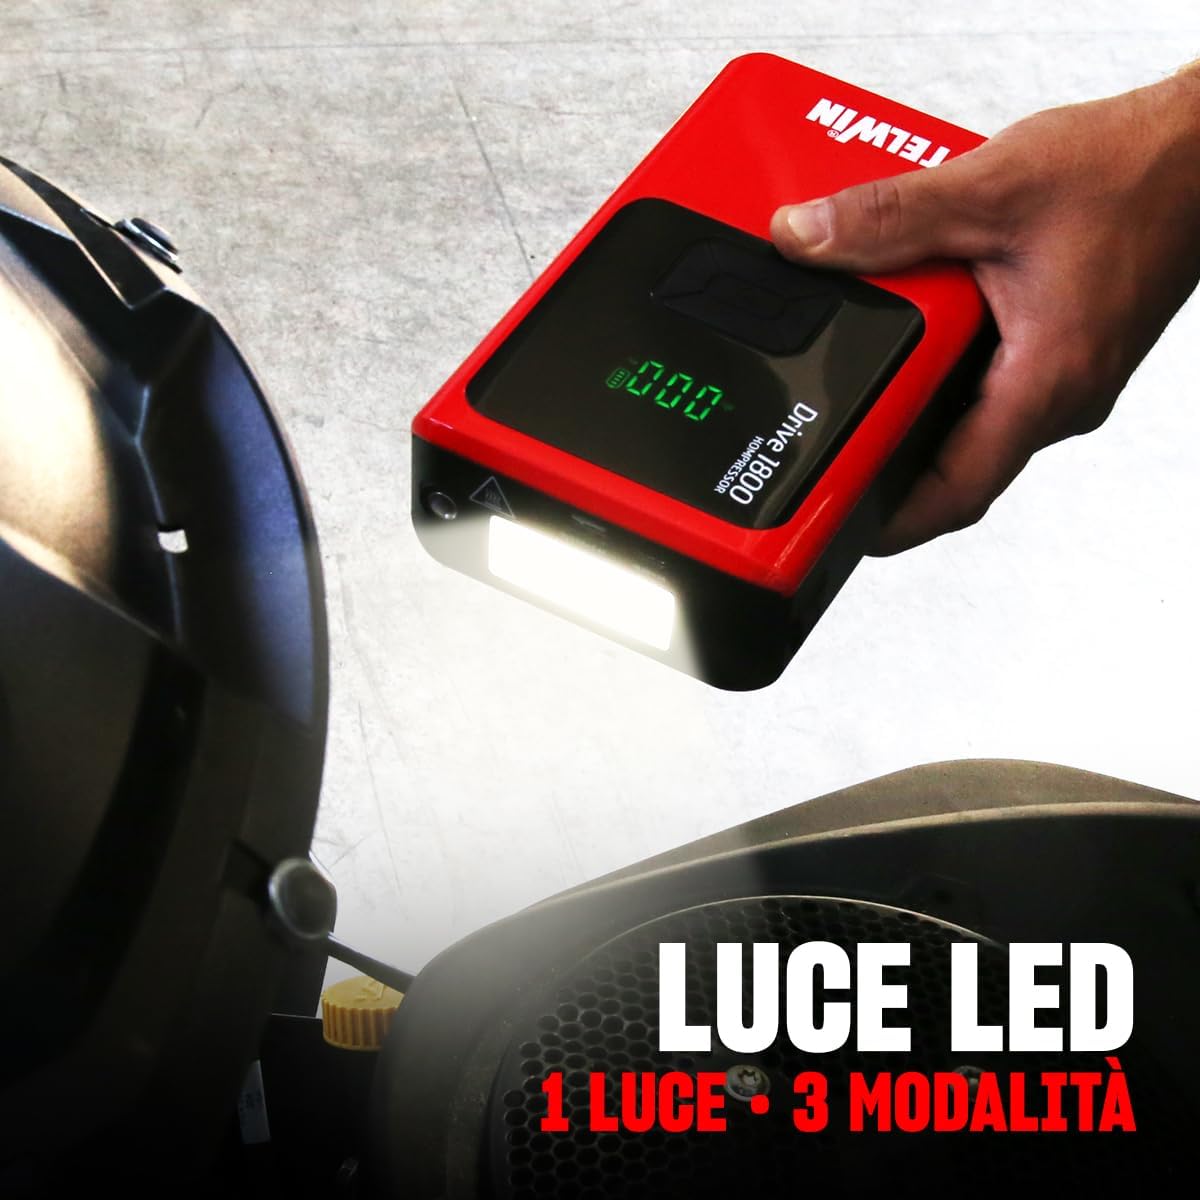
Figure 6.3: The LED light in operation.
7. Manutenzione
- Ricarica: Per una durata ottimale della batteria, ricaricare il dispositivo ogni 3-6 mesi, anche se non lo si utilizza.
- Pulizia: Wipe the exterior with a soft, dry cloth. Do not use harsh chemicals or abrasives.
- Magazzinaggio: Conservare il dispositivo in un luogo fresco e asciutto, lontano dalla luce solare diretta e da temperature estreme. Assicurarsi che sia completamente carico prima di riporlo per un lungo periodo.
- Filtro dell'aria: Periodically check the air intake vents for dust or debris and clean if necessary to maintain compressor efficiency.
8. Risoluzione Dei Problemi
| Problema | Possibile causa | Soluzione |
|---|---|---|
| Il dispositivo non si accende. | La batteria è scarica. | Caricare completamente il dispositivo utilizzando il cavo USB-C. |
| Il veicolo non si avvia con i cavi. | clamp connection; vehicle battery too deeply discharged; device battery too low. | Verificare clamp connections (red to +, black to chassis); ensure device is fully charged; consult vehicle manual. |
| Compressor not inflating. | Air hose not securely attached; nozzle not properly connected; target pressure not set. | Check all connections; ensure nozzle is firmly attached; set target pressure on the display. |
| La luce LED non funziona. | Device battery is depleted; light button not pressed correctly. | Charge the device; press the light button firmly to cycle modes. |
9. Specifiche
- Modello: Drive 1800 Kompressor
- Produttore: Telwin
- Peso dell'articolo: 2 chilogrammi
- Dimensioni della confezione: Dimensioni: 25.8 x 12.7 x 11 cm
- Numero modello: 829575
- Massimo Ampera: 1800 A
- Voltage: 12 Volt
- Composizione della batteria: Lithium-ion (LiPo)
- Compressor Max Pressure: Fino a 3.5 bar
- Uscita USB-A: 5V == 2.4A
- Ingresso USB-C: 5V == 2A
10. Garanzia e supporto
For warranty information and customer support, please refer to the documentation included with your purchase or visit the official Telwin websito. Conservare la prova d'acquisto per eventuali reclami in garanzia.