
1. Introduzione
Grazie per l'acquistoasing the AODK L-Shaped Gaming Desk. This manual provides detailed instructions for the safe assembly, proper operation, and effective maintenance of your new desk. Please read this manual thoroughly before assembly and retain it for future reference.

Image: AODK L-Shaped Gaming Desk in a modern office setting, showcasingrazie al suo design spazioso e al supporto per monitor integrato.
2. Informazioni sulla sicurezza
- Seguire sempre attentamente le istruzioni di montaggio. Un montaggio errato può causare instabilità e potenziali lesioni.
- Assicurarsi che tutte le viti e gli elementi di fissaggio siano ben serrati prima dell'uso. Controllare periodicamente e serrare nuovamente se necessario.
- Non superare la capacità di carico massima di 50 kg (110 libbre) per la scrivania.
- Tenere lontani bambini e animali domestici durante il montaggio. Le parti di piccole dimensioni possono rappresentare un rischio di soffocamento.
- Place the desk on a level surface to prevent wobbling. Use the adjustable feet to stabilize if needed.
- Non esporre la scrivania a umidità eccessiva o alla luce solare diretta, poiché ciò potrebbe danneggiare il materiale.
- When using the integrated power outlets, ensure devices are compatible with the specified voltage and current (2 AC outlets: 100-240V/15A; 2 USB ports: 5V-2A). Do not overload the outlets.
3. Contenuto della confezione
Prima di iniziare il montaggio, verificare che tutti i componenti elencati di seguito siano presenti e integri. Se qualche componente risulta mancante o danneggiato, contattare l'assistenza clienti.
- Pannelli da scrivania (sezioni a L)
- Componenti del supporto per monitor
- Componenti del telaio metallico (gambe, barre di supporto)
- 4 cassetti portaoggetti
- Ciabatta integrata con 2 prese CA e 2 porte USB
- Gancio per cuffie
- Piedini regolabili
- Ferramenta di montaggio (viti, bulloni, dadi)
- Attrezzi di montaggio (chiave inglese, cacciavite)
- Striscia LED RGB con controller
- Manuale di istruzioni

Immagine: Esploso view diagram illustrating all desk components and their respective dimensions for assembly reference.
4. Istruzioni di montaggio
Assembly typically requires two people. Follow the numbered steps in the included assembly guide. All necessary tools are provided.
4.1. Assemblaggio del telaio
- Disimballare tutti i componenti e disporli su una superficie pulita e morbida per evitare graffi.
- Attach the main support beams to the desk legs using the provided hardware. Do not fully tighten screws until all parts are aligned.
- Connect the L-shaped sections of the frame. Ensure the cross-bracing is installed for stability.
- Install the adjustable feet onto the bottom of each leg.
4.2. Desktop and Storage Installation
- Carefully place the desktop panels onto the assembled frame. Secure them with the designated screws.
- Assemble the four storage drawers according to their specific instructions. The drawer unit can be installed on either the left or right side of the desk to suit your preference.
- Install the open shelving units into their designated positions.
- Attach the PC tower stand and the headphone hook as shown in the diagram.
4.3. Monitor Stand and Electrical Components
- Assemble the monitor stand. It is designed for 3-stage height adjustment (9cm, 12cm, 15cm). Choose your desired height during assembly.
- Mount the integrated power strip onto the designated area of the desk.
- Attach the RGB LED strip to the underside of the monitor stand or desktop edge as desired. Connect it to the power source.
- Una volta che tutti i componenti sono al loro posto, serrare completamente tutte le viti e gli elementi di fissaggio.

Image: The desk fully assembled, highlighting the PC tower stand, headphone hook, and integrated storage options.
5. Istruzioni per l'uso
5.1. Prese di corrente integrate
The desk is equipped with a built-in power strip for convenience:
- 2 prese CA: Provides 100-240V/15A power for your computer, monitor, and other AC-powered devices.
- 2 porte USB: Provides 5V-2A power for charging smartphones, tablets, and other USB-powered accessories.
To use, simply plug the desk's main power cord into a wall outlet, then connect your devices to the integrated outlets.

Immagine: Dettaglio view of the desk's integrated power outlets and USB ports, along with the RGB LED lighting.
5.2. Illuminazione LED RGB
The integrated RGB LED strip offers customizable lighting to enhance your environment:
- Modalità di illuminazione: Features 10 different illumination modes.
- Regolazione del colore: Offers 10 color adjustment modes.
- Funzione di memoria: The LED system remembers your last selected mode when powered off and on.
Use the inline controller to cycle through modes and adjust colors. Refer to the controller's specific markings for function identification.
5.3. Supporto per monitor regolabile
The monitor stand can be adjusted to three different heights to promote ergonomic posture and reduce strain on your neck and shoulders:
- Opzioni altezza: 9 cm, 12 cm e 15 cm.
Adjust the height during assembly or by carefully re-positioning the stand according to the assembly instructions. Ensure monitors are stable after adjustment.
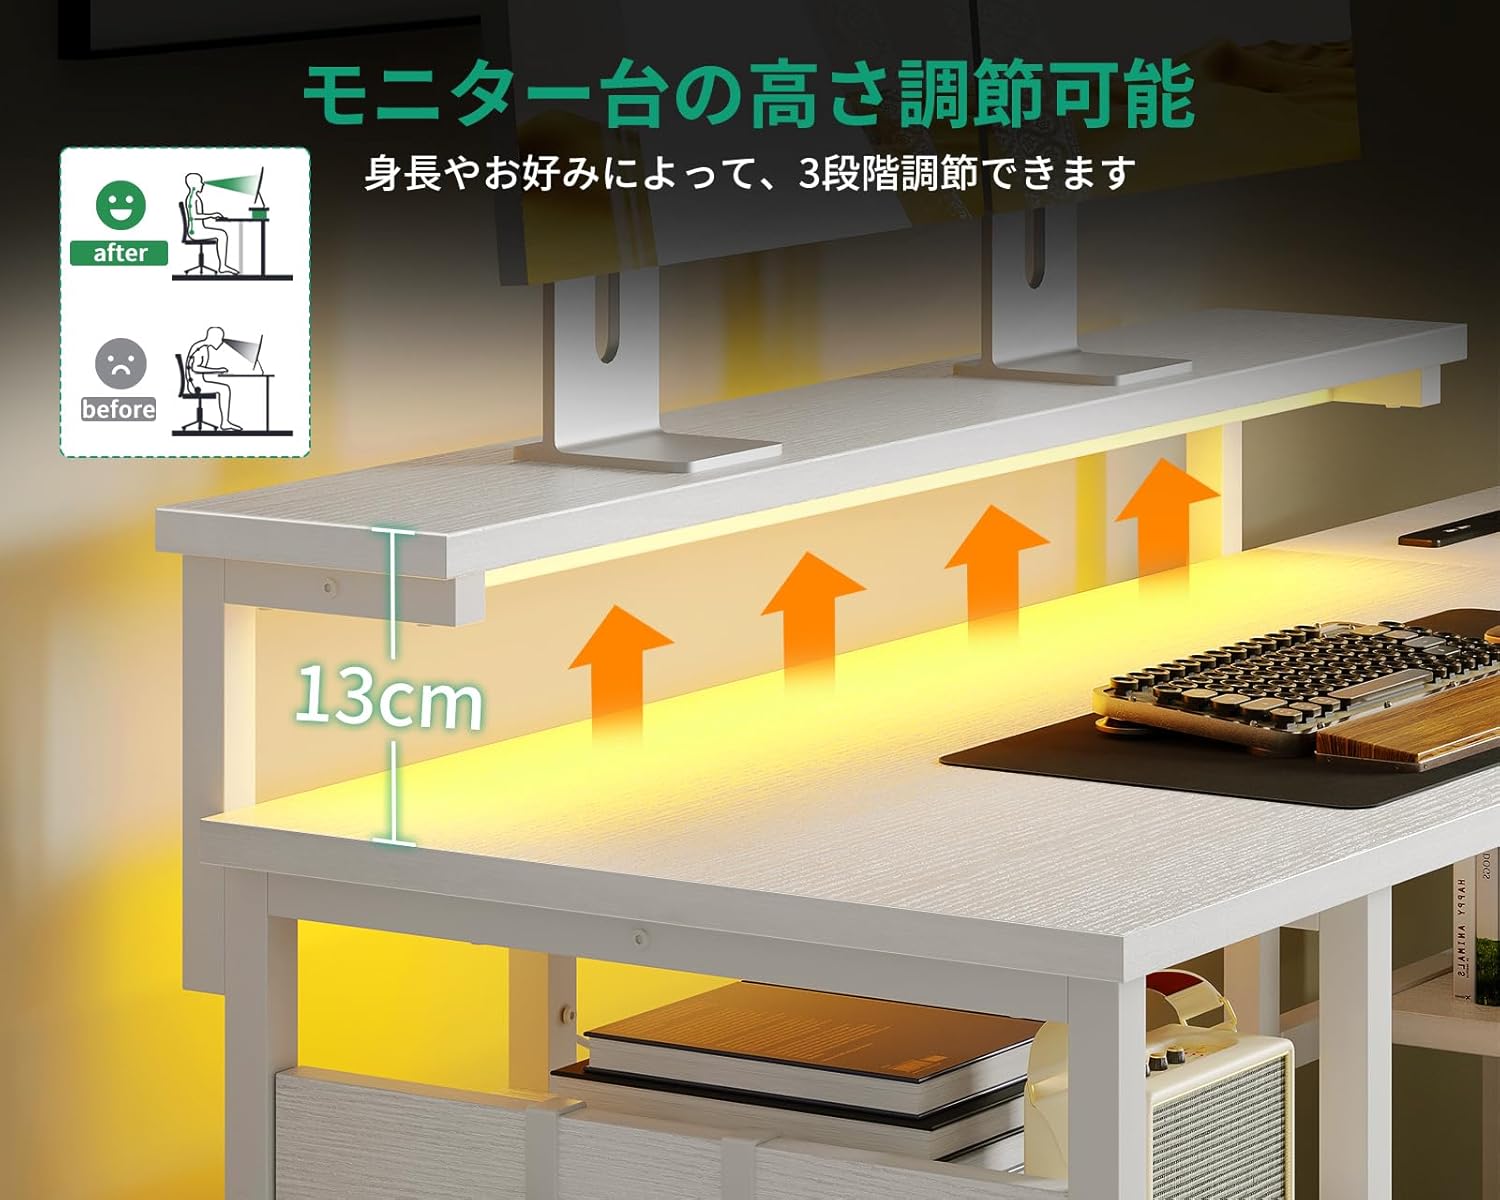
Image: Visual representation of the monitor stand's three adjustable height settings, designed to improve user posture.
5.4. Caratteristiche di archiviazione
The desk is designed with multiple storage solutions:
- 4 Cassetti portaoggetti: Provides enclosed storage for documents, supplies, and personal items. The drawer unit is reversible and can be installed on either side.
- Scaffali aperti: Ideale per libri, raccoglitori o oggetti decorativi.
- Supporto per torre PC: A dedicated space for your computer tower, keeping it off the floor and improving airflow.
- Gancio per cuffie: Conveniently located for hanging headphones, keeping your desktop clear.

Image: The desk's storage areas, including drawers and shelves, are highlighted to show their capacity and organization potential.
6. Manutenzione
- Pulizia: Pulisci le superfici della scrivania con un panno morbido eamp cloth. Avoid abrasive cleaners or harsh chemicals, as these can damage the melamine finish.
- Fuoriuscite: Asciugare immediatamente eventuali fuoriuscite per evitare danni o macchie causati dall'acqua. La superficie in melamina è resistente all'acqua ma non impermeabile.
- Elementi di fissaggio: Controllare periodicamente tutte le viti e i bulloni per assicurarsi che siano ben serrati. Serrarli nuovamente se necessario per mantenere la stabilità.
- Componenti elettrici: Ensure the power cord and integrated outlets are free from damage. Do not attempt to repair electrical components yourself.
7. Risoluzione Dei Problemi
7.1. La scrivania è traballante
- Controllare i dispositivi di fissaggio: Assicurarsi che tutte le viti e i bulloni siano ben serrati.
- Superficie piana: Verify the desk is on a flat, level floor.
- Piedini regolabili: Use the adjustable feet at the bottom of the legs to compensate for uneven flooring.
7.2. Le luci LED non funzionano
- Collegamento elettrico: Ensure the LED strip is properly connected to its power source and the desk's main power cord is plugged into a functional wall outlet.
- Controllo del controller: Verify the LED controller is not damaged and is set to an active mode.
7.3. Power Outlets Not Functioning
- Potere principale: Verificare che il cavo di alimentazione principale della scrivania sia collegato saldamente a una presa a muro funzionante.
- Compatibilità del dispositivo: Ensure the connected device is compatible with the outlet's voltage e le specifiche attuali.
- Sovraccarico: Check if the outlets are overloaded. Disconnect some devices and try again.
8. Specifiche
| Marca | AODK |
| Numero di modello | OKTB02020801002JP |
| Forma | A forma di L |
| Tipo di scrivania | Scrivania per computer, scrivania con ripiani |
| Dimensioni del prodotto (P x L x A) | Dimensioni: 110 cm x 135 cm x 76 cm |
| Colore | Bianco |
| Materiale | Melamine Faced Particle Board, Metal Frame |
| Tipo di finitura | Powder Coated (Frame) |
| Caratteristiche speciali | Built-in USB & AC Power Outlets, RGB LED Lighting, Adjustable Monitor Stand, 4 Storage Drawers, Headphone Hook, PC Tower Stand |
| Numero di cassetti | 4 |
| Capacità di carico massima | 50 kg (Desktop) |
| Assemblaggio richiesto | Yes (Assembly tools and instructions included) |
| Specifiche della presa di corrente | 2 prese CA (100-240 V/15 A), 2 porte USB (5 V-2 A) |
9. Garanzia e supporto
This AODK L-Shaped Gaming Desk comes with a limited warranty. Please refer to the warranty card included in your package for specific terms and conditions.
For technical assistance, missing parts, or any other inquiries, please contact AODK customer support through the retailer where you purchased the product. Please have your model number (OKTB02020801002JP) and purchase date ready when contacting support.

