1. Prodotto finitoview e compatibilità
This manual provides instructions for the Uckazy 12.3-inch Car Radio, designed specifically for BMW 2 Series F45 models manufactured between 2012 and 2015, equipped with the original NBT system. It features an ultra-narrow 12.3-inch HD (1920x720) IN-CELL screen with full lamination technology for enhanced display clarity and reduced reflection.
The device operates on a dual system, allowing a one-click switch between the Linux system and the original car system. It retains all original car functions, including radio, amplifier, steering wheel controls, iDrive controller, speed display, fuel level, oil pressure, safety warnings, and original reverse camera functionality. No software modifications are made to the vehicle's control unit.
1.1. Controllo di compatibilità
Before installation, ensure your vehicle has the NBT system. The device is compatible with BMW 2 Series F45 models from 2012-2015. If you are uncertain about your car's system, please consult a professional or the manufacturer.

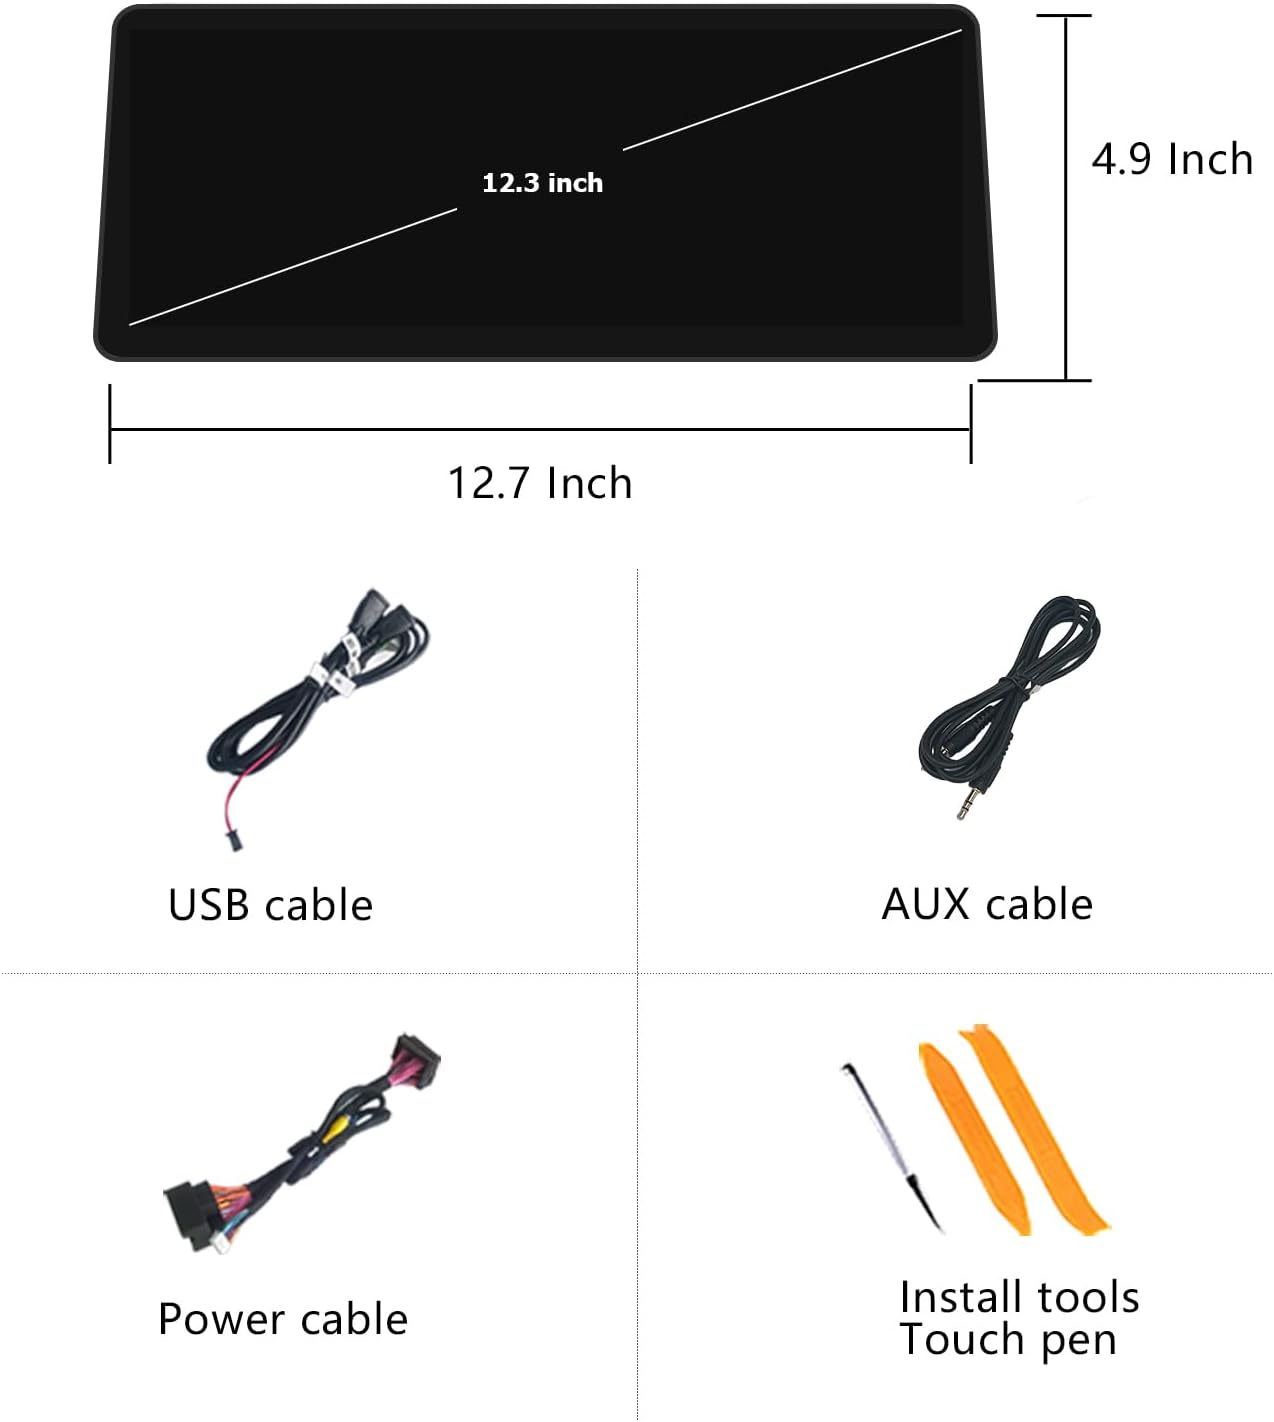
2. Cosa c'è nella scatola
Disimballare con attenzione la scatola e assicurarsi che siano presenti tutti gli articoli:
- Ultra narrow 12.3-inch in-cell display screen
- Plug and play power cable
- Cavo USB/AUX/RCA
- Telaio
- Strumenti di installazione e penna touch

3. Configurazione e installazione
Si consiglia l'installazione da parte di un professionista. Assicurarsi che il veicolo sia spento prima di iniziare l'installazione.
3.1. Wiring Definition and Linking
Refer to the provided wiring diagram to correctly link the car machine system according to the wire definitions. Carefully review and accurately connect all wires.
- A: 360-DET
- B: CONTO USCITA
- C: Rear-Camera-PWR
- D: Terra

3.2. Fiber Optic Cable Transfer
If your original car system uses fiber optic cables for audio, you must transfer them to the new system's harness to ensure sound functionality.
- Locate the 2P fiber optic harness from the original car CD unit.
- Unplug the fiber optic cables from the original harness.
- Insert these fiber optic cables into the designated slots on the Linux system harness.
3.1 video: How to transfer fiber optic cables. This video demonstrates the process of transferring fiber optic cables from the original car harness to the new system's harness to ensure proper audio output.
3.3. Collegamento del cavo di alimentazione
Connect the new power cable to the original car's power cable. Ensure a secure connection to the correct interface.
3.2 video: Prodotto finitoview for Linux System 12.3 inch Screen. This video provides a general overview of the product and its features, including the power cable connection.
3.4. AUX Input Setup
To ensure proper audio output from the new system, the car's original AUX input must be enabled and configured.
- Plug in the stock AUX cable (located in the manual gear position or passenger side storage box).
- Go to the system settings and turn off the AUX auto-switching setting.
- In the new system's settings, navigate to Setup > Car Settings > Auto Switch to AUX and select either "Harman Head Unit" or "Alpine Head Unit" based on your car's audio system.
- For manual AUX setting, go to the original car system's main menu, select "Multimedia," then "External devices." Long press the number key "8" until you hear a tone, then press "8" every time before entering the new system to get CarPlay sound.

3.5. Connessione cablata CarPlay/Android Auto
For wired CarPlay or Android Auto functionality, use USB1 for data link. USB2 is for read storage link only.

4. Istruzioni per l'uso
4.1. Commutazione del sistema doppio
The device supports one-click switching between the Linux system and the original car system. This allows you to retain all original car functionalities while benefiting from the new system's features.

4.2. CarPlay wireless e Android Auto
The system supports wireless (and wired) Apple CarPlay and Android Auto. You can access navigation, phone contacts, email, notifications, music, and more through voice commands (Siri or Google Voice Assistant).
- Ensure the LVDS and power cord are connected on the machine before wireless connection.
- First, turn on Bluetooth on your phone and the car radio.
- Find the Bluetooth connection of the screen (e.g., CAR-BT-7B:0) and pair your phone.
- If prompted, open Siri voice on your iPhone.
- Once connected, CarPlay or Android Auto will launch, providing access to various functions like navigation, music, and messages.
4.1 video: Product Display Operating System. This video demonstrates the operating system interface and various functions, including CarPlay connection.
4.3. Impostazioni display
Regola le impostazioni di visualizzazione in modo ottimale viewesperienza di acquisizione.
- Risoluzione OEM: To set the correct resolution for OEM displays, navigate to Impostazioni > Impostazioni auto > Risoluzione schermo auto originale and select the appropriate resolution (e.g., 800x480). Incorrect resolution may prevent OEM car information from displaying correctly.
- Tipo di telecamera: For reversing cameras, go to Setup > Car Settings > Reversing Settings > Camera Type and select "Original" or "Aftermarket" as applicable.
- Modalità giorno e notte: The system features automatic light sensitivity, adjusting day and night modes based on your car's original headlights.


4.4. Impostazioni audio (DSP)
The built-in DSP (Digital Signal Processor) with 16 EQ segments allows for detailed audio tuning. You can use EQ presets or customize settings to enhance the overall sound quality and adjust speaker positioning to your preference.
5 Caratteristiche
- Ultra Narrow 12.3-inch IN-CELL Screen: HD 1920x720 resolution with full lamination technology for a clearer, more transparent display and 75% reflection reduction.
- Connettività wireless e cablata: Supports Apple CarPlay, Android Auto, MirrorLink for iOS and Android phones, Bluetooth, and Wi-Fi.
- Controllo vocale: Use Siri or Google Voice Assistant for hands-free operation of navigation, calls, messages, and music.
- DSP integrato: 16 EQ segments for advanced audio customization.
- Mantenimento del sistema originale dell'auto: Mantiene l'autoradio originale, amplifier, steering wheel controls, iDrive knob, and safety features.


6. Risoluzione Dei Problemi
If you encounter problems such as installation difficulties, sound issues, CarPlay not displaying, or the original car UI not appearing, please contact customer support. Many issues can be resolved with proper guidance.
Problemi comuni:
- Nessun suono: Ensure the fiber optic cables are correctly transferred and the AUX input is properly configured (see Section 3.2 and 3.4).
- CarPlay/Android Auto non si connette: Verify Bluetooth pairing and ensure Siri is enabled on iOS devices. Check USB connection for wired mode (use USB1).
- Interfaccia utente originale dell'auto non visualizzata: Check OEM resolution settings (see Section 4.3).
- Screen Blur/Visual Obstruction: Ensure the correct screen resolution is selected and that the unit is properly installed without physical obstructions. The Uckazy screen is designed for a larger field of view compared to older models.

7. Specifiche
| Caratteristica | Specificazione |
|---|---|
| Dimensioni dello schermo | 12.3 pollici |
| Risoluzione | Risoluzione: 1920 x 720 (alta definizione) |
| Tecnologia di visualizzazione | IN-CELL, Full Lamination |
| Sistema operativo | Linux |
| Connettività | Wireless/Wired Apple CarPlay, Wireless/Wired Android Auto, MirrorLink, Bluetooth, Wi-Fi |
| Elaborazione audio | Built-in DSP with 16 EQ segments |
| Metodo di controllo | Touch, Voice (Siri/Google Assistant) |
| Dispositivi compatibili | Smartphone |
| Dimensioni del pacco | 15.16 x 7.17 x 6.85 pollici |
| Peso dell'articolo | 3.32 libbre |
| Produttore | Uckazy |
| Data prima disponibilità | 10 gennaio 2025 |
8. Garanzia e supporto
For technical assistance, installation queries, or troubleshooting, please contact Uckazy customer support. Many issues can be resolved quickly with expert guidance.
The product is sold by Uckzay Factory Outlet and fulfilled by Amazon. Please refer to Amazon's return policy for details on returns and replacements.
You can find more information and contact the seller through the Uckazy Store on Amazon.