1. Introduzione
Thank you for choosing the Bear Baby Bottle Warmer Y-H12-H5M7. This device is designed to simplify feeding routines by providing multiple functions for warming milk, formula, and baby food. Please read this manual thoroughly before use to ensure proper operation and safety.
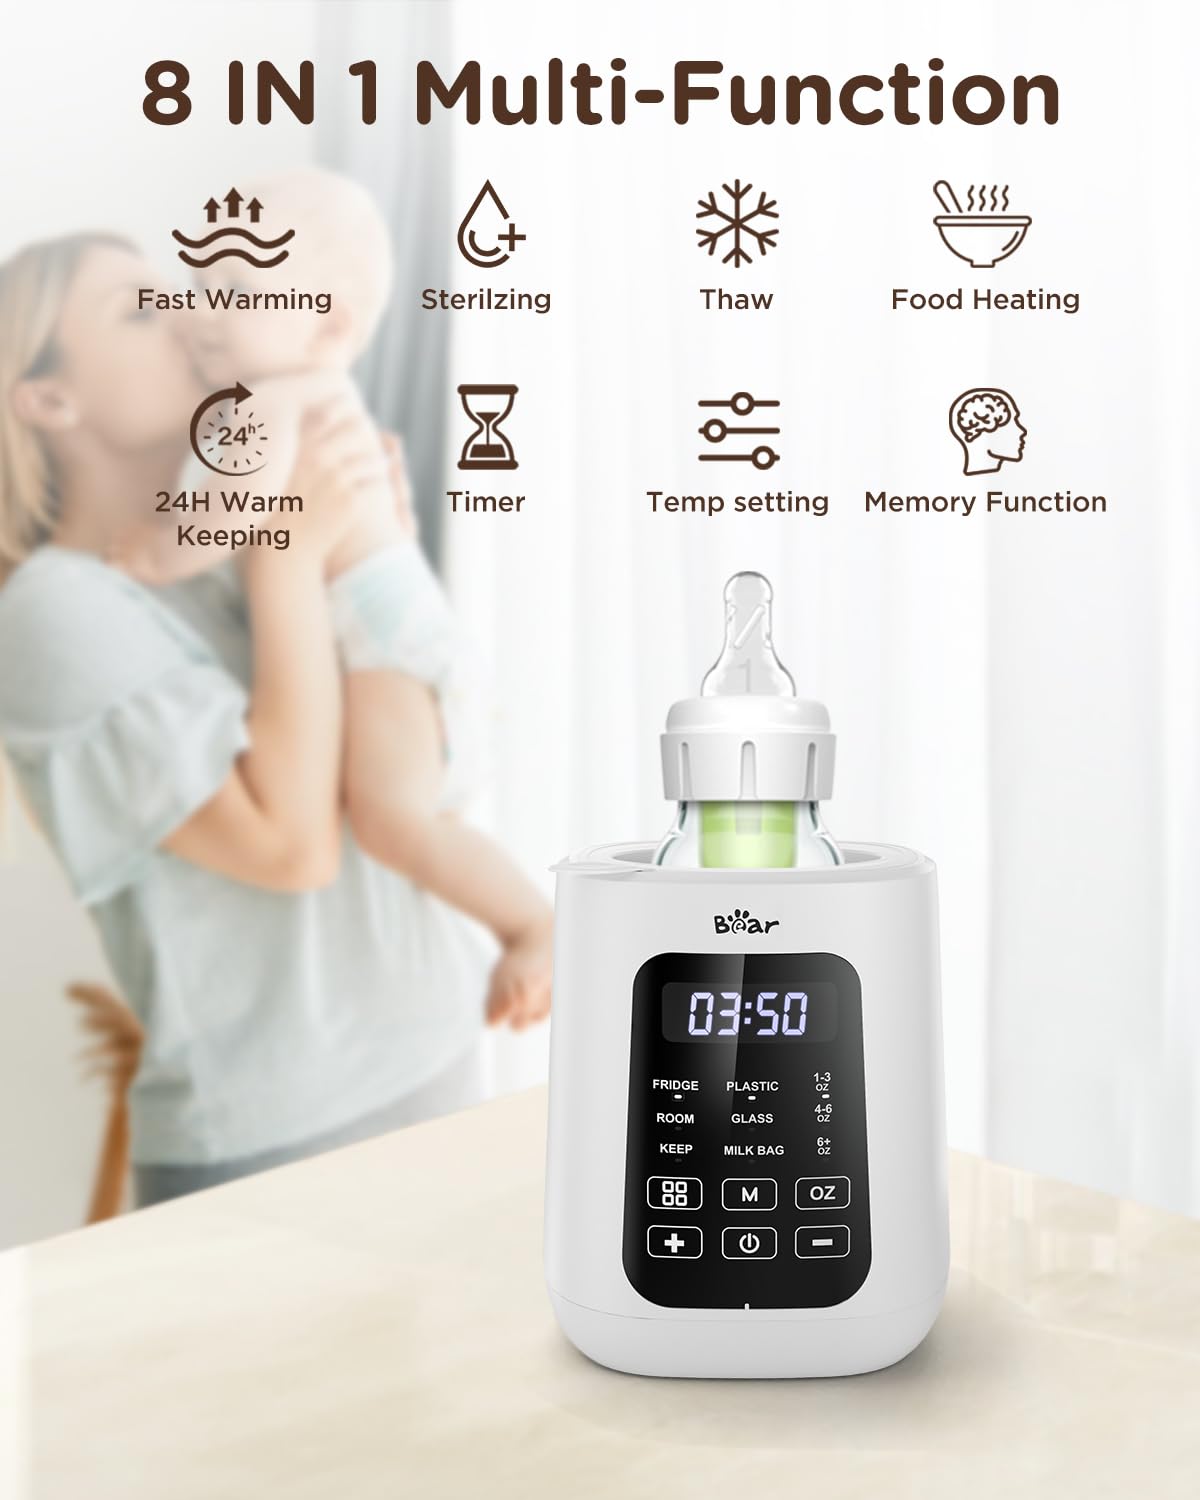
Image 1.1: The Bear Baby Bottle Warmer highlighting its 8-in-1 multi-function capabilities, including fast warming, sterilizing, thawing, food heating, 24-hour warm keeping, timer, temperature setting, and memory function.
2. Informazioni sulla sicurezza
Per evitare lesioni o danni, seguire sempre queste precauzioni di sicurezza di base:
- Non immergere l'unità, il cavo o la spina in acqua o altri liquidi.
- Supervisionare sempre il dispositivo durante l'uso, soprattutto in presenza di bambini.
- Assicurare il volumetagLa tensione specificata sull'apparecchio corrisponde alla tensione di alimentazione locale.
- Scollegare l'apparecchio quando non è in uso e prima di pulirlo.
- Non utilizzare alcun apparecchio con cavo o spina danneggiati.
- This bottle warmer requires a power outlet and is not wireless or battery-operated.
The Bear Baby Bottle Warmer includes safety features:
- Anti-dry Burning Protection: The unit is designed to prevent operation without sufficient water, reducing the risk of damage.
- Spegnimento automatico: The device will automatically turn off after completing a warming cycle or if it detects an issue, preventing overheating.
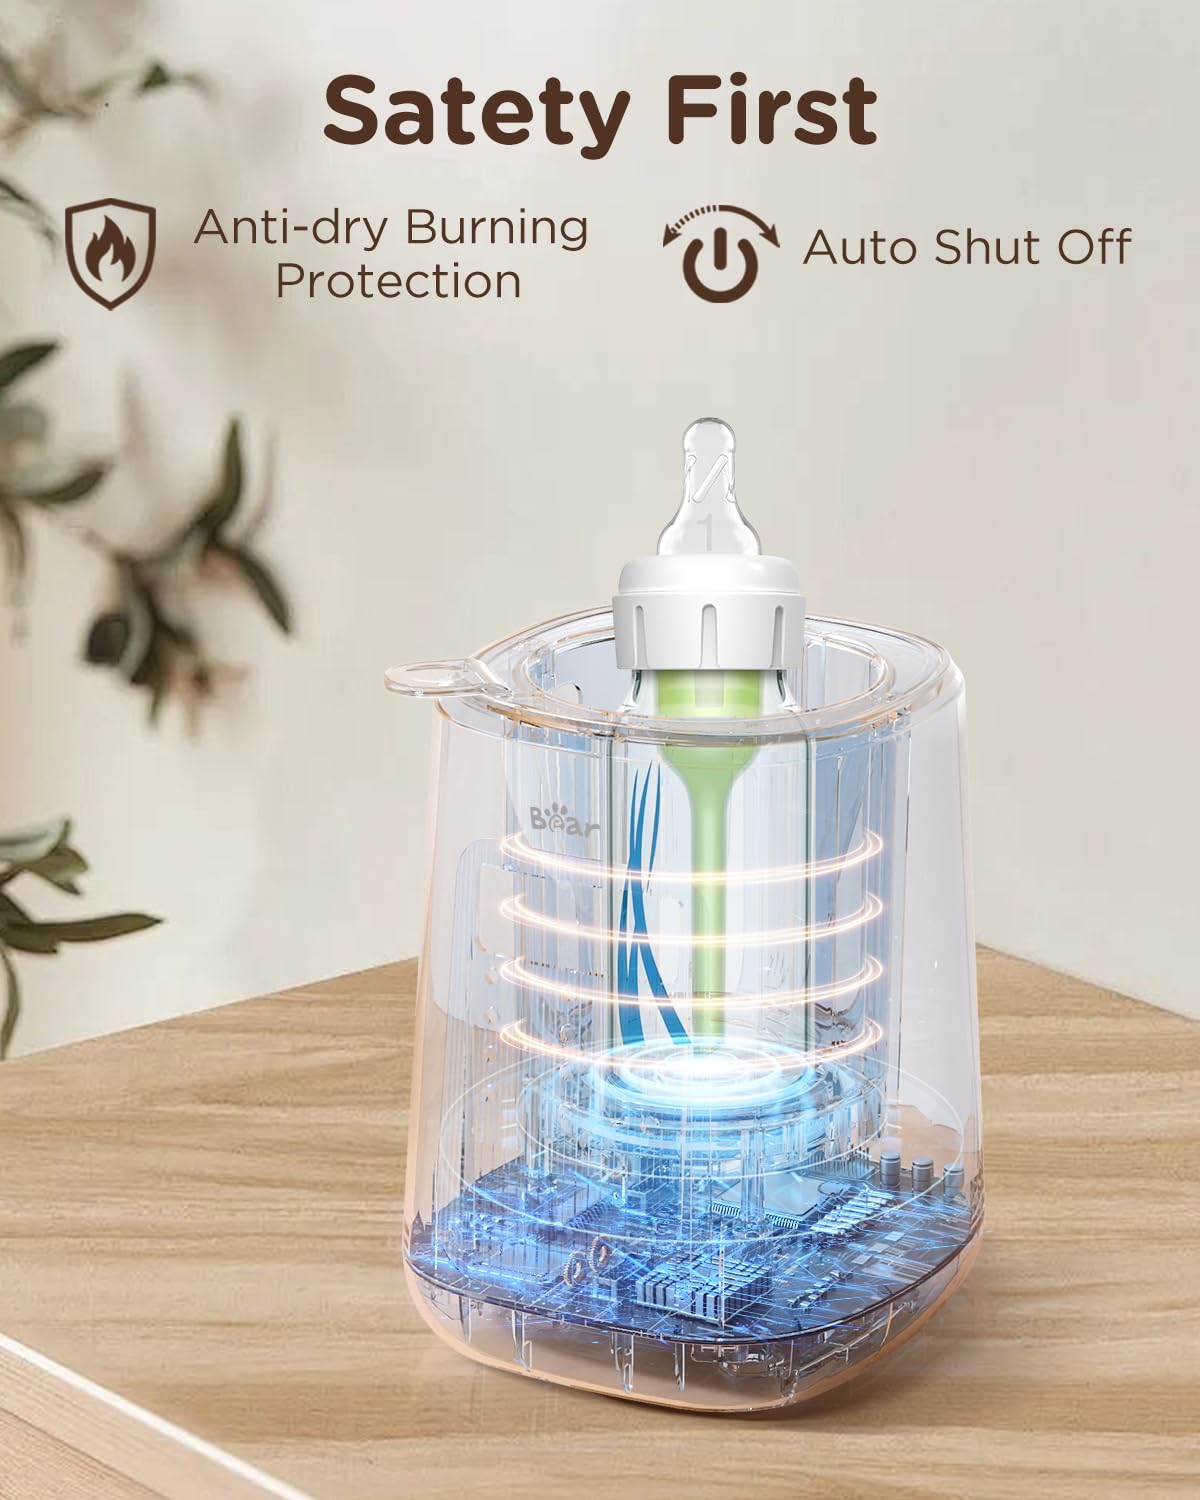
Image 2.1: An illustration of the internal components of the bottle warmer, emphasizing the anti-dry burning protection and automatic shut-off mechanisms for user safety.
3. Prodotto finitoview
3.1 Componenti
- Unità principale di riscaldamento
- Bottle Lifting Basket
- Coperchio
3.2 Pannello di controllo
The control panel features a digital display and touch buttons for various functions:
- Schermo di visualizzazione: Shows time, temperature, and selected modes.
- Pulsante di accensione: Accende/spegne l'unità.
- Pulsante Modalità (M): Selects warming modes (e.g., Fridge, Room, Keep Warm, Milk Bag).
- Material Button: Selects bottle material (Plastic, Glass).
- Capacity Button (OZ): Selects milk volume (1-3 oz, 4-6 oz, 6+ oz).
- +/- Pulsanti: Regola le impostazioni di tempo o temperatura.

Image 3.1: The Bear Baby Bottle Warmer, illustrating its compact design, digital display, and intuitive control buttons for easy operation.
3.3 Compatibilità
The warmer is designed to fit most baby bottles, breastmilk bags, and baby food jars. It accommodates various bottle materials including glass, plastic, and silicone.

Image 3.2: The bottle warmer displayed alongside different sizes and types of baby bottles, breastmilk storage bags, and baby food jars, highlighting its universal fit.
4. Impostazione
- Disimballare: Rimuovere tutto il materiale di imballaggio e assicurarsi che tutti i componenti siano presenti.
- Pulito: Prima del primo utilizzo, pulire l'esterno dello scaldavivande con un panno umido.amp cloth. Wash the bottle lifting basket and lid with warm soapy water, then rinse thoroughly.
- Posizionamento: Place the warmer on a stable, flat, heat-resistant surface, away from direct sunlight or heat sources.
- Aggiungere acqua: Pour clean water into the warming chamber. The water level should be between the MIN and MAX marks, or sufficient to cover the milk level in the bottle.
- Connetti alimentazione: Collegare il cavo di alimentazione a una presa elettrica idonea.
5. Istruzioni per l'uso
5.1 Funzionamento generale
- Place the bottle or food jar into the lifting basket, then lower it into the warming chamber.
- Premere il pulsante di accensione per accendere l'unità.
- Select the desired function using the Mode (M), Material, and Capacity (OZ) buttons.
- Adjust the time or temperature using the +/- buttons if needed.
- The unit will begin the warming process.
- Once complete, the unit will beep and/or automatically shut off. Carefully remove the bottle using the lifting basket.
- Always test the temperature of the milk or food before feeding by placing a few drops on your wrist.
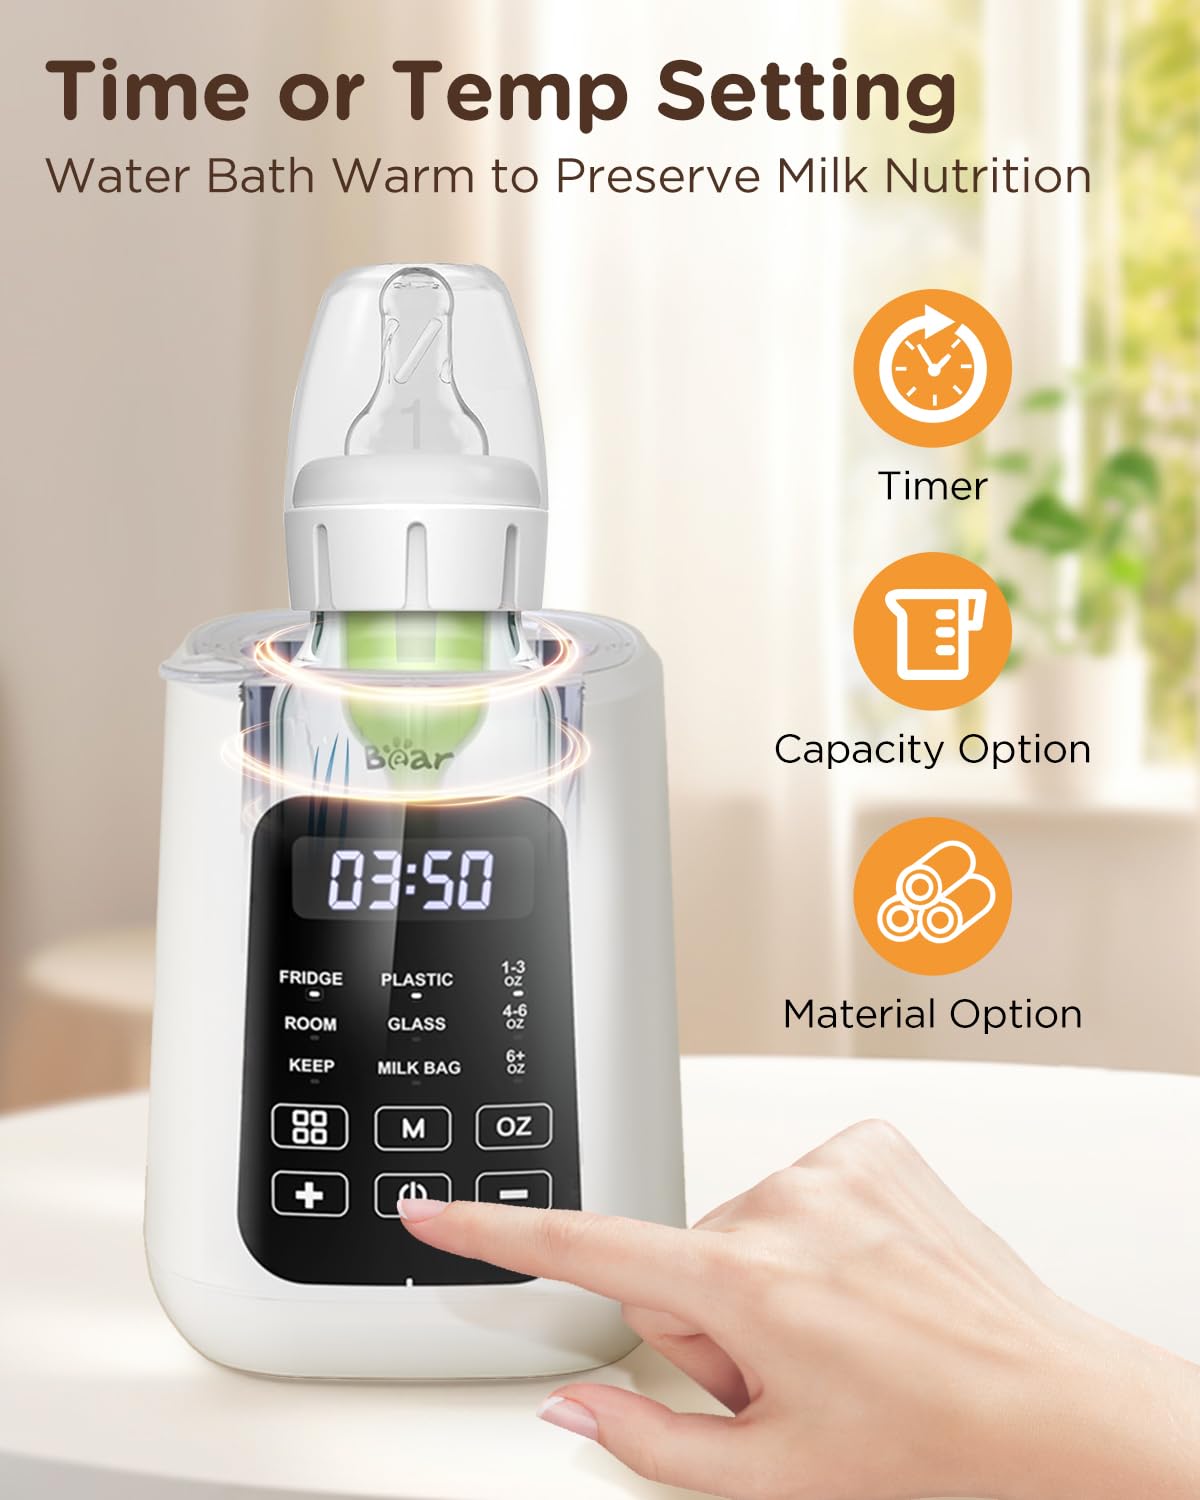
Image 5.1: Close-up of the bottle warmer's control panel, illustrating the various buttons for setting time, temperature, bottle material, and milk volume.
5.2 Riscaldamento rapido
This mode quickly warms milk or formula to feeding temperature, typically within 3 minutes, depending on volume and initial temperature.
- Select the 'Fridge' or 'Room' mode based on the milk's initial temperature.
- Choose the bottle material (Plastic/Glass) and milk volume (1-3 oz, 4-6 oz, 6+ oz).
- The unit will automatically set a recommended warming time. You can adjust this manually using the +/- buttons.

Image 5.2: The bottle warmer in action, demonstrating the fast warming process with an internal view of the heating mechanism and a visual indicator for 3-minute warming.
5.3 24H Keep Warm
This function maintains milk at a consistent, pre-set temperature for up to 24 hours, ideal for bedside feeding.
- Selezionare la modalità "Mantieni caldo".
- Adjust the desired target temperature using the +/- buttons.
- The warmer will heat the milk to the set temperature and maintain it.
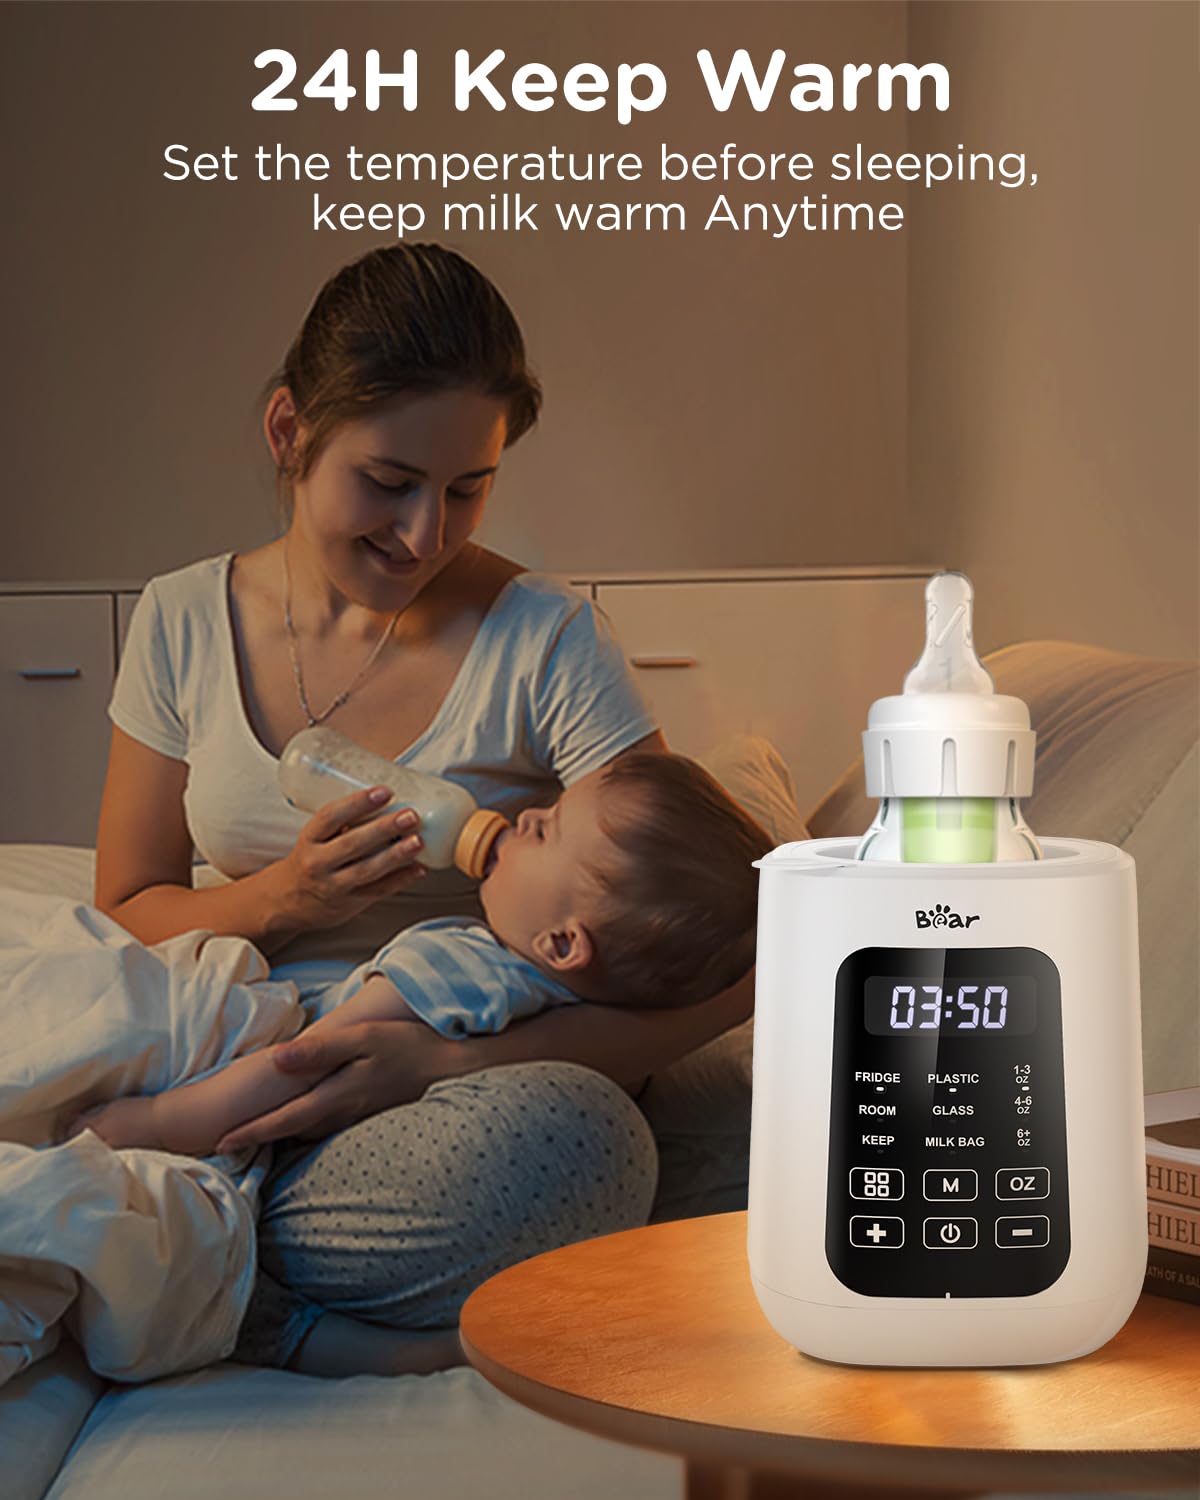
Image 5.3: The bottle warmer positioned on a bedside table, depicting its utility for maintaining milk warmth for 24 hours, facilitating convenient night feedings.
5.4 Scongelamento
Gently thaws frozen breast milk bags or formula using a water bath, preserving nutrients.
- Select the 'Milk Bag' mode.
- Place the frozen breast milk bag into the warming chamber.
- The unit will thaw the milk at a safe, controlled temperature.
5.5 Riscaldamento degli alimenti
Heats baby food jars to an ideal temperature.
- Place the baby food jar into the warming chamber.
- Select the appropriate mode for food heating (refer to display for specific icon/text).
- Adjust time/temperature as needed.
5.6 Sterilizzazione
This function can be used for sterilizing small items like pacifiers or bottle nipples.
- Place the items to be sterilized into the lifting basket.
- Add water to the chamber, ensuring it covers the items.
- Select the 'Sterilize' mode (refer to display for specific icon/text).
6. Manutenzione e pulizia
6.1 Pulizia giornaliera
- Scollegare lo scaldavivande e lasciarlo raffreddare completamente.
- Empty any remaining water from the warming chamber.
- Pulisci l'interno e l'esterno dell'unità con l'adamp panno. Non usare detergenti abrasivi.
- Wash the lifting basket and lid with warm soapy water and rinse thoroughly.
6.2 Decalcificazione
Mineral deposits (limescale) can build up in the warming chamber over time. Descale regularly to maintain efficiency.
- Mescolare 60 ml di aceto bianco con 120 ml di acqua fredda.
- Versare la soluzione nella camera di riscaldamento.
- Turn on the warmer and select a warming cycle (e.g., 'Room' mode for 10-15 minutes) without a bottle inside.
- After the cycle, unplug the unit and let it cool.
- Empty the solution and rinse the chamber thoroughly with clean water several times.
7. Risoluzione Dei Problemi
| Problema | Possibile causa | Soluzione |
|---|---|---|
| Lo scaldabagno non si accende. | Nessuna alimentazione, spina allentata. | Controllare il collegamento elettrico, provare una presa diversa. |
| Milk not warming. | Insufficient water, incorrect settings. | Ensure water level is correct. Verify mode, material, and volume settings. |
| Milk too hot/cold. | Incorrect time/temperature setting. | Adjust time/temperature using +/- buttons. Always test milk temperature before feeding. |
| L'unità visualizza un codice di errore. | Malfunzionamento interno. | Scollegare l'unità, attendere 5 minuti, quindi ricollegarla. Se l'errore persiste, contattare l'assistenza clienti. |
Se riscontri problemi non elencati qui, contatta l'assistenza clienti per ricevere assistenza.
8. Specifiche
- Modello: Y-H12-H5M7
- Dimensioni del prodotto: 4.53 x 4.53 x 6.5 pollici
- Composizione del materiale: Plastica
- Peso dell'articolo: 1.43 libbre
- Istruzioni per la cura: Lavare a mano
- Caratteristiche aggiuntive: 24H Keep Warm, 8-in-1 Fast Bottle Warming, Adjustable Temperature Control and Timer, Automatic Shut Off, Universal Fit for All Bottles.
9. Garanzia e supporto
For warranty information or technical support, please refer to the product packaging or contact Bear customer service. Keep your purchase receipt as proof of purchase.
Nota: Nei dati forniti non erano disponibili video ufficiali del prodotto da incorporare in questo manuale.