
Introduzione
Thank you for choosing the Spider Farmer Pro Series Grow Tent. This manual provides essential information for the safe and efficient setup, operation, and maintenance of your grow tent. Please read it thoroughly before assembly and use to ensure optimal performance and plant growth.
Informazioni sulla sicurezza
- Assicurarsi che la tenda da coltivazione sia montata su una superficie piana e stabile.
- Keep all electrical components (lights, fans, etc.) away from water and moisture.
- Do not overload the tent's frame with excessive weight. Refer to specifications for weight capacity.
- Assicurare una ventilazione adeguata per evitare l'accumulo di calore e mantenere la qualità dell'aria.
- Tenere fuori dalla portata dei bambini e degli animali domestici.
- Do not modify the tent structure or materials, as this may compromise its integrity and safety.
Contenuto della confezione
Verificare che tutti i componenti siano presenti prima di iniziare il montaggio:
- Tela per tenda da coltivazione (Mylar 2000D)
- Metal Support Poles (Alloy Steel)
- Durable Corner Connectors
- Vassoio rimovibile impermeabile per pavimento
- Hanging Straps for Equipment
- Manuale di istruzioni
Istruzioni di installazione
Follow these steps for quick and tool-free assembly:
1. Assemblare il telaio
Connect the metal support poles using the durable corner connectors to form the base, sides, and top of the tent frame. Ensure all connections are secure.

Image: Frame assembly diagram.

Image: Detail of reinforced metal frame connections.
2. Install the Tent Canvas
Carefully drape the 2000D Mylar canvas over the assembled frame. Ensure the zippers are aligned correctly for easy closure. The canvas is designed for durability and light-proofing.
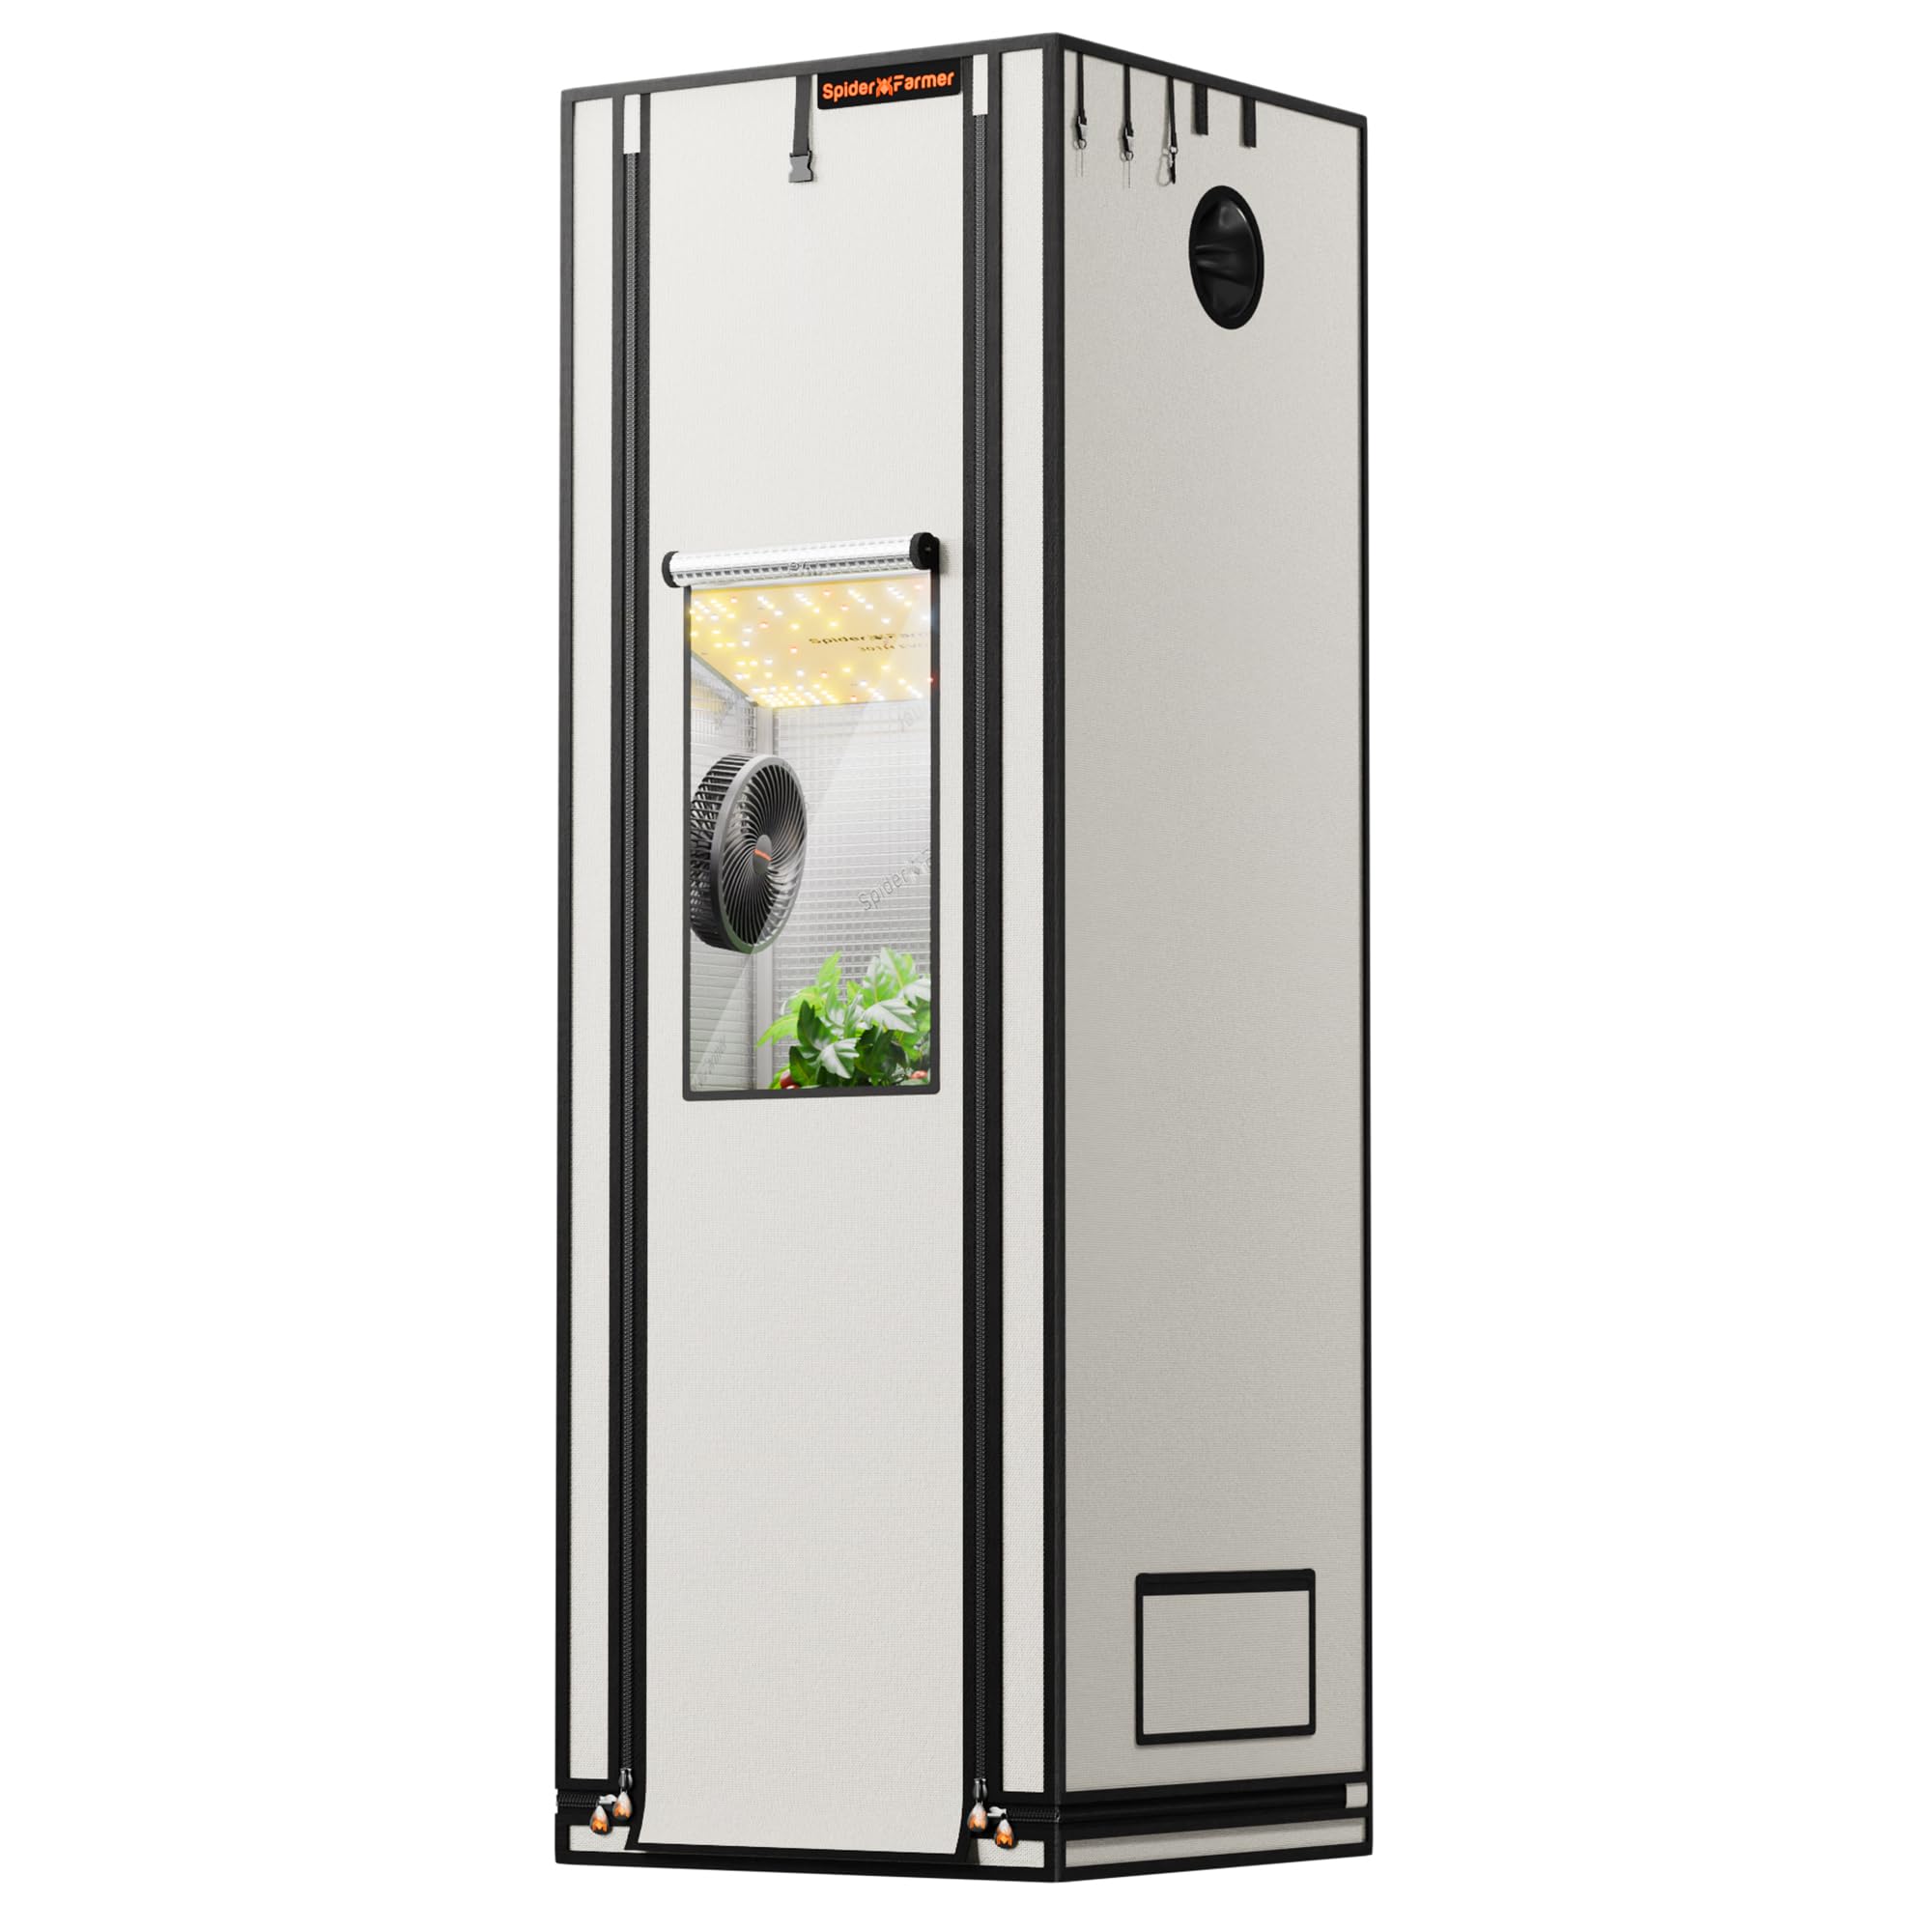
Image: Fully assembled grow tent.
3. Place the Floor Tray
Insert the removable waterproof floor tray at the bottom of the tent. This tray collects spills and makes cleaning easier.

Image: Smart and tidy side storage for accessories.
4. Install Accessories (Optional)
Use the provided hanging straps to install grow lights, fans, and other equipment. Ensure all equipment is securely fastened and cables are managed to prevent hazards.

Image: Large door design with strap fastening.
Unboxing and Assembly Video
Video: Detailed unboxing and assembly guide for the Spider Farmer 2000D Grow Tent.
Operazione
Accedere alle tue piante
The roll-up door with Velcro closure provides easy access to your plants for watering, feeding, and inspection. Simply unroll the door and secure it with the Velcro straps.
Monitoring with the Observation Window
Utilize the transparent observation window to check on your plants without opening the main door, which helps maintain a stable internal environment (temperature and humidity).

Image: Observation window for plant monitoring.
Efficienza luminosa
The 100% reflective diamond Mylar interior maximizes light efficiency, ensuring your plants receive optimal light exposure for photosynthesis and healthy growth.

Image: Multi-layered fabric construction for light reflection and durability.

Image: High-reflectance technology of diamond Mylar.
Prodotto generale finitoview Video
Video: Oltreview of Spider Farmer 2000D Pro Grow Tents, highlighting key features and benefits for indoor gardening.
Manutenzione
Cleaning the Floor Tray
The removable waterproof floor tray can be easily taken out and cleaned with water and a mild detergent. Ensure it is completely dry before placing it back into the tent.
Cleaning the Tent Interior/Exterior
Wipe down the interior Mylar and exterior canvas with a damp cloth as needed. Avoid abrasive cleaners that could damage the material or reflective surface.
Inspecting Zippers and Seams
Periodically check the SBS double zippers and seams for any signs of wear or damage to ensure continued light-proofing and smooth operation. Lubricate zippers if they become stiff.
Risoluzione dei problemi
| Problema | Possibile causa | Soluzione |
|---|---|---|
| Perdita di luce | Zippers not fully closed, damaged seams, or improperly sealed ports. | Ensure all zippers are fully closed. Inspect seams for tears and use repair kit if necessary. Verify all cable and ventilation ports are tightly secured. |
| Difficulty Zipping/Unzipping | Dirt or debris in zipper teeth, or lack of lubrication. | Clean zipper teeth with a soft brush. Apply a small amount of zipper lubricant (e.g., silicone spray) to the teeth. |
| Tent Frame Instability | Loose pole connections or uneven assembly. | Recheck all pole and connector junctions to ensure they are fully inserted and secure. Ensure the tent is on a level surface. |
| Excessive Heat/Humidity Inside | Ventilazione inadeguata. | Ensure exhaust fans are operating correctly and intake vents are open. Consider adding an additional fan or adjusting fan speed. |
Specifiche
Key specifications for the Spider Farmer Pro Series 2x2x6 Grow Tent (Model 60x60x180 cm):

Image: Grow tent specifications diagram.
- Dimensioni del prodotto: 24"L x 24"W x 72"H (60 cm x 60 cm x 180 cm)
- Volume della camera: 24 piedi cubi
- Peso dell'articolo: 15.4 libbre (7 chilogrammi)
- Materiale del telaio: Acciaio legato
- Materiale interno: 100% Reflective Diamond Mylar
- Materiale esterno: 2000D Thicken Mylar Canvas (White)
- Caratteristiche: Roll-up Door, Observation Window, Removable Waterproof Floor Tray, Cable Ports
- Recommended Grow Light: SF1000 (or similar)
- Recommended Fan: 4" Inline Fan (or similar)
- Capacità dell'impianto: 2 plants in 3-gallon pots (approximate)
Garanzia e supporto
For warranty information, product support, or to purchase replacement parts, please contact Spider Farmer customer service. Refer to the official Spider Farmer websito o nella documentazione di acquisto per i dettagli di contatto.
Ufficiale Websito: www.spiderfarmer.com


