
1. Introduzione
The Sharkoon AK2 Black is an ATX PC case designed for a wide range of computer builds, including gaming, work, and multimedia stations. It offers a discreet aesthetic combined with extensive compatibility for modern hardware and efficient cooling solutions. This manual provides essential information for the proper setup, operation, and maintenance of your AK2 PC case.
Le caratteristiche principali includono:
- Support for Mini-ITX, Micro-ATX, ATX, and BTF motherboards.
- Spacious interior for large graphics cards (up to 41 cm).
- CPU cooler height clearance up to 17 cm.
- Power supply unit (PSU) length up to 23.5 cm.
- Pre-installed 120mm fans (one front, one rear), with support for up to eleven fans total.
- Compatibility with up to two 360mm radiators for liquid cooling.
- Front panel with modern TRRS and USB-C ports.
- Storage options for up to two 3.5" HDDs or four 2.5" SSDs.
2. Informazioni sulla sicurezza
Please read and understand the following safety guidelines before installing components into your PC case:
- Always disconnect the power supply from the wall outlet before opening the PC case or installing/removing components.
- Handle all components with care to avoid damage. Static electricity can harm sensitive electronic parts. Consider using an anti-static wrist strap.
- Assicurare una corretta ventilazione attorno al case del PC per evitare il surriscaldamento.
- Tenere le parti piccole e gli strumenti lontano dalla portata dei bambini.
- Do not attempt to modify the case structure, as this may compromise its integrity and void your warranty.
- Refer to the manuals of your individual components (motherboard, GPU, PSU, etc.) for specific installation instructions.
3. Configurazione e installazione dei componenti
This section outlines the general steps for installing your computer components into the Sharkoon AK2 Black PC case.
3.1. Preparazione del caso
Carefully remove the side panels of the case. The AK2 features a spacious interior designed for ease of access during component installation.

Figura 1: Interno view of the main compartment, ready for component installation.
3.2. Installazione della scheda madre
The AK2 supports Mini-ITX, Micro-ATX, ATX, and BTF motherboards. Install the necessary standoffs for your motherboard form factor. Carefully place your motherboard onto the standoffs and secure it with screws.

Figure 2: Motherboard tray cutout for easy CPU cooler installation/removal.
3.3. Installazione dell'unità di alimentazione (PSU)
Install your PSU into the dedicated compartment at the bottom of the case. The AK2 accommodates PSUs up to 23.5 cm in length. Secure the PSU with screws from the rear of the case.
3.4. Installazione dell'unità di archiviazione
The case provides bays for up to two 3.5" HDDs or four 2.5" SSDs. Locate the drive cages and mounting points, typically behind the motherboard tray or within the PSU shroud area. Secure your drives using the provided screws or tool-less mechanisms.

Figura 3: Interno posteriore view showing cable management space and drive mounting options.
3.5. Installazione della scheda grafica (GPU) e della scheda di espansione
Install your graphics card into the appropriate PCIe slot on your motherboard. The AK2 supports large graphics cards up to 41 cm in length. Remove the necessary expansion slot covers from the rear of the case and secure your card.
3.6. Cooling System Installation (Fans and Radiators)
The AK2 comes with two pre-installed 120mm fans (one in the front, one in the rear). The case supports up to eleven fans in total for optimal airflow. For liquid cooling, it can accommodate up to two 360mm radiators. Install additional fans or radiators in the designated mounting positions (front, top, rear) as needed.

Figura 4: Interno view showing fan and radiator mounting locations.
3.7. Collegamento dell'I/O del pannello frontale
Connect the front panel cables (USB-C, TRRS audio, power button, reset button, LED indicators) to the corresponding headers on your motherboard. Refer to your motherboard manual for exact header locations.

Figura 5: Fronte view of the AK2 case, featuring the front panel I/O.
4. Utilizzo del case del PC
Once all components are installed and connected, replace the side panels. Connect your peripherals, monitor, and power cable. Press the power button on the front panel to start your computer.
The AK2's design prioritizes airflow to ensure efficient cooling for your components. Ensure that the pre-installed fans are spinning and consider adding more fans if your system generates significant heat, especially during demanding tasks like gaming.
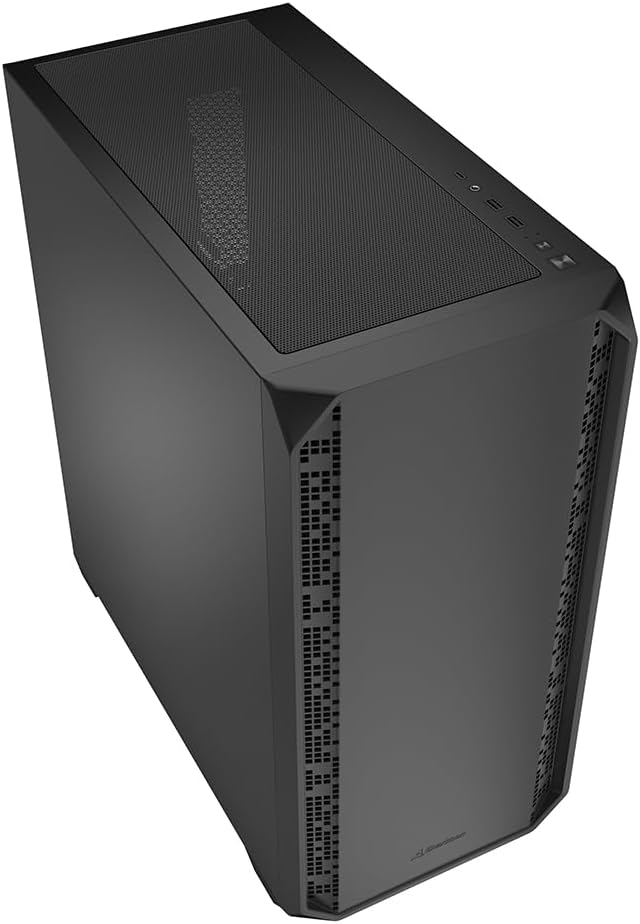
Figura 6: Angolato view of the AK2 case, showcasing il suo design complessivo.
5. Manutenzione
Una manutenzione regolare aiuta a garantire prestazioni ottimali e longevità dei componenti del PC.
- Filtri antipolvere: The AK2 likely includes removable dust filters (e.g., on the top, front, and/or bottom). Regularly clean these filters by gently brushing or washing them to prevent dust buildup inside the case, which can impede airflow and cause overheating.
- Pulizia interna: Periodically open the case (after disconnecting power) and use compressed air to remove dust from fans, heatsinks, and other components.
- Gestione dei cavi: Ensure cables are neatly routed to avoid obstructing airflow. The AK2 offers ample space behind the motherboard tray for effective cable management.
6. Risoluzione Dei Problemi
If you encounter issues during or after building your PC, consider the following common troubleshooting steps:
- Nessun potere: Double-check all power connections, including the 24-pin ATX, 8-pin CPU, and PCIe power cables. Ensure the PSU switch is in the 'ON' position.
- Nessuna visualizzazione: Verify that your monitor is connected to the graphics card (not the motherboard's integrated graphics, unless you are using it) and that the monitor is powered on and set to the correct input. Reseat your graphics card and RAM modules.
- Surriscaldamento: Ensure all case fans and CPU cooler fans are spinning correctly. Check for dust buildup on heatsinks and dust filters. Verify proper thermal paste application on the CPU.
- Problemi di I/O del pannello frontale: Confirm that all front panel headers (USB, audio, power/reset switches) are correctly connected to the motherboard.
Per problemi più complessi, consultare i manuali dei singoli componenti o chiedere assistenza a un tecnico qualificato.
7. Specifiche
Below are the technical specifications for the Sharkoon AK2 Black ATX PC Case:
| Marca | Squalo |
| Nome del modello | AK2 Nero |
| Tipo di caso | Torre |
| Colore | Nero |
| Materiale | Acciaio legato |
| Peso dell'articolo | 6.46 chilogrammi |
| Dimensioni del prodotto (P x L x A) | 46P x 22.5L x 48.5A centimetri |
| Numero totale di vani interni | 6 (for 3.5" HDDs or 2.5" SSDs) |
| Supporto per la scheda madre | Mini-ITX, Micro-ATX, ATX, BTF |
| Max. GPU Length | 41 centimetri |
| massimo Altezza del dispositivo di raffreddamento della CPU | 17 centimetri |
| massimo Lunghezza alimentatore | 23.5 centimetri |
| Supporto per i fan | Up to 11 (2 x 120mm pre-installed) |
| Supporto radiatore | Up to two 360mm radiators |
| I/O frontale | TRRS, USB-C |

Figure 7: Product dimensions of the AK2 Black PC case.
8. Garanzia e supporto
Per informazioni sulla garanzia e supporto tecnico, fare riferimento al sito ufficiale Sharkoon webo contattare direttamente il servizio clienti. Conservare la prova d'acquisto per eventuali reclami in garanzia.
Per ulteriore assistenza, puoi visitare il Sharkoon official websito.