
1. Introduzione
This manual provides essential instructions for the safe and effective use, installation, and maintenance of your Linkifly XT1 Vacuum Cleaner Replacement Battery. Please read this manual thoroughly before installing or using the battery to ensure optimal performance and longevity.
2. Informazioni sulla sicurezza
- Non smontare, aprire o distruggere il pacco batteria.
- Non esporre la batteria a calore o fuoco. Evitare la conservazione alla luce diretta del sole.
- Non cortocircuitare un pacco batteria. Non conservare i pacchi batteria a caso in una scatola o in un cassetto dove potrebbero cortocircuitarsi tra loro o essere cortocircuitati da materiali conduttivi.
- Non sottoporre i pacchi batteria a urti meccanici.
- In caso di perdite dalla batteria, evitare che il liquido entri in contatto con la pelle o gli occhi. In caso di contatto, lavare la zona interessata con abbondante acqua e consultare un medico.
- Mantenere la batteria pulita e asciutta.
- Non utilizzare caricabatterie diversi da quello specificamente fornito per l'uso con l'apparecchiatura.
- Rispettare i segni più (+) e meno (-) sulla batteria e sull'attrezzatura e garantire un uso corretto.
- Tenere le batterie fuori dalla portata dei bambini.
3. Contenuto della confezione
Verificare che tutti gli articoli siano presenti e in buone condizioni all'apertura della confezione.
- 1 x Linkifly XT1 Vacuum Cleaner Replacement Battery
4. Configurazione e installazione
Follow these steps to safely replace the battery in your compatible vacuum cleaner.
- Spegni: Ensure your vacuum cleaner is completely turned off and unplugged from any power source before beginning the battery replacement process.
- Individuare il vano batteria: Identify the battery compartment on your vacuum cleaner. This is typically located on the main body or handle of the device. Refer to your vacuum cleaner's original manual if you are unsure.
- Rimuovere la vecchia batteria: Depending on your vacuum model, you may need to press a release button or unlatch a cover to access the battery. Carefully remove the old battery pack.
- Inserire una nuova batteria: Align the Linkifly XT1 replacement battery with the battery slot. Ensure the connectors are properly aligned and gently push the battery into place until it clicks or locks securely. Do not force the battery.
- Scomparto sicuro: Close the battery compartment cover or latch it securely.
- Carica iniziale: After installation, it is recommended to fully charge the new battery before its first use. Connect your vacuum cleaner to its charger and allow it to charge until the indicator light shows a full charge.

Image: The Linkifly XT1 Replacement Battery, highlighting its connection interface for proper installation.
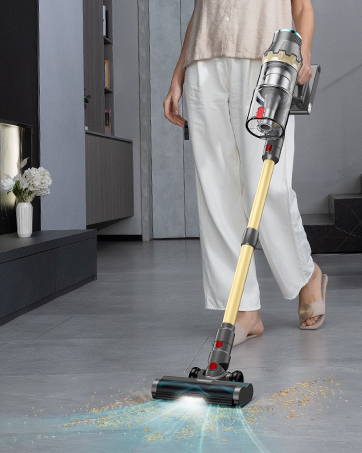
Image: A person operating a Linkifly stick vacuum cleaner, demonstrating the type of device this battery is designed for.
5. Istruzioni per l'uso
The XT1 replacement battery operates in conjunction with your vacuum cleaner's existing charging system. Once installed, the battery will power your vacuum as designed by the original manufacturer.
- Ricarica: Always use the original charger provided with your vacuum cleaner. Connect the charger to the vacuum and a power outlet. The charging indicator on your vacuum will show the charging status.
- Primo utilizzo: For optimal performance, fully charge the battery before its initial use.
- Scarico: Avoid completely draining the battery frequently. Recharge the battery when the vacuum's power indicator shows low battery.
6. Manutenzione
Proper maintenance ensures the longevity and performance of your XT1 replacement battery.
- Ricarica regolare: If the vacuum is not used for an extended period, charge the battery at least once every 3 months to prevent deep discharge, which can reduce battery life.
- Magazzinaggio: Conservare la batteria in un luogo fresco e asciutto, lontano dalla luce solare diretta e da temperature estreme. Per una conservazione a lungo termine, assicurarsi che la batteria sia parzialmente carica (circa il 50%).
- Pulizia: Mantenere i contatti della batteria puliti e privi di polvere o detriti. Utilizzare un panno asciutto per pulirli, se necessario.
- Disposizione: Do not dispose of the battery in household waste. Follow local regulations for proper disposal of lithium-ion batteries.
7. Risoluzione Dei Problemi
If you encounter issues with your XT1 replacement battery, refer to the following common problems and solutions.
| Problema | Possibile causa | Soluzione |
|---|---|---|
| Batteria non in carica | Charger not connected properly; faulty charger; battery not seated correctly; vacuum cleaner issue. | Ensure charger is securely connected to both vacuum and power outlet. Verify the battery is correctly installed. Test the charger with another device if possible. Consult your vacuum cleaner's manual for charging troubleshooting. |
| Breve tempo di funzionamento | Battery not fully charged; battery degradation over time; vacuum cleaner operating in high-power mode. | Ensure the battery is fully charged before use. If the battery is old, its capacity may naturally decrease. Use the vacuum in standard mode for longer run times. |
| L'aspirapolvere non si accende | Battery not charged; battery not installed correctly; vacuum cleaner fault. | Charge the battery. Re-install the battery, ensuring it is securely seated. If the issue persists, the problem might be with the vacuum cleaner itself, not the battery. |
If these solutions do not resolve the issue, please contact Linkifly customer support.
8. Specifiche
- Modello: XT1
- Marca: Linkifly
- Composizione delle celle della batteria: Ioni di litio
- Peso dell'articolo: 6.4 once
- Dimensioni della confezione: 7.68 x 3.66 x 1.69 pollici
- ASIN: B0DR2TVS6C
- Data prima disponibilità: 20 dicembre 2024
9. Garanzia e supporto
Linkifly is committed to providing high-quality products and excellent customer service.
- Garanzia: This product comes with a 12-Month Normal Warranty from the date of purchase.
- Garanzia di rimborso: Enjoy a 30-Day Money Back Guarantee.
- Assistenza clienti: Linkifly offers 24/7 Customer Support.
- Soddisfazione del cliente: We aim for 100% Customer Satisfaction.
For warranty claims, technical assistance, or any questions regarding your XT1 replacement battery, please contact Linkifly customer service through the retailer's platform or the official Linkifly websito.
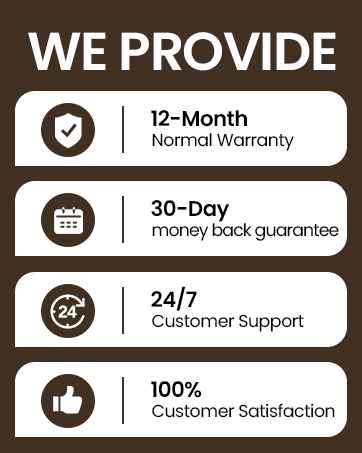
Immagine: Oltreview of Linkifly's customer service commitments, including warranty and satisfaction guarantees.