1. Introduzione
This manual provides essential instructions for the safe and efficient operation of your EPEVER Tracer4210ANG3 MPPT Solar Charge Controller. This device is designed to manage power flow from your solar panels to your battery bank, ensuring optimal charging and extending battery life. Please read this manual thoroughly before installation and use.
2. Informazioni sulla sicurezza
Durante l'installazione e il funzionamento, osservare le seguenti precauzioni di sicurezza:
- Assicurarsi che tutti i cavi siano correttamente polarizzati e saldamente collegati per evitare danni al controller o ad altri componenti.
- Collegare sempre prima la batteria, poi il pannello solare e infine il carico. Scollegare in ordine inverso.
- Non tentare di smontare o riparare il controller da soli. Contattare personale qualificato per l'assistenza.
- Installare il controller in un'area ben ventilata, lontano da materiali infiammabili e dalla luce solare diretta.
- Utilizzare interruttori automatici o fusibili adeguati per tutti i collegamenti per proteggerli dalle sovracorrenti.
- Indossare protezioni per gli occhi quando si lavora con le batterie.
3. Prodotto finitoview
The EPEVER Tracer4210ANG3 is an advanced Maximum Power Point Tracking (MPPT) solar charge controller designed for off-grid solar systems. It automatically identifies 12V or 24V system voltages and supports various battery types, including Lithium. Key features include high tracking and conversion efficiency, and comprehensive electronic protections.
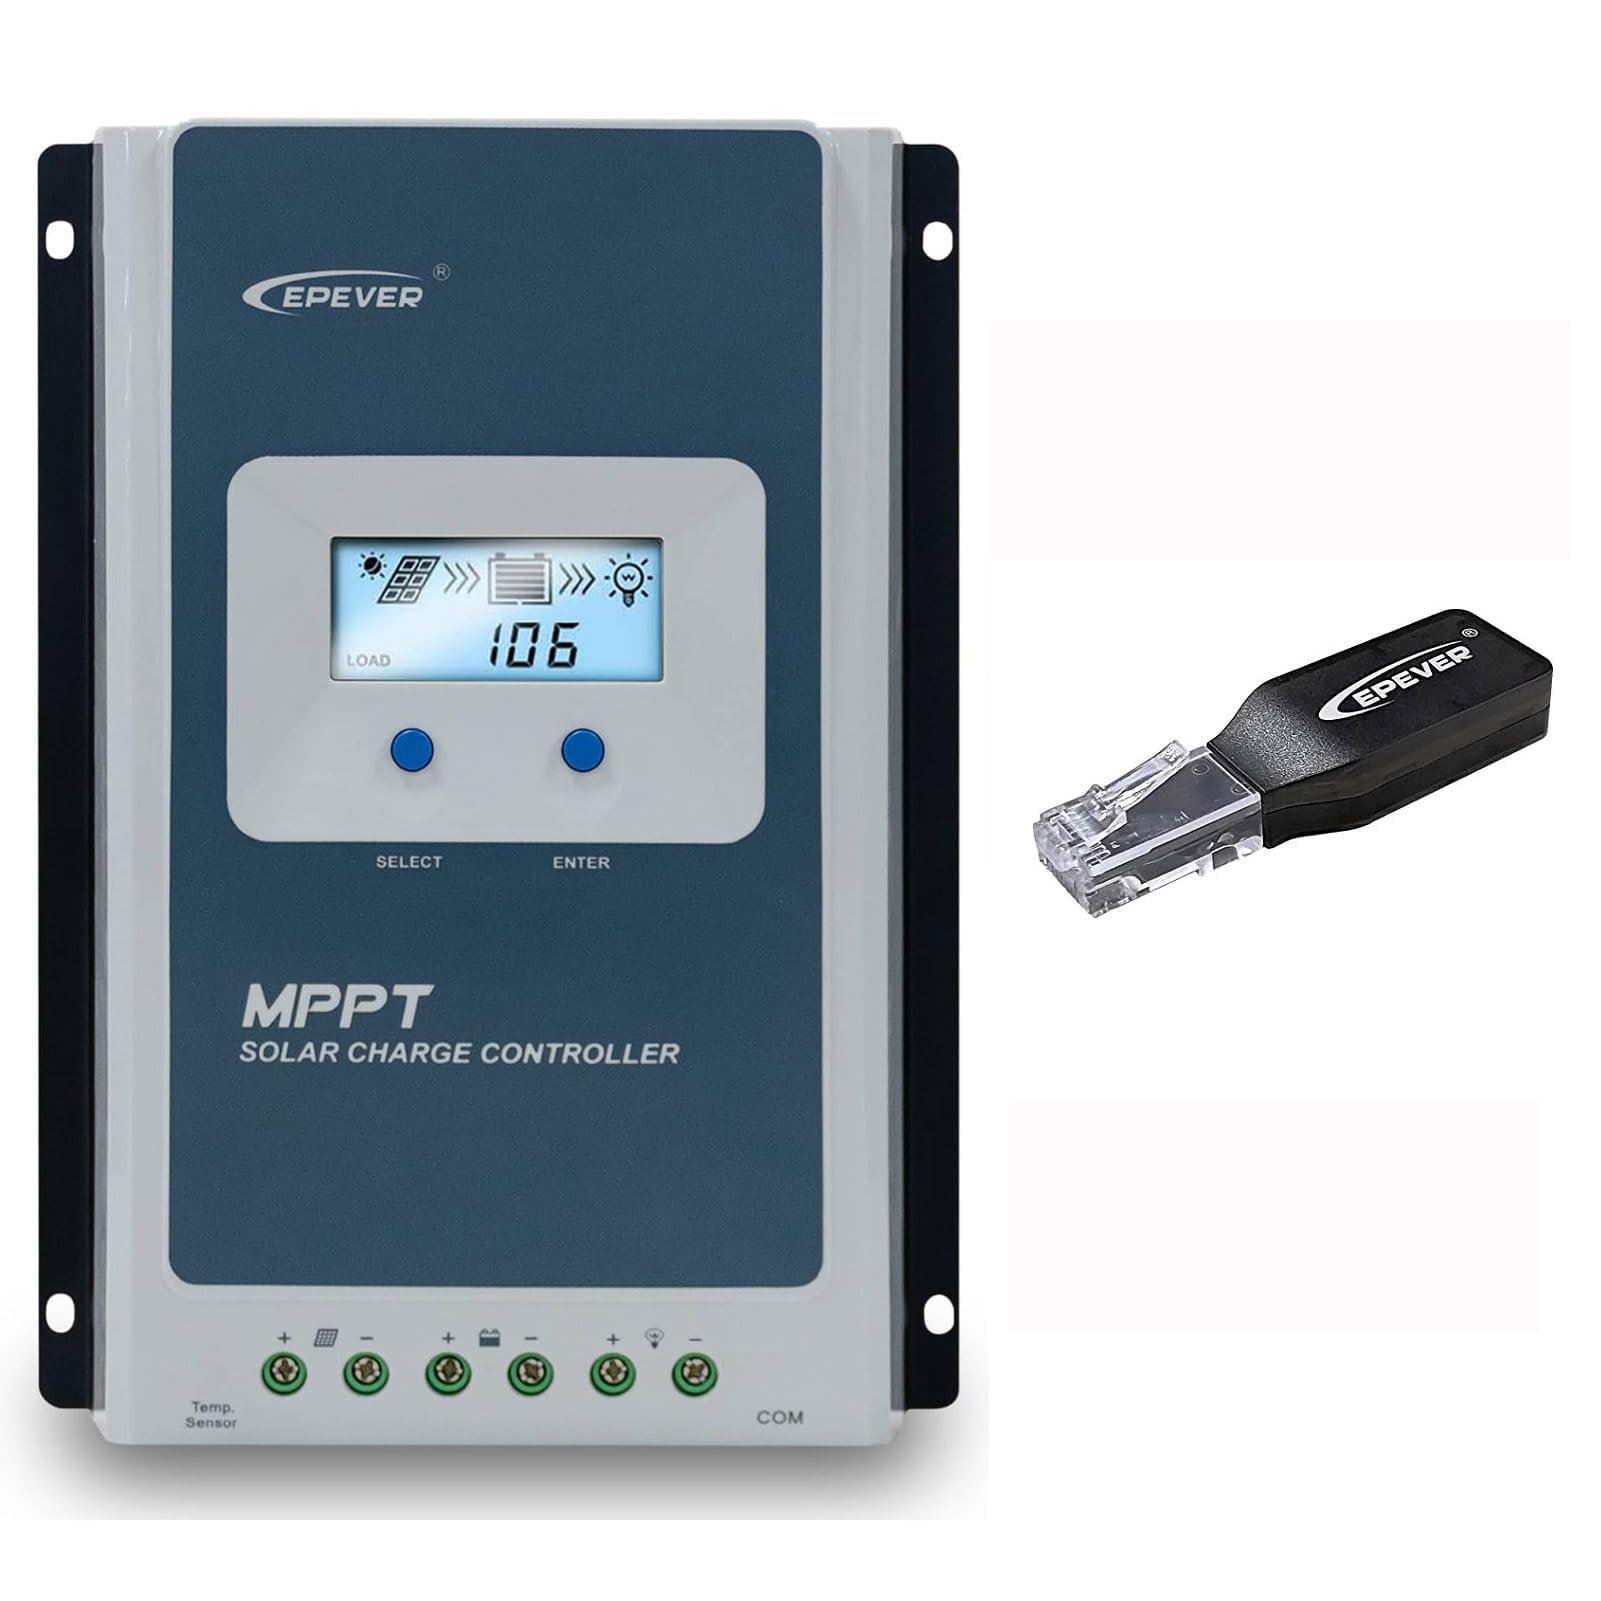
Figure 3.1: EPEVER Tracer4210ANG3 MPPT Solar Charge Controller with LCD display and connection terminals.
3.1 Caratteristiche principali
- Volume automatico del sistema 12V/24Vtage identificazione.
- Advanced MPPT technology with tracking efficiency above 99.5% and conversion efficiency up to 98%.
- Quattro-stage charging (Bulk, Boost, Float, Equalization) to optimize battery health and lifespan.
- Supports various battery types including Sealed, Gel, Flooded, and Lithium.
- Comprehensive electronic protection functions: PV over current, short-circuit, reverse polarity, night reverse charging, battery reverse, over voltage, over-discharging, overheating, Lithium battery low temperature, load short circuit/overload, device overheating, and TVS high voltage transients protection.
- Remote control and monitoring capabilities via BLE (Bluetooth Low Energy) module (included with this model).

Figure 3.2: The Tracer4210ANG3 controller is compatible with multiple battery types, including Lithium (LI), Sealed (SLD), Flooded (FLD), Gel, and AGM, automatically identifying 12V/24V battery voltage.

Figure 3.3: System diagram illustrating the high tracking efficiency (above 99.5%) and conversion efficiency (98%) of the MPPT solar charge controller within a typical solar power setup for a home.

Figure 3.4: The controller offers real-time monitoring via a mobile application using BLE (Bluetooth Low Energy) or an optional MT50 remote meter. Note: BLE module is included with this model, while MT50 or WiFi modules are sold separately.
4. Configurazione e installazione
4.1 Montaggio del controller
- Scegliete un luogo asciutto e ben ventilato, protetto dalla luce solare diretta, dalle alte temperature e dall'umidità.
- Assicurarsi che vi sia spazio sufficiente attorno al controller per la dissipazione del calore.
- Mount the controller vertically on a wall or suitable surface using appropriate fasteners.
4.2 Collegamenti di cablaggio
Importante: Always connect in the following order: Battery → Solar Panel → Load. Disconnect in the reverse order.
- Collegare la batteria: Collegare i terminali positivo e negativo della batteria ai corrispondenti terminali della batteria sul controller. Assicurarsi della corretta polarità. Il controller rileverà automaticamente la tensione del sistema.tage (12V o 24V).
- Collegare il pannello solare: Collegare i terminali positivo e negativo del pannello solare ai corrispondenti terminali FV sul controller. Assicurarsi della corretta polarità.
- Collegare il carico: Collegare i terminali positivo e negativo del carico CC ai corrispondenti terminali del carico sul controller.
After all connections are made, the controller's LCD display should illuminate, indicating proper power-up.
5. Istruzioni per l'uso
Display LCD e pulsanti 5.1
The controller features an LCD display for real-time system status and parameters, along with buttons for navigation and settings adjustment.
- Pulsante SELEZIONA: Used to cycle through display screens and menu options.
- Pulsante INVIO: Utilizzato per confermare le selezioni o accedere alla modalità di modifica dei parametri.
Refer to the detailed user manual (available for download from the manufacturer's website) for a complete guide on LCD navigation and parameter settings.
5.2 Selezione del tipo di batteria
It is crucial to select the correct battery type in the controller's settings to ensure proper charging algorithms and prevent battery damage. The Tracer4210ANG3 supports various battery types, including:
- Sigillato (SLD)
- Gel
- Allagato (FLD)
- Litio (LI)
- User-defined (for custom parameters)
Access the battery settings via the LCD menu and select the type that matches your connected battery bank. For Lithium batteries, ensure the correct voltage and charging parameters are set, especially if using user-defined settings.
5.3 Remote Monitoring (BLE)
This model includes a Bluetooth Low Energy (BLE) module, allowing you to monitor and configure the controller wirelessly via a smartphone application. Download the official EPEVER app from your device's app store, connect to the controller via Bluetooth, and follow the in-app instructions for monitoring system data and adjusting parameters.
6. Manutenzione
Una manutenzione regolare garantisce prestazioni ottimali e longevità del tuo regolatore di carica solare:
- Controllare le connessioni: Controllare periodicamente tutti i collegamenti elettrici per verificarne la tenuta e la presenza di corrosione. Serrare eventuali collegamenti allentati.
- Pulisci il controller: Keep the controller clean and free of dust and debris. Use a dry cloth for cleaning. Do not use liquids.
- Ventilazione: Assicurarsi che le aperture di ventilazione non siano ostruite per consentire una corretta dissipazione del calore.
- Ispezione della batteria: Regularly check your battery bank for signs of damage, corrosion, or electrolyte levels (for flooded batteries).
7. Risoluzione Dei Problemi
If you encounter issues with your Tracer4210ANG3 controller, refer to the following common problems and solutions:
| Problema | Possibile causa | Soluzione |
|---|---|---|
| Il display del controller è spento. | No power from battery or solar panel; reversed battery polarity. | Controllare i collegamenti della batteria e il voltage. Ensure solar panels are receiving sunlight. Verify battery polarity. |
| Batteria non in carica. | Solar panel not connected; low solar input; incorrect battery type setting; faulty wiring. | Check solar panel connections and ensure sufficient sunlight. Verify battery type setting. Inspect all wiring. |
| Il carico non funziona. | Load disconnected; battery voltage too low; load overcurrent protection activated. | Check load connections. Allow battery to charge. Reduce load or check for short circuits. |
| Avviso di surriscaldamento. | Scarsa ventilazione; temperatura ambiente eccessiva; sistema sovraccarico. | Ensure adequate airflow around the controller. Reduce load if possible. Relocate to a cooler environment. |
For more complex issues, please contact EPEVER customer support.
8. Specifiche
| Parametro | Valore |
|---|---|
| Vol. nominale sistematage | 12V / 24V Auto Identify |
| Corrente di carica nominale | 40A |
| massimo Ingresso FV Voltage | 100V |
| Potenza massima in ingresso FV | 520W (sistema 12V) / 1040W (sistema 24V) |
| Efficienza di monitoraggio MPPT | >99.5% |
| Efficienza di conversione della carica | Fino al 98% |
| Tipi di batteria supportati | Sealed, Gel, Flooded, Lithium, User-defined |
| Ricarica Stages | Bulk, Boost, Float, Equalization |
| Porta di comunicazione | RS485 (for BLE module, MT50, or PC connection) |
| Componenti inclusi | MPPT Solar Controller, BLE Module |
9. Garanzia e supporto
EPEVER products are designed for reliability and performance. For warranty information, please refer to the warranty card included with your product or visit the official EPEVER website. If you have any questions, require technical assistance, or need to report an issue, please contact EPEVER customer support directly. Contact details can typically be found on the manufacturer's websito o nella confezione del prodotto.
Puoi anche visitare il Negozio EPEVER su Amazon per ulteriori informazioni sul prodotto e risorse di supporto.