
Introduzione
The LifePro Pacer Mini Pro Treadmill is a compact and versatile walking pad designed for light exercise and fitness in both home and office environments. Its adjustable incline and variable speed settings allow for a customized workout experience, helping you stay active throughout your day. This manual provides essential information for the safe and effective use, setup, operation, and maintenance of your Pacer Mini Pro Treadmill.
Informazioni importanti sulla sicurezza
Please read and understand all instructions before operating the treadmill. Failure to follow these instructions may result in injury or damage to the product.
- Posizionare sempre il tapis roulant su una superficie piana e stabile.
- Tenere i bambini e gli animali domestici lontani dal tapis roulant durante il funzionamento.
- Non utilizzare il tapis roulant se è danneggiato o non funziona correttamente.
- Consultare un medico prima di iniziare qualsiasi nuovo programma di esercizi.
- Assicurarsi che il cavo di alimentazione non sia schiacciato o danneggiato.
- Non tentare di riparare il tapis roulant da soli. Contattare l'assistenza clienti per ricevere assistenza.
Contenuto della confezione
Verificare che tutti i componenti siano presenti nella confezione:
- LifePro Pacer Mini Pro Treadmill Unit
- Telecomando
- Cavo di alimentazione
- Lubrificante
- Manubrio regolabile
- Porta tablet
Impostare
Follow these steps to set up your LifePro Pacer Mini Pro Treadmill:
- Disimballaggio: Estrarre con cautela il tapis roulant e tutti i componenti dall'imballaggio.
- Posizionamento: Choose a flat, stable surface for the treadmill. Ensure there is adequate space around the unit for safe operation.
- Handlebar and Feet Assembly: While the main unit comes pre-assembled, minimal assembly is required. Attach the adjustable handlebar and the incline feet as instructed in the included quick start guide. Ensure all screws are tightened securely.
- Lubrificazione iniziale: The treadmill may come with some initial lubrication. Refer to the maintenance section for instructions on how to check and apply lubricant if needed before first use.
- Collegamento elettrico: Collegare il cavo di alimentazione al tapis roulant e poi a una presa elettrica dotata di messa a terra.

Istruzioni per l'uso
Operating your Pacer Mini Pro Treadmill is straightforward:
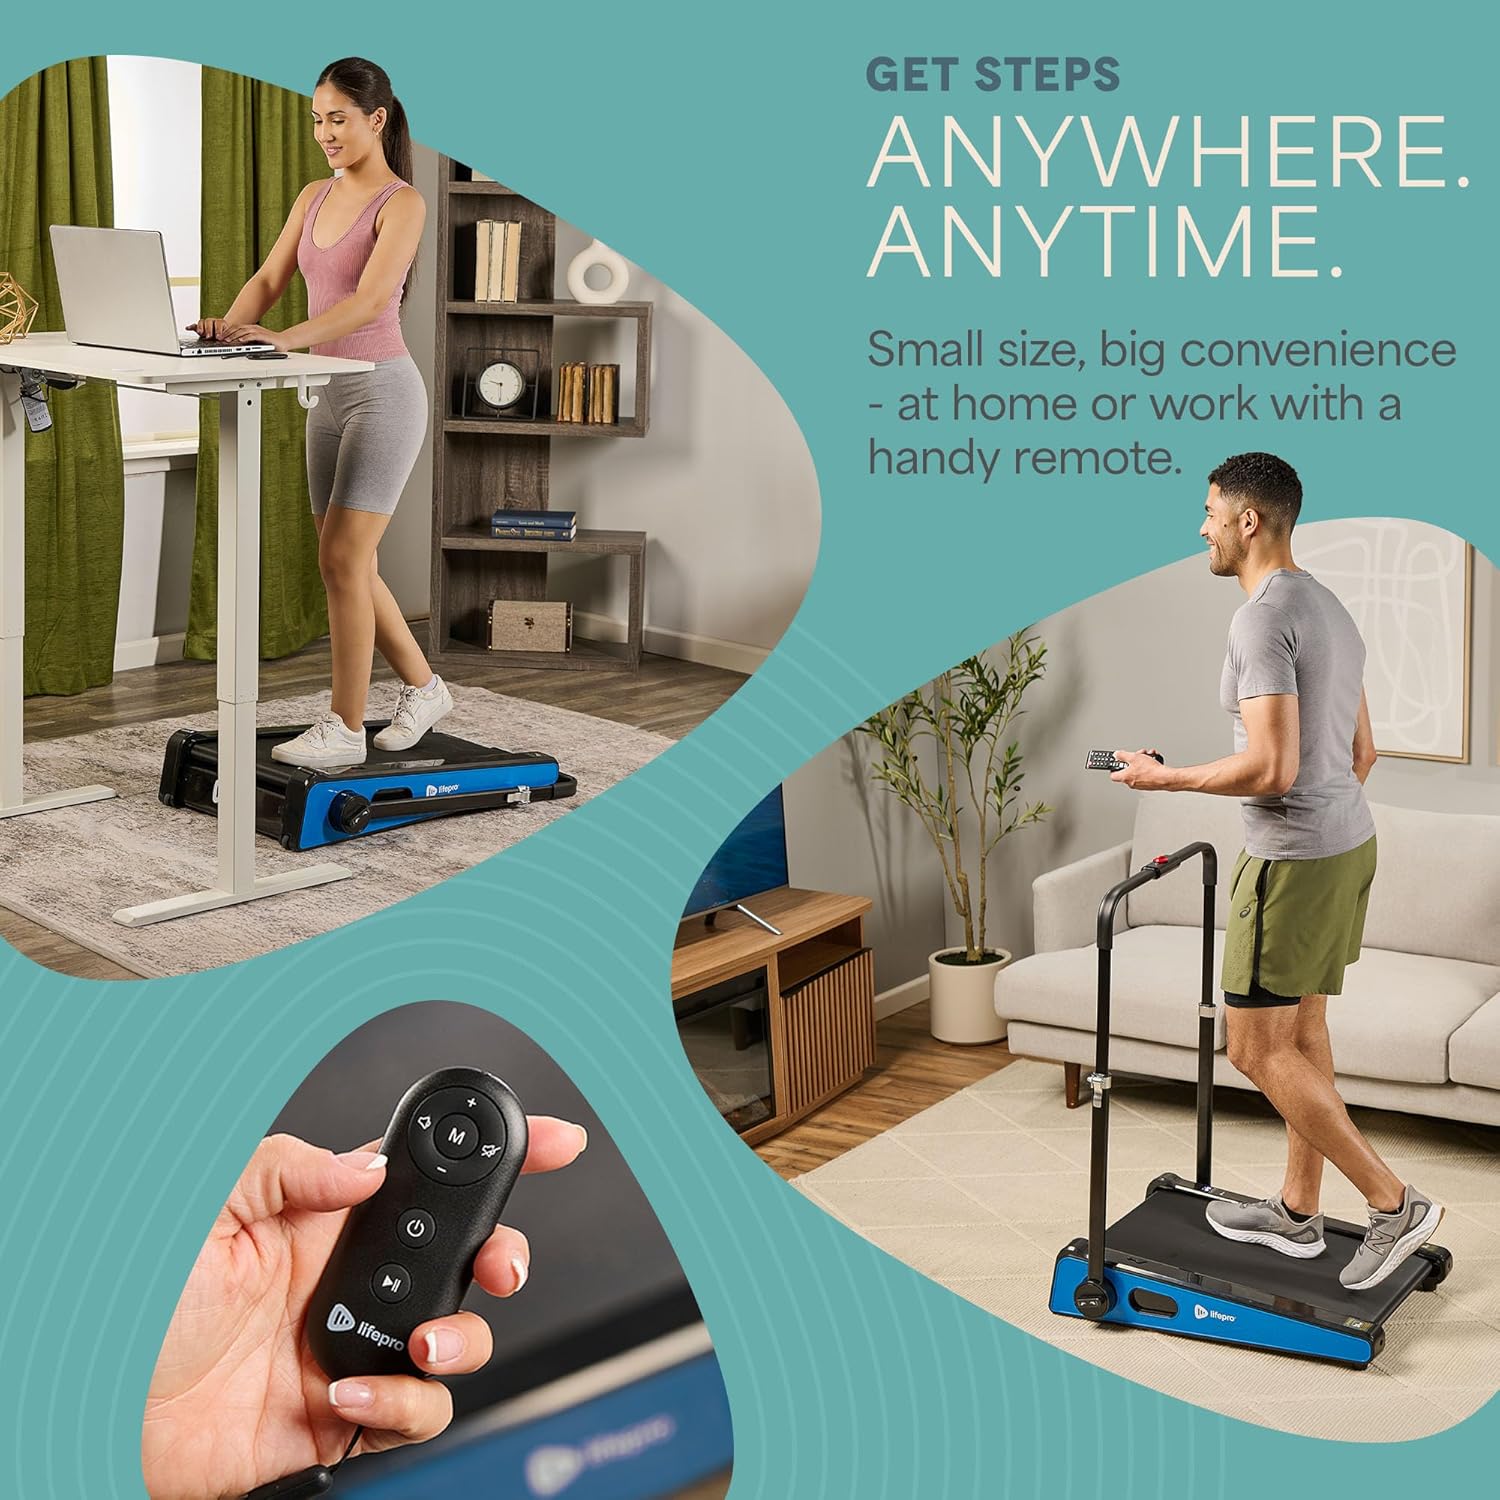
- Accensione: Plug in the treadmill and press the power button on the unit or the remote control. The LED display will illuminate.
- Regolazione della velocità: Use the remote control to increase or decrease the walking speed. The maximum speed is 3 MPH. The current speed will be shown on the LED display.
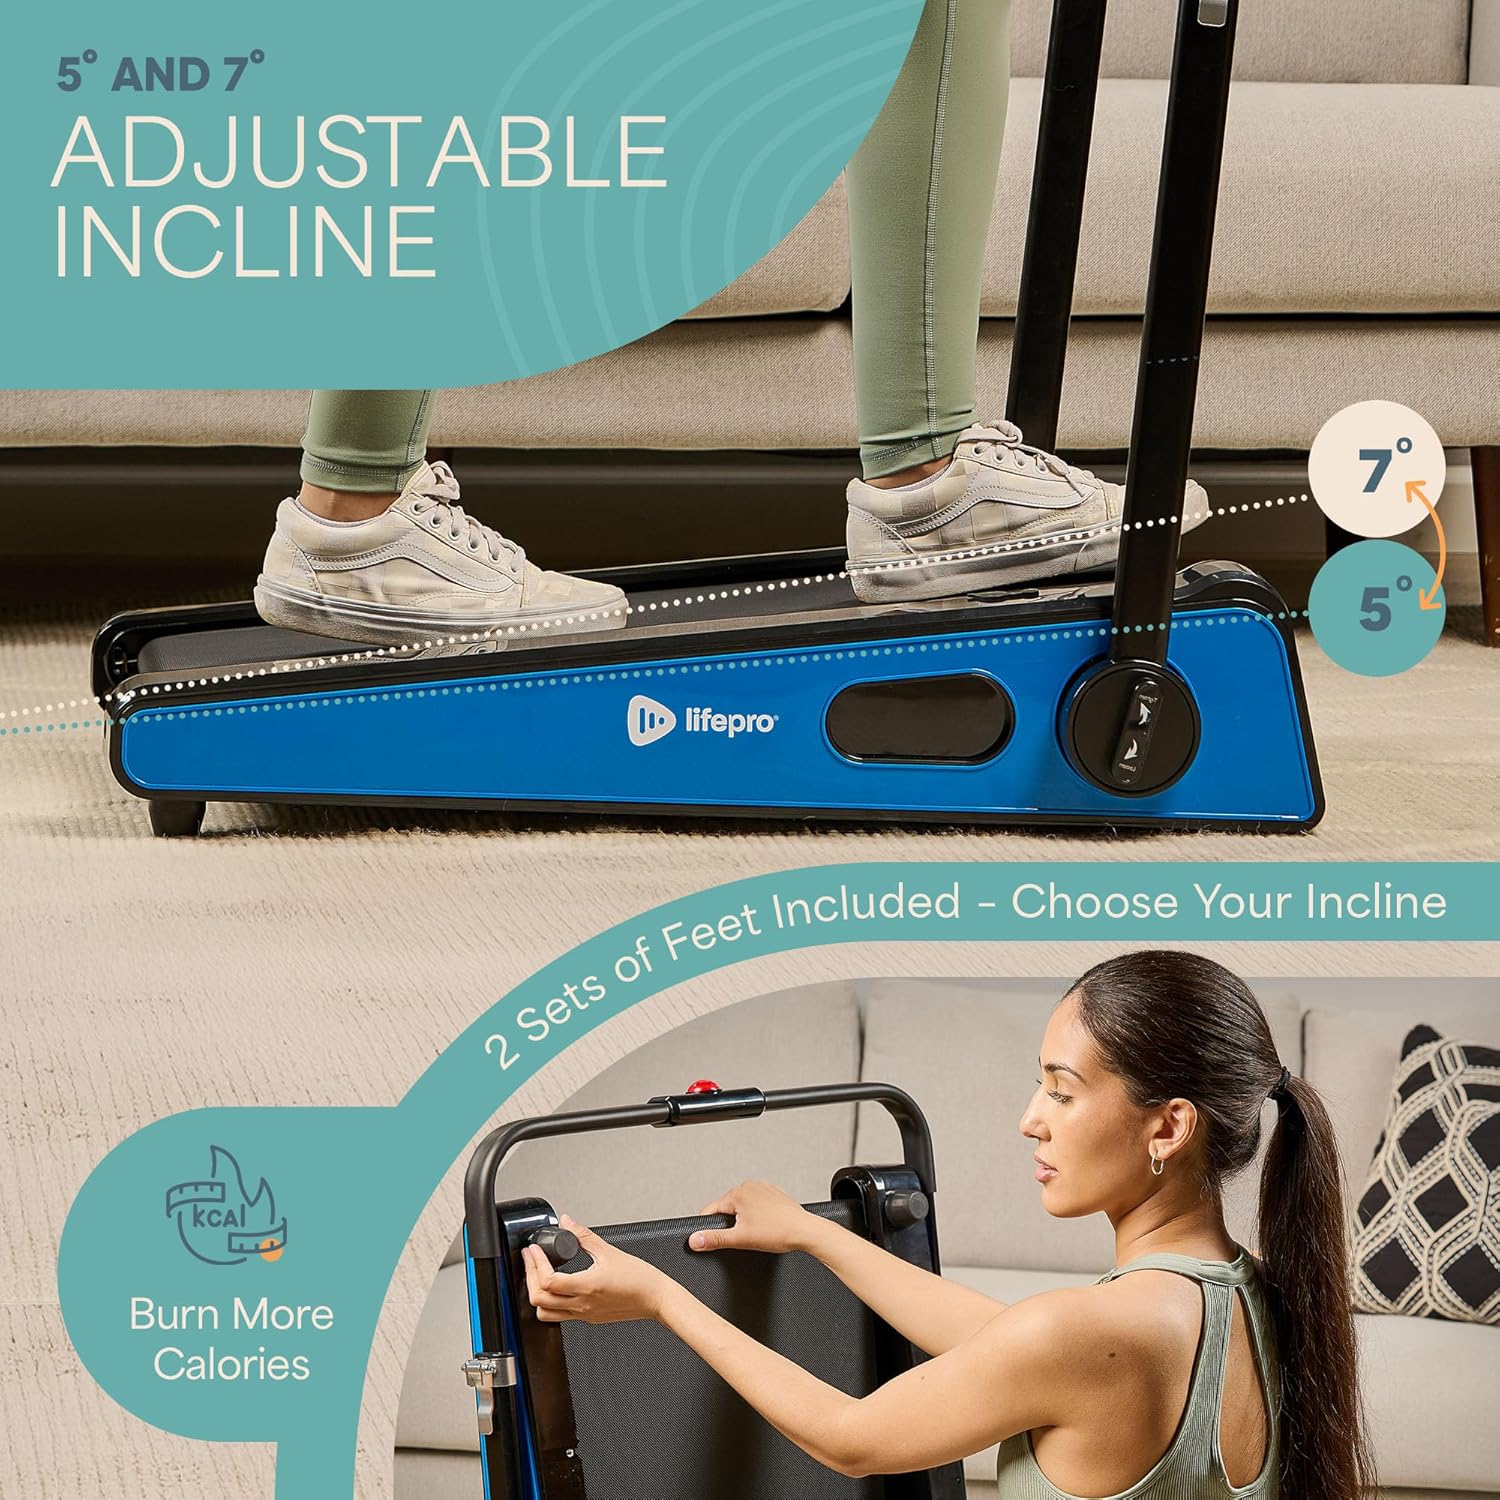
- Regolazione dell'inclinazione: The treadmill offers adjustable incline settings of 5 or 7 degrees. To change the incline, manually adjust the feet at the rear of the treadmill. Refer to the setup section and product diagrams for visual guidance.
- Monitoraggio del tuo allenamento: The LED display shows important workout metrics such as speed, calories burned, and distance covered. This helps you track your progress and stay motivated.
- Spegni: To stop your workout, press the stop button on the remote control or the unit. For complete power off, unplug the treadmill from the power outlet.

Manutenzione
Una manutenzione regolare garantisce la longevità e le prestazioni ottimali del tuo tapis roulant:
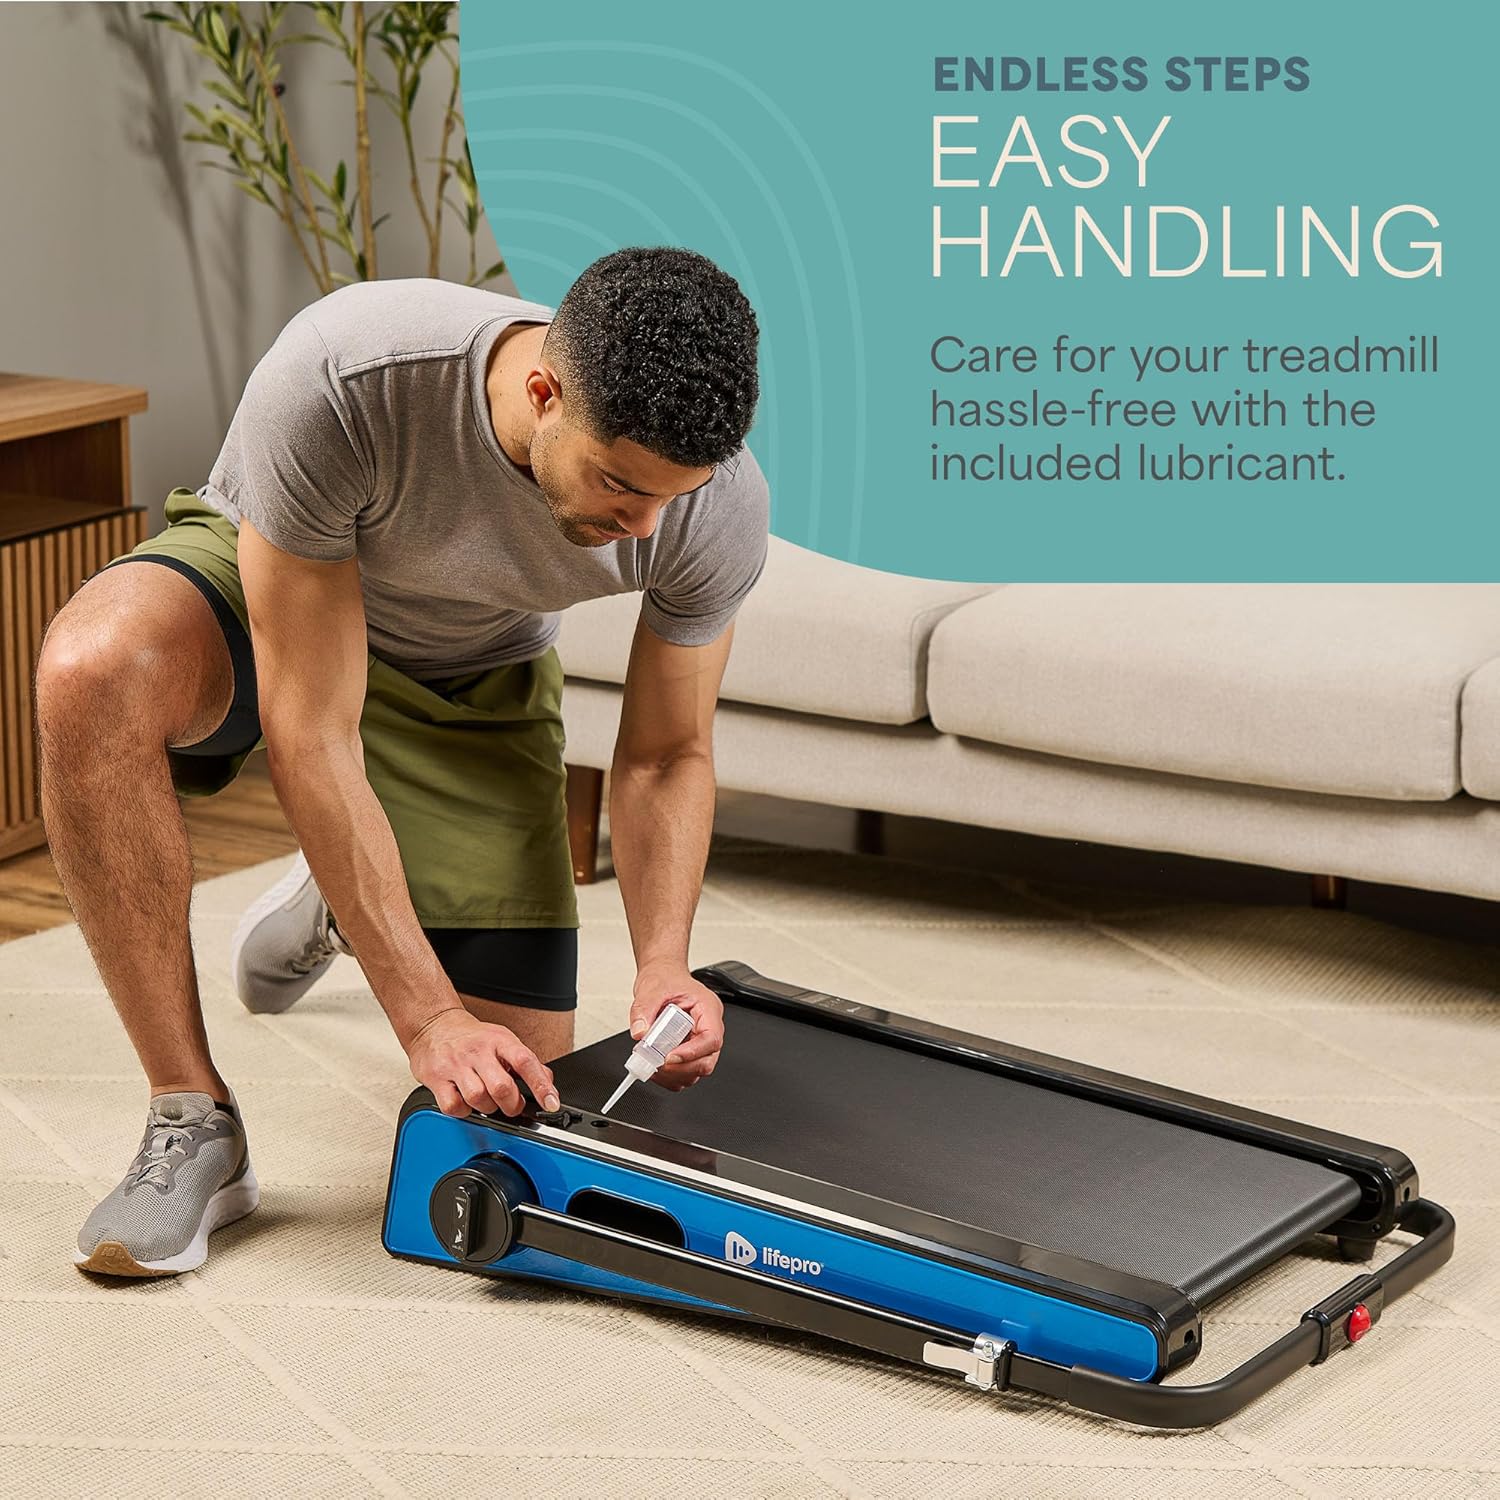
- Lubrificazione: The walking belt requires periodic lubrication to reduce friction and wear. A dedicated slot on the upper left side of the treadmill allows for easy injection of the provided lubricant. Lubricate as needed, typically every few months depending on usage.
- Pulizia: Pulisci la superficie del tapis roulant con un pannoamp Dopo ogni utilizzo, rimuovere il sudore e la polvere con un panno. Non utilizzare detergenti abrasivi.
- Magazzinaggio: The Pacer Mini Pro is designed for compact storage. It can be easily stored under a couch, desk, or in a closet thanks to its small footprint and built-in wheels for portability.
Risoluzione dei problemi
Se riscontri problemi con il tuo tapis roulant, fai riferimento alle seguenti soluzioni comuni:
- Il tapis roulant non si accende: Ensure the power cord is securely plugged into both the treadmill and a working electrical outlet. Check the power switch on the unit.
- Cinghia che slitta o non è uniforme: The walking belt may require adjustment or lubrication. Refer to the maintenance section for lubrication instructions. For belt tension adjustment, consult the detailed manual or contact customer support.
- Rumori insoliti: Stop using the treadmill immediately and inspect for any loose parts or obstructions. If the noise persists, contact customer support.
For issues not covered here, please contact LifePro customer support for assistance.
Specifiche
| Marca | LifePro |
| Numero di modello | LP-PCRMP-BLU-VC |
| Colore | Blue with Handlebar |
| Dimensioni del prodotto (P x L x A) | Dimensioni: 83.1 cm x 63.5 cm x 104.1 cm |
| Peso dell'articolo | 53.9 libbre |
| Materiale | Acciaio inossidabile |
| Velocità massima | 3 miglia orarie |
| Inclinazione regolabile | 5 o 7 gradi |
| Caratteristica speciale | Design compatto |
| Usi consigliati | Light exercise, walking, home and office use |
| Pubblico di destinazione | Adulto |
| Potenza massima | 1.75 CV |
| Tipo di visualizzazione | GUIDATO |
| Fonte di alimentazione | Elettrico con cavo |
| Tecnologia di connettività | Etereo |
| Tipo di contatore | Digitale |
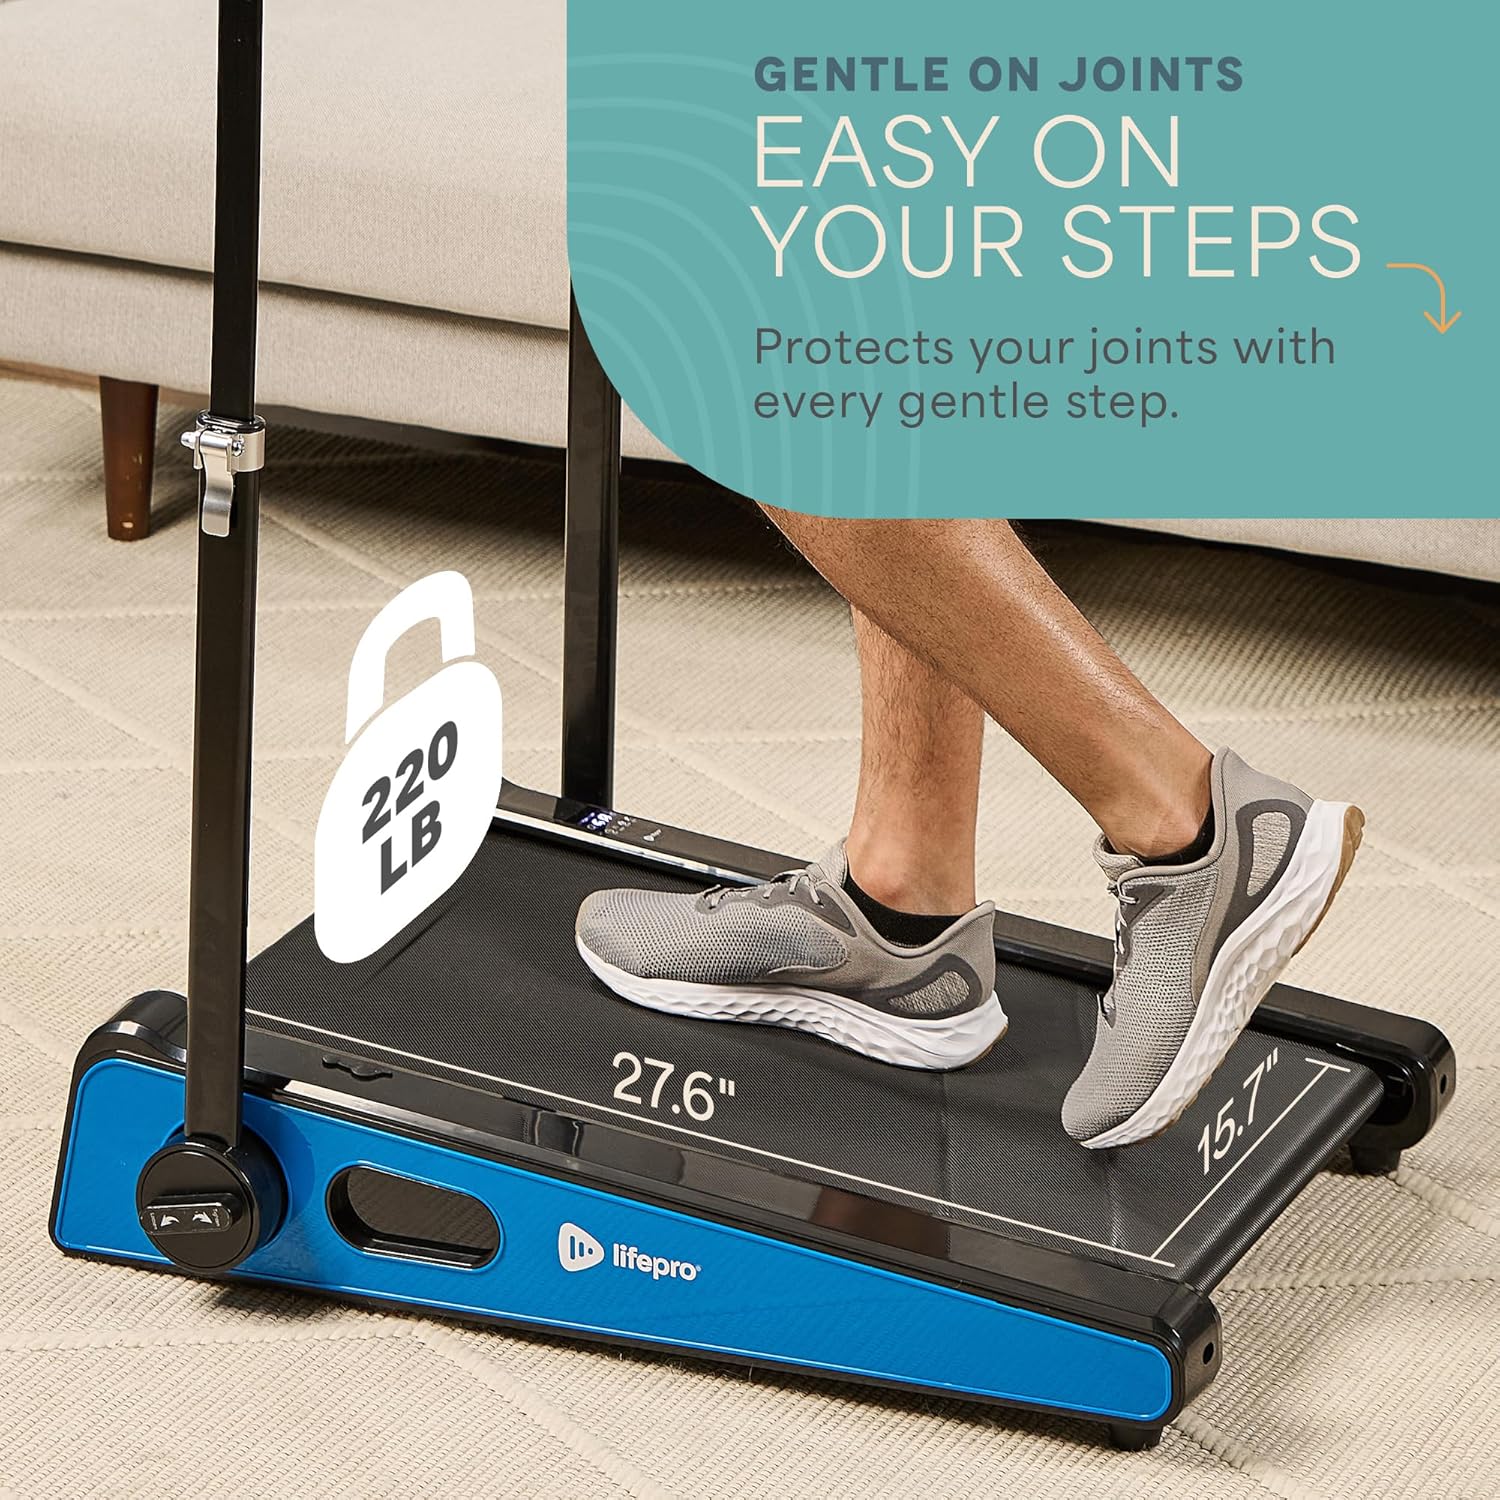
| Peso massimo raccomandato | 220 libbre |
| Numero di programmi | 1 |
| Running Surface Length | 40 pollici |
| Running Surface Width | 15.7 pollici |
| Dimensioni dello schermo | 30 pollici |
| Assemblaggio richiesto | Minimal (Handlebar and feet attachment) |
| Codice UPC | 810161332328 |
Garanzia e supporto
LifePro is committed to providing high-quality products and customer satisfaction. The LifePro Pacer Mini Pro Treadmill comes with a garanzia a vita, garantendo tranquillità per il tuo investimento.
For any questions, concerns, or technical support, please contact LifePro customer service:
- Websito: www.lifeprofitness.com (Example link, please replace with actual support link if available)
- E-mail: support@lifeprofitness.com (Example email, please replace with actual support email if available)
- Telefono: [Inserisci qui il numero di telefono]
Please have your model number (LP-PCRMP-BLU-VC) and proof of purchase ready when contacting support.