
GMKtec EVO-X1
Manuale utente del mini PC GMKtec EVO-X1 AI
Model: EVO-X1 | Brand: GMKtec
Introduzione
This manual provides detailed instructions for the setup, operation, maintenance, and troubleshooting of your GMKtec EVO-X1 AI Mini PC. Designed for high performance in gaming, content creation, and everyday computing, the EVO-X1 features the AMD Ryzen AI 9 HX-370 Series processor, advanced graphics, and versatile connectivity options. Please read this manual thoroughly to ensure optimal performance and longevity of your device.

Figura 1: Anteriore e posteriore view of the GMKtec EVO-X1 AI Mini PC, highlighting its compact design and array of ports.
Contenuto della confezione
Upon opening the retail packaging, verify that all items listed below are present and in good condition:
- GMKtec Nucbox EVO AMD Ryzen AI 9 HX 370 Mini PC Computer
- Alimentazione e cavo
- Cavo HDMI
- Supporto VESA e viti
- Manuale dell'utente (questo documento)

Figure 2: Contents of the GMKtec EVO-X1 retail package, including the mini PC, power supply, HDMI cable, VESA mount, and user manual.
Guida all'installazione
Follow these steps to set up your GMKtec EVO-X1 Mini PC:
- Connetti le periferiche: Connect your keyboard, mouse, and monitor(s) to the available USB, HDMI, or DisplayPort interfaces. The EVO-X1 supports triple screen 8K display output via HDMI 2.1 (8K@60Hz), DisplayPort 2.1 (8K@60Hz), and USB 4 40Gbps (supporting PD3.0/DP1.4/DATA).
- Collegamento elettrico: Connect the power supply to the DC IN port on the rear of the mini PC and then plug it into a power outlet.
- Connessione di rete: For wired internet, connect an Ethernet cable to one of the two 2.5G LAN ports. For wireless connectivity, ensure your Wi-Fi network is available; the device supports Wi-Fi 6 and Bluetooth 5.2.
- Avvio iniziale: Press the power button located on the front of the device. The system will boot into the pre-installed operating system (OS Pro).
- Configurazione del sistema operativo: Follow the on-screen instructions to complete the initial setup of the operating system, including language, region, and user account creation.

Figura 3: dettagliata view of the EVO-X1's rich interface, including USB 4.0, HDMI 2.1, DP 2.1, USB 3.2, CTIA, Oculink, and dual 2.5G LAN ports.
Istruzioni per l'uso
Modalità di prestazione
The EVO-X1 AI Mini PC features three adjustable performance modes to suit your needs:
- Modalità silenziosa (35 W): Ideal for light tasks, web browsing, and media consumption. Fan noise is minimized to approximately 35dB.
- Modalità Bilanciamento (54W): A balanced setting for everyday productivity and moderate workloads.
- Modalità Performance (65 W): Maximizes CPU and GPU performance for demanding applications, gaming, and intensive tasks.
These modes can be adjusted via the updated UEFI (BIOS) settings. Refer to the BIOS section for detailed instructions on accessing and configuring these settings.
Configurazione dello schermo
The EVO-X1 supports up to three independent displays simultaneously, with resolutions up to 8K. Connect your monitors using the available HDMI 2.1, DisplayPort 2.1, and USB4 ports. Ensure your cables and monitors support the desired resolutions and refresh rates for optimal visual experience.

Figure 4: The EVO-X1 supporting a triple-screen display setup with up to 8K resolution.
Network and Wireless Connectivity
The device features dual Intel i226V 2.5Gbps LAN ports for high-speed wired network connections, suitable for various applications including firewalls and file servers. For wireless connectivity, the integrated Wi-Fi 6 module provides fast and stable internet access, while Bluetooth 5.2 allows for efficient connection to wireless peripherals.

Figure 5: Illustration of the EVO-X1's Wi-Fi 6 and Bluetooth 5.2 capabilities, ensuring fast and stable wireless connections.
Oculink Port for External GPUs
The EVO-X1 is equipped with an Oculink port, which supports external graphics cards with data transfer speeds up to 64 Gbps. This feature provides significant expansion options for high-end gaming and professional graphics workloads, offering higher bandwidth compared to Thunderbolt's x3 speeds.

Figure 6: The Oculink port enabling connection to an external GPU for enhanced graphics performance.
Video ufficiale del prodotto
Video 1: Un funzionario sopraview of the GMKtec EVO-X1 AI Mini PC, showcasinle sue caratteristiche e capacità.
Manutenzione
Sistema di raffreddamento
The EVO-X1 features an upgraded Hyper Ice Chamber 2.0 cooling design with larger top and bottom cooling fans, providing 360-degree airflow. The copper base helps maintain optimal temperatures. To ensure efficient cooling, keep the ventilation areas clear of obstructions. Regularly inspect and gently clean any dust accumulation from the vents using compressed air.

Figure 7: Internal structure of the EVO-X1, illustrating the dual cooling fans and component layout for efficient heat dissipation.
Espansione di archiviazione
The mini PC includes dual M.2 2280 PCIe 4.0 SSD slots, supporting up to 8TB total storage. If you need to expand storage, ensure you use compatible M.2 NVMe SSDs. Consult a professional if you are unsure about installing additional storage to avoid damaging the device.
Risoluzione dei problemi
This section addresses common issues you might encounter with your GMKtec EVO-X1 Mini PC.
Nessuna uscita di visualizzazione
- Ensure all display cables (HDMI, DisplayPort, USB4) are securely connected to both the mini PC and the monitor.
- Verificare che il monitor sia acceso e impostato sulla sorgente di ingresso corretta.
- Try connecting to a different display port on the mini PC or a different monitor if available.
- Riavviare il mini PC.
Nessun potere
- Check that the power adapter is securely connected to the mini PC and the wall outlet.
- Verificare che la presa a muro funzioni testandola con un altro dispositivo.
- Verify the power adapter is the original one provided with the mini PC.
Prestazioni lente
- Check the selected performance mode in the BIOS. Switch to Balance or Performance mode for demanding tasks.
- Ensure the cooling vents are not obstructed and the fans are operating correctly. Overheating can lead to performance throttling.
- Chiudere le applicazioni non necessarie in esecuzione in background.
- Assicurati che il sistema operativo e i driver siano aggiornati.
Problemi di connettività di rete
- Per le connessioni cablate, assicurarsi che il cavo Ethernet sia collegato correttamente e che il router/modem funzioni.
- For Wi-Fi, check if Wi-Fi is enabled in the operating system settings. Restart your router.
- Ensure Wi-Fi drivers are installed and up to date.
If issues persist after attempting these steps, please contact GMKtec customer support.
Specifiche
| Caratteristica | Dettaglio |
|---|---|
| Processore | AMD Ryzen AI 9 HX-370 Series (Up to 5.1GHz, 12 Cores, 24 Threads) |
| AI NPU | XDNA 2 Architecture, up to 50 TOPS |
| Grafica | AMD Radeon 890M iGPU (RDNA 3.5) |
| Memoria RAM | 64GB LPDDR5X 8000MT/s (Quad Channel) |
| Magazzinaggio | 1TB PCIe 4.0 M.2 2280 SSD (Dual Slots, Max. 8TB) |
| Uscita di visualizzazione | Triplo schermo 8K (HDMI 2.1, DisplayPort 2.1, USB4) |
| Fare rete | Dual Intel i226V 2.5Gbps LAN, Wi-Fi 6, Bluetooth 5.2 |
| Porti | USB4 (PD/DP/DATA), Oculink (PCIe 4.0 x4), USB 3.2 (Gen2) x4, 3.5mm Audio, DC IN |
| Sistema operativo | OS Pro (Compatible with Win 11 Pro, Linux, Ubuntu) |
| Dimensioni | Circa. 7.4 x 7.32 x 5.39 pollici |
| Peso | Circa 4.02 libbre |
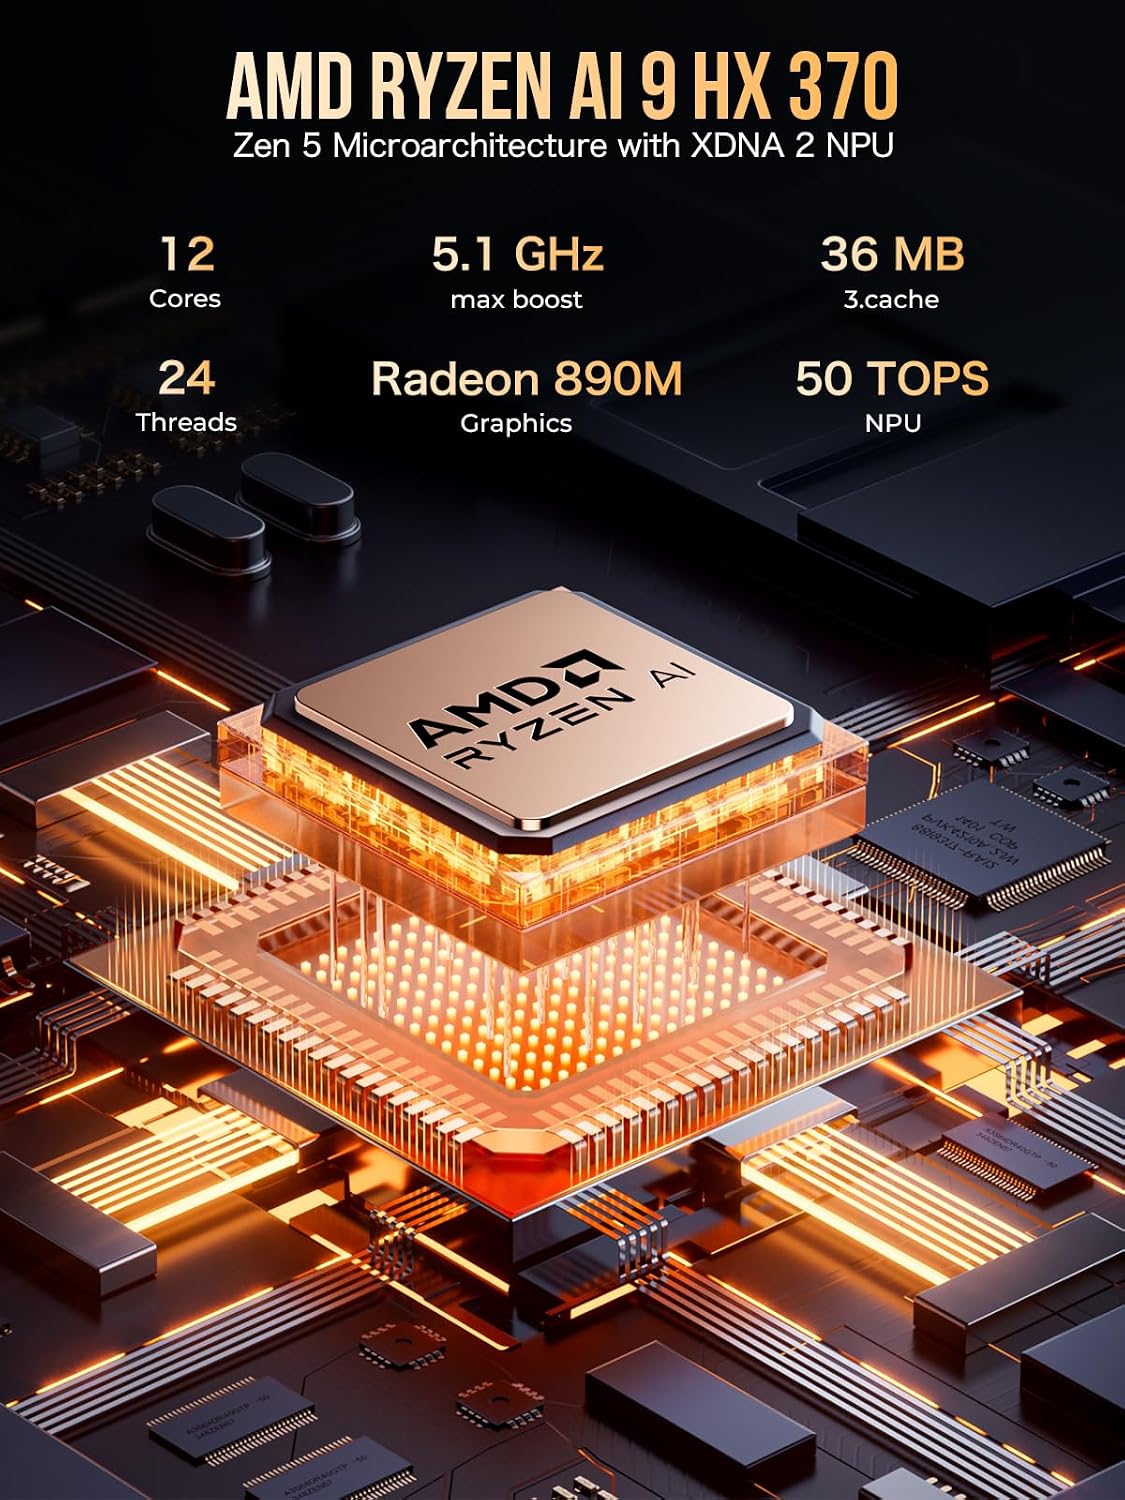
Figure 8: Key specifications of the AMD Ryzen AI 9 HX 370 processor, including cores, threads, max boost clock, cache, Radeon 890M graphics, and NPU TOPS.
Garanzia e supporto
GMKtec offers a 1-year limited warranty for each mini PC, starting from the date of purchase. This warranty covers all defects due to design and workmanship. For warranty claims or technical assistance, please use the following contact methods:
- Contattaci su Amazon: Log in to your Amazon account, navigate to "Your Orders," and select "Ask Product Question" for your purchase.
- Invia un'e-mail al team post-vendita: support@gmktec.com
- Assistenza clienti 24 ore su 7, XNUMX giorni su XNUMX: Available for assistance.
Conservare la prova d'acquisto per la convalida della garanzia.
Ask a question about this manual
Ask about setup, troubleshooting, compatibility, parts, safety, or missing instructions. Manuals+ will review the question and use this page’s manual context to help answer it.