
Montech HeritagePro-B
MONTECH Heritage PRO mATX Gaming Chassis User Manual
Modello: HeritagePro-B | Brand: Montech
Introduzione
This manual provides comprehensive instructions for the setup, operation, and maintenance of your MONTECH Heritage PRO mATX Gaming Chassis. Designed with a unique blend of leather and metal, this compact case offers robust support for high-performance components while maintaining a portable and stylish form factor.
Le caratteristiche principali includono:
- Portable suitcase-style leather handle for convenient mobility.
- Elegant leather and metal fusion with a timeless aesthetic design.
- Supports high-performance components including RTX 40 Series GPUs, ATX PSU, and 360mm AIO liquid cooling.
- Includes 4 x 120mm fans for optimal airflow.
- Additional headphone hanger for added convenience.
Prodotto finitoview
Familiarize yourself with the various components and features of your Heritage PRO chassis.

Figura 1: Complessivamente view of the MONTECH Heritage PRO chassis, showcasing its unique leather handle and compact design.

Figura 2: Front I/O panel featuring power button, reset button, headset audio jack, USB-A 5Gb/s ports, and a Type-C 20Gb/s port.
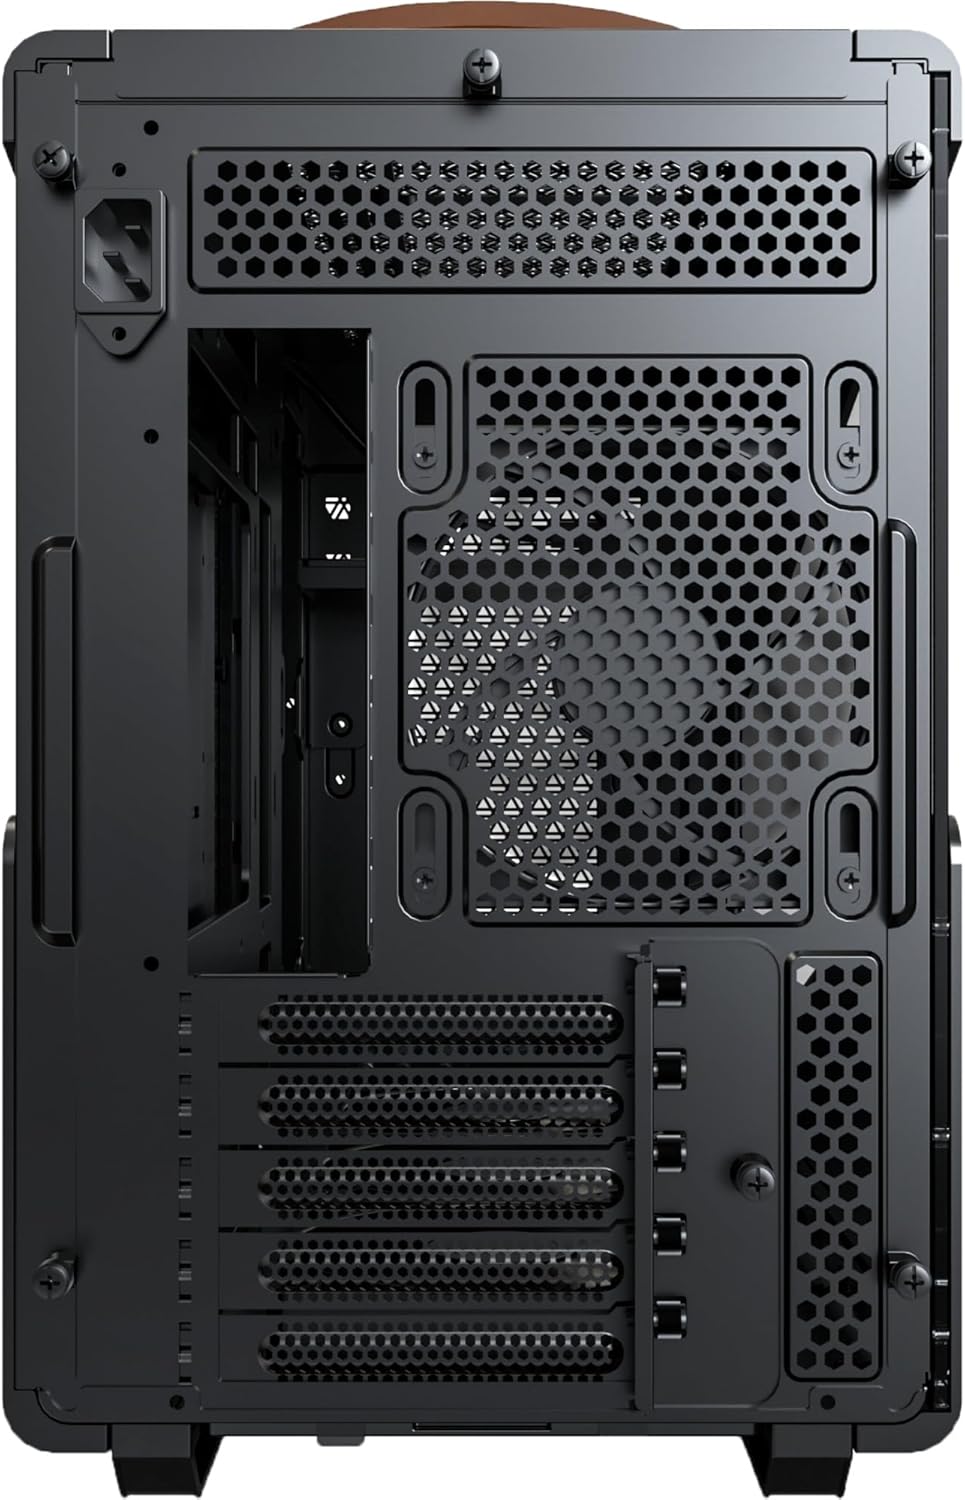
Figura 3: Rear panel layout, including motherboard I/O cutout, expansion slots, and power supply mounting area.

Figura 4: The durable leather handle is engineered to support up to 40KG, facilitating easy transport of your system.
Guida all'installazione
Follow these steps to assemble your computer components within the Heritage PRO chassis.
1. Preparazione del telaio
Before installation, ensure the chassis is placed on a stable, flat surface. Remove the side panels by unscrewing the thumb screws at the rear of the case and gently sliding them off.
2. Installazione della scheda madre
L'Eritage PRO supports Micro-ATX and Mini-ITX motherboards. Align your motherboard with the standoffs inside the chassis. Secure the motherboard using the provided screws. Ensure the I/O shield is properly seated in the rear opening.
3. Installazione dell'unità di alimentazione (PSU)
This chassis supports ATX PSUs. Install your power supply into the designated bottom mount area. Secure it with screws from the rear of the chassis. Route the necessary power cables through the cable management cutouts.
4. Installazione dell'unità di elaborazione grafica (GPU)
L'Eritage PRO can accommodate GPUs up to 400mm in length, supporting RTX 40 Series GPUs. Remove the necessary PCIe slot covers at the rear. Insert your GPU into the PCIe slot on the motherboard and secure it with screws.
5. Installazione del sistema di raffreddamento
The chassis includes 4 x 120mm fans for optimal airflow. Additional cooling options include support for a 360mm AIO liquid cooler. Install fans and radiators in their respective mounting positions (front, top, rear, or bottom) as per your cooling configuration.

Figura 5: Internal layout showing component compatibility: Micro-ATX/Mini-ITX motherboards, 160mm ATX PSU, 400mm GPU, and 360mm AIO support.
6. Installazione dell'unità di archiviazione
Install your 2.5-inch SSDs or 3.5-inch HDDs into the designated drive bays. Secure them with the appropriate screws.
7. Gestione dei cavi
Utilizzate i fori per il passaggio dei cavi e i punti di fissaggio dietro il vassoio della scheda madre per gestire i cavi. Questo migliora il flusso d'aria e l'estetica.
8. Reassembling the Chassis
Once all components are installed and cables are managed, carefully reattach the side panels and secure them with the thumb screws.
Istruzioni per l'uso
After successful assembly, connect your peripherals and power cable to the system. Press the power button on the front I/O panel to turn on your computer. The system status indicator will illuminate.
To power off, initiate a shutdown from your operating system. For a forced shutdown, press and hold the power button for several seconds.
Manutenzione
Regular maintenance helps ensure optimal performance and longevity of your chassis.
- Filtri antipolvere: L'Eritage PRO features magnetic dust filters. Regularly remove and clean these filters to prevent dust buildup and maintain optimal airflow. Gently brush or rinse them with water (ensure they are completely dry before reinstallation).
- Pulizia esterna: Wipe the exterior surfaces, including the leather and metal parts, with a soft, dry cloth. For stubborn marks on metal, a slightly damp È possibile utilizzare un panno e asciugare immediatamente. Evitare prodotti chimici aggressivi o detergenti abrasivi.
- Pulizia interna: Periodically use compressed air to clear dust from internal components and fans. Ensure the system is powered off and unplugged before performing internal cleaning.
Risoluzione dei problemi
Questa sezione affronta i problemi più comuni che potresti incontrare.
| Problema | Possibile causa | Soluzione |
|---|---|---|
| Il sistema non si accende. | Cavi di alimentazione allentati, alimentatore difettoso, collegamenti errati del pannello frontale. |
|
| I ventilatori non girano. | Loose fan connections, fan controller issues, faulty fans. |
|
| Componenti surriscaldati. | Poor airflow, dust buildup, incorrect fan orientation. |
|
Specifiche
Detailed technical specifications for the MONTECH Heritage PRO mATX Gaming Chassis.
| Caratteristica | Dettaglio |
|---|---|
| Marca | Montech |
| Nome del modello | maletagePro-B |
| Tipo di caso | Mid Tower |
| Compatibilità della scheda madre | Micro-ATX, Mini-ITX |
| Materiale | Pelle, Metallo |
| Colore | Marrone (per questo modello specifico) |
| Peso dell'articolo | 13.23 libbre (6.0 kg) |
| Dimensioni del prodotto (LxWxH) | 18.9 x 9.25 x 14.49 pollici (48.0 x 23.5 x 36.8 cm) |
| Tipo di montaggio dell'alimentatore | Montaggio inferiore |
| Metodo di raffreddamento | Acqua, Aria |
| Ventole preinstallate | 4 ventole da 120 mm |
| Lunghezza massima della GPU | 400mm |
| Lunghezza massima dell'alimentatore | 160 mm (alimentatore ATX) |
| Supporto per radiatori AIO | Fino a 360 mm |
| Porte I / O anteriori | Power Button, Reset Button, Headset Audio Jack (1), USB-A 5Gb/s (2), Type-C 20Gb/s (1) |
Garanzia e supporto
For detailed warranty information and technical support, please refer to the official Montech webo contattare direttamente il servizio clienti. Conservare la prova d'acquisto per eventuali reclami in garanzia.
Official Montech Websito: www.montechpc.com
Ask a question about this manual
Ask about setup, troubleshooting, compatibility, parts, safety, or missing instructions. Manuals+ will review the question and use this page’s manual context to help answer it.