1. Introduzione
This manual provides essential instructions for setting up, operating, maintaining, and troubleshooting your CRUA 32-inch 4K UHD 160Hz Curved Gaming Monitor (Model CR320A). Please read this manual thoroughly before using the product to ensure proper functionality and to prevent damage.
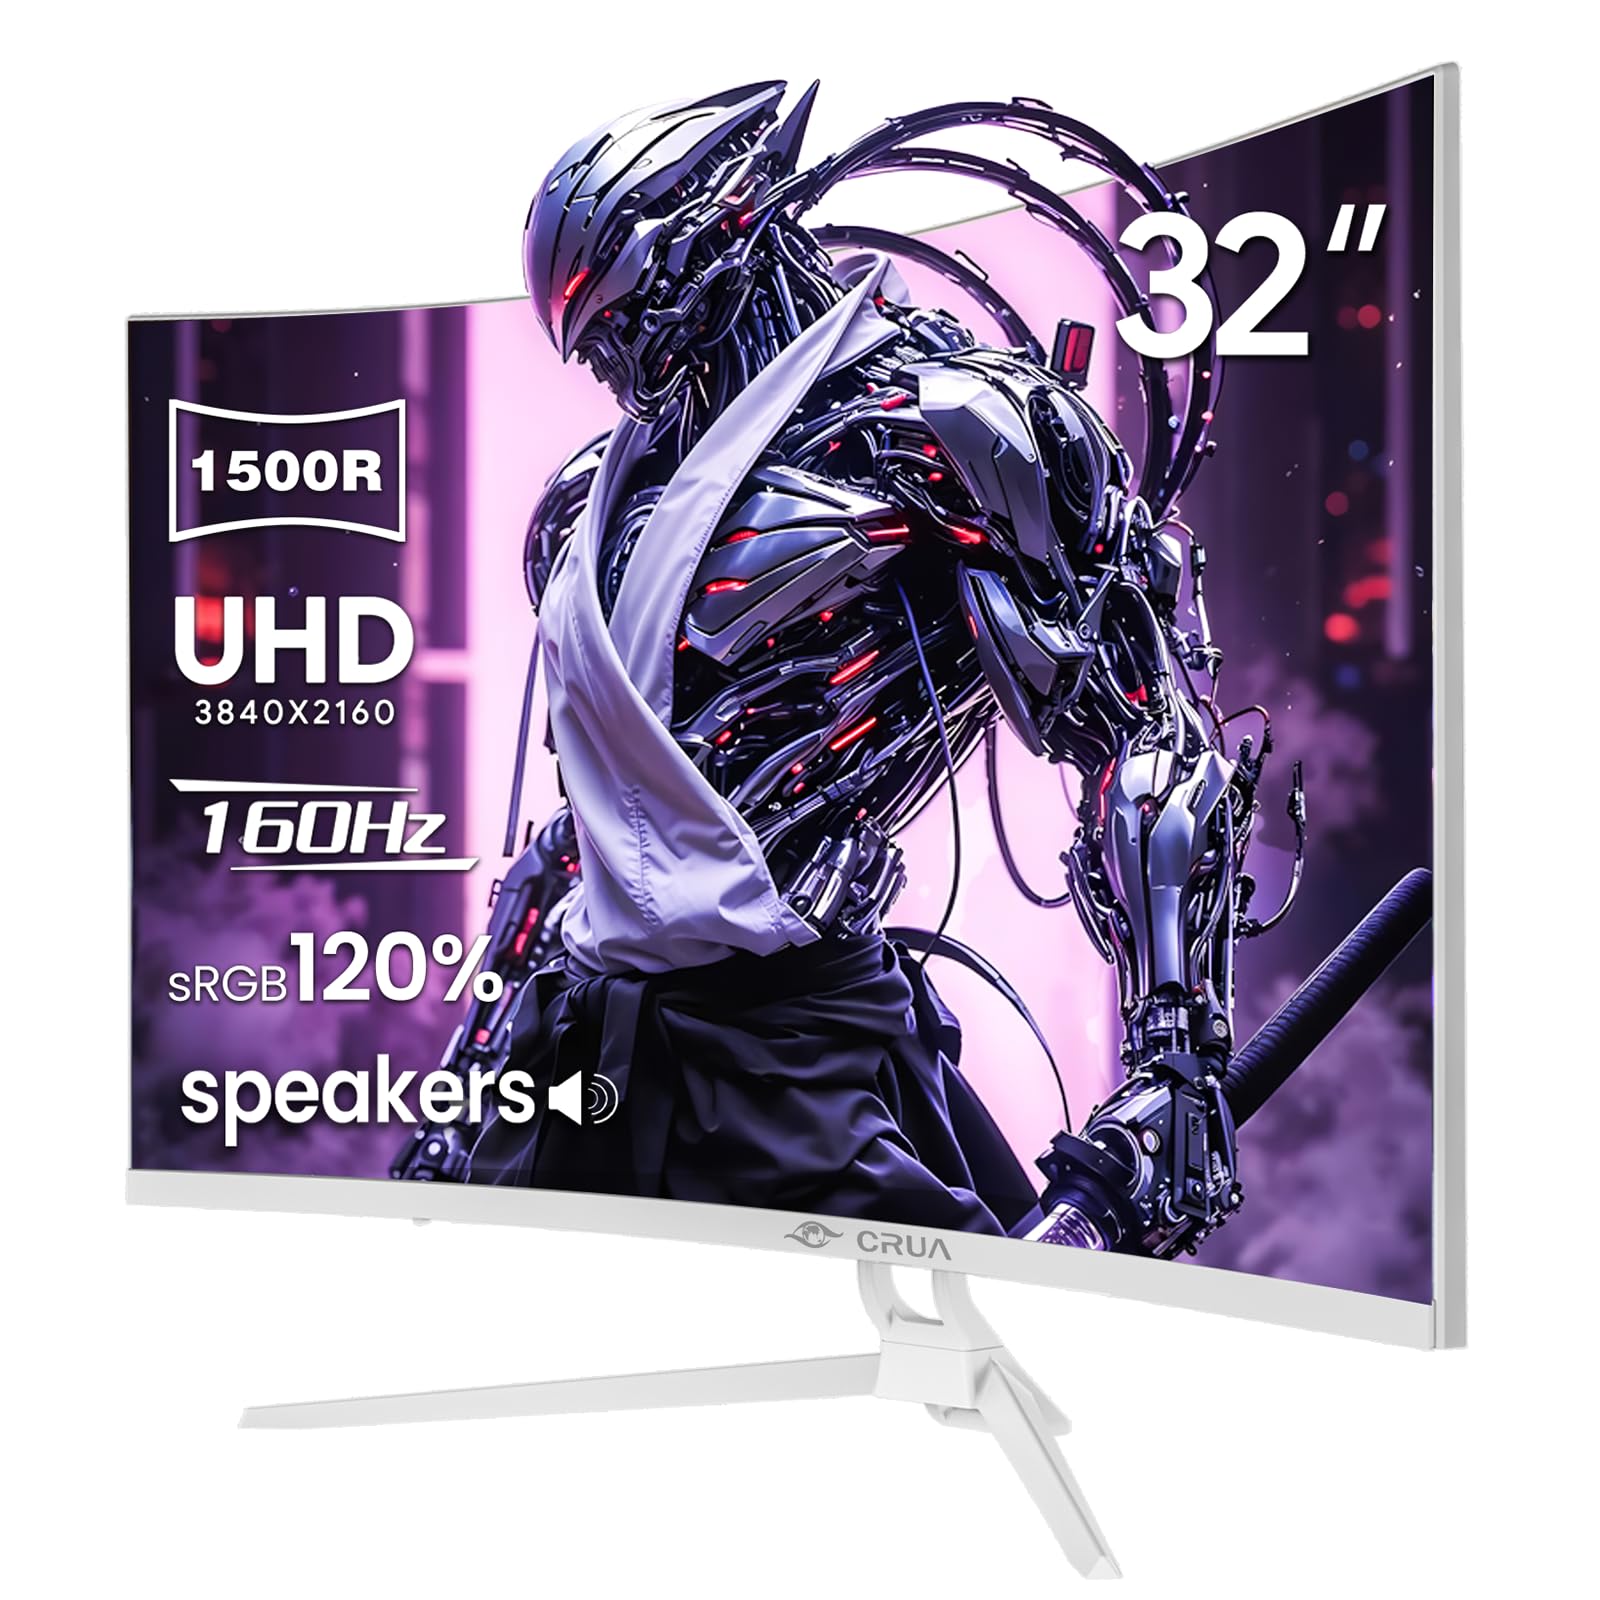
Figura 1: Fronte view of the CRUA 32-inch 4K UHD 160Hz Curved Gaming Monitor.
2. Cosa c'è nella scatola
Verificare che tutti i componenti siano presenti nella confezione:
- CRUA 32-inch Monitor
- Monitor Base and Support
- Cavo DisplayPort (DP)
- Unità di alimentazione
- Manuale dell'utente (questo documento)
3. Impostazione
3.1 Montaggio del supporto
- Carefully remove the monitor from its packaging, placing it face down on a soft, clean surface to prevent screen damage.
- Attach the monitor support arm to the back of the monitor. Ensure it clicks securely into place or is fastened with screws if provided.
- Connect the base to the support arm and secure it with the provided screw(s).
Note: The included stand is fixed and does not offer height, tilt, or swivel adjustments. For adjustable positioning, the monitor supports VESA wall mounting (75mm x 75mm) using a compatible VESA mount (sold separately).

Figura 2: Posteriore view of the monitor with stand attachment area and RGB lighting.
3.2 Cavi di collegamento
- Connect the DisplayPort (DP) cable from your computer's graphics card to the DP 1.4 port on the monitor. Alternatively, use an HDMI 2.1 cable for compatible devices.
- Connect the power supply unit to the monitor's power input, then plug the power cord into an electrical outlet.
- Assicurarsi che tutti i collegamenti siano sicuri.

Figure 3: Monitor connectivity ports including HDMI 2.1, DP 1.4, and audio out.
4. Funzionamento del monitor
4.1 Accensione/spegnimento
Premere il pulsante di accensione, solitamente situato sul retro o in basso a destra del monitor, per accendere o spegnere il monitor. La spia di accensione si accende quando il monitor è acceso.
4.2 Menu di visualizzazione su schermo (OSD)
The OSD menu allows you to adjust various monitor settings. Use the navigation buttons (joystick or individual buttons) typically found on the back or bottom of the monitor to access and navigate the OSD.
- Sorgente di input: Selezionare tra gli ingressi DisplayPort e HDMI.
- Impostazioni immagine: Regola luminosità, contrasto, nitidezza e temperatura del colore.
- Impostazioni colore: Fine-tune color gamut (120% sRGB), gamma, and color depth (8-bit).
- Impostazioni di gioco: Enable/disable AMD FreeSync, adjust refresh rate (144Hz/160Hz), and other gaming-specific features.
- Impostazioni audio: Control volume for the built-in speakers or connected external audio devices.
- Illuminazione RGB: Customize the RGB lighting effects on the back of the monitor.

Figure 4: Visual representation of color and brightness capabilities.
4.3 AMD FreeSync
This monitor supports AMD FreeSync technology, which synchronizes the monitor's refresh rate with your graphics card's frame rate to eliminate screen tearing and stuttering. Ensure FreeSync is enabled in both the monitor's OSD and your graphics card's control panel for optimal performance.

Figure 5: Visualizing the benefit of 160Hz refresh rate and FreeSync.
4.4 Curved Display (1500R)
The 1500R curvature of the screen provides an immersive viewing experience, reducing eye strain and enhancing depth perception, especially beneficial for gaming and multimedia content.

Figure 6: The 1500R curved screen design.
5. Manutenzione
5.1 Pulizia del monitor
- Prima di procedere alla pulizia, spegnere sempre il monitor e scollegare il cavo di alimentazione.
- Utilizzare un panno morbido e privo di lanugine leggermente dampcon acqua o con un detergente per schermi non abrasivo.
- Non spruzzare il detergente direttamente sullo schermo. Applicalo prima sul panno.
- Evitare l'uso di alcol, ammoniaca o detergenti abrasivi, poiché potrebbero danneggiare la superficie dello schermo.
5.2 Cura generale
- Tenere il monitor lontano dalla luce solare diretta, da calore eccessivo e dall'umidità.
- Assicurare un'adeguata ventilazione attorno al monitor per evitare il surriscaldamento.
- Evitare di posizionare oggetti pesanti sul monitor o sui suoi cavi.
6. Risoluzione Dei Problemi
6.1 Nessun potere
- Verificare che il cavo di alimentazione sia collegato saldamente sia al monitor sia alla presa di corrente.
- Verificare che la presa di corrente funzioni correttamente collegandovi un altro dispositivo.
- Assicurarsi che il pulsante di accensione del monitor sia premuto.
6.2 Nessun segnale
- Verificare che il cavo video (DP o HDMI) sia collegato saldamente sia al monitor sia al computer/dispositivo.
- Assicurarsi che nel menu OSD del monitor sia selezionata la sorgente di input corretta.
- Check if your computer/device is powered on and outputting a signal.
- Se disponibile, provare un cavo video o una porta diversa.
6.3 Screen Flickering or Tearing
- Assicurati che AMD FreeSync sia abilitato sia nell'OSD del monitor sia nelle impostazioni della scheda grafica.
- Verifica che i driver della scheda grafica siano aggiornati.
- Check the refresh rate setting in your operating system's display settings; it should be set to 144Hz or 160Hz.
6.4 Washed Out Colors or Poor Picture Quality
- Access the OSD menu and adjust picture settings such as brightness, contrast, and color temperature.
- Ripristinare le impostazioni predefinite di fabbrica del monitor tramite il menu OSD.
- Ensure your graphics card output settings are correctly configured for the monitor's resolution (3840x2160) and color depth.
6.5 No Sound from Built-in Speakers
- Check the volume level in the monitor's OSD menu.
- Verify that the audio output on your computer/device is set to the monitor.
- Ensure the video cable (DP or HDMI) supports audio transmission.
7. Specifiche
| Caratteristica | Specificazione |
|---|---|
| Numero di modello | CR320A |
| Dimensioni dello schermo | 32 pollici |
| Tipo di pannello | VA |
| Curvatura | 1500R |
| Risoluzione | 4K UHD (3840 x 2160 pixel) |
| Proporzioni | 16:9 |
| Frequenza di aggiornamento | 144Hz / 160Hz |
| Luminosità | 320 candele (cd/m²) |
| Rapporto di contrasto | 3000:1 |
| Gamma di colori | 120% sRGB |
| Profondità del colore | 8 bit |
| Superficie dello schermo | Opaco |
| Connettività | HDMI 2.1, DisplayPort 1.4 |
| Audio | Altoparlanti incorporati |
| Compatibilità montaggio VESA | 75 mm x 75 mm |
| Dimensioni del prodotto (L x P x A) | 1 x 28 x 16.6 pollici |
| Peso dell'articolo | 16.57 libbre |
8. Garanzia e supporto
8.1 Product Assurance
CRUA is committed to providing high-quality computer monitors and premium services. We offer assurances for our products to ensure customer satisfaction.
8.2 Assistenza clienti
If you encounter any issues or have questions regarding your CRUA monitor, please contact our customer support team. We are available to assist you and resolve any problems you may experience.
For support, please refer to the contact information provided on the official CRUA websito o la documentazione di acquisto.