
1. Introduzione
Grazie per l'acquistoasing the Trevi RA 7F50 BT Portable Multiband Radio. This device offers versatile audio entertainment with FM, AM, and SW radio bands, wireless connectivity, and MP3 playback via USB and Micro SD. Its integrated solar panel and USB Type-C charging port ensure power availability wherever you go. Please read this manual carefully to ensure proper use and maintenance of your radio.
2. Informazioni sulla sicurezza
- Non esporre il dispositivo a pioggia, umidità o temperature estreme.
- Evitare di far cadere la radio o di sottoporla a forti urti.
- Do not disassemble the unit. Repairs should only be performed by qualified personnel.
- Tenere fuori dalla portata dei bambini.
- Assicurare una ventilazione adeguata durante la ricarica.
- Use only the provided USB Type-C cable for charging or a certified equivalent.
3. Prodotto finitoview
Familiarize yourself with the components and controls of your Trevi RA 7F50 BT radio.
Davanti View
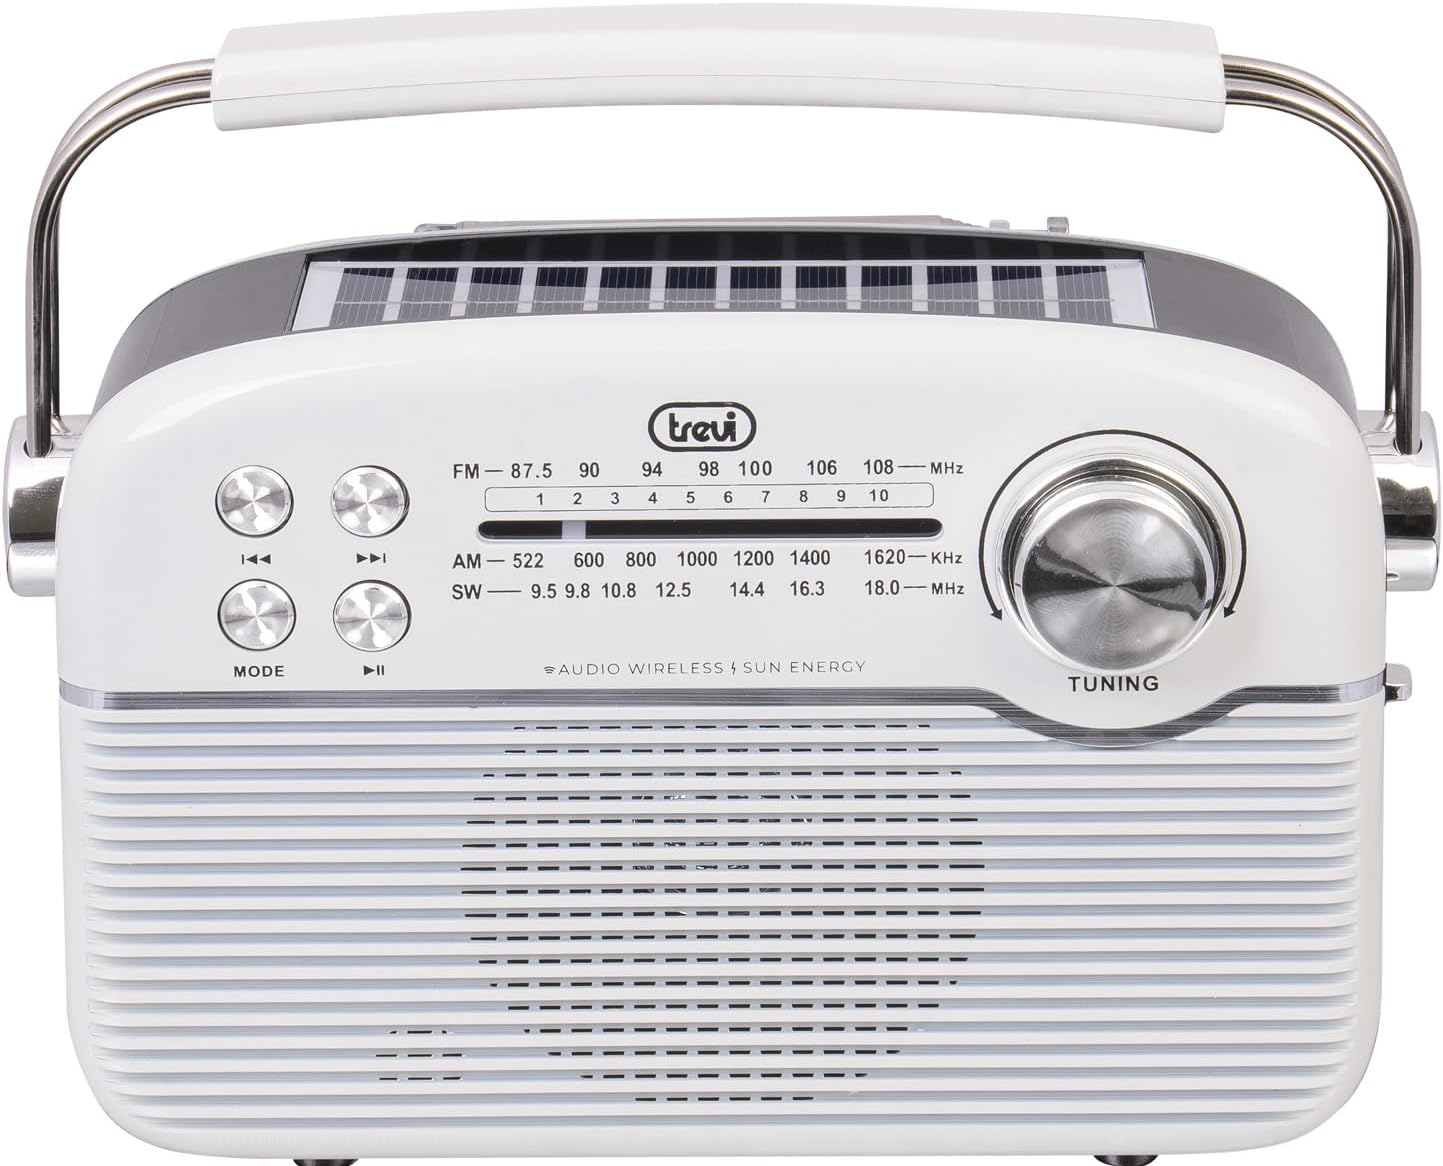
Immagine: Frontale view of the Trevi RA 7F50 BT radio. Visible elements include the main speaker grille, frequency display for FM, AM, and SW bands, control buttons for playback and mode selection, and a large tuning dial on the right side. The Trevi logo is centered above the frequency display.
Superiore e laterale View

Immagine: parte superiore e laterale view of the Trevi RA 7F50 BT radio. This perspective clearly shows the integrated solar panel on the top surface, designed for charging. The sturdy carrying handle is also prominent, extending across the top of the unit. The side view reveals the rounded edges and overall compact design.
Posteriore View

Immagine: Posteriore view of the Trevi RA 7F50 BT radio. The telescopic antenna is visible at the top. Below it, the various input ports are shown, including a USB port for flash drives, a Micro SD card slot for memory cards, and a USB Type-C port for charging the internal battery. The back panel also features a textured design.
Controlli e porte:
- Quadrante di sintonia: Per selezionare le frequenze radio.
- Pulsante Modalità: Switches between radio (FM/AM/SW), Wireless, and MP3 (USB/Micro SD) modes.
- Pulsante Play/Pausa: Controls playback in MP3 and Wireless modes.
- Pulsanti traccia precedente/successiva: Navigates tracks in MP3 and Wireless modes, or fine-tunes radio frequency.
- Controllo del volume: Regola il livello di uscita audio.
- Porta USB: Per collegare unità flash USB.
- Slot per scheda microSD: For inserting Micro SD memory cards.
- Porta USB di tipo C: Per caricare la batteria interna.
- Antenna telescopica: Per una migliore ricezione radio.
- Pannello solare: Integrated on top for solar charging.
4. Impostazione
4.1 Caricamento della batteria
The Trevi RA 7F50 BT radio is equipped with a rechargeable lithium battery (1500 mAh) and offers two charging methods:
- Ricarica USB di tipo C: Connect the provided USB Type-C cable to the radio's charging port and the other end to a standard USB power adapter (not included) or a computer's USB port. The charging indicator light will illuminate.
- Ricarica solare: Place the radio with its solar panel facing direct sunlight. The integrated 80 mA solar panel will slowly recharge the battery. This method is ideal for maintaining charge or for emergency power in outdoor environments.
Si consiglia di caricare completamente la batteria prima del primo utilizzo.
4.2 Accensione iniziale
Locate the Power On/Off switch, usually on the side or back of the unit. Slide it to the "ON" position. The radio will power on, and the display (if available) will light up.
5. Istruzioni per l'uso
5.1 Funzionamento radio (FM/AM/SW)
- Seleziona la modalità radio: Premere il tasto MODALITÀ button repeatedly until you reach the desired radio band (FM, AM, or SW).
- Estendi antenna: For optimal FM and SW reception, fully extend the telescopic antenna. For AM, the internal ferrite antenna is typically sufficient.
- Sintonizzarsi su una stazione: Ruotare il ACCORDATURA dial to scan for stations. The frequency display will show the current frequency.
- Regola volume: Use the volume control knob to set the desired listening level.
5.2 Wireless Connectivity (Bluetooth)
- Enter Wireless Mode: Premere il tasto MODALITÀ button repeatedly until "BT" or "Wireless" appears on the display (if applicable), or you hear an audible prompt indicating Bluetooth pairing mode.
- Associa al dispositivo: On your smartphone, tablet, or other Bluetooth-enabled device, go to the Bluetooth settings and search for available devices. Select "Trevi RA 7F50 BT" from the list.
- Conferma: Once paired, the radio will indicate a successful connection (e.g., an audible tone or stable indicator light).
- Riproduci audio: You can now play audio from your connected device through the radio's speaker. Use the radio's playback controls (Play/Pause, Previous/Next) or your device's controls.
5.3 MP3 Playback (USB/Micro SD)
- Inserisci supporto: Insert a USB flash drive into the USB port or a Micro SD card into the Micro SD slot. Ensure the media contains MP3 audio files.
- Enter MP3 Mode: Premere il tasto MODALITÀ button repeatedly until the radio automatically switches to MP3 playback mode, or you hear an audible prompt.
- Controlli di riproduzione: Utilizzare il Riproduci/Pausa button to start or pause playback. Use the Traccia precedente/successiva pulsanti per saltare tra le tracce.
6. Manutenzione
- Pulizia: Pulire la radio con un panno morbido e asciutto. Non utilizzare detergenti abrasivi o solventi.
- Cura della batteria: To prolong battery life, avoid fully discharging the battery frequently. Recharge regularly, especially if the unit will be stored for an extended period.
- Magazzinaggio: Conservare la radio in un luogo fresco e asciutto, lontano dalla luce solare diretta e da temperature estreme.
7. Risoluzione Dei Problemi
| Problema | Possibile causa | Soluzione |
|---|---|---|
| Nessun potere | Battery discharged; Power switch off. | Charge the battery via USB-C or solar panel; Ensure power switch is ON. |
| Scarsa ricezione radio | Antenna non estesa; Segnale debole; Interferenza. | Estendere completamente l'antenna telescopica; Riposizionare la radio; Provare a sintonizzarsi su una stazione più forte. |
| Cannot connect via Wireless (Bluetooth) | Radio not in Wireless mode; Device not discoverable; Already connected to another device. | Press MODE to enter Wireless mode; Ensure your device's Bluetooth is on and discoverable; Disconnect from other devices. |
| MP3 filenon sta giocando | Non corretto file format; USB/Micro SD not inserted correctly; Corrupted media. | Garantire files are MP3 format; Reinsert USB/Micro SD; Try different media. |
8. Specifiche
- Modello: Modello RA 7F50 BT
- Bande radiofoniche: FM, AM, SO
- Connettività: Wireless (Bluetooth), USB, Micro SD
- Fonte di energia: Rechargeable Lithium Battery (1500 mAh), Solar Panel (80 mA max), USB Type-C
- Ingresso volumetage: 3.7V CC
- Dimensioni: 25L x 11W x 20H cm (circa)
- Peso: 0.98 kg (circa)
- Componenti inclusi: USB / Type-C charging cable, User Manual
9. Cosa c'è nella scatola
- Trevi RA 7F50 BT Radio portatile multibanda
- Cavo di ricarica USB/tipo C
- Manuale d'uso
10. Garanzia e supporto
This product is covered by a standard manufacturer's warranty. For detailed warranty information, technical support, or service inquiries, please refer to the warranty card included with your product or visit the official Trevi websito. Conservare la prova d'acquisto per eventuali reclami in garanzia.