1. Prodotto finitoview
The Andeman Cordless Pressure Washer is a portable, battery-powered cleaning device designed for various outdoor tasks. It offers powerful cleaning performance without the need for a direct water faucet connection, providing ultimate flexibility.
Figure 1: Andeman Cordless Pressure Washer and included accessories.
2. Contenuto della confezione
Verifica che tutti gli articoli elencati di seguito siano inclusi nel tuo pacchetto:

Figura 2: dettagliata view of all components in the package.
- Cordless Pressure Washer Unit
- Caricabatterie
- Removable Foam Bottle
- Lithium Battery (2x 3.0Ah included)
- 6-in-1 Multi-function Nozzle
- Manuale d'uso
- Filtro per l'acqua
- Connettore per bottiglia
- Adattatore per tubo
- 5m/16.4ft Water Hose
3. Istruzioni per l'installazione
3.1 Installazione della batteria
Ensure the battery is fully charged before first use. Slide the 21V Lithium-Ion battery into the base of the pressure washer handle until it clicks securely into place.
Video 1: Andeman Pressure Washer Installation Guide. This video demonstrates the battery installation process.
3.2 Attacco ugello
Connect the 6-in-1 multi-function nozzle to the front of the pressure washer unit. Push it in firmly and rotate clockwise until it locks into position.

Figure 3: Visual guide for attaching the battery and nozzle.
3.3 Collegamento del tubo
Attach the hose adapter to the water inlet on the pressure washer. Then, connect the 5m water hose to the adapter and tighten it securely to prevent leaks.
3.4 Water Source Options
The Andeman Cordless Pressure Washer offers flexible water intake methods:
- Secchio autoadescante: Place the weighted water filter end of the hose into a bucket of water.
- Bottle Self-Priming: Use the included bottle adapter to connect a standard soda bottle (e.g., 2-liter) directly to the pressure washer.
- Pool Self-Priming: Place the weighted water filter end of the hose directly into a pool or other large water body.

Figure 4: Three convenient ways to draw water for your pressure washer.
Nota: This product lacks a flow-stop feature. Direct faucet connections are not recommended to avoid potential leaks.
4. Istruzioni per l'uso
4.1 Accensione/Spegnimento
With the battery installed and water source connected, press and hold the trigger to start the pressure washer. Release the trigger to stop. Ensure the safety lock is engaged when not in use.
4.2 Selezione dell'ugello
The 6-in-1 nozzle allows you to customize spray patterns for different cleaning tasks. Rotate the nozzle head to select from the following patterns:
- 0° (getto diretto): For stubborn dirt, moss, and rusty spots.
- 15° (Narrow Fan): For brick, cement floors, and wood.
- 25° (Medium Fan): For glass, plastic surfaces, and ceramics.
- 40° (Wide Fan): For large-area spraying, watering plants, or rinsing.
- Jet: A powerful stream for tough grime.
- Doccia: A gentle spray for delicate surfaces or watering.
Video 2: Guide on how to use the 6-in-1 nozzle for various cleaning tasks.
4.3 Utilizzo del cannone a schiuma
For deep cleaning or car detailing, attach the removable foam bottle. Fill it with your preferred cleaning solution. The upgraded foam blaster creates 50% thicker foam for optimal soap application.

Figure 5: The 400ML adjustable pressure foam bottle for effective cleaning.
4.4 Suggerimenti per la pulizia
- Always start with a wider spray pattern on delicate surfaces and adjust as needed.
- Tenere l'ugello a una distanza adeguata dalla superficie per evitare danni.
- For heavily soiled areas, pre-soak with foam or a wider spray before using a direct jet.
5. Manutenzione
5.1 Ricarica della batteria
The 3.0Ah Lithium-Ion batteries charge fully in approximately 3 hours. Use the provided charger to ensure optimal battery life.

Figura 6: Specifiche della batteria e dettagli di ricarica.
5.2 Water Filter Cleaning
Regularly inspect and clean the water filter to prevent clogging and maintain consistent suction efficiency. The weighted filter design helps keep it submerged for better performance.
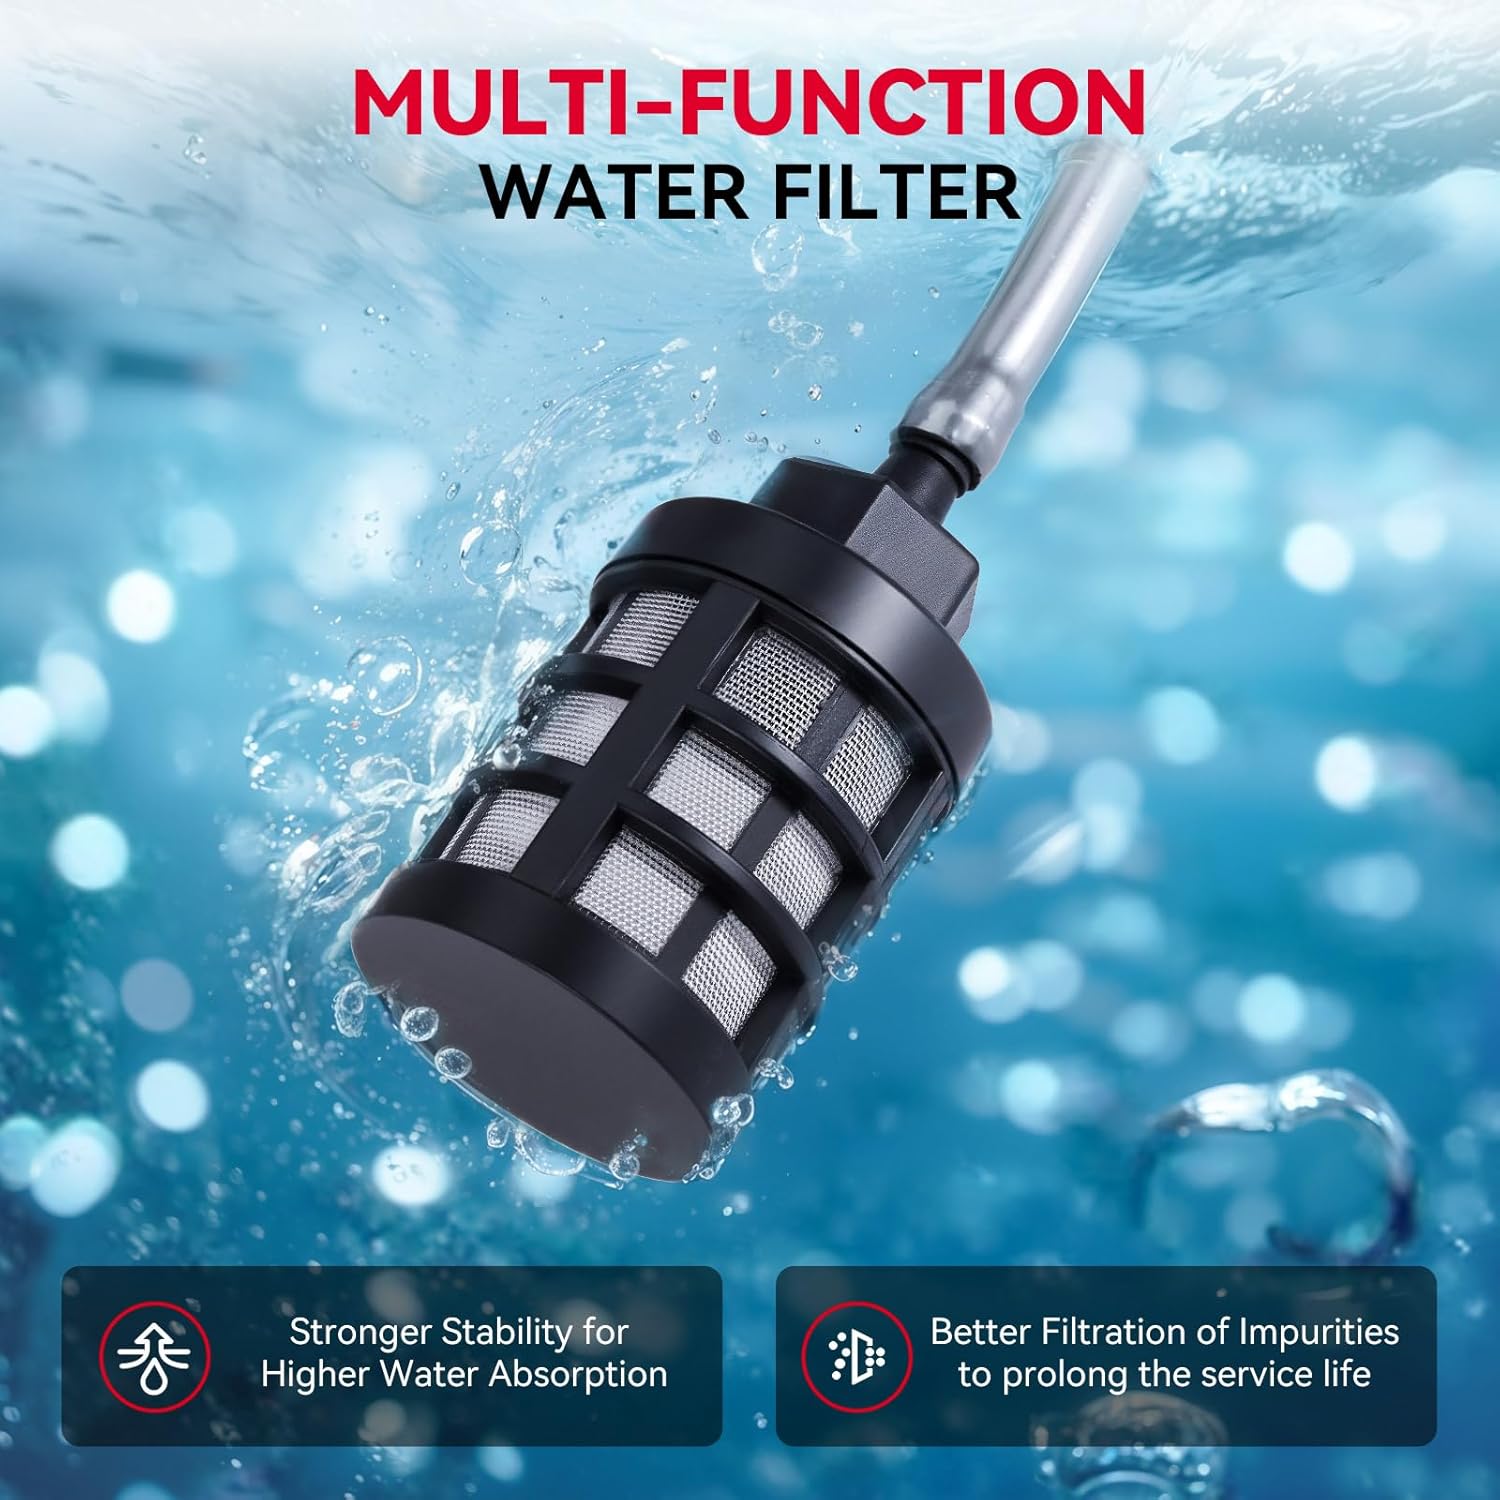
Figure 7: The multi-function water filter ensures better filtration of impurities.
5.3 Conservazione
After each use, ensure the pressure washer is drained of all water. Store the unit and all accessories in the rugged carry case in a dry, cool place.
6. Risoluzione Dei Problemi
- Nessun flusso d'acqua: Check if the water filter is clean and fully submerged. Ensure the hose is properly connected and not kinked.
- Bassa pressione: Verify the battery is fully charged. Check the nozzle setting; a wider spray will have lower perceived pressure. Ensure the water source is adequate.
- Batteria non in carica: Ensure the charger is properly connected to both the battery and a power outlet.
- Nota del prodotto: All products undergo rigorous waterproof and battery testing prior to shipment. A small amount of residual moisture inside is normal and poses no safety risk.
7. Specifiche
| Caratteristica | Specificazione |
|---|---|
| Marca | Andeman |
| Fonte di alimentazione | Alimentato a batteria |
| Pressione massima | 800 bar |
| Portata massima | 1.5 galloni al minuto (GPM) |
| Lunghezza del tubo flessibile | 16.4 piedi (5 m) |
| Tipo di batteria | 21V Lithium Ion (2x 3.0Ah included) |
| Peso dell'articolo | 8.82 libbre |
| Dimensioni del prodotto | 16.54 cm L x 13.11 cm P x 5.04 cm A |
| Numero modello articolo | Andeman2 |
8. Garanzia e supporto
For any inquiries or support needs, please contact our customer service team. Refer to your purchase documentation for specific warranty details. Our team is available 24/7 to assist you.