
1. Istruzioni di sicurezza
Please read all instructions carefully before using the KEENSTAR 20Bar Espresso Machine. Keep this manual for future reference.
- Assicurarsi che l'apparecchio sia collegato a una presa di corrente con messa a terra e con la tensione correttatage.
- Non immergere la macchina, il cavo di alimentazione o la spina in acqua o altri liquidi.
- Tenere i bambini e gli animali domestici lontani dall'apparecchio durante il funzionamento.
- Scollegare la macchina quando non è in uso e prima di pulirla.
- Non utilizzare la macchina con un cavo o una spina danneggiati.
- Use only medium-ground coffee (greater than 0.5mm) to prevent clogging and ensure proper extraction.
- Non superare il livello massimo dell'acqua indicato sul serbatoio.
- Ensure the portafilter is fully locked before starting the brewing process.
- Prestare attenzione quando si maneggiano superfici calde e vapore.
2. Prodotto finitoview
2.1 Componenti
The KEENSTAR 20Bar Espresso Machine includes the following main components:
- Pannello di controllo (touch screen)
- Water Tank (37oz / 1.1 Liters)
- Manopola del vapore
- Maniglia Portafiltro
- Portafiltro
- 1-Shot Filter Basket
- 2-Shot Filter Basket
- Cup Plate (Heated)
- Vassoio raccogli gocce rimovibile
- Steam Nozzle (Milk Frother)
- Cucchiaino da caffè e Tamper
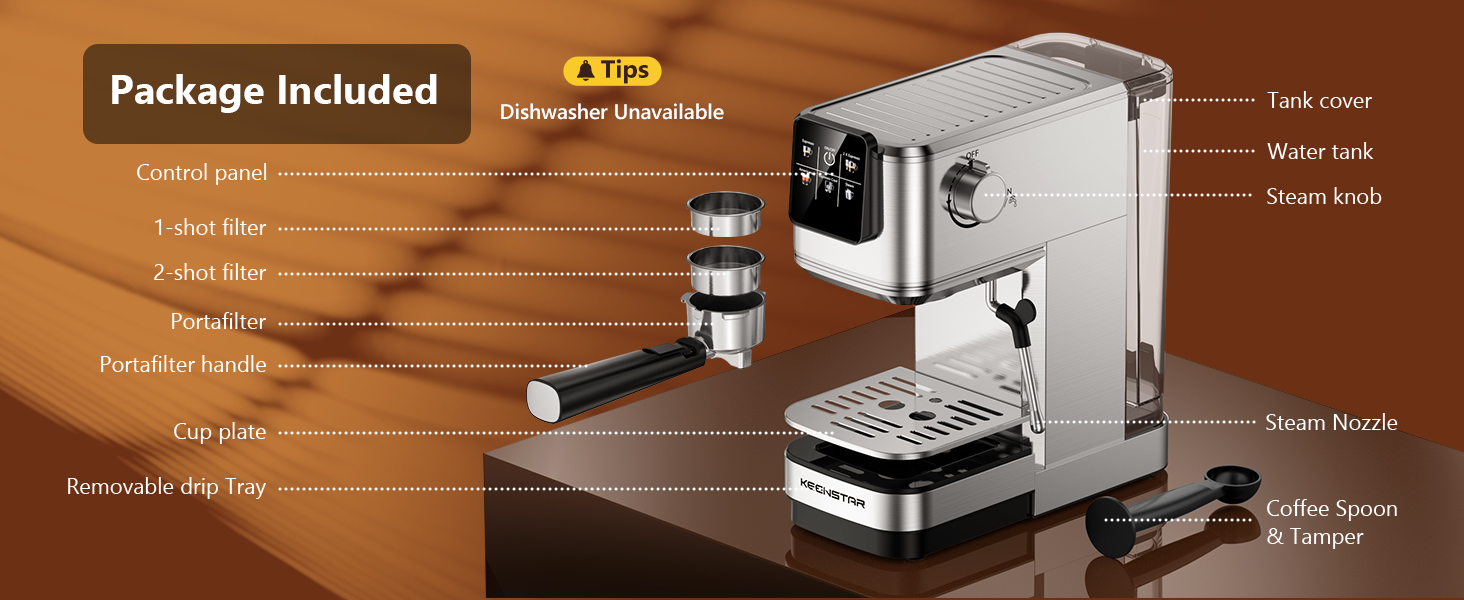
Figura 1: Sopraview of KEENSTAR Espresso Machine components.
2.2 Specifiche
| Caratteristica | Specificazione |
|---|---|
| Marca | KEENSTAR |
| Nome del modello | JH-C5010E |
| Sistema di pressione | Pompa professionale da 20 bar |
| Energia | 1350W |
| Capacità del serbatoio dell'acqua | 1.1 litri (37 once) |
| Dimensioni del prodotto | 11.8"P x 5.5"L x 12.6"A |
| Materiale | Acciaio inossidabile |
| Tipo di ingresso caffè | Caffè macinato |
| Tipo di filtro | Reusable (1-shot, 2-shot) |
| Caratteristiche speciali | Rapid Cold Brew, Touch Screen, Milk Frother, Fast Heating System, Pre-Soak Technology |

Figura 2: Product dimensions for the KEENSTAR Espresso Machine.
3. Impostazione
3.1 Pulizia iniziale
Before first use, clean all removable parts (water tank, portafilter, filter baskets, drip tray) with warm soapy water. Wipe the exterior of the machine with a damp stoffa.
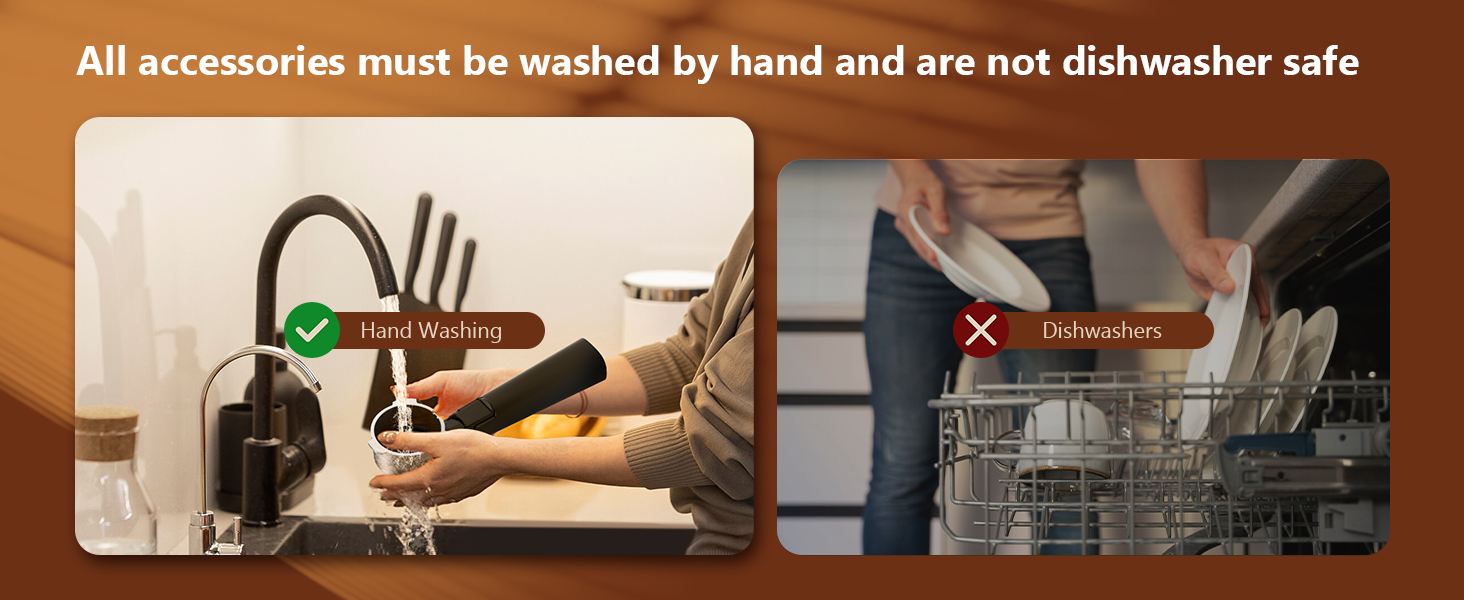
Figura 3: All accessories must be washed by hand and are not dishwasher safe.
3.2 Priming the Machine (Before Each Use)
To ensure optimal performance and drain air from the pipes, prime the machine before each use:
- Fill the water tank with fresh water and press the power button to turn on the machine.
- Turn the steam knob to the "ON" position.
- Wait for water to run out from the steam wand in a steady stream.
- Turn the steam knob to the "OFF" position.
- Spegnere la macchina del caffè.
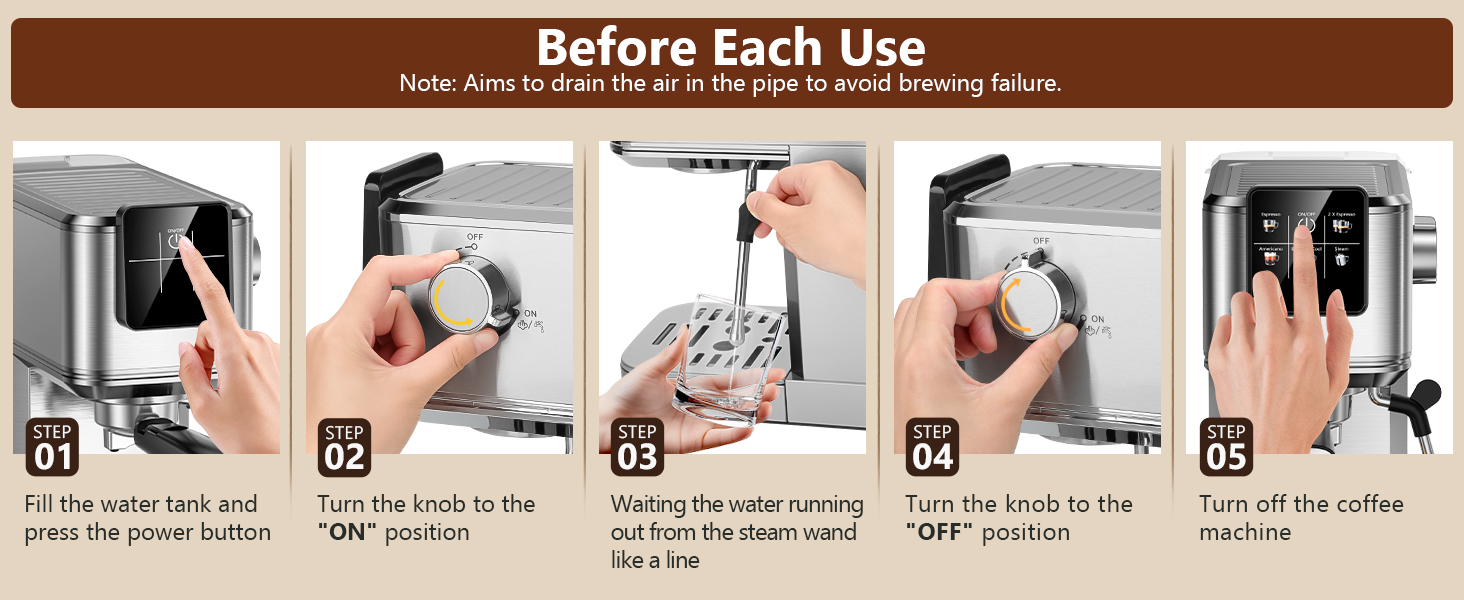
Figura 4: Steps for priming the machine before each use.
Note: Do not exceed the maximum water level (1200ml) in the water tank.
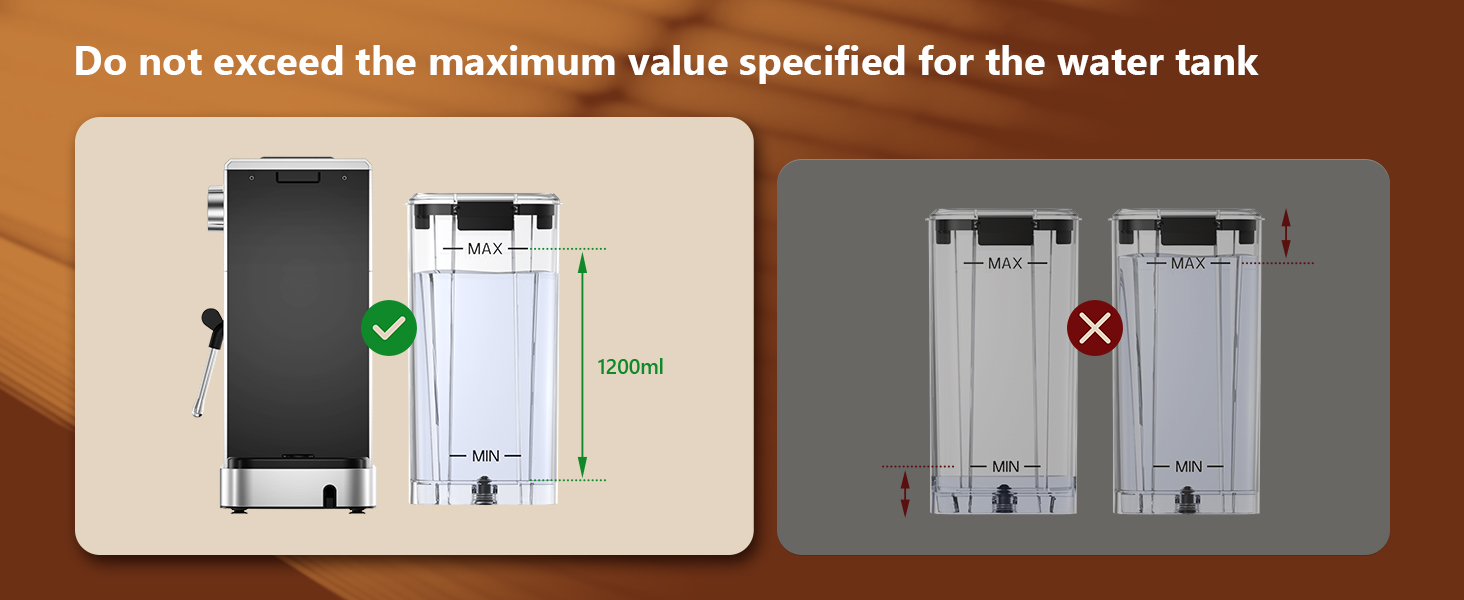
Figura 5: Illustration of correct water tank fill level.
4. Istruzioni per l'uso
4.1 Preparare l'Espresso
Per preparare un espresso perfetto, segui questi passaggi:
- Fill the water tank and press the power button. The indicator will blink during preheating.
- Load the appropriate filter basket (1-shot or 2-shot) with medium-ground coffee (recommended >0.5mm) and tamp fermamente.
- Place the portafilter into the machine and turn it to the right until it is fully locked. Place a cup underneath.
- Once the indicator light is steady (preheating complete), press the "Espresso" button for a single shot or "2 X Espresso" for a double shot.
- The machine will automatically brew the espresso.

Figura 6: Step-by-step guide for making espresso.
Note: Ensure the steam knob is set to the "OFF" position before brewing coffee. The blinking indicator signifies preheating; it's ready to brew when steady.
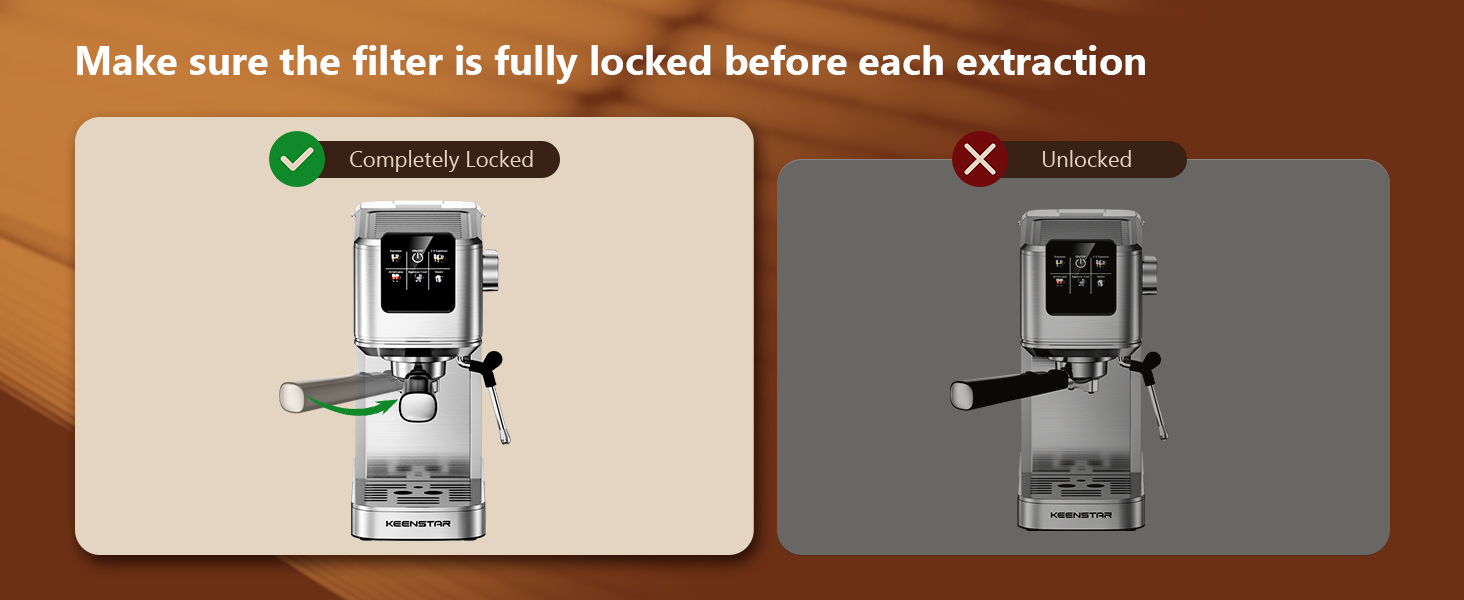
Figura 7: Correctly locking the portafilter before brewing.
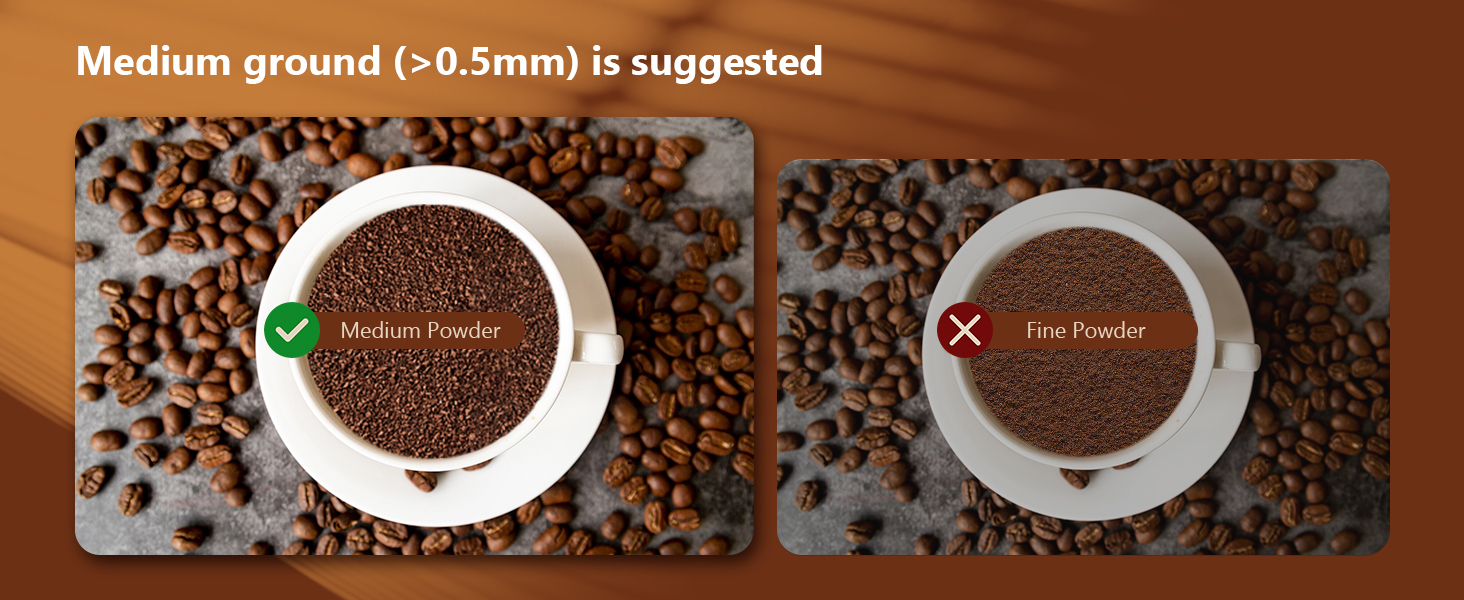
Figura 8: Medium ground coffee is recommended for optimal extraction.
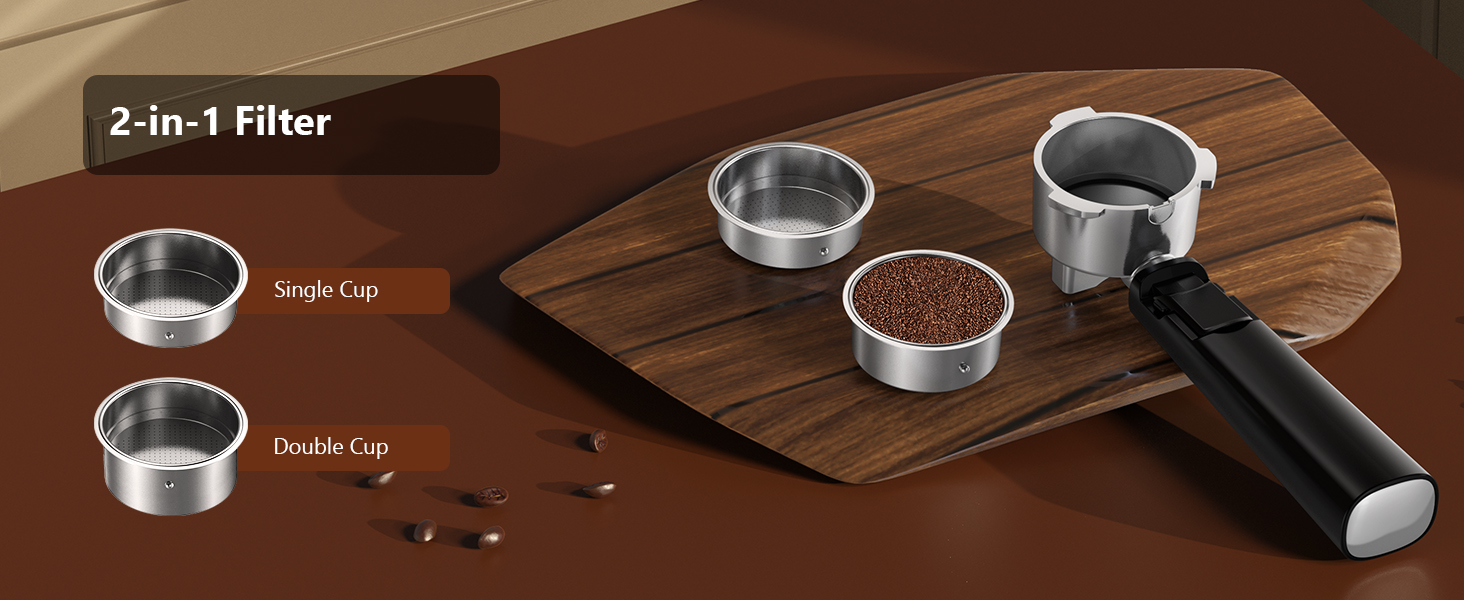
Figura 9: Use the appropriate 2-in-1 filter for single or double espresso shots.
4.2 Making Cold Brew Espresso
The machine features a rapid cold brew function:
- Fill the water tank 2/3 full with ice cubes, then add water.
- Prepare the portafilter with ground coffee as described for espresso.
- Press the "Espresso Cool" button on the touch screen.
- The machine will brew a smooth, fresh cold brew espresso in approximately 10 minutes.

Figura 10: Preparing cold brew espresso with ice in the water tank.
4.3 Schiumare il latte
To create creamy milk foam for lattes and cappuccinos:
- Premere il pulsante di accensione per accendere la macchina.
- Press the "Steam" button on the touch screen to preheat the steam wand. The indicator will blink.
- Once preheating is complete (indicator steady), turn the steam knob to the "ON" position to release any residual water from the pipe.
- Insert the steam nozzle approximately 1 inch into a pitcher of cold milk.
- Gradually turn the steam knob until steam begins to emerge, frothing the milk to your desired texture.
- Turn the steam knob to "OFF" and clean the steam wand immediately after use.
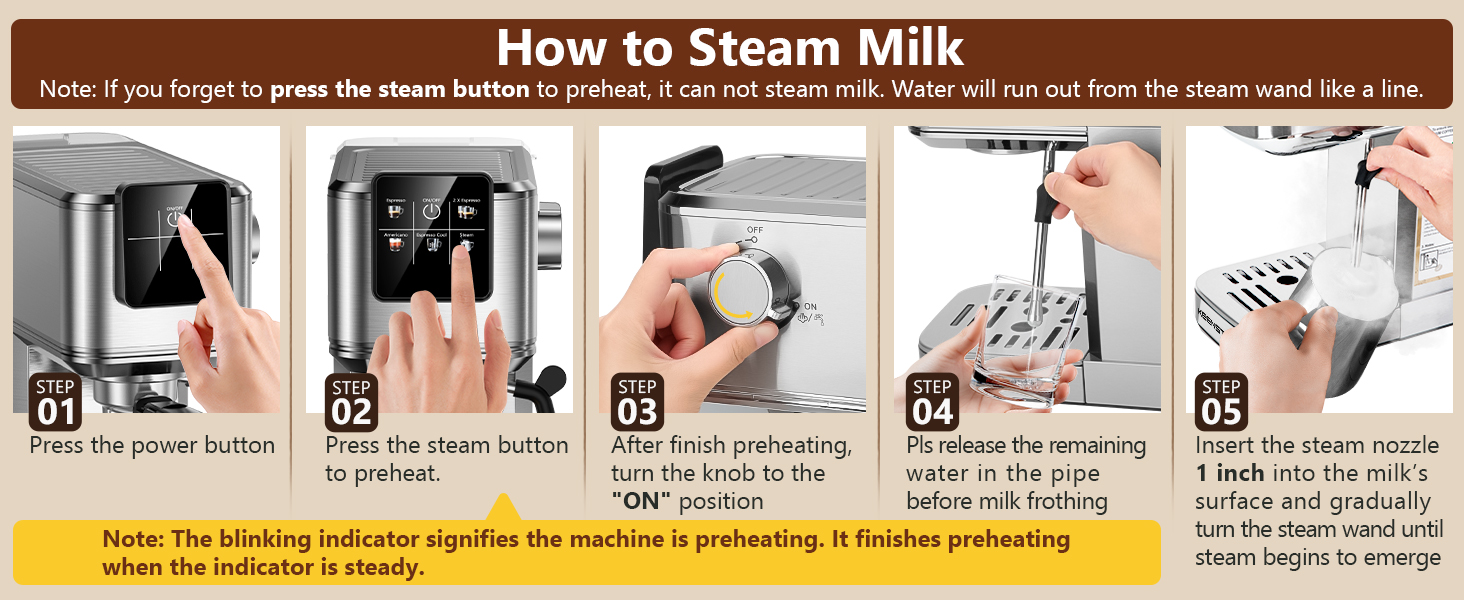
Figura 11: Detailed steps for frothing milk using the steam wand.
Note: If you forget to press the steam button to preheat, water will run out from the steam wand instead of steam.
5. Pulizia e manutenzione
5.1 Pulizia giornaliera
- vassoio antigoccia: Svuotare e pulire il vassoio raccogli-gocce rimovibile dopo ogni utilizzo.
- Portafiltro e filtri: Remove spent coffee grounds and rinse the portafilter and filter baskets thoroughly under running water.
- Lancia vapore: Pulire la lancia vapore subito dopo aver montato il latte con un pannoamp panno per evitare che i residui di latte si asciughino. Attivare brevemente la funzione vapore per eliminare eventuali ostruzioni interne.
- Serbatoio dell'acqua: Risciacquare regolarmente il serbatoio dell'acqua e riempirlo con acqua fresca.
- Esterno: Pulire l'esterno della macchina con un panno morbido, damp stoffa. Non utilizzare detergenti abrasivi o spugnette abrasive.

Figura 12: The removable drip tray simplifies cleaning.
5.2 Decalcificazione
Regular descaling is essential to maintain machine performance and extend its lifespan. The frequency depends on water hardness and usage. Refer to the full product manual for detailed descaling instructions and recommended descaling solutions.
6. Risoluzione Dei Problemi
If you encounter issues with your KEENSTAR Espresso Machine, refer to the table below for common problems and solutions:
| Problema | Possibile causa | Soluzione |
|---|---|---|
| Non viene erogato caffè. | No water in tank; tank not properly seated; machine not primed; coffee too fine/tamped too hard; portafilter not locked. | Fill water tank; ensure tank is seated; prime the machine; use medium-ground coffee and tamp correctly; lock portafilter fully. |
| Il caffè viene preparato troppo lentamente o gocciola. | Coffee grounds too fine; too much coffee; machine needs descaling. | Utilizzare una macinatura più grossa; ridurre la quantità di caffè; decalcificare la macchina. |
| Il caffè si prepara troppo velocemente. | Coffee grounds too coarse; not enough coffee; tamptroppo leggero. | Utilizzare una macinatura più fine; aumentare la quantità di caffè; tamp più saldamente. |
| La lancia vapore non produce vapore. | Steam button not pressed for preheating; steam wand clogged. | Press "Steam" button and wait for preheating; clean steam wand thoroughly. |
| La macchina perde acqua. | Water tank not properly seated; drip tray full; portafilter not locked correctly. | Ensure water tank is secure; empty drip tray; lock portafilter firmly. |
If the problem persists after attempting these solutions, please contact KEENSTAR customer support.
7. Garanzia e supporto
KEENSTAR offers the following support for your espresso machine:
- Garanzia soddisfatti o rimborsati entro 30 giorni: Se non sei soddisfatto del tuo acquisto, puoi restituirlo entro 30 giorni per ottenere un rimborso completo.
- Sostituzione gratuita per 1 anno: The product is eligible for a free replacement within 1 year from the date of purchase for manufacturing defects.
- Lifetime After-Customer Service: KEENSTAR provides lifetime customer service to assist with any questions or issues you may encounter.
For warranty claims or technical assistance, please refer to the contact information provided with your product packaging or visit the official KEENSTAR websito.