1. Introduzione
This manual provides detailed instructions for the installation, operation, and maintenance of your Gsycle Programmable Smart Thermostat. Please read this manual thoroughly before installation and use to ensure proper function and safety. Keep this manual for future reference.
2. Informazioni sulla sicurezza
- L'installazione deve essere eseguita da un elettricista qualificato.
- Prima di installare o effettuare la manutenzione del termostato, scollegare sempre l'alimentazione dall'interruttore automatico.
- Assicurarsi che tutti i cablaggi siano conformi ai codici e alle normative elettriche locali.
- Do not install in locations with excessive vibration, direct sunlight, or extreme temperature fluctuations.
- This thermostat is designed for AC95-240V electric heating systems. Do not use with other voltage sistemi o tipi di riscaldamento.
3. Contenuto della confezione
Verificare che tutti gli articoli siano presenti nel pacco:
- 1 x Gsycle Programmable Smart Thermostat
- 2 viti di montaggio
- 1 x Manuale di istruzioni (questo documento)
4. Prodotto finitoview
The Gsycle Smart Thermostat features a sleek, round design with a 13mm recessed panel for seamless integration into your home. It includes an LED display for clear temperature readings and capacitive touch keys for intuitive control.
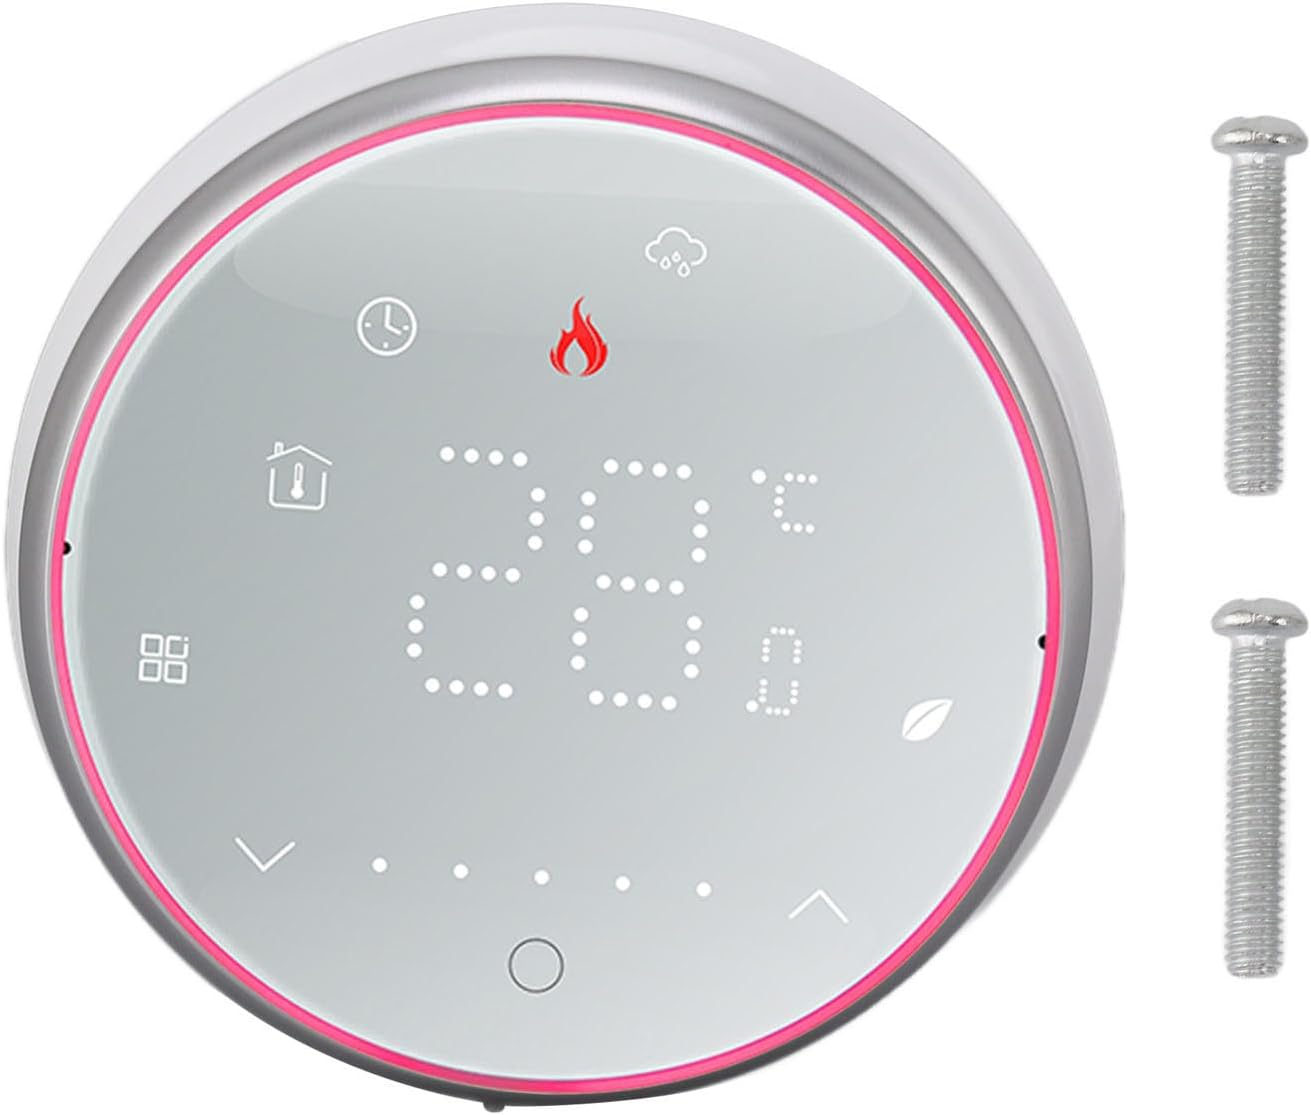
Figura 4.1: Davanti view of the Gsycle Smart Thermostat, showcasing its LED display and the included mounting screws.

Figura 4.2: The thermostat's LED display showing different icons for mode, time, and temperature settings, indicating its versatile interface.

Figura 4.3: Lato profile of the thermostat, illustrating its 13mm recessed panel design, thermal hole for accurate temperature sensing, and durable PC ABS shell construction.
5. Configurazione e installazione
Follow these steps for proper installation of your thermostat. Ensure power is OFF before proceeding.
5.1 Montaggio
- Scegliere una posizione adatta su una parete interna, lontano dalla luce solare diretta, dalle correnti d'aria o da fonti di calore.
- The thermostat is designed to fit standard 86x86mm or European-style concealed boxes.
- Carefully separate the front panel from the back plate.
- Mount the back plate to the wall box using the provided screws. Ensure it is level.
5.2 Cablaggio
Connect the electrical wires to the terminals on the back plate according to your heating system's wiring diagram. This thermostat is for electric heating systems (AC95-240V, 16A). Consult a qualified electrician if you are unsure about wiring connections.
5.3 Assemblaggio finale
- Once wiring is complete and secure, carefully reattach the front panel to the mounted back plate.
- Ripristinare l'alimentazione all'interruttore automatico. Il display del termostato dovrebbe illuminarsi.

Figura 5.1: The Gsycle Smart Thermostat seamlessly installed on a wall, demonstrating its recessed design in a typical home environment.
6. Istruzioni per l'uso
Your Gsycle Smart Thermostat offers intuitive control and programmable features for optimal comfort and energy efficiency.
6.1 Funzionamento di base
- Accensione/spegnimento: Press the power icon (usually a circle with a line) to turn the thermostat on or off.
- Regolazione della temperatura: Use the up and down arrow icons on the display to set your desired temperature. The current room temperature and set temperature will be displayed.
- Selezione della modalità: Press the mode icon (e.g., flame for heating) to cycle through available operating modes.
6.2 Impostazioni programmabili
The thermostat supports 5+1+1 day programming (5 weekdays, Saturday, Sunday) with 6 programmable time slots per day. This allows you to customize temperature settings to match your schedule and save energy.
- Access the programming menu by pressing and holding the menu/settings icon (refer to display icons).
- Navigate through the days and time slots using the arrow keys.
- Set the desired temperature for each time slot.
- Confirm settings to save. The thermostat will automatically follow the programmed schedule.
6.3 Protezione contro le interruzioni di corrente
The thermostat is equipped with a power failure protection function. All your settings, including programmed schedules, are safely stored in memory and will be retained even during a power outage. No need to reconfigure after power is restored.
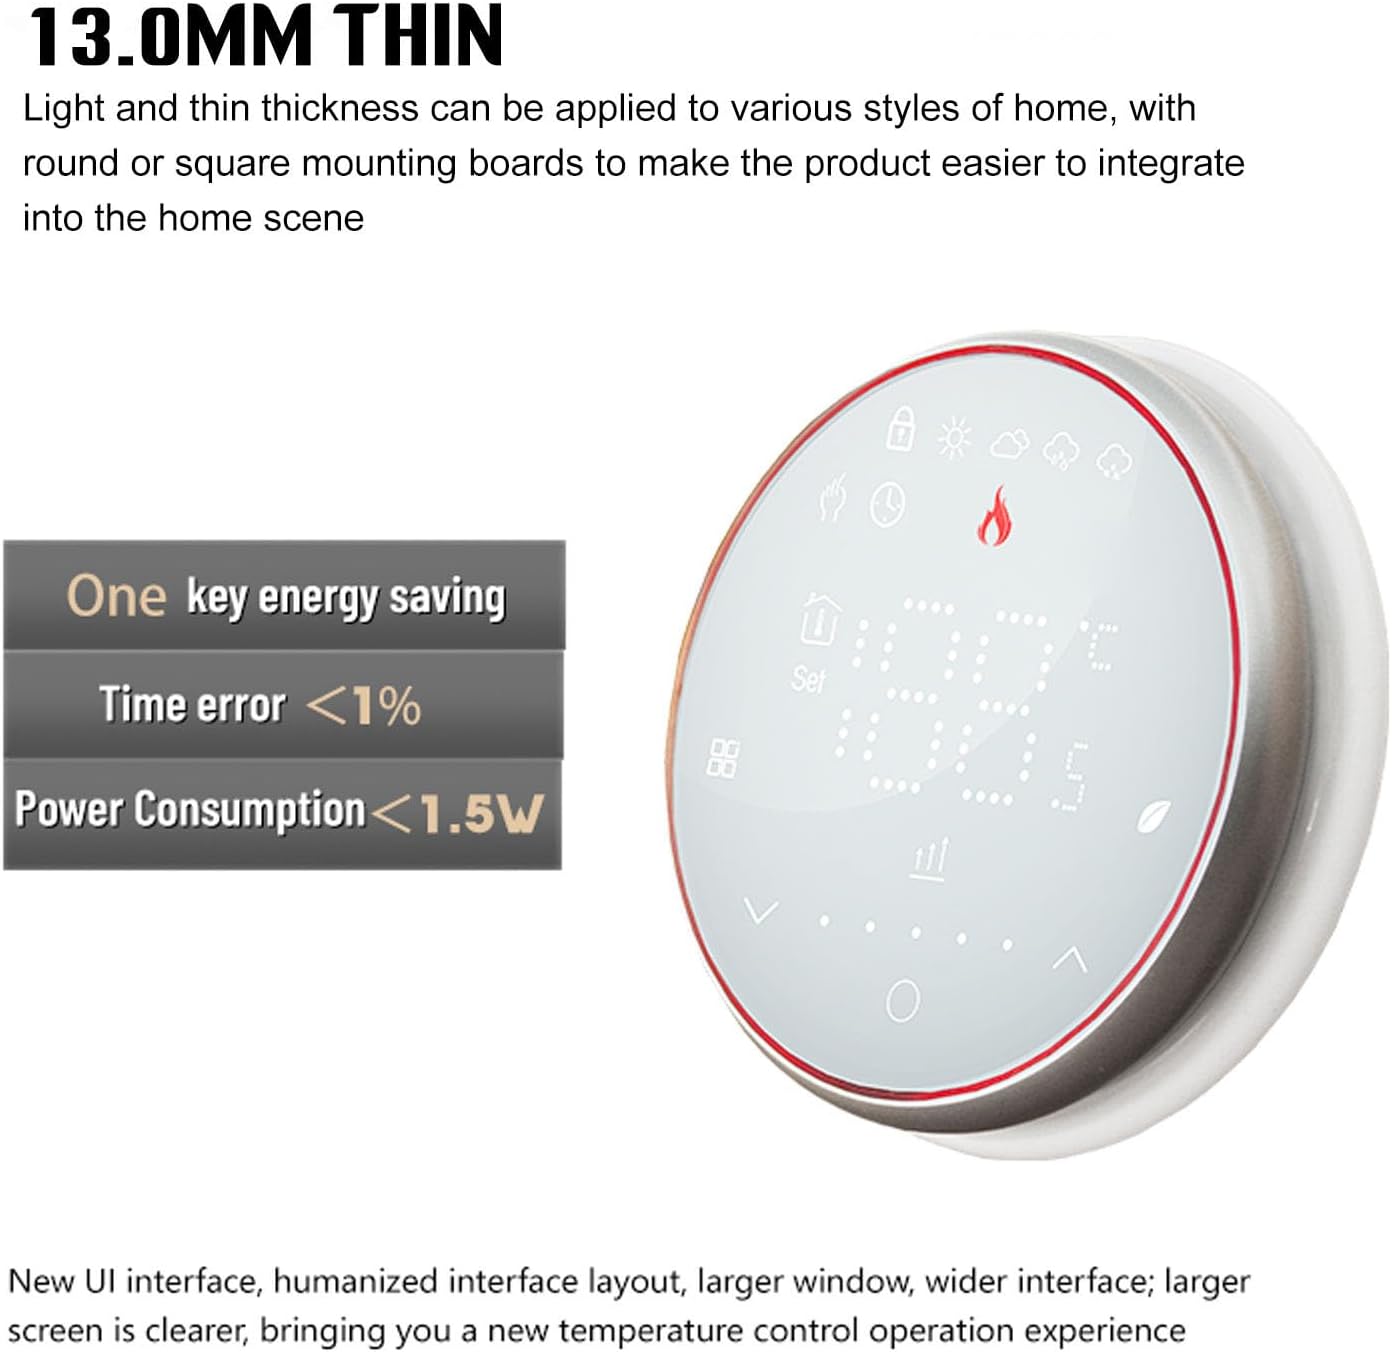
Figura 6.1: The thermostat's design emphasizes its 13.0mm thin profile and energy-saving capabilities, including a time error of less than 1% and power consumption below 1.5W.
7. Manutenzione
To ensure optimal performance and longevity of your Gsycle Smart Thermostat, follow these simple maintenance guidelines:
- Pulizia: Gently wipe the display and outer casing with a soft, dry cloth. Do not use abrasive cleaners, solvents, or chemical sprays, as these can damage the surface or internal components.
- Area del sensore: Ensure the thermal hole (refer to Figure 4.3) is free from dust or obstructions to maintain accurate temperature readings.
- Evitare l'impatto: Protect the thermostat from physical impact or dropping, which can damage the sensitive electronics.
8. Risoluzione Dei Problemi
Se riscontri problemi con il termostato, fai riferimento ai seguenti problemi comuni e alle relative soluzioni:
| Problema | Possibile causa | Soluzione |
|---|---|---|
| Il display del termostato è vuoto | No power, incorrect wiring | Check circuit breaker. Verify wiring connections are secure and correct. |
| Lettura della temperatura errata | Sensor obstructed, thermostat location | Ensure the thermal hole is clear. Relocate thermostat if exposed to drafts or direct heat. |
| Il sistema di riscaldamento non risponde | Wiring issue, system fault | Check wiring to the heating system. Consult a qualified technician if the heating system itself is faulty. |
| La pianificazione programmabile non funziona | Settings not saved, manual override | Ensure programmed settings were saved. Check if the thermostat is in manual mode; switch to auto/program mode. |
Se il problema persiste dopo aver provato queste soluzioni, contattare l'assistenza clienti.
9. Specifiche
| Caratteristica | Specificazione |
|---|---|
| Modello | Gsycle8gzshgdwa1-12 |
| Voltage Gamma | AC95-240V |
| Attuale | 16A |
| Sensore | NTC3950, 10K |
| Errore di temperatura | ±1 Degree Celsius |
| Intervallo di controllo della temperatura | 5-35 gradi Celsius |
| Intervallo di temperatura ambiente | 5-99 gradi Celsius |
| Visualizzazione dell'intervallo di temperatura | 5-99 gradi Celsius |
| Normal Working Environment Temperature | 0-45 gradi Celsius |
| Normal Working Environment Humidity | 5-95% RH (senza condensa) |
| Temperatura di conservazione | -10-45 gradi Celsius |
| Consumo energetico | <1.5Settembre |
| Errore di tempo | <1% |
| Mounting Insert Box | 86x86mm or Regular European Style Concealed Box |
| Connettore | 2 x 1.5 mm² o 1 x 2.5 mm² |
| Grado di protezione | Grado di protezione IP20 |
| Tipo di chiave | Tasti a sfioramento capacitivo |
| Materiale | PC, ABS |
| Peso | Circa 200 g / 7.1 once |
| Spessore del pannello | 13mm (recessed) |
10. Garanzia e supporto
Gsycle products are manufactured to high-quality standards. For warranty information or technical support, please refer to the contact details provided with your purchase documentation or visit the official Gsycle website. Please have your model number (Gsycle8gzshgdwa1-12) ready when contacting support.