1. Prodotto finitoview
The AWANFI YG-811 Two-Way Radios provide reliable communication for various activities. This manual details the setup, operation, and maintenance of your device to ensure optimal performance and longevity.
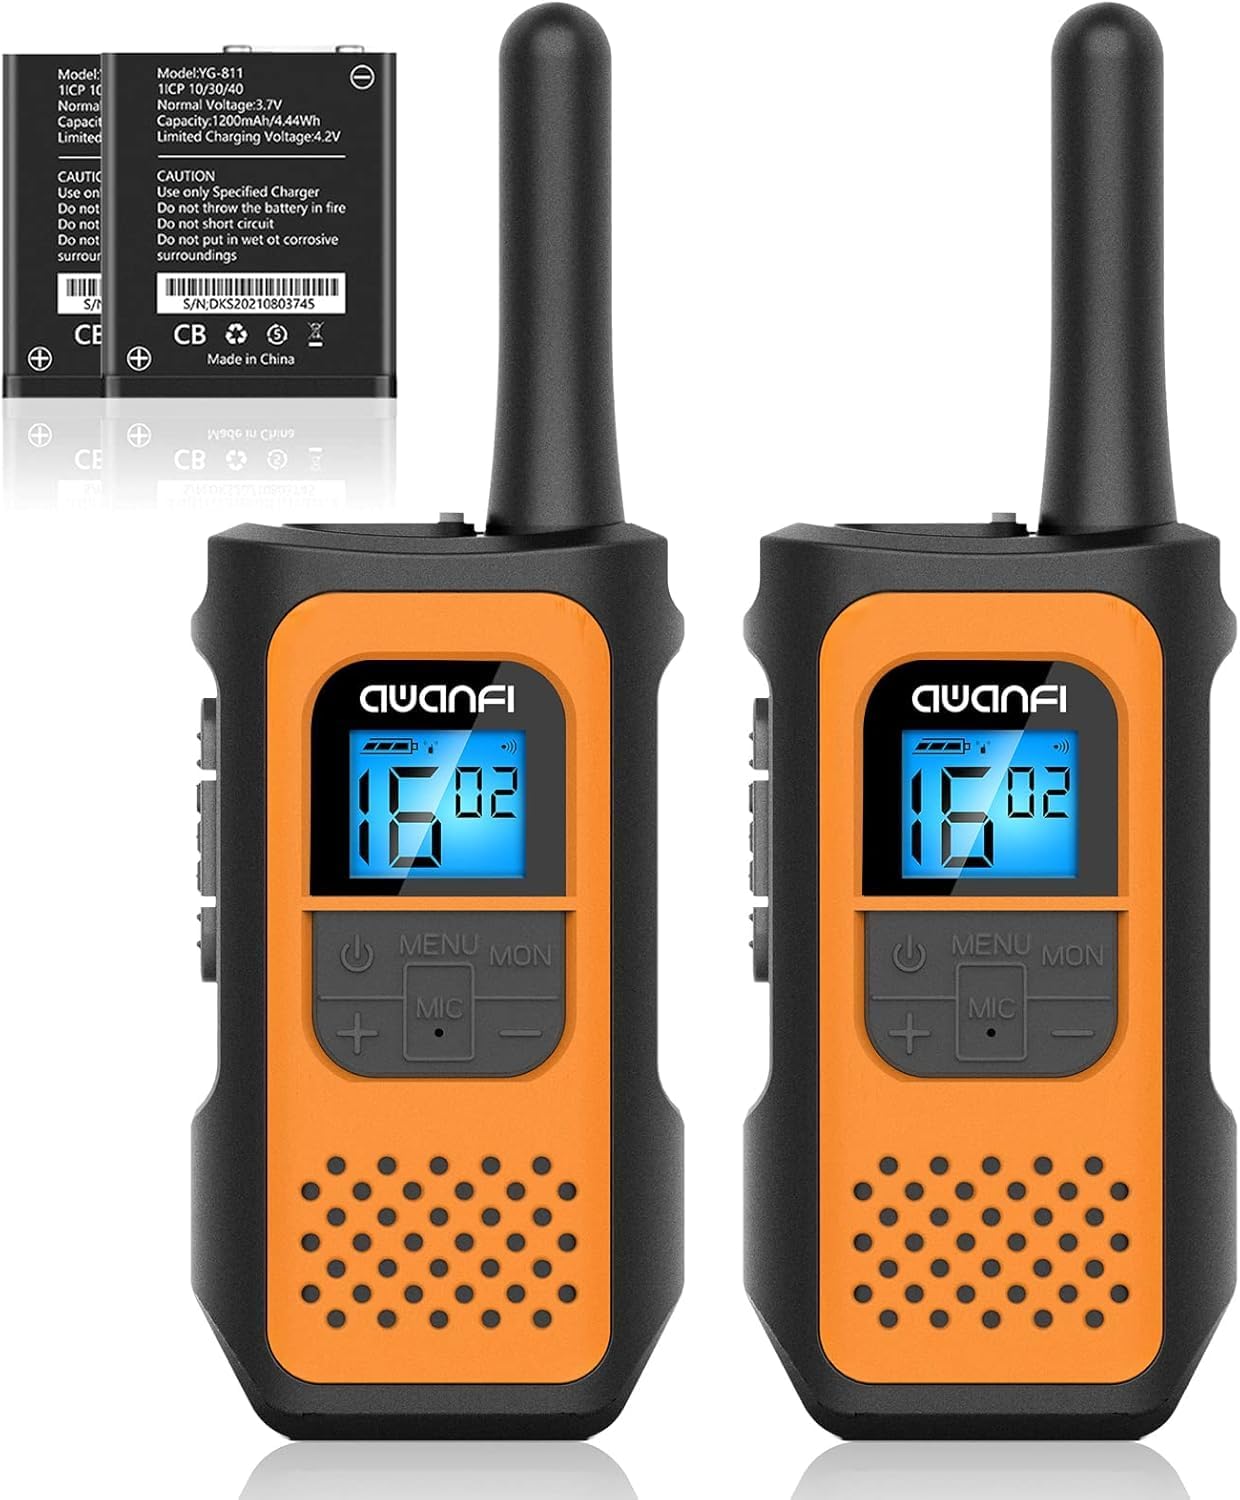
Image 1.1: AWANFI YG-811 Two-Way Radios. This image displays two orange and black walkie-talkies, highlighting their compact design and digital display.
2. Contenuto della confezione
Si prega di verificare che tutti gli articoli siano presenti nel pacco:
- 2 x AWANFI Walkie Talkies
- Clip 2 x cinghie
- 1 x 2-in-1 Type-C Cable
- 1 x Manuale utente (questo documento)
3. Caratteristiche del prodotto
- Rechargeable 1200mAh Li-ion Battery: Fornisce fino a 24 ore di durata della batteria con una singola carica.
- Ricarica USB di tipo C: Ricarica comoda ed efficiente.
- 22 canali: Offre un'ampia gamma di opzioni di comunicazione.
- 99 Codici sulla privacy: Ensures private communication.
- VOX (Centrale a comando vocale): Consente la comunicazione a mani libere.
- Torcia integrata: Utile in condizioni di scarsa illuminazione.
- Blocco tastiera: Impedisce modifiche accidentali delle impostazioni.
- Scansione automatica: Esegue automaticamente la scansione dei canali attivi.
- 10 Call Tone Alerts: Customizable alert sounds.
- Sirena SOS: Per segnalazioni di emergenza.
- Design compatto e leggero: Easy to carry with included lanyards and belt clips.
- Display retroilluminato: Migliora la visibilità in diverse condizioni di illuminazione.
- Riduzione del rumore: Migliora la chiarezza dell'audio.
- Sistema di silenziamento: Riduce il rumore di fondo.
- Protezione dalle cadute: Durable environmental protection shell.
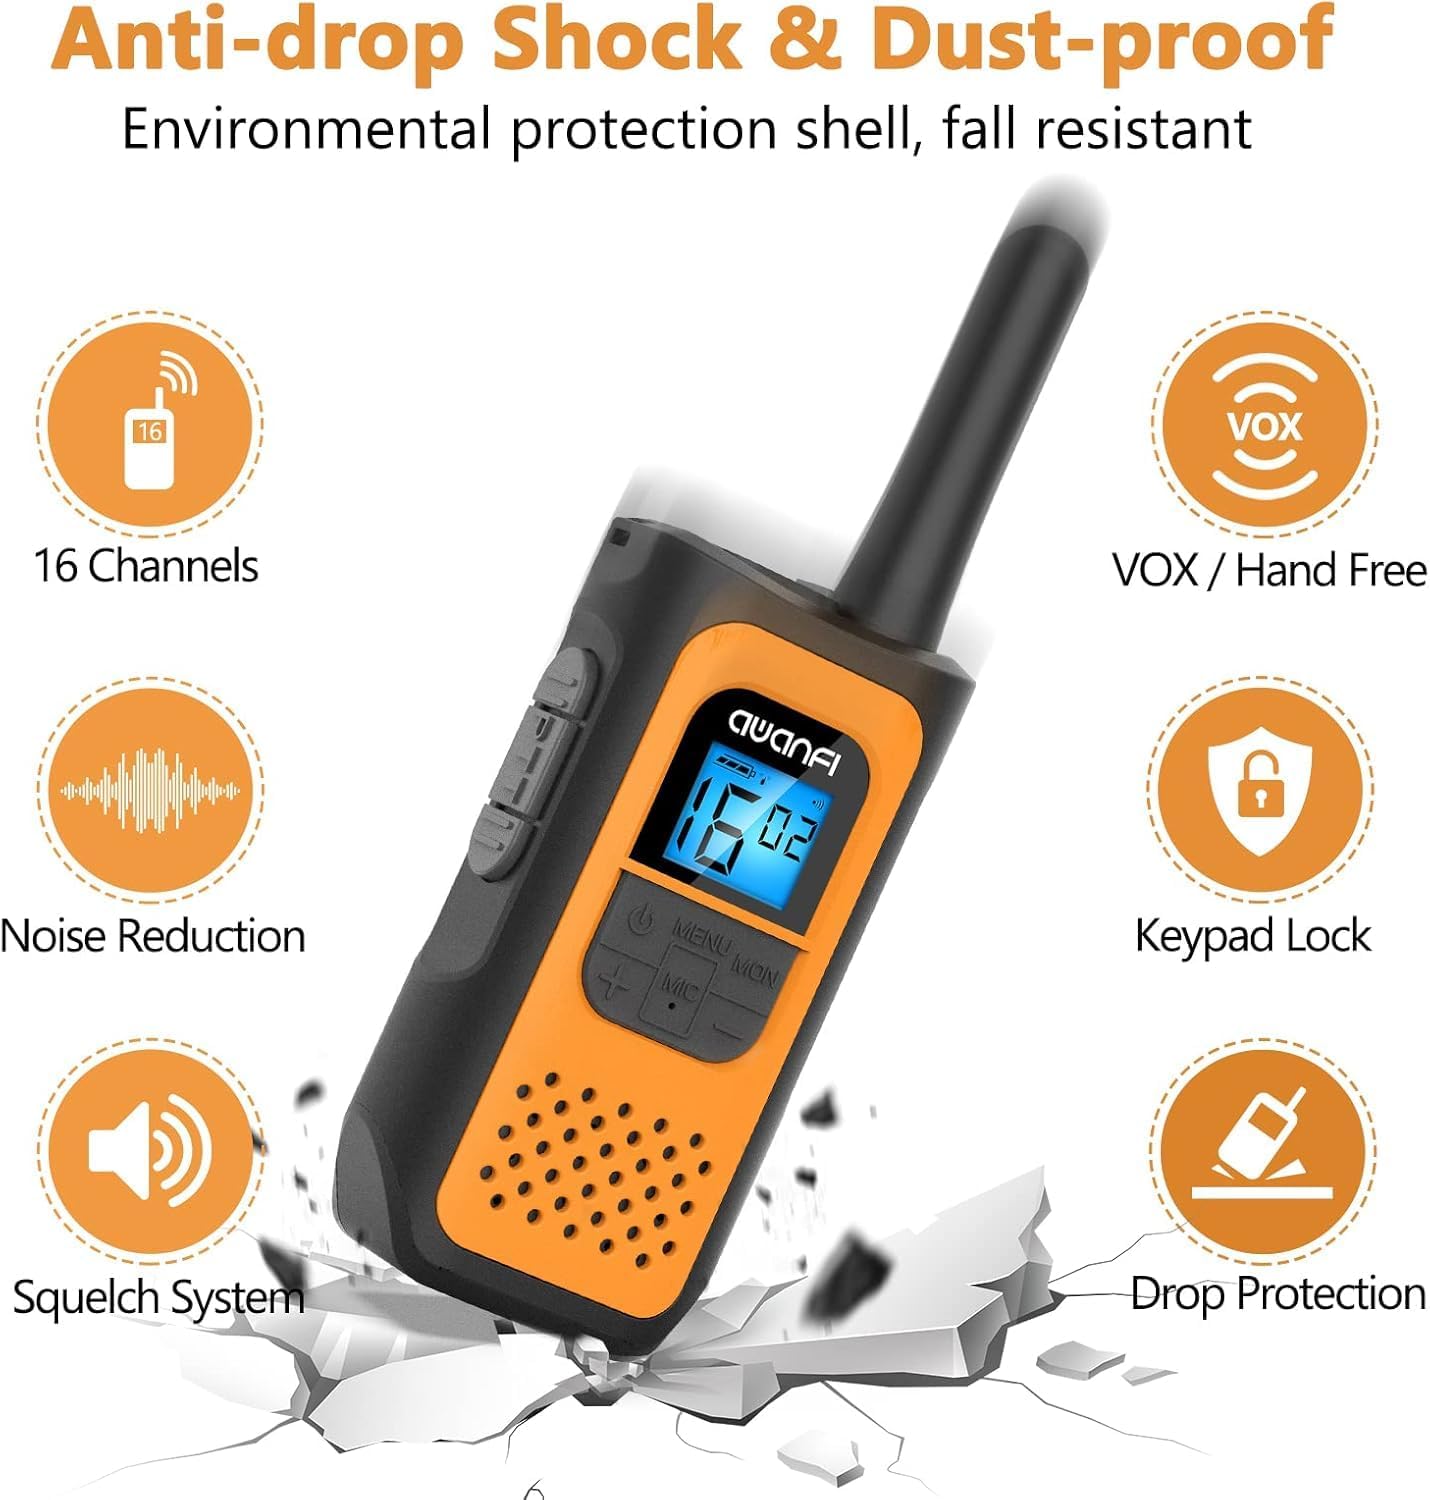
Image 3.1: Key Features of the AWANFI YG-811. This graphic illustrates the main functionalities such as VOX, Keypad Lock, and Noise Reduction.
4. Identificazione dei componenti
Familiarize yourself with the various parts of your AWANFI Two-Way Radio:

Image 4.1: AWANFI YG-811 Component Diagram. This image labels the antenna, earphone jack, charge jack, PTT button, power button, microphone/speaker, LCD display, menu/lock button, up button, and down button.
- Antenna: Per la trasmissione e la ricezione del segnale.
- Spinotto degli auricolari: Connect external audio accessories.
- Jack di carica: Porta USB Type-C per la ricarica.
- Pulsante PTT (premi per parlare): Tieni premuto per trasmettere la tua voce.
- Pulsante di accensione: Accende/spegne la radio.
- Microfono/Altoparlante: For speaking and listening.
- Schermo LCD: Shows channel, battery status, and other settings.
- MENU/MON Button: Accesses menu settings or monitors channels.
- Pulsante SU (+): Navigates menu or increases values.
- Pulsante GIÙ (-): Navigates menu or decreases values.
5. Impostazione
5.1 Installazione della batteria
The AWANFI YG-811 uses a 1200mAh Li-ion battery. Ensure the battery is correctly installed before first use.
- Aprire il coperchio del vano batteria sul retro della radio.
- Inserire la batteria agli ioni di litio, assicurandosi che i contatti siano allineati correttamente.
- Chiudere saldamente il coperchio del vano batterie.

Image 5.1: Battery Installation and Safety. This image illustrates how to insert the 1200mAh Li-ion battery and highlights its safety features like overcharge protection and IEC62133 certification.
5.2 Caricamento della batteria
Charge the walkie-talkie fully before initial use. Use the provided Type-C cable for charging.
- Connect the Type-C cable to the charge jack on the side of the radio.
- Collegare l'altra estremità del cavo a un adattatore di alimentazione USB compatibile, a un power bank o a un caricabatteria per auto.
- L'indicatore della batteria sul display LCD mostrerà lo stato di carica.
- La ricarica è completa quando l'indicatore della batteria indica che è piena.
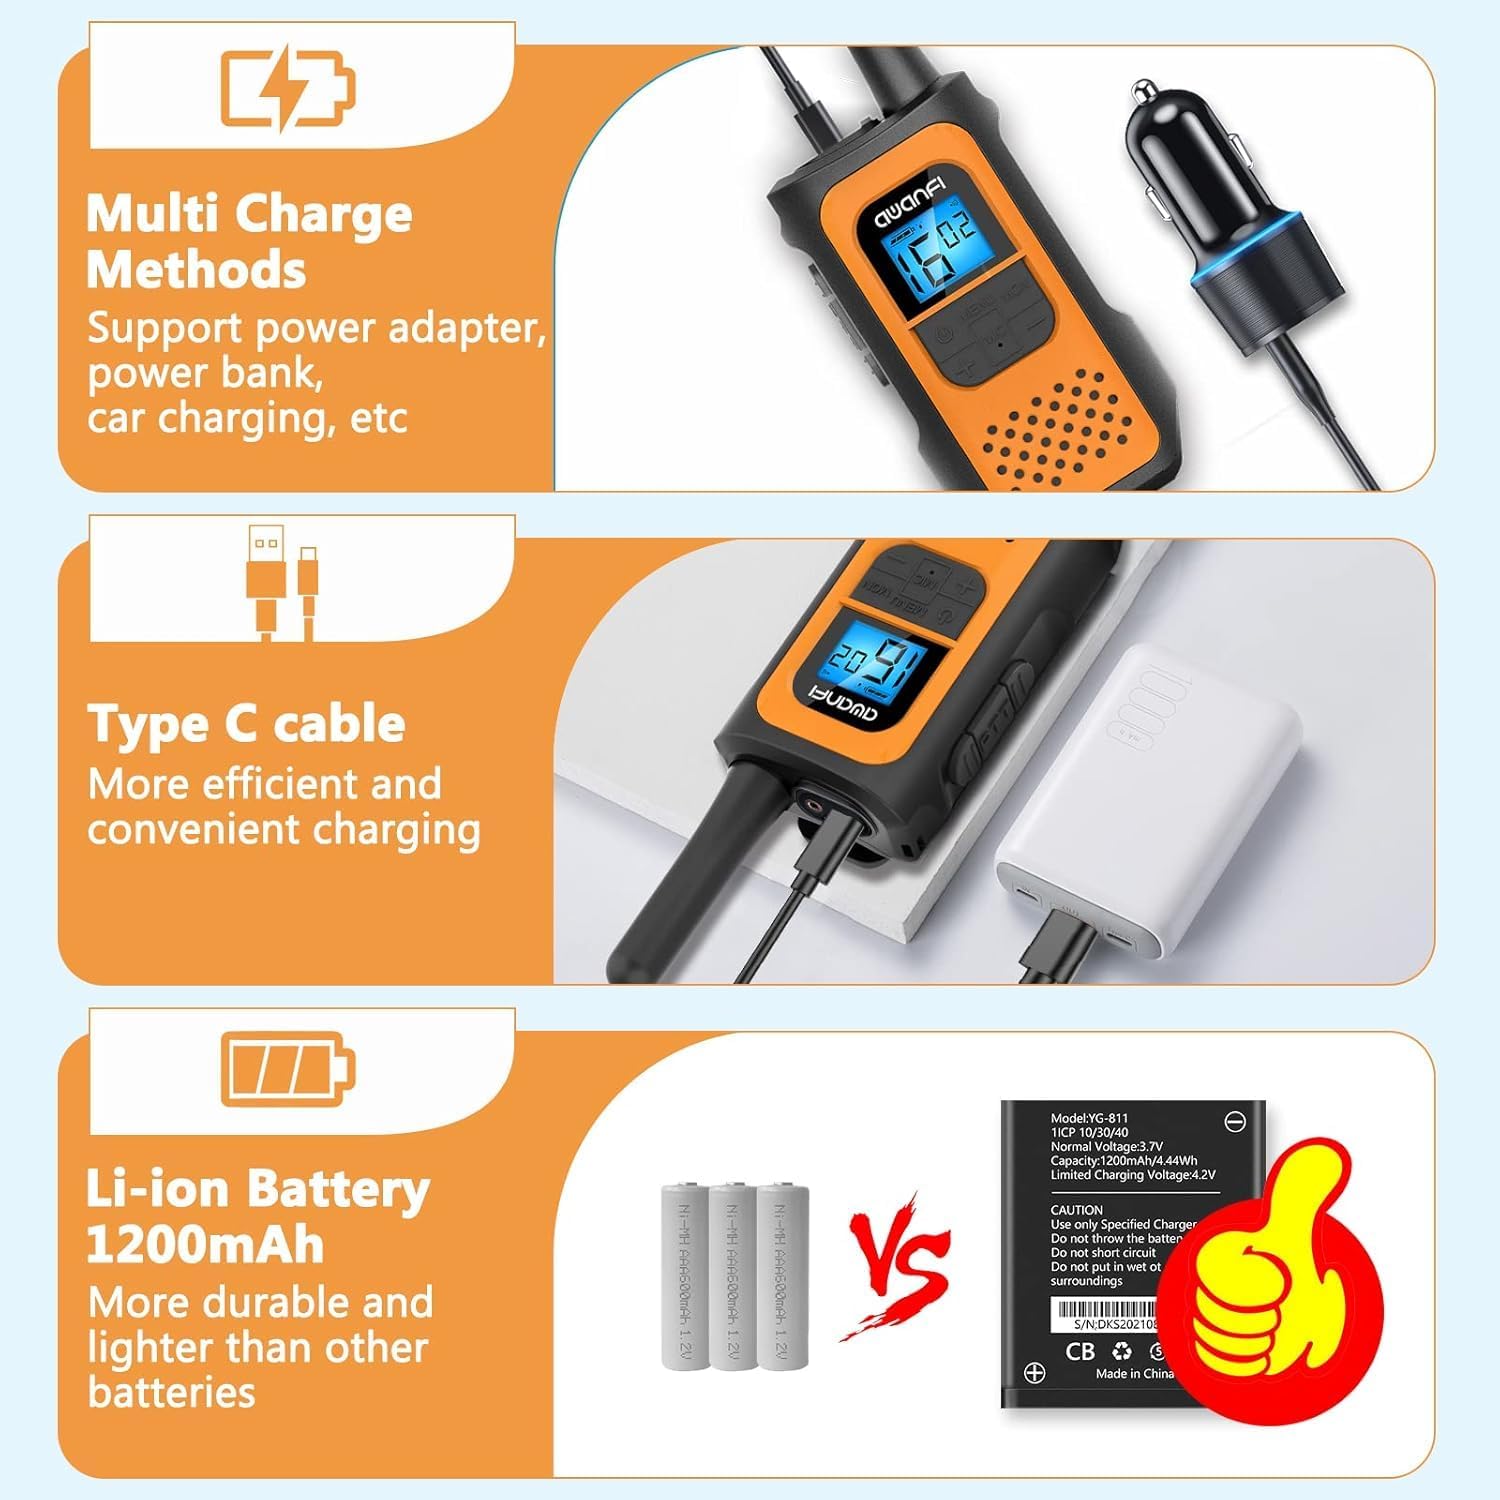
Image 5.2: Multi-Charge Methods. This image demonstrates various ways to charge the walkie-talkie using the Type-C cable, such as with a power adapter, power bank, or car charger.
5.3 Accensione/Spegnimento
- Per accendere: Press and hold the Power Button until the LCD display illuminates.
- Per spegnere: Press and hold the Power Button until the LCD display turns off.
6. Istruzioni per l'uso
6.1 Selezione di un canale
- Premere il pulsante MENU per accedere al menu.
- Use the UP (+) or DOWN (-) buttons to navigate to the channel setting.
- Press MENU again to select the channel.
- Use UP (+) or DOWN (-) to choose your desired channel (1-22).
- Press MENU to confirm, then press PTT or wait for the menu to exit automatically.
6.2 Impostazione dei codici di privacy (CTCSS/DCS)
I codici di privacy aiutano a ridurre le interferenze da parte di altri utenti sullo stesso canale.
- Press the MENU button repeatedly until the privacy code setting appears.
- Use UP (+) or DOWN (-) to select a privacy code (01-99).
- Press MENU to confirm, then press PTT or wait for the menu to exit automatically.
- Ensure all radios in your group are set to the same channel and privacy code.
6.3 Trasmissione e ricezione
- Per trasmettere: Press and hold the PTT button. Speak clearly into the microphone. Release the PTT button when finished speaking.
- Per ricevere: The radio will automatically receive transmissions when the PTT button is not pressed and you are on the same channel and privacy code as the transmitting party.
6.4 Funzione VOX (comunicazione a mani libere)
When VOX is enabled, the radio transmits automatically when it detects your voice.

Image 6.1: VOX Function in Use. This image shows two individuals hiking, with walkie-talkies attached to their backpacks, illustrating the convenience of hands-free communication.
- Press the MENU button repeatedly until the VOX setting appears.
- Use UP (+) or DOWN (-) to select a VOX sensitivity level (e.g., 1-3, with 3 being most sensitive). Select 'OFF' to disable.
- Press MENU to confirm, then press PTT or wait for the menu to exit automatically.
6.5 Blocco tastiera
Per evitare modifiche accidentali alle impostazioni:
- Chiudere a chiave: Press and hold the MENU/MON button until the lock icon appears on the display.
- Per sbloccare: Press and hold the MENU/MON button again until the lock icon disappears.
6.6 Torcia elettrica
The integrated flashlight can be activated for illumination in dark environments.
- Consult the specific button assignment in your radio's menu or quick guide for flashlight activation, typically a long press of a specific button (e.g., UP or DOWN button).
6.7 Informazioni sulla portata
The communication range varies depending on terrain and conditions.

Image 6.2: Communication Range. This graphic provides estimated ranges for different environments: up to 5km in mountainous areas, up to 3km in open water, and up to 1.5km in urban neighborhoods.
- Dalla montagna alla valle: Fino a 5 km
- Acque libere: Fino a 3 km
- Quartiere: Fino a 1.5 km
7. Manutenzione
7.1 Cura della batteria
- Non esporre la batteria a temperature estreme.
- Evitare di cortocircuitare i terminali della batteria.
- Ricaricare regolarmente la batteria, anche se non la si utilizza, per preservarne la durata.
- Utilizzare solo il caricabatterie specificato.
7.2 Pulizia
- Pulire la radio con un panno morbido, damp stoffa.
- Non utilizzare prodotti chimici aggressivi o detergenti abrasivi.
- Assicurarsi che la radio sia asciutta prima dell'uso o della ricarica.
7.3 Conservazione
- Quando non viene utilizzata, conservare la radio in un luogo fresco e asciutto.
- Rimuovere la batteria se si prevede di non utilizzarlo per periodi prolungati.
7.4 Resistenza all'acqua
Please note that the AWANFI YG-811 Two-Way Radio is Non resistente all'acquaEvitare l'esposizione all'acqua o a elevata umidità per evitare danni.
8. Risoluzione Dei Problemi
| Problema | Possibile causa | Soluzione |
|---|---|---|
| Nessun potere | Batteria scarica o non installata correttamente. | Caricare la batteria. Reinstallare la batteria, assicurandosi che il contatto sia corretto. |
| Impossibile trasmettere o ricevere | Canale/codice privacy errato. Fuori portata. Batteria scarica. | Verify all radios are on the same channel and privacy code. Move closer to other radios. Charge the battery. |
| Scarsa qualità audio | Segnale debole. Interferenza. | Move to an open area. Change channel/privacy code. |
| La tastiera non risponde | Il blocco tastiera è attivo. | Unlock the keypad by pressing and holding the MENU/MON button. |
9. Specifiche
- Numero modello: YG-811
- Marca: AWANFI
- Numero di canali: 22
- Tipo di batteria: 1200mAh Li-ion (Nonstandard Battery)
- Intervallo di conversazione massimo: 3 Kilometers (Open Water)
- Livello di resistenza all'acqua: Non resistente all'acqua
- Produttore: Shenzhen yizhongge Electronic Co., Ltd
10. Garanzia e supporto
Your AWANFI YG-811 Two-Way Radio comes with a Garanzia di 1 anno dalla data di acquisto.
For technical support, warranty claims, or further assistance, please contact AWANFI customer service through the retailer where the product was purchased or visit the official AWANFI websito.
Si prega di conservare la prova d'acquisto ai fini della garanzia.