1. Introduzione
Thank you for choosing the Jocca Digital Air Fryer. This appliance is designed to provide a healthy and convenient way to cook your favorite meals with up to 80% less oil. Its advanced features, including a digital LED touch screen and multiple automatic programs, ensure perfect results every time. Please read this manual thoroughly before first use to ensure safe and optimal operation.
2. Istruzioni di sicurezza
- Posizionare sempre la friggitrice ad aria su una superficie stabile e resistente al calore.
- Non immergere l'apparecchio, il cavo o la spina in acqua o altri liquidi.
- Tenere i bambini e gli animali domestici lontani dall'apparecchio durante il funzionamento.
- Assicurare il volumetage indicato sull'apparecchio corrisponde al volume della rete elettrica localetage.
- Scollegare la friggitrice ad aria dalla presa di corrente quando non è in uso e prima di pulirla.
- Non bloccare le bocchette di ingresso o uscita dell'aria.
- Do not fill the basket with oil or other liquids.
- L'apparecchio funziona ad alte temperature; utilizzare guanti da forno quando si maneggiano le parti calde.
3. Prodotto finitoview
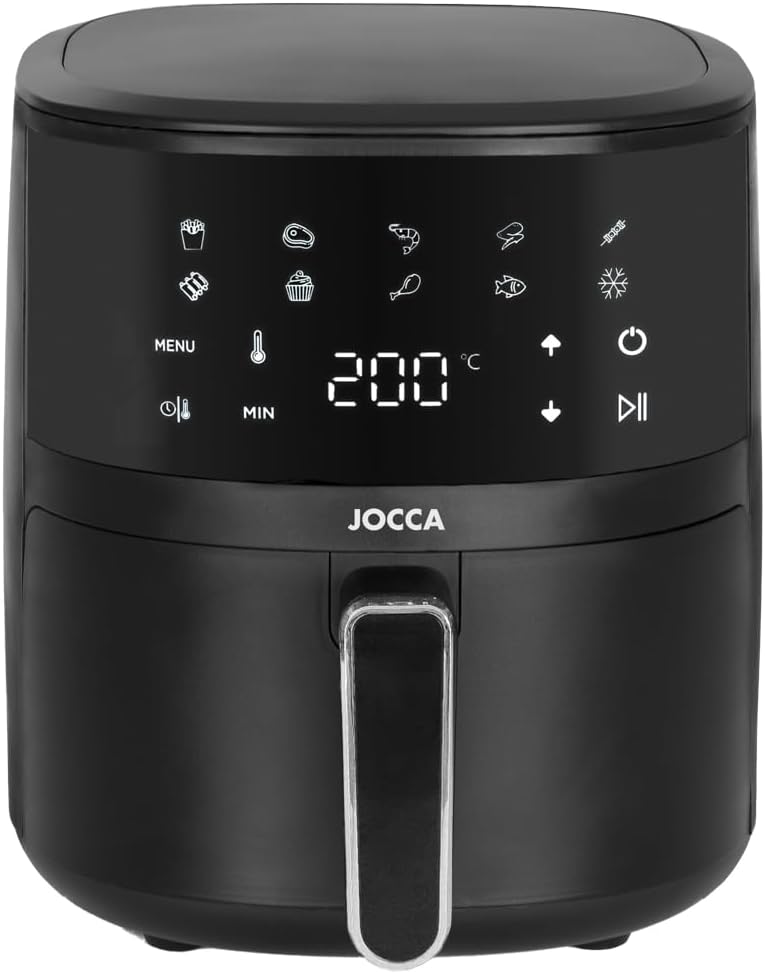
Figura 3.1: Davanti view of the Jocca Digital Air Fryer, showcasing its sleek black design and intuitive LED touch screen control panel. The display shows temperature and time settings, along with various cooking icons.

Figura 3.2: Angolato view highlighting the digital control panel with touch-sensitive buttons for menu selection, temperature adjustment, timer settings, and power control. The current temperature is displayed as 180°C.

Figura 3.3: The air fryer with its cooking basket fully pulled out, demonstrating the easy access for loading and unloading food. The handle is ergonomically designed for comfortable grip.

Figura 3.4: Un primo piano view of the air fryer's interior basket, showing the removable crisper plate. This design allows for optimal air circulation and easy cleaning after use.
4. Configurazione e primo utilizzo
4.1 Disimballaggio
- Estrarre con cautela la friggitrice ad aria e tutto il materiale di imballaggio dalla scatola.
- Rimuovere eventuali adesivi o etichette dall'elettrodomestico.
- Conservare l'imballaggio per un eventuale stoccaggio o trasporto futuro.
4.2 Pulizia iniziale
- Before first use, clean the basket and crisper plate with hot water, a mild dishwashing detergent, and a non-abrasive sponge.
- Pulire l'interno e l'esterno dell'apparecchio con un pannoamp stoffa.
- Assicurarsi che tutte le parti siano completamente asciutte prima dell'uso.
4.3 Posizionamento
- Posizionare la friggitrice ad aria su una superficie stabile, piana e resistente al calore.
- Assicurarsi che vi siano almeno 10 cm (4 pollici) di spazio libero sul retro e sui lati dell'apparecchio e 10 cm (4 pollici) sopra di esso, per consentire una corretta circolazione dell'aria.
- Non posizionare l'apparecchio contro una parete o altri elettrodomestici.
5. Istruzioni per l'uso
5.1 Pannello di controllo Sopraview
The Jocca Digital Air Fryer features an intuitive LED touch screen. The main controls include:
- Pulsante di accensione (): Accende/spegne l'apparecchio e avvia/mette in pausa la cottura.
- Pulsante del menu (MENU): Esegue ciclicamente 9 programmi di cottura preimpostati.
- Regolazione della temperatura ( / ): Increases or decreases the cooking temperature (30°C - 200°C).
- Timer Adjustment ( / ): Increases or decreases the cooking time (1 - 60 minutes).
- Funzione di sbrinamento (): Activates the defrost program.
5.2 Funzionamento di base
- Collegare la friggitrice ad aria a una presa a muro con messa a terra. Il pulsante di accensione si illuminerà.
- Pull out the basket from the air fryer. Place the crisper plate inside the basket.
- Mettere gli ingredienti nel cestello. Non superare la linea MAX.
- Slide the basket back into the air fryer. Ensure it clicks securely into place.
- Premi il pulsante di accensione () per accendere il display.
- Impostazione manuale: Utilizzare i pulsanti di regolazione della temperatura ( / ) to set the desired temperature and the Timer Adjustment buttons ( / ) per impostare il tempo di cottura.
- Programmi preimpostati: Premere il pulsante Menu (MENU) repeatedly to cycle through the 9 automatic programs (e.g., fries, chicken, fish, cake, shrimp, steak, vegetables, defrost, keep warm). The corresponding icon will light up.
- Once settings are chosen, press the Power Button () per avviare la cottura. Si attiveranno la ventola e l'elemento riscaldante.
- Durante la cottura, è possibile estrarre il cestello per scuotere o girare gli ingredienti. La friggitrice ad aria si metterà automaticamente in pausa e riprenderà a funzionare quando il cestello verrà reinserito.
- Una volta terminato il tempo di cottura, la friggitrice ad aria emetterà un segnale acustico e si spegnerà automaticamente.
- Estrarre con cautela il cestello e versare il cibo cotto su un piatto. Per gli alimenti più grandi, utilizzare le pinze.
5.3 Funzione di sbrinamento
The defrost function allows for gentle thawing of frozen foods. To use:
- Place frozen food in the basket.
- Premi il pulsante di accensione ().
- Press the Defrost Function button (). The air fryer will set an appropriate temperature and time for defrosting.
- Premi il pulsante di accensione () again to start the defrosting process.
6. Pulizia e manutenzione
6.1 Pulizia
- Scollegare sempre la friggitrice ad aria e lasciarla raffreddare completamente prima di pulirla.
- Clean the basket and crisper plate with hot water, dish soap, and a non-abrasive sponge. These parts are also dishwasher safe.
- Pulire l'esterno dell'apparecchio con un pannoamp stoffa. Non utilizzare detergenti abrasivi o spugnette abrasive.
- Pulire l'interno dell'apparecchio con l'adamp panno e detersivo delicato se necessario.
- Assicurarsi che tutti i componenti siano completamente asciutti prima di riporli o di utilizzarli nuovamente.
6.2 Conservazione
Store the air fryer in a cool, dry place, away from direct sunlight and moisture. Ensure the power cord is neatly wrapped and secured.
7. Risoluzione Dei Problemi
| Problema | Possibile causa | Soluzione |
|---|---|---|
| La friggitrice ad aria non si accende. | Non collegato; problema con la presa di corrente; malfunzionamento dell'apparecchio. | Ensure the plug is securely inserted. Check the power outlet with another appliance. If problem persists, contact support. |
| Il cibo non è cotto in modo uniforme. | Basket overloaded; ingredients not shaken/turned. | Do not overload the basket. Shake or turn ingredients halfway through cooking. |
| Fumo bianco proveniente dall'apparecchio. | Residui di grasso derivanti da un utilizzo precedente; ingredienti grassi. | Clean the basket and crisper plate thoroughly after each use. For fatty foods, place a piece of aluminum foil under the crisper plate. |
| L'elettrodomestico emana cattivo odore durante il primo utilizzo. | Normale per i nuovi elettrodomestici. | Questo è normale e scomparirà dopo alcuni utilizzi. Assicurare una buona ventilazione. |
8. Specifiche
| Caratteristica | Dettaglio |
|---|---|
| Marca | Jocca |
| Numero di modello | 2219P |
| Colore | Nero totale |
| Dimensioni del prodotto (L x P x A) | 29 x 26 x 35 cm (11.4 x 10.2 x 13.8 pollici) |
| Capacità | 4 litri |
| Energia | 1400 Watt |
| Materiale | Polipropilene |
| Caratteristiche speciali | Automatic Shut-off, Temperature Control, Timer, LED Touch Screen, 9 Automatic Programs, Defrost Function |
| Peso dell'articolo | 3.93 chilogrammi (8.66 libbre) |
| Intervallo di temperatura | da 30°C a 200°C |
| Intervallo del timer | Da 1 a 60 minuti |
9. Garanzia e supporto
The Jocca Digital Air Fryer is covered by a manufacturer's warranty. Please refer to your purchase documentation for specific warranty terms and conditions. For technical support, spare parts, or any inquiries not covered in this manual, please contact Jocca customer service through the retailer where the product was purchased or visit the official Jocca websito.
Conservare la prova d'acquisto per eventuali richieste di garanzia.