
1. Introduzione
Thank you for choosing the Enhulk PC40 Pool Vacuum. This manual provides essential information for the safe and efficient operation, maintenance, and troubleshooting of your new pool cleaner. Please read it thoroughly before first use and keep it for future reference.
2. Informazioni sulla sicurezza
AVVERTENZA: Leggere attentamente tutte le avvertenze di sicurezza e le istruzioni prima di utilizzare questo prodotto. La mancata osservanza delle avvertenze e delle istruzioni può causare scosse elettriche, incendi e/o lesioni gravi.
- Prima di procedere alla ricarica, assicurarsi sempre che la porta di ricarica sia asciutta.
- Store the machine in a dry place when not in use.
- Do not use the vacuum for cleaning algae or silt, as this may affect performance.
- Tenere bambini e animali domestici lontani dall'area della piscina durante il funzionamento.
- Ensure the suction head is placed at least 11 inches underwater for optimal performance.
- Do not operate the vacuum out of water.
3. Contenuto della confezione
Verifica che tutti gli articoli elencati di seguito siano inclusi nel tuo pacchetto:
- Enhulk PC40 Pool Vacuum Unit
- 12.2" Removable Vacuum Head with Side Brushes
- Telescopic Pole (extends from 3.2ft to 6.4ft)
- Batteria al litio ricaricabile (preinstallata)
- Cavo di ricarica magnetico
- Removable Filter Screen
- Rete skimmer per piscina
- Manuale d'uso
4. Installazione e assemblaggio
The Enhulk PC40 Pool Vacuum is designed for tool-free assembly. Follow these steps to prepare your vacuum for use:
- Installa il filtro: Ensure the removable filter screen is correctly seated inside the vacuum unit.
- Attach the Vacuum Head: Align the 12.2" removable vacuum head with the main unit and snap it into place.
- Attach the Handle/Pole:
- For handheld use, attach the short handle directly to the vacuum unit.
- For extended reach, connect the telescopic pole to the vacuum unit. The pole extends from 3.2ft to 6.4ft.
- Carica iniziale: Before first use, fully charge the lithium battery using the magnetic charging cable. The charging time is approximately 90 minutes.

Image: The Enhulk PC40 Pool Vacuum connected to its magnetic charging cable. The unit features a clear debris canister and a red power switch.

Image: A person using the Enhulk PC40 Pool Vacuum with its telescopic pole to clean a pool. The pole extends to reach deeper areas.
5. Istruzioni per l'uso
Per una pulizia efficace della piscina, segui questi passaggi:
- Pre-clean (Optional but Recommended): For optimal performance, use the included skimmer net to remove large debris like leaves from the pool surface before using the vacuum.
- Accensione: Turn on the vacuum unit using the power switch.
- Immergere: Carefully submerge the vacuum head into the water. Ensure the suction head is at least 11 inches underwater for maximum cleaning power.
- Pulito: Move the vacuum slowly across the pool floor, stairs, and corners. The side brushes on the vacuum head assist in dislodging dirt and debris.
- Durata: The Enhulk PC40 offers up to 80 minutes of continuous runtime on a full charge.
- Spegni: Once cleaning is complete, turn off the vacuum unit and remove it from the water.
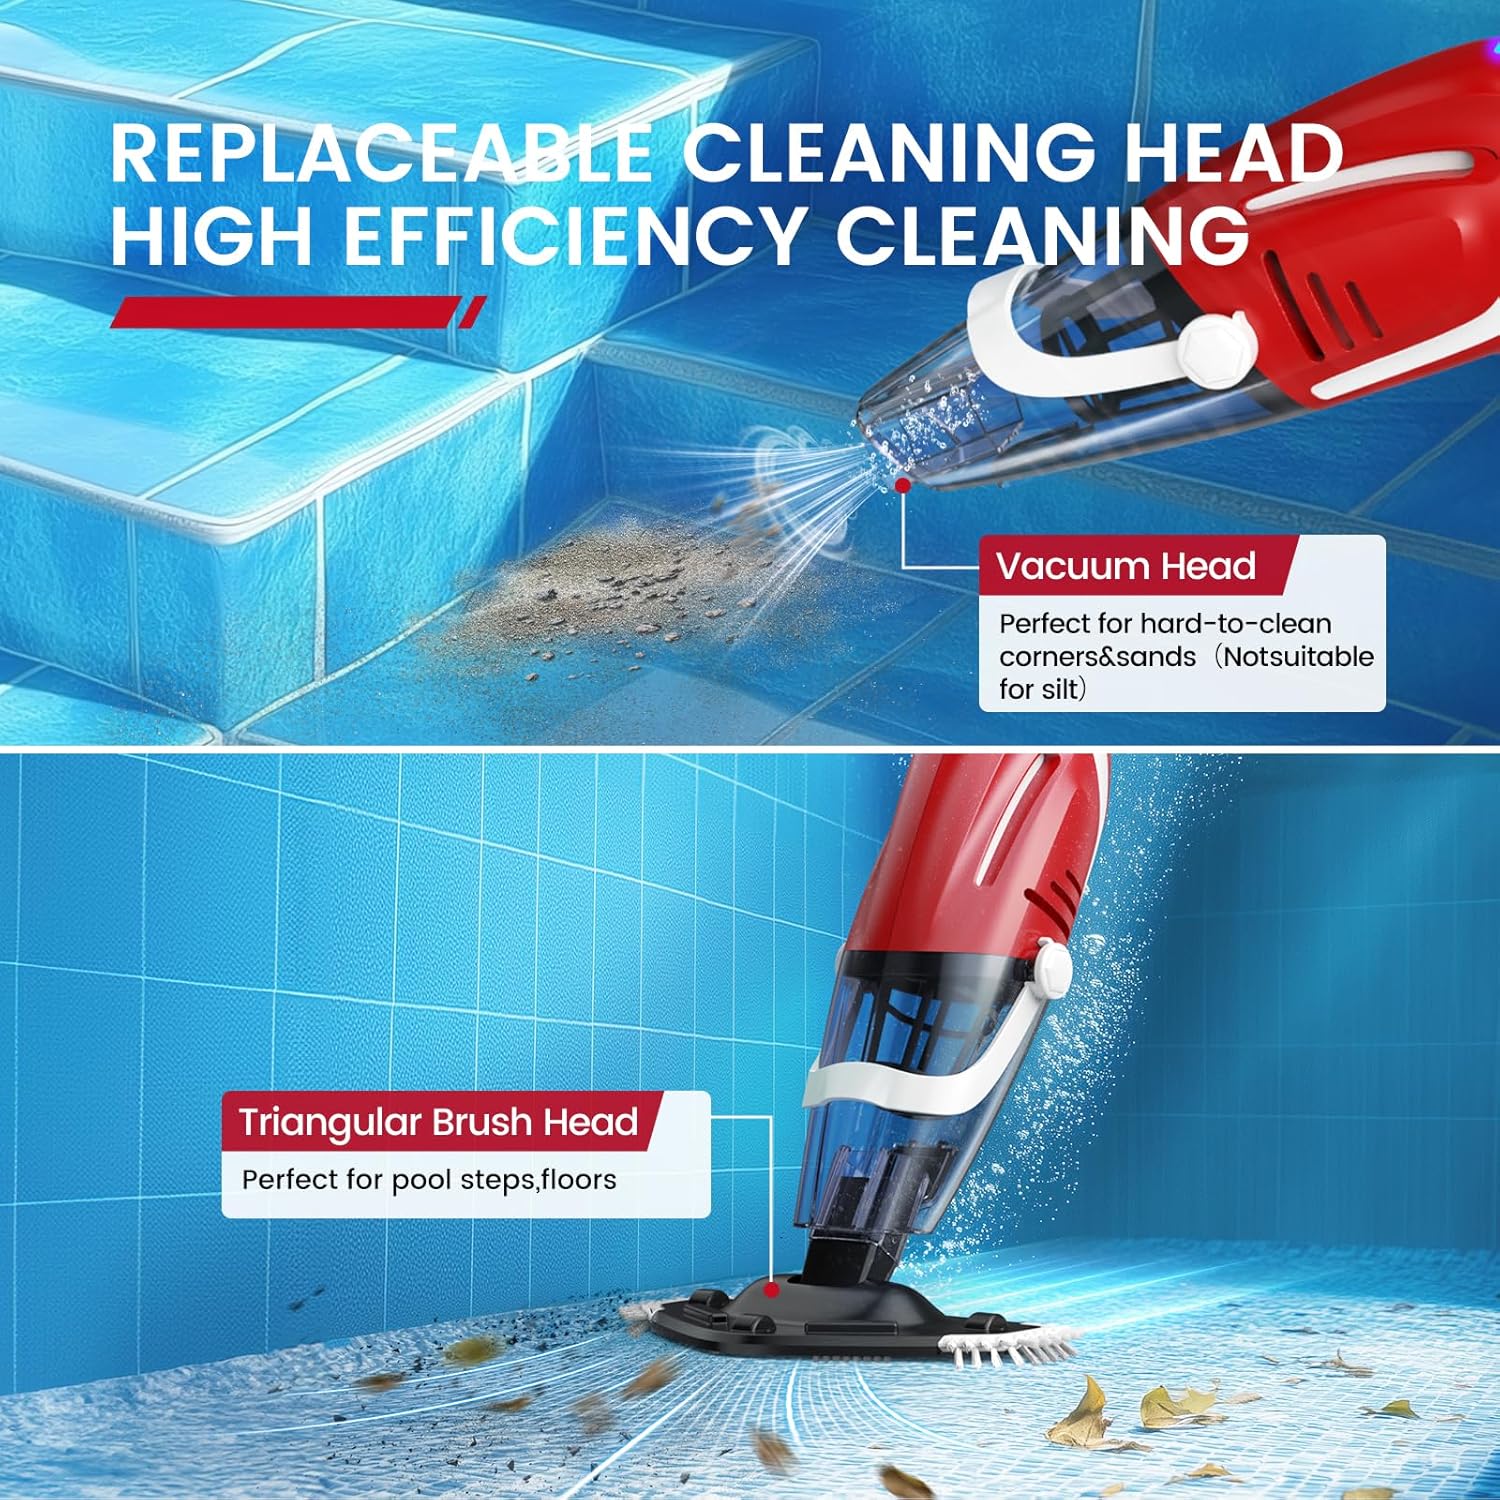
Image: The Enhulk PC40 Pool Vacuum's cleaning head with side brushes actively collecting debris from the pool floor. The image highlights its strong suction power.

Image: Various pool types where the Enhulk PC40 Pool Vacuum can be used, including in-ground pools, spas, hot tubs, and above-ground pools.
Video: A demonstration of the 2025 Upgraded Cordless Pool Vacuum for Above Ground pools, showcasing its assembly and cleaning capabilities.
6. Manutenzione
Regular maintenance ensures the longevity and optimal performance of your Enhulk PC40 Pool Vacuum.
- Filtro vuoto e pulito: After each use, remove the filter screen and empty any collected debris. Rinse the filter thoroughly with clean water.
- Clean Vacuum Head: Rinse the vacuum head and brushes to remove any clinging debris.
- Porta di ricarica a secco: Always wipe the charging port dry after cleaning to prevent damage.
- Magazzinaggio: Store the vacuum in a dry place, away from direct sunlight and extreme temperatures. Ensure the battery is fully charged before long-term storage.
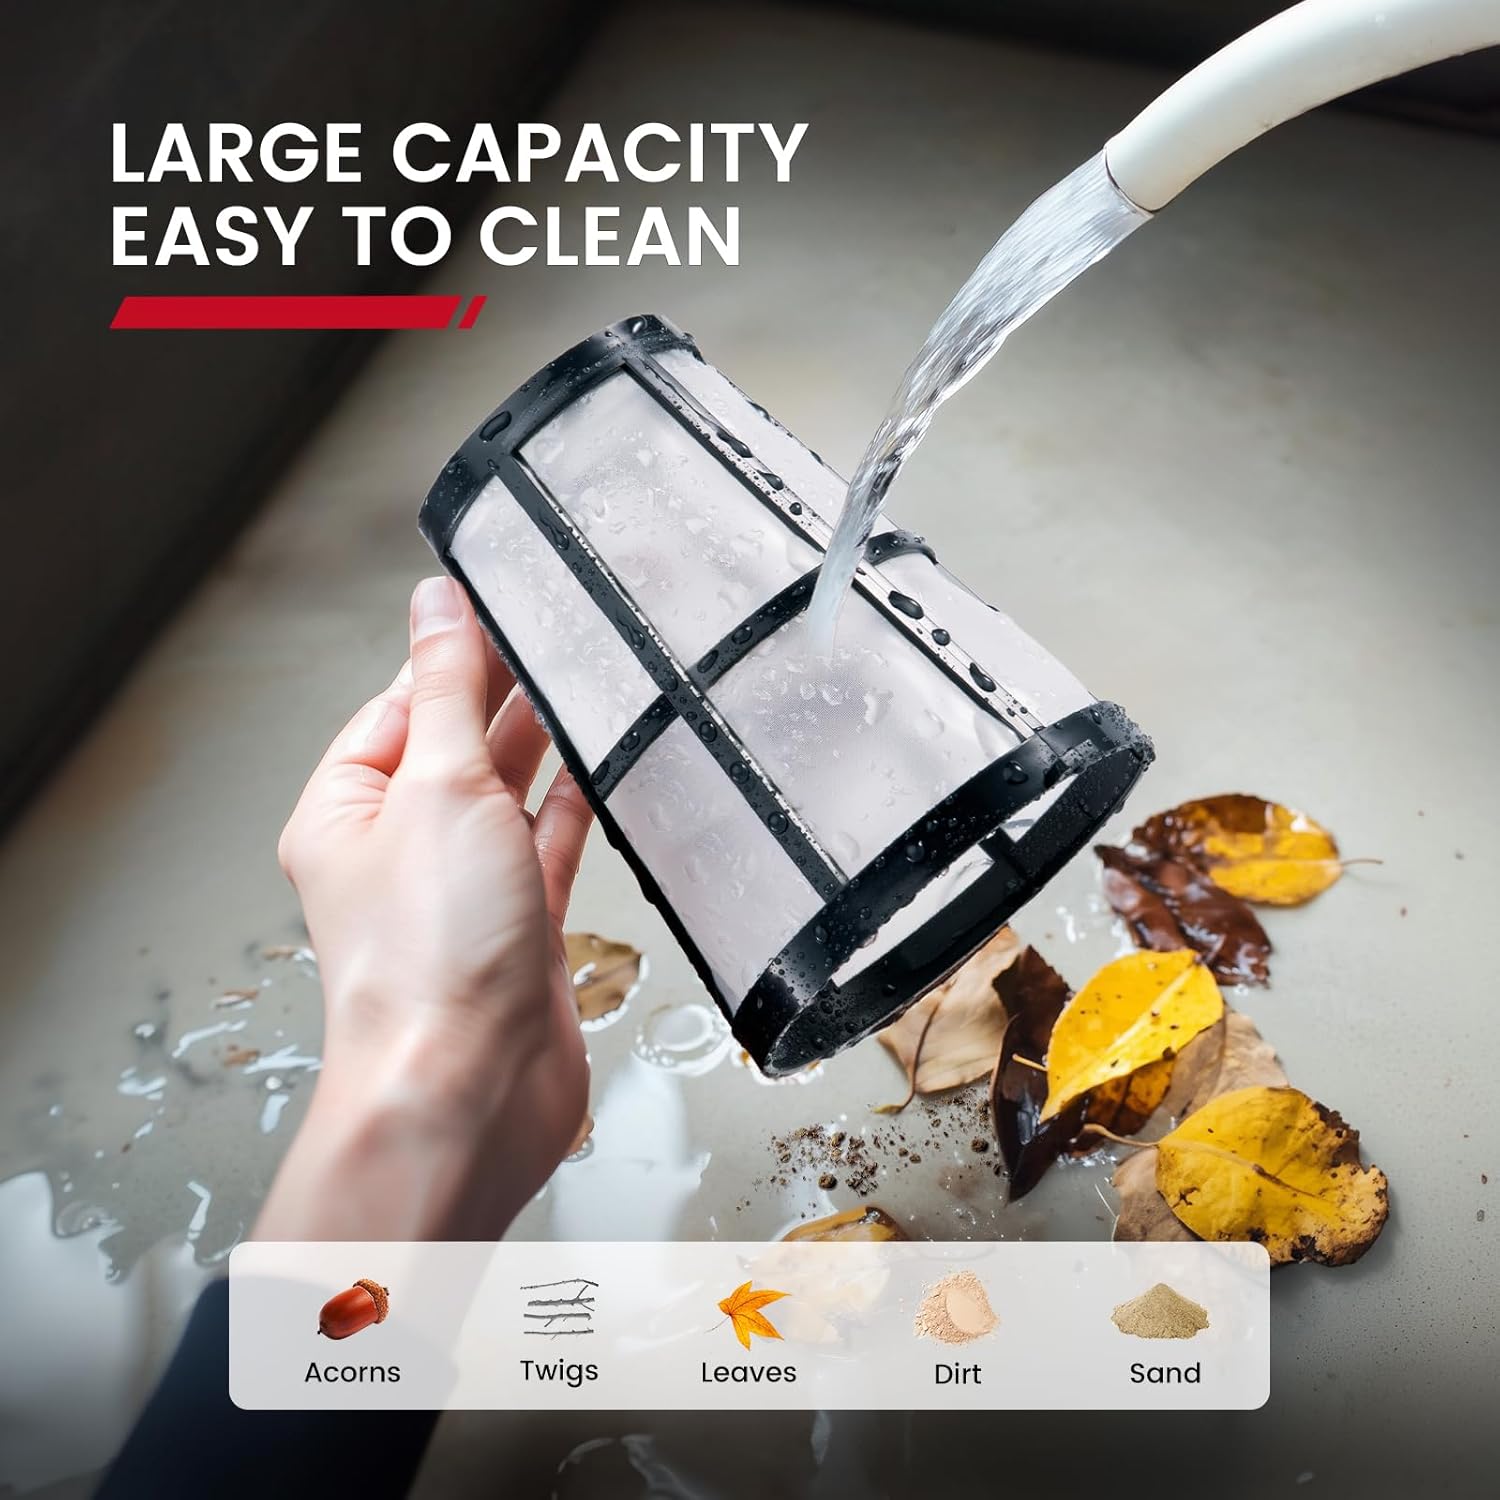
Image: A hand rinsing the removable filter screen of the Enhulk PC40 Pool Vacuum under running water, showing collected leaves, dirt, and sand.
7. Risoluzione Dei Problemi
If you encounter issues with your Enhulk PC40 Pool Vacuum, refer to the following common problems and solutions:
| Problema | Possibile causa | Soluzione |
|---|---|---|
| Potenza di aspirazione ridotta | Clogged filter screen; Low battery; Large debris blocking intake. | Clean or replace filter; Recharge battery; Remove large debris manually. |
| L'aspirapolvere non si accende | Battery not charged; Power switch in OFF position. | Charge battery fully; Ensure power switch is in ON position. |
| Debris Escaping Vacuum | Filter screen improperly installed or damaged. | Re-install filter correctly; Replace damaged filter. |
8. Specifiche
| Caratteristica | Dettaglio |
|---|---|
| Nome del modello | PC40 Pool Vacuum |
| Fonte di alimentazione | Alimentato a batteria (1 batteria agli ioni di litio inclusa) |
| Capacità della batteria | 40 Watt ora |
| Autonomia massima | 80 minuti |
| Tempo di ricarica | 90 minuti |
| Potenza di aspirazione | 18.5 Gal/Min |
| Lunghezza del palo telescopico | Da 3.2 piedi a 6.4 piedi |
| Vacuum Head Width | 12.2 inches (with side brushes) |
| Peso dell'articolo | 7.48 libbre (3.4 chilogrammi) |
| Dimensioni del prodotto | 24.4 cm L x 19.7 cm P x 16.5 cm A |
| Materiale | Plastica |
| Colore | Rosso |
9. Garanzia e supporto
For warranty information or technical support, please refer to the contact details provided with your purchase documentation or visit the official Enhulk websito.