
1. Prodotto finitoview
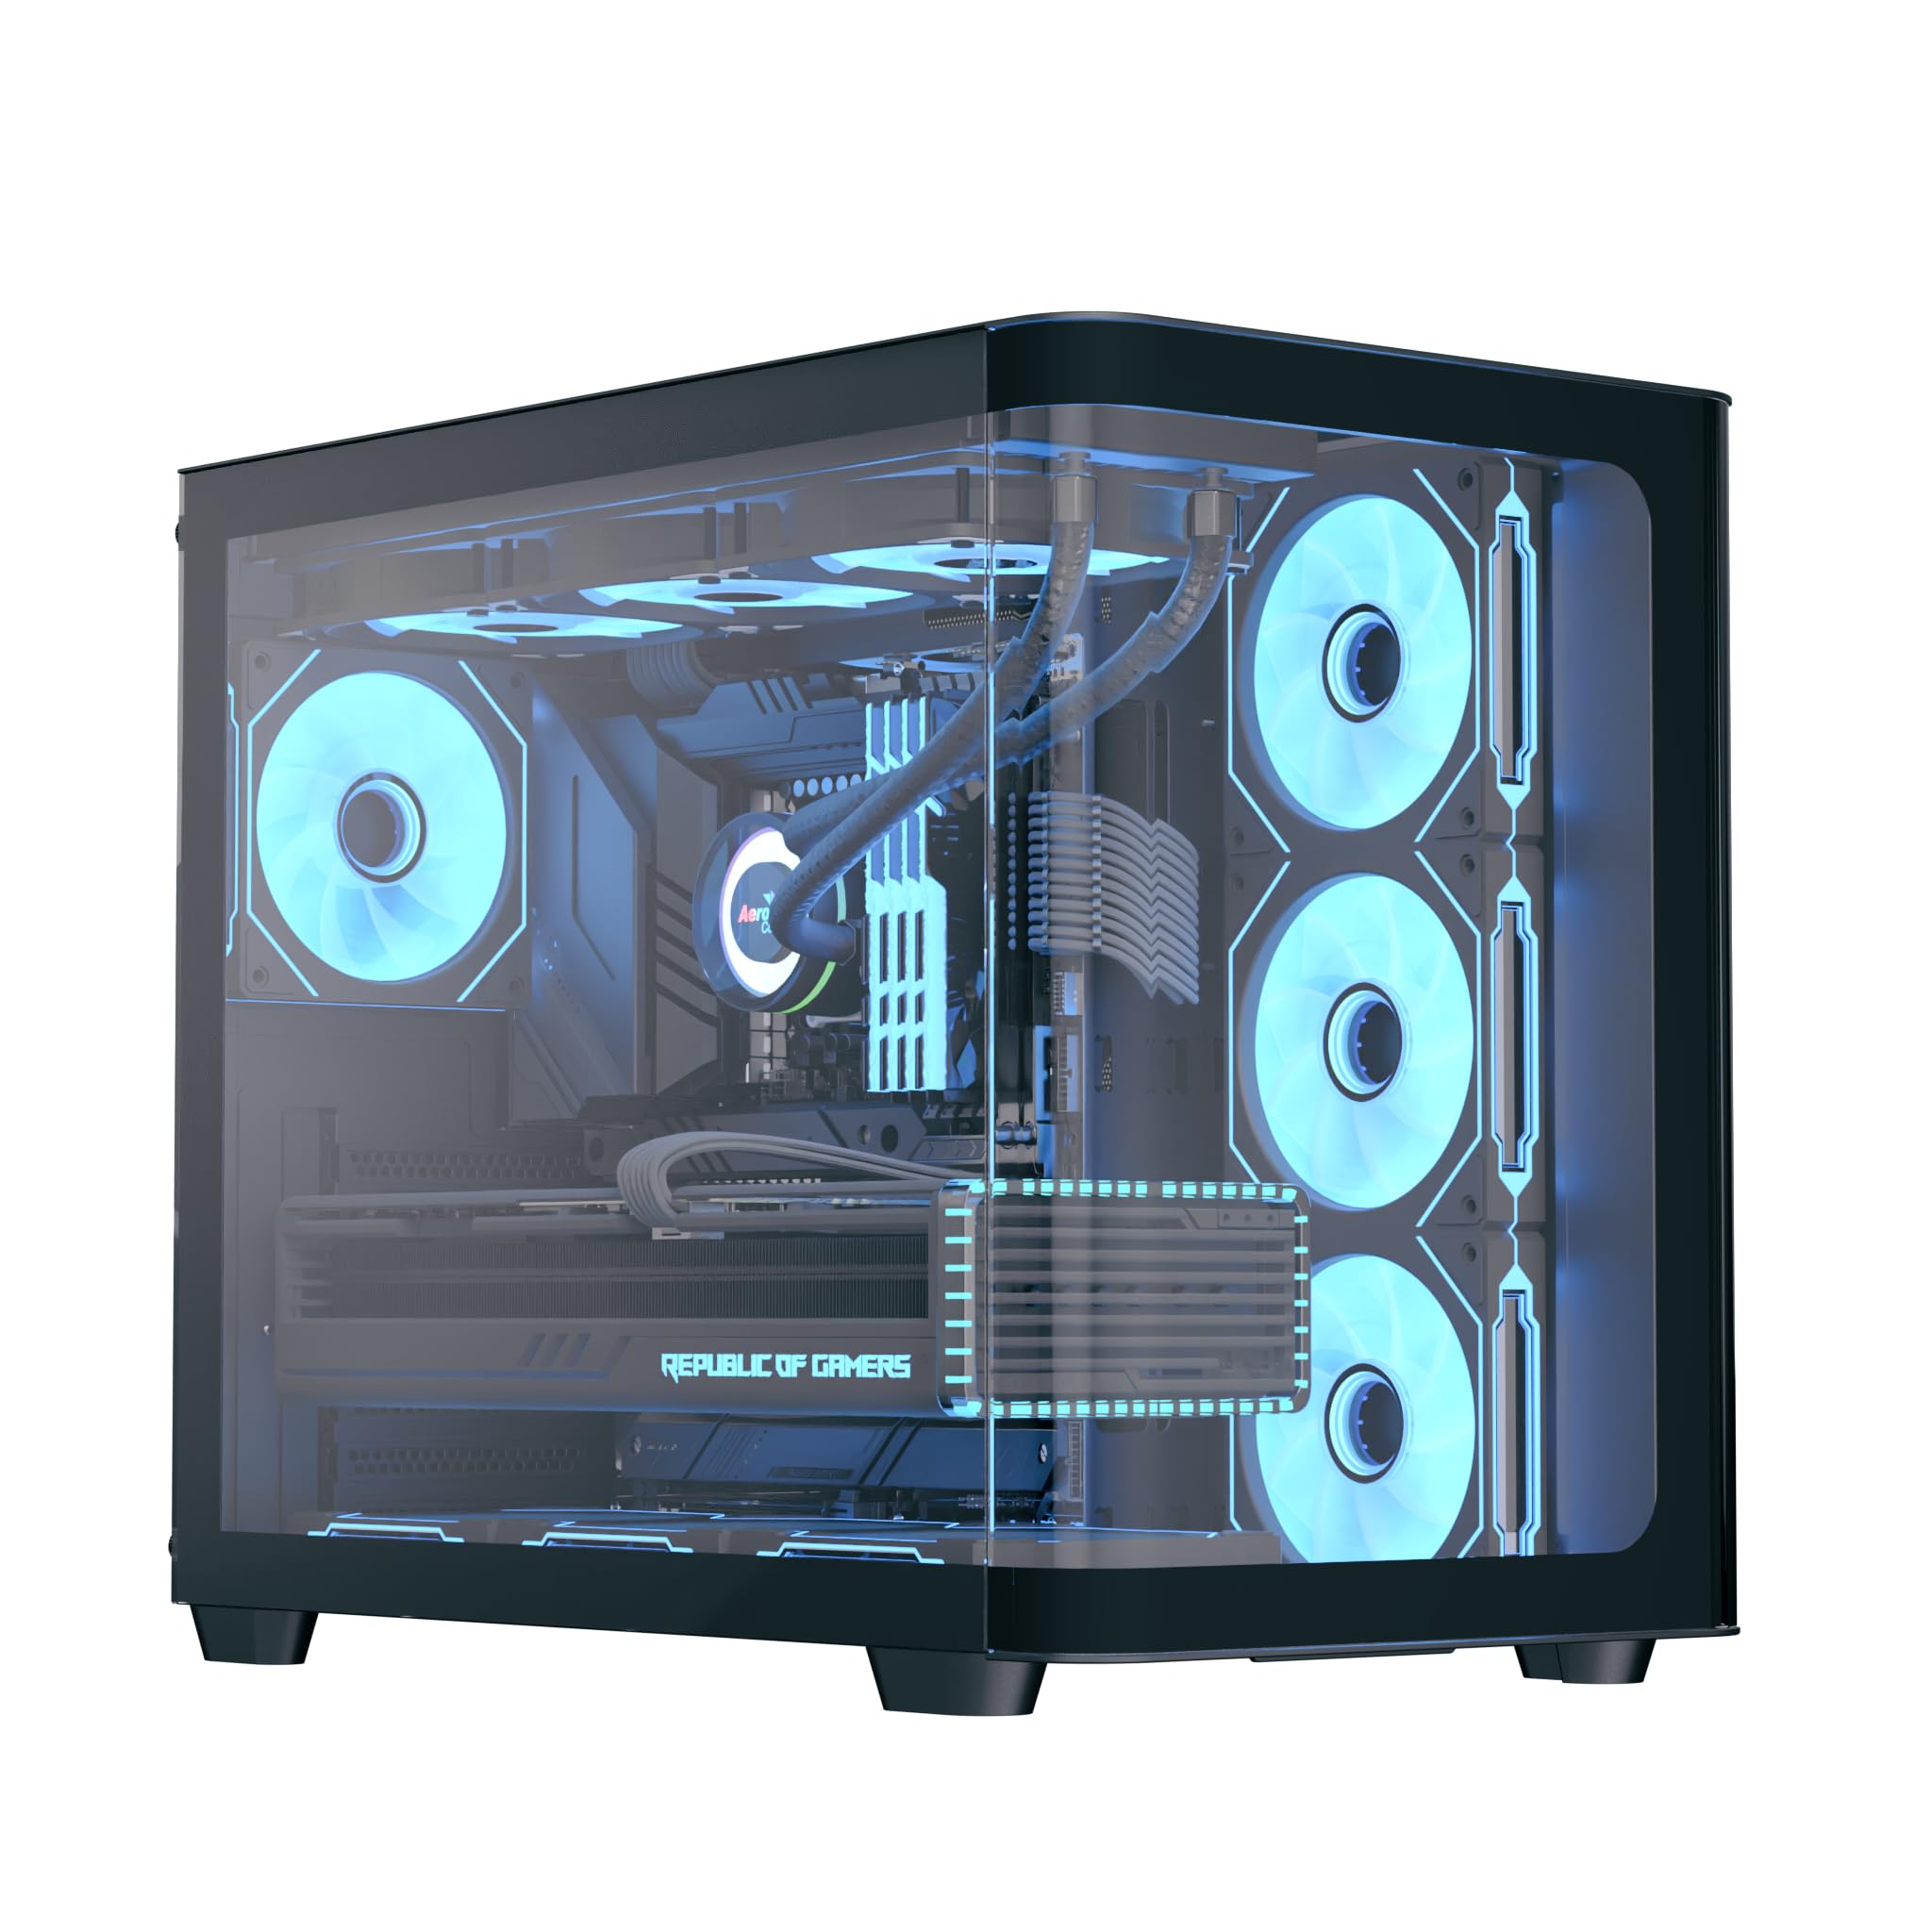
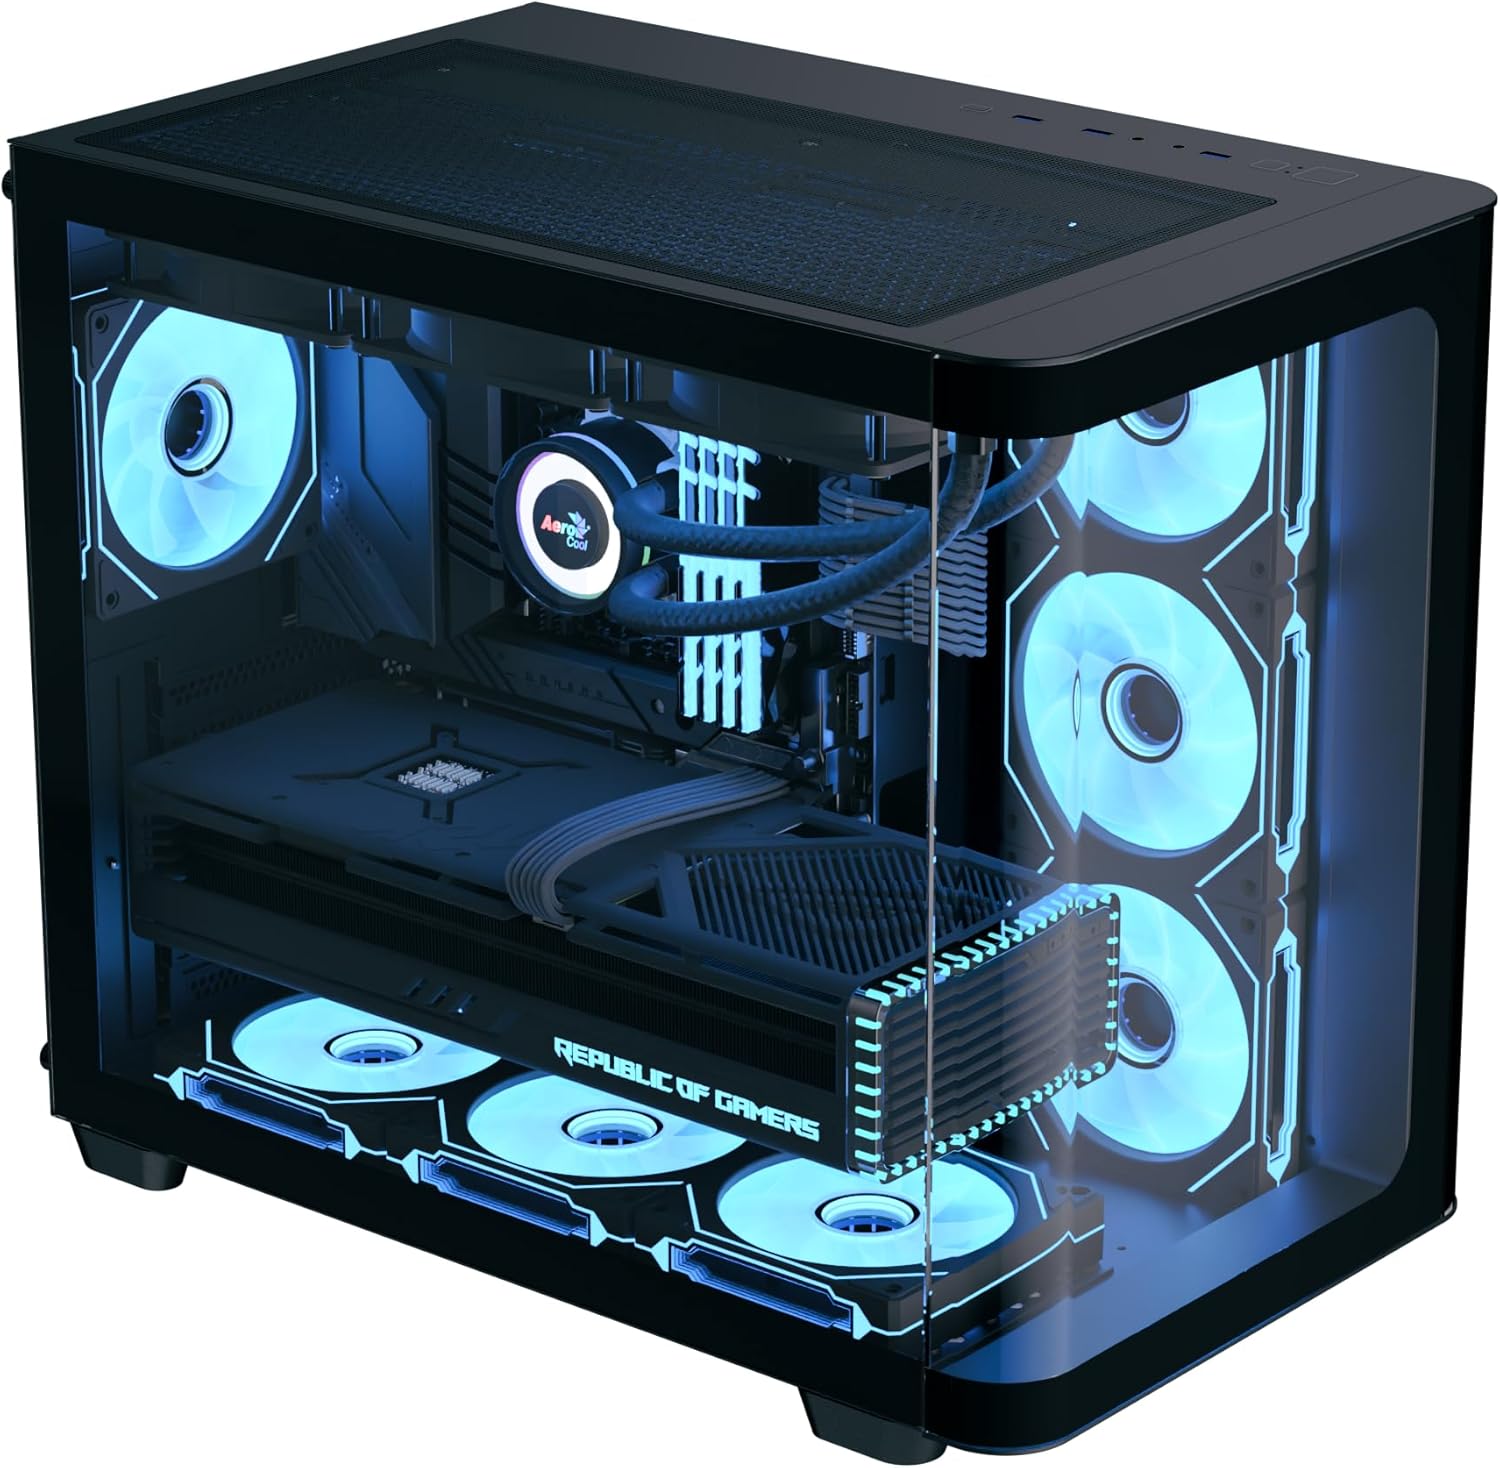
The AeroCool P500C is a mid-tower PC case designed with a dual-chamber layout. It features full tempered glass panels on the front and side, providing a clear view of internal components. The case includes four pre-installed ARGB fans, with three reverse-blade fans on the side and one standard fan at the rear, all featuring a "mirage" infinity mirror lighting effect. This case supports various cooling configurations, including air and liquid cooling systems up to 360mm radiators. It is compatible with ATX, micro-ATX, and mini-ITX motherboards, and accommodates high-end graphics cards up to 450mm in length and CPU coolers up to 162mm in height. Storage options include three SSD slots and two HDD drive bays. For ease of maintenance, the case is equipped with magnetic dust filters on the top and bottom.
2. Caratteristiche principali
- Mid-tower dual chamber design with full tempered glass front and side panels.
- Four pre-installed ARGB fans: three 12cm reverse-blade fans on the side and one 12cm fan at the rear.
- "Mirage" infinity mirror lighting effect on all included fans.
- Extensive cooling support for radiators up to 360mm (top and bottom) and up to 10 total fan slots.
- Compatibility with high-end graphics cards up to 450mm in length.
- Supports ATX, micro-ATX, and mini-ITX motherboards.
- Includes a 4-port PWM ARGB fan hub for centralized control.
- Equipped with top and bottom magnetic dust filters for easy maintenance.
3. Contenuto della confezione
Verificare che tutti i componenti siano presenti nella confezione:
- AeroCool P500C Mid-Tower PC Case
- Four pre-installed 12cm ARGB fans (3 reverse-blade, 1 standard)
- 4-port PWM ARGB fan hub
- Accessory box with screws, standoffs, and cable ties
- Manuale dell'utente (questo documento)
4. Configurazione e installazione
This section provides general guidelines for installing components into your AeroCool P500C PC case. Always refer to the specific manuals for your motherboard, power supply, and other components for detailed installation instructions.
4.1 Preparazione del caso
- Rimuovere i pannelli laterali: Carefully remove the tempered glass side panel(s) by unscrewing the thumb screws and gently sliding them off. Place them on a soft, flat surface to prevent scratches.
- Scatola degli accessori: Individuare la scatola degli accessori all'interno della custodia, che contiene tutte le viti e l'hardware di montaggio necessari.
4.2 Installazione della scheda madre
- Installare i distanziatori: Ensure the correct standoffs are installed for your motherboard form factor (ATX, micro-ATX, mini-ITX). The P500C typically has pre-installed standoffs for ATX. Adjust as needed.
- Installa I/O Shield: If your motherboard requires a separate I/O shield, install it into the rear opening of the case before mounting the motherboard.
- Montare la scheda madre: Carefully align your motherboard with the standoffs and I/O shield, then gently lower it into place. Secure it with the provided screws.
4.3 Installazione del dispositivo di archiviazione
The P500C supports three SSDs and two HDDs.
- SSD da 2.5": Mount 2.5" SSDs onto the dedicated SSD trays, typically located behind the motherboard tray or in the PSU shroud area. Secure with screws.
- HDD da 3.5": Install 3.5" HDDs into the drive bays, usually found in the lower chamber. Slide the drives into the trays and secure them.
4.4 Installazione della scheda grafica (GPU)
Il case supporta schede grafiche lunghe fino a 450 mm.
- Rimuovere le coperture degli slot PCIe: Rimuovere le coperture degli slot PCIe necessari dalla parte posteriore del case, corrispondenti alle dimensioni della GPU.
- Inserisci GPU: Align your graphics card with the PCIe slot on the motherboard and press firmly until it clicks into place. Secure it with screws.

4.5 Installazione del sistema di raffreddamento
The P500C supports up to 360mm radiators at the top and bottom, and a total of 10 fans.
- Radiatori: Mount radiators to the designated top or bottom brackets using the appropriate screws.
- Altri fan: Install any additional fans in available slots (e.g., front, top, bottom, rear) as needed for optimal airflow.
- Fan Hub: Connect the pre-installed fans and any additional ARGB/PWM fans to the included 4-port PWM ARGB fan hub. Connect the hub to your motherboard's ARGB header and a PWM fan header for control.
4.6 Gestione dei cavi
Utilizzate i fori per il passaggio dei cavi e i punti di fissaggio dietro il vassoio della scheda madre per gestire i cavi. Questo migliora il flusso d'aria e l'estetica.
4.7 Collegamenti del pannello I/O frontale
Connect the front panel cables (USB, audio, power switch, reset switch, LED indicators) to the corresponding headers on your motherboard. Refer to your motherboard manual for header locations.

5. Istruzioni per l'uso
- Accensione: After all components are installed and cables connected, close the side panels. Connect your power supply to a wall outlet and flip the PSU switch to the ON position. Press the power button on the front panel of the case to start your system.
- Controllo dell'illuminazione ARGB: The pre-installed ARGB fans are connected to a 4-port PWM ARGB fan hub. If this hub is connected to your motherboard's ARGB header, you can control the lighting effects using your motherboard's RGB software (e.g., ASUS Aura Sync, MSI Mystic Light Sync, Gigabyte RGB Fusion, ASRock Polychrome Sync).
- Controllo della velocità della ventola: The PWM functionality of the fan hub allows your motherboard to control fan speeds based on system temperatures, optimizing cooling performance and noise levels.
6. Manutenzione
Una manutenzione regolare aiuta a garantire prestazioni ottimali e longevità dei componenti del PC.
- Filtri antipolvere: The AeroCool P500C is equipped with magnetic dust filters on the top and bottom. Regularly remove and clean these filters to prevent dust buildup inside the case, which can impede airflow and component cooling.
- Pulizia interna: Aprire periodicamente il case e utilizzare aria compressa per rimuovere la polvere da ventole, dissipatori di calore e altri componenti. Assicurarsi che il sistema sia spento e scollegato prima di pulirlo.
- Gestione dei cavi: Periodically check cable routing to ensure no cables are obstructing airflow or fan operation.
7. Risoluzione Dei Problemi
In caso di problemi, prendere in considerazione i seguenti passaggi comuni per la risoluzione dei problemi:
- Il sistema non si accende:
- Ensure the power supply is properly connected to the wall outlet and the PSU switch is ON.
- Verificare che tutti i cavi di alimentazione (ATX a 24 pin, CPU a 8 pin, alimentazione PCIe) siano collegati saldamente alla scheda madre e ai componenti.
- Verificare che il cavo dell'interruttore di alimentazione del pannello frontale sia collegato correttamente al connettore della scheda madre.
- Le ventole non girano/ARGB non si accende:
- Confirm that the fans are properly connected to the fan hub.
- Ensure the fan hub is connected to a power source (e.g., SATA power) and the motherboard's ARGB/PWM headers.
- Check your motherboard's BIOS/UEFI settings or RGB software for fan control and lighting settings.
- Problemi di surriscaldamento:
- Verify that all case fans are spinning and oriented correctly for optimal airflow (intake/exhaust).
- Pulire i filtri antipolvere e i componenti interni per garantire un flusso d'aria senza ostacoli.
- Ensure CPU cooler and GPU fans are functioning correctly.
8. Specifiche
| Caratteristica | Specificazione |
|---|---|
| Marca | AeroCool |
| Tipo di caso | Mid Tower |
| Nome del modello | P500C |
| Colore | Nero |
| Supporto per la scheda madre | ATX, Micro ATX, Mini ITX |
| Ventole preinstallate | 4 x 12cm ARGB (3 reverse-blade side, 1 rear) |
| Supporto radiatore | Up to 360mm (Top, Bottom) |
| Lunghezza massima della GPU | 450mm |
| Altezza massima del dissipatore della CPU | 162mm |
| Alloggiamenti unità | 3 SSD da 2.5", 2 HDD da 3.5" |
| Porte I/O | USB, Audio (specifics not detailed in source) |
| Peso dell'articolo | 9.12 chilogrammi |
| Codice UPC | 810189570009 |
9. Garanzia e supporto
The AeroCool P500C PC Case comes with a Garanzia limitataSi prega di conservare la prova d'acquisto per eventuali reclami in garanzia.
For technical support, warranty inquiries, or further assistance, please visit the official AeroCool website or contact their customer service department. Contact information can typically be found on the AeroCool websito o sulla confezione del prodotto.