1. Importanti istruzioni di sicurezza
Leggere tutte le avvertenze di sicurezza, le istruzioni, le illustrazioni e le specifiche fornite con questo elettroutensile. La mancata osservanza di tutte le istruzioni elencate di seguito può causare scosse elettriche, incendi e/o lesioni gravi.
- Sicurezza dell'area di lavoro: Mantenere l'area di lavoro pulita e ben illuminata. Non utilizzare utensili elettrici in atmosfere esplosive, ad esempio in presenza di liquidi, gas o polveri infiammabili.
- Sicurezza elettrica: Le spine degli elettroutensili devono essere adatte alla presa. Non modificare mai la spina in alcun modo. Evitare il contatto del corpo con superfici messe a terra.
- Sicurezza personale: Always wear eye protection, respiratory protection, and appropriate clothing. Do not overreach. Maintain proper footing and balance at all times.
- Uso e cura dello strumento: Non forzare l'utensile elettrico. Utilizzare l'utensile elettrico corretto per l'applicazione desiderata. Scollegare la spina dalla presa di corrente prima di effettuare qualsiasi regolazione, sostituire accessori o riporre l'utensile elettrico.
- Specific Sprayer Safety: Ensure proper ventilation when spraying. Do not spray flammable materials near open flames or ignition sources. Always clean the sprayer thoroughly after each use.
2. Prodotto finitoview e contenuto della confezione
The VISLONE 300W Electric Paint Sprayer is designed for efficient application of various coatings. Familiarize yourself with its components and ensure all items are present.

Figura 2.1: Oltreview of the VISLONE 300W Electric Paint Sprayer.
2.1 Package List:
- 1 x Paint Sprayer
- 2 batteria (1300 mAh)
- 1 x Spazzola per la pulizia
- 1 x Ago di pulizia
- 4 x Nozzles (Φ1.0mm, 1.8mm, 2.0mm, 2.5mm)
- 3 x Guarnizione
- 1 x tazza di viscosità
- 1 x Manuale utente (questo documento)
- 1 x Caricabatterie
3. Installazione e assemblaggio
3.1 Preparing the Paint
- Ensure the paint or coating material is suitable for spray application.
- Use the provided viscosity cup to check the paint's viscosity. Thin the paint with the appropriate solvent (water for latex, mineral spirits for oil-based) until it passes through the viscosity cup within the recommended time (refer to paint manufacturer's instructions).
- Strain the thinned paint to remove any lumps or debris that could clog the nozzle.
3.2 Montaggio dello spruzzatore
- Attach the paint container (800ml tank) to the sprayer body by screwing it securely.
- Insert a charged battery into the battery slot at the base of the handle until it clicks into place.

Figure 3.1: The 800ml capacity paint tank attached to the sprayer.
3.3 Selecting and Installing Nozzles
The sprayer includes four copper nozzles of different sizes (Φ1.0mm, 1.8mm, 2.0mm, 2.5mm) for various paint types and project requirements.
- Choose the appropriate nozzle size for your paint and desired finish. Generally, smaller nozzles are for thinner materials and finer finishes, while larger nozzles are for thicker materials and faster coverage.
- Unscrew the nozzle cap from the front of the sprayer.
- Insert the selected nozzle and ensure a gasket is properly seated.
- Screw the nozzle cap back on securely.

Figure 3.2: The four interchangeable copper nozzles (1.0mm, 1.8mm, 2.0mm, 2.5mm).
3.4 Regolazione dei modelli di spruzzo
The sprayer offers three spray patterns: horizontal, vertical, and circular. Rotate the air cap to select the desired pattern.
- Orizzontale: Per spruzzare con movimenti verso l'alto e verso il basso.
- Verticale: Per spruzzare con movimenti laterali.
- Circolare: Per piccole aree o lavori dettagliati.
4. Funzionamento
4.1 Powering On and Testing
- Ensure the sprayer is fully assembled and the paint tank is filled.
- Point the sprayer at a test surface (e.g., cardboard) and press the trigger to start spraying.
- Adjust the flow control knob on the sprayer to achieve the desired paint output. The flow rate can be adjusted between 500-800ml/min.

Figure 4.1: Adjusting the flow control and selecting spray patterns (circular, horizontal, vertical).
4.2 Tecnica di spruzzatura
- Maintain a consistent distance (typically 6-12 inches) from the surface being painted.
- Muovere lo spruzzatore con movimenti fluidi e uniformi, sovrapponendo ogni passaggio di circa il 50% per garantire una copertura uniforme.
- Rilasciare il grilletto alla fine di ogni passata per evitare accumuli di vernice.
- Per ottenere risultati ottimali, applicare più strati sottili anziché uno spesso.
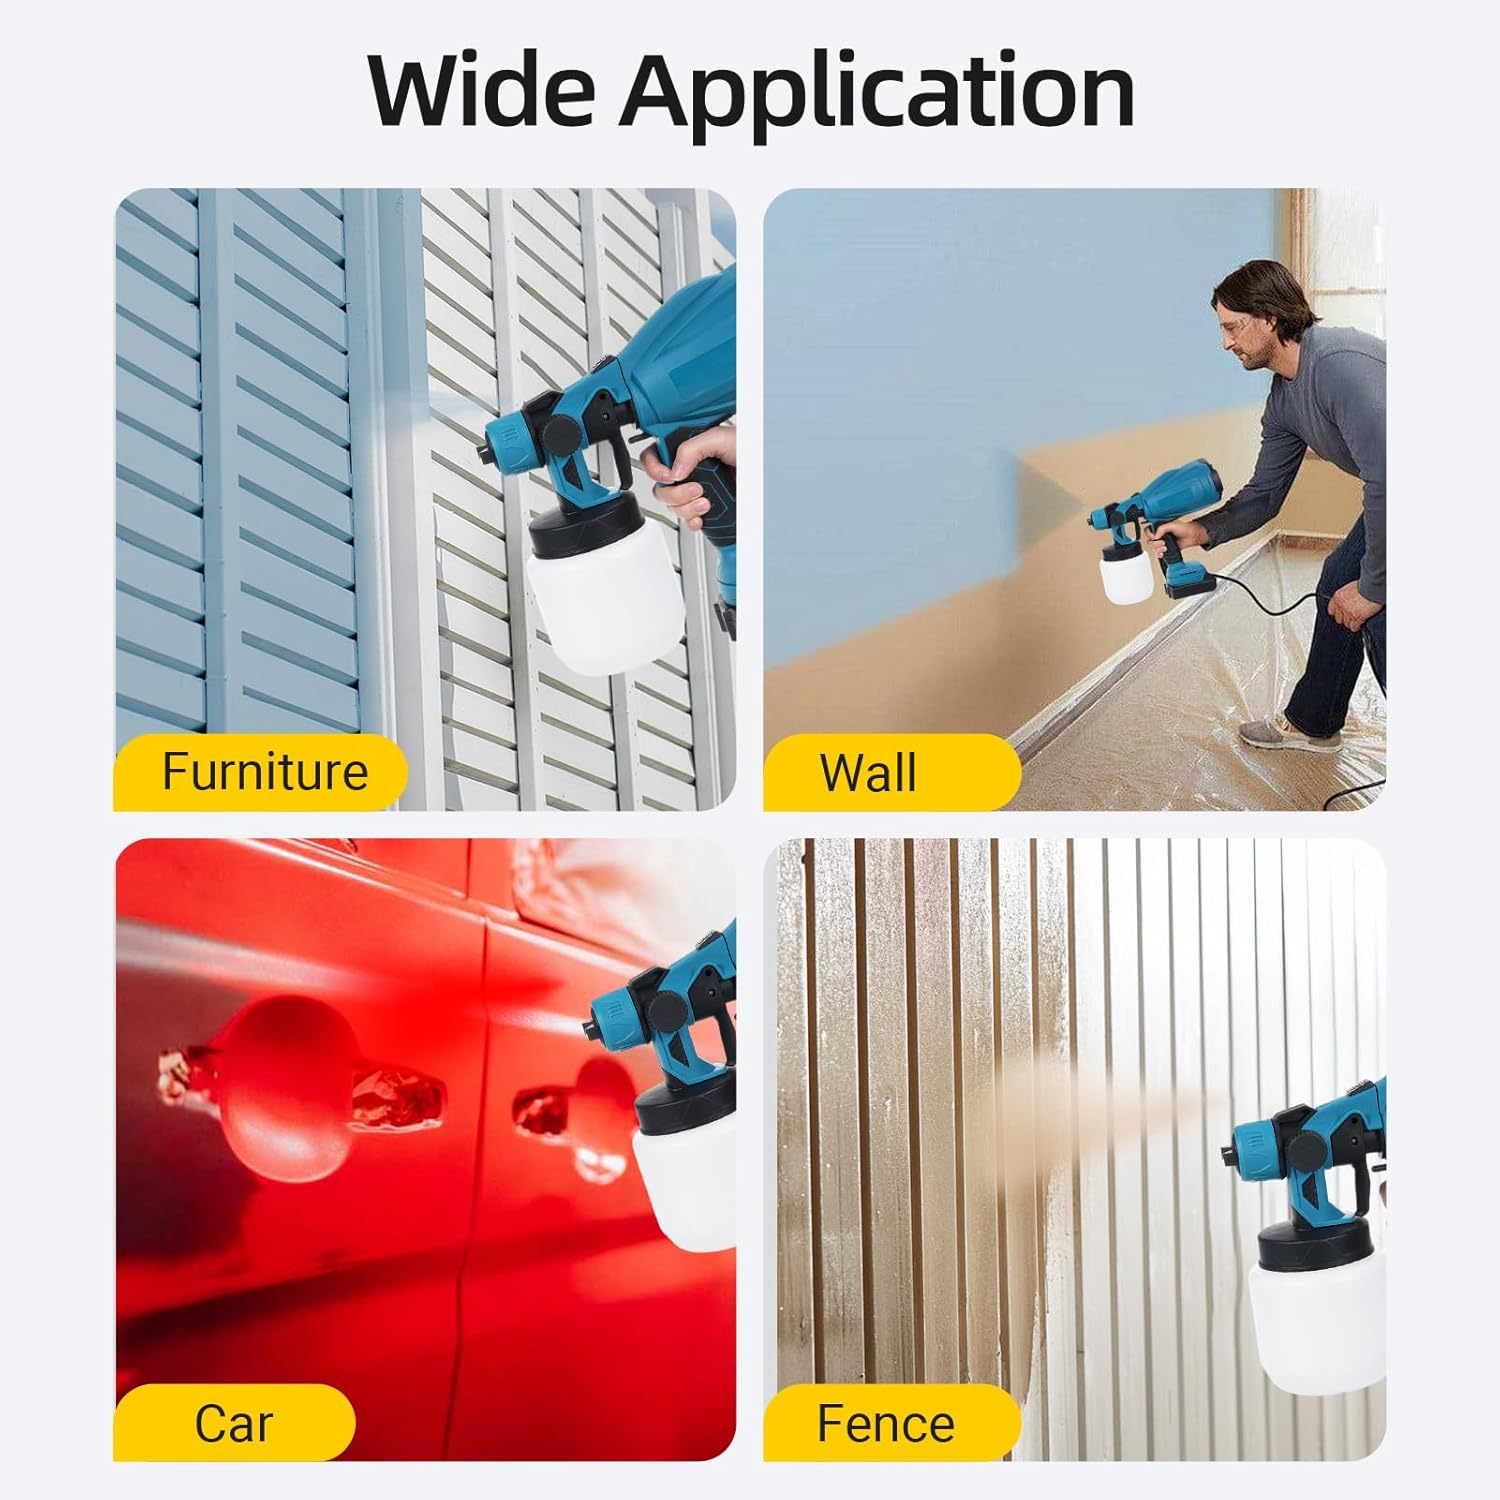
Figura 4.2: Esamples of the paint sprayer's application on furniture, walls, cars, and fences.
5. Manutenzione e pulizia
Proper cleaning after each use is essential to ensure the longevity and optimal performance of your paint sprayer.
5.1 Smontaggio per la pulizia
- Disconnect the battery from the sprayer.
- Unscrew the paint container and empty any remaining paint.
- Unscrew the nozzle cap and remove the nozzle and gasket.
- The front section of the sprayer can be easily detached from the motor housing for thorough cleaning.

Figure 5.1: The sprayer's design allows for easy disassembly for cleaning.
5.2 Procedura di pulizia
- Fill the paint container with the appropriate cleaning solution (water for water-based paints, solvent for oil-based paints).
- Ricollegare il contenitore e spruzzare la soluzione detergente attraverso l'apposito spruzzatore finché non esce trasparente.
- Thoroughly clean all disassembled parts (nozzle, gasket, container, suction tube) using the provided cleaning brush and needle.
- Pulisci l'esterno dello spruzzatore con un pannoamp stoffa.
- Allow all parts to dry completely before reassembly or storage.
5.3 Conservazione
Store the clean, dry sprayer in a cool, dry place, away from direct sunlight and extreme temperatures. Ensure the battery is removed if storing for extended periods.
6. Risoluzione Dei Problemi
| Problema | Possibile causa | Soluzione |
|---|---|---|
| Nessuno spruzzo o spruzzo debole | Clogged nozzle; paint too thick; low paint level; air leak. | Clean nozzle; thin paint; refill tank; check all connections for tightness. |
| Modello di spruzzo non uniforme | Incorrect nozzle selection; clogged air cap; inconsistent spraying distance. | Select appropriate nozzle; clean air cap; maintain consistent distance. |
| La vernice gocciola o cola | Too much paint flow; spraying too close; paint too thin. | Reduce flow rate; increase spraying distance; thicken paint slightly. |
| Lo spruzzatore non si accende | Battery not charged; battery not properly inserted. | Charge battery; ensure battery is securely inserted. |
7. Specifiche
| Caratteristica | Specificazione |
|---|---|
| Potenza nominale in ingresso | 300W |
| Capacità del contenitore | 800ml |
| Dimensioni degli ugelli | Φ1.0mm, 1.8mm, 2.0mm, 2.5mm (4 copper nozzles) |
| Velocità del motore | 30000rpm / min |
| Distanza di spruzzatura | 200-500 cm |
| Paint Flow | 500-800 ml/min |
| Batteria | 2 x 1300 mAh (inclusi) |
| Materiale | PP (polipropilene) |
| Peso dell'articolo | 3.91 libbre |
| Dimensioni del pacco | 10.43 x 7.68 x 6.89 pollici |

Figure 7.1: Dimensions of the VISLONE 300W Electric Paint Sprayer.
8. Garanzia e supporto
For warranty information or technical support, please refer to the contact details provided by your retailer or visit the official VISLONE websito. Conserva la ricevuta d'acquisto come prova d'acquisto.
Puoi visitare il VISLONE Store on Amazon per ulteriori informazioni.