1. Introduzione
This manual provides instructions for the assembly, operation, and maintenance of your DYRABREST Air Conditioner Fence, Model A256. This product is designed to discreetly cover outdoor air conditioning units, provide privacy, and offer a surface for decorative items like potted plants. It is constructed from durable aluminum alloy for long-lasting outdoor use.
2. Informazioni sulla sicurezza
- Assicurarsi che tutti i componenti siano fissati saldamente durante il montaggio per evitare instabilità.
- Place the fence on a stable, level surface to avoid tipping.
- Tenere bambini e animali domestici lontani dall'unità durante il montaggio.
- Do not climb on or lean heavily against the fence.
- Maintain adequate clearance around the air conditioning unit as specified by the AC manufacturer to ensure proper airflow and operation.
3. Contenuto della confezione
Verify that all components listed below are present in your package. Refer to the image for visual confirmation of parts.
- 1 x Air Conditioner Fence Screen (unassembled panels)
- All necessary accessories (screws, caps, etc.)

Figura 3.1: All components included in the package for assembly.
4. Istruzioni di montaggio
Assembly of the DYRABREST Air Conditioner Fence is straightforward and requires basic tools (not included, typically a screwdriver). Follow these steps:
- Disimballare i componenti: Carefully remove all parts from the packaging and lay them out on a clean, flat surface. Refer to Figure 3.1 to identify each piece.
- Fissare i pannelli laterali: Connect the side panels to the back panel using the provided screws. Ensure the louvers are oriented correctly for airflow.
- Collegare il pannello frontale: Secure the front panel to the side panels using the remaining screws.
- Installare il pannello superiore: Place the top panel onto the assembled frame and secure it with screws.
- Controllo finale: Assicurarsi che tutte le viti siano serrate e che la struttura sia stabile.
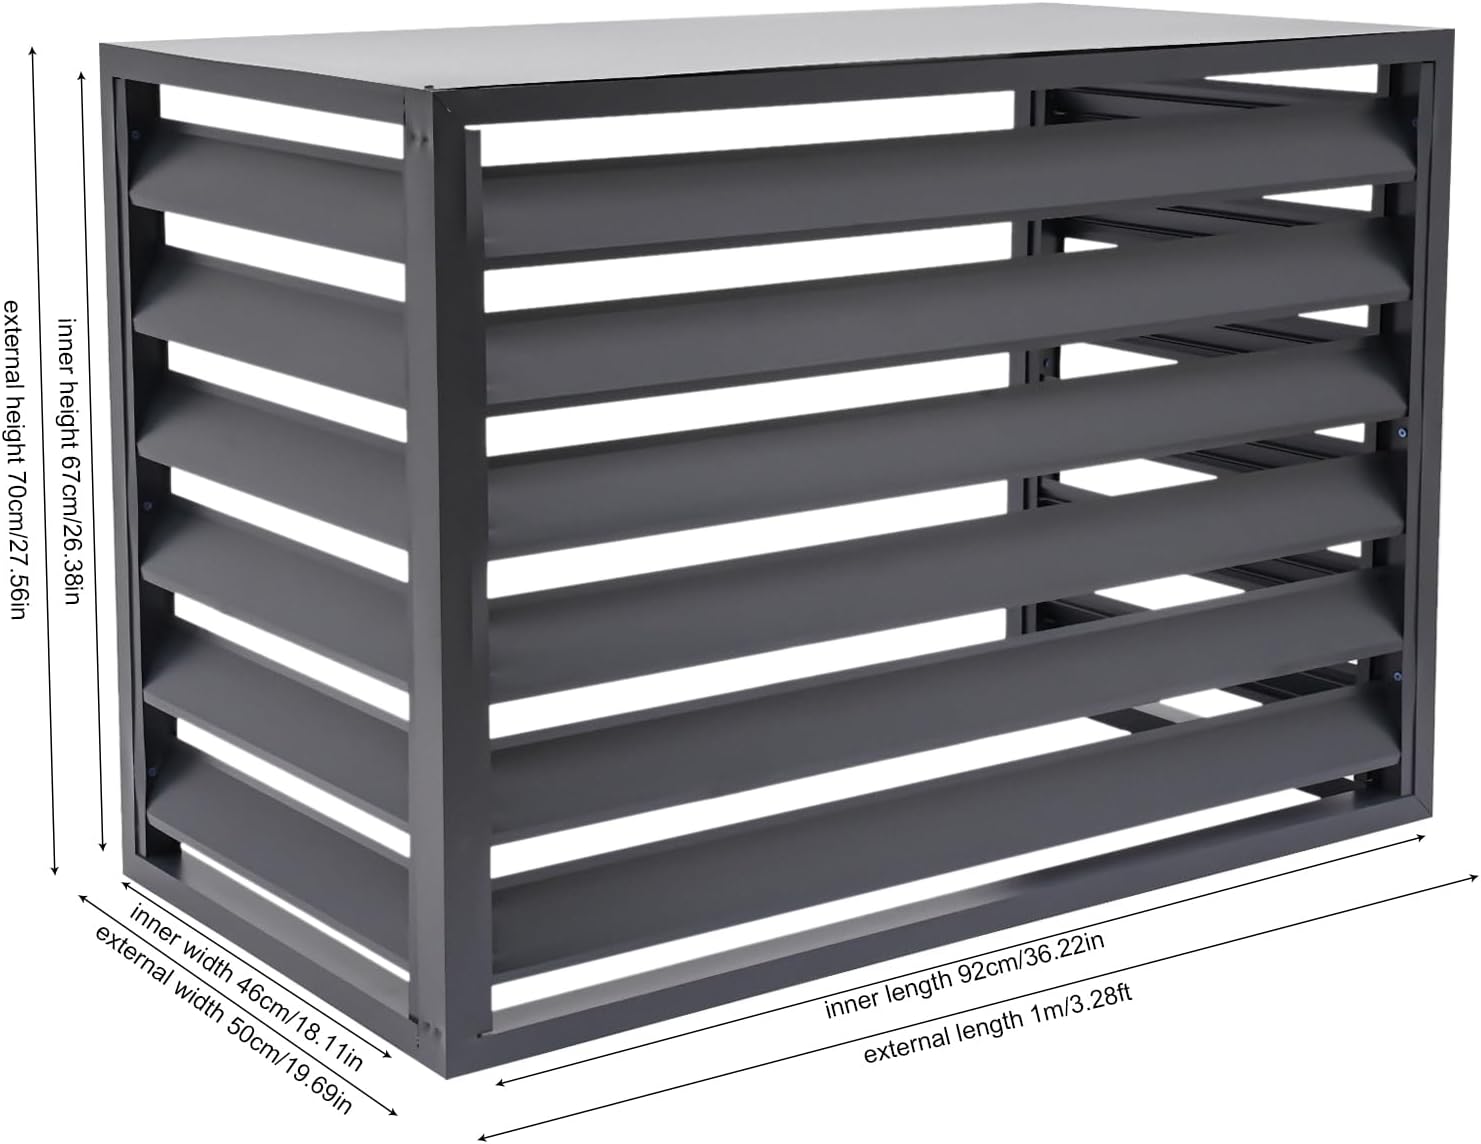
Figura 4.1: Dimensionale oltreview per riferimento di assemblaggio.
5. Utilizzo
The DYRABREST Air Conditioner Fence serves multiple functions:
- Air Conditioner Unit Cover: Position the fence around your outdoor air conditioning unit to conceal it while allowing proper airflow through its louvered design. This helps dissipate heat and evaporate water vapor effectively.
- Schermo per la privacy: Use it as a privacy screen in your garden, yard, or balcony to create secluded areas.
- Elemento decorativo: The top surface can be used as a flower stand to display potted plants, adding a decorative touch to your outdoor space.
- Barriera protettiva: It can act as a barrier to prevent direct contact with the AC unit, enhancing safety for children and pets.

Figura 5.1: Fence covering a wall-mounted AC unit.

Figura 5.2: Fence used as a flower stand on a balcony.
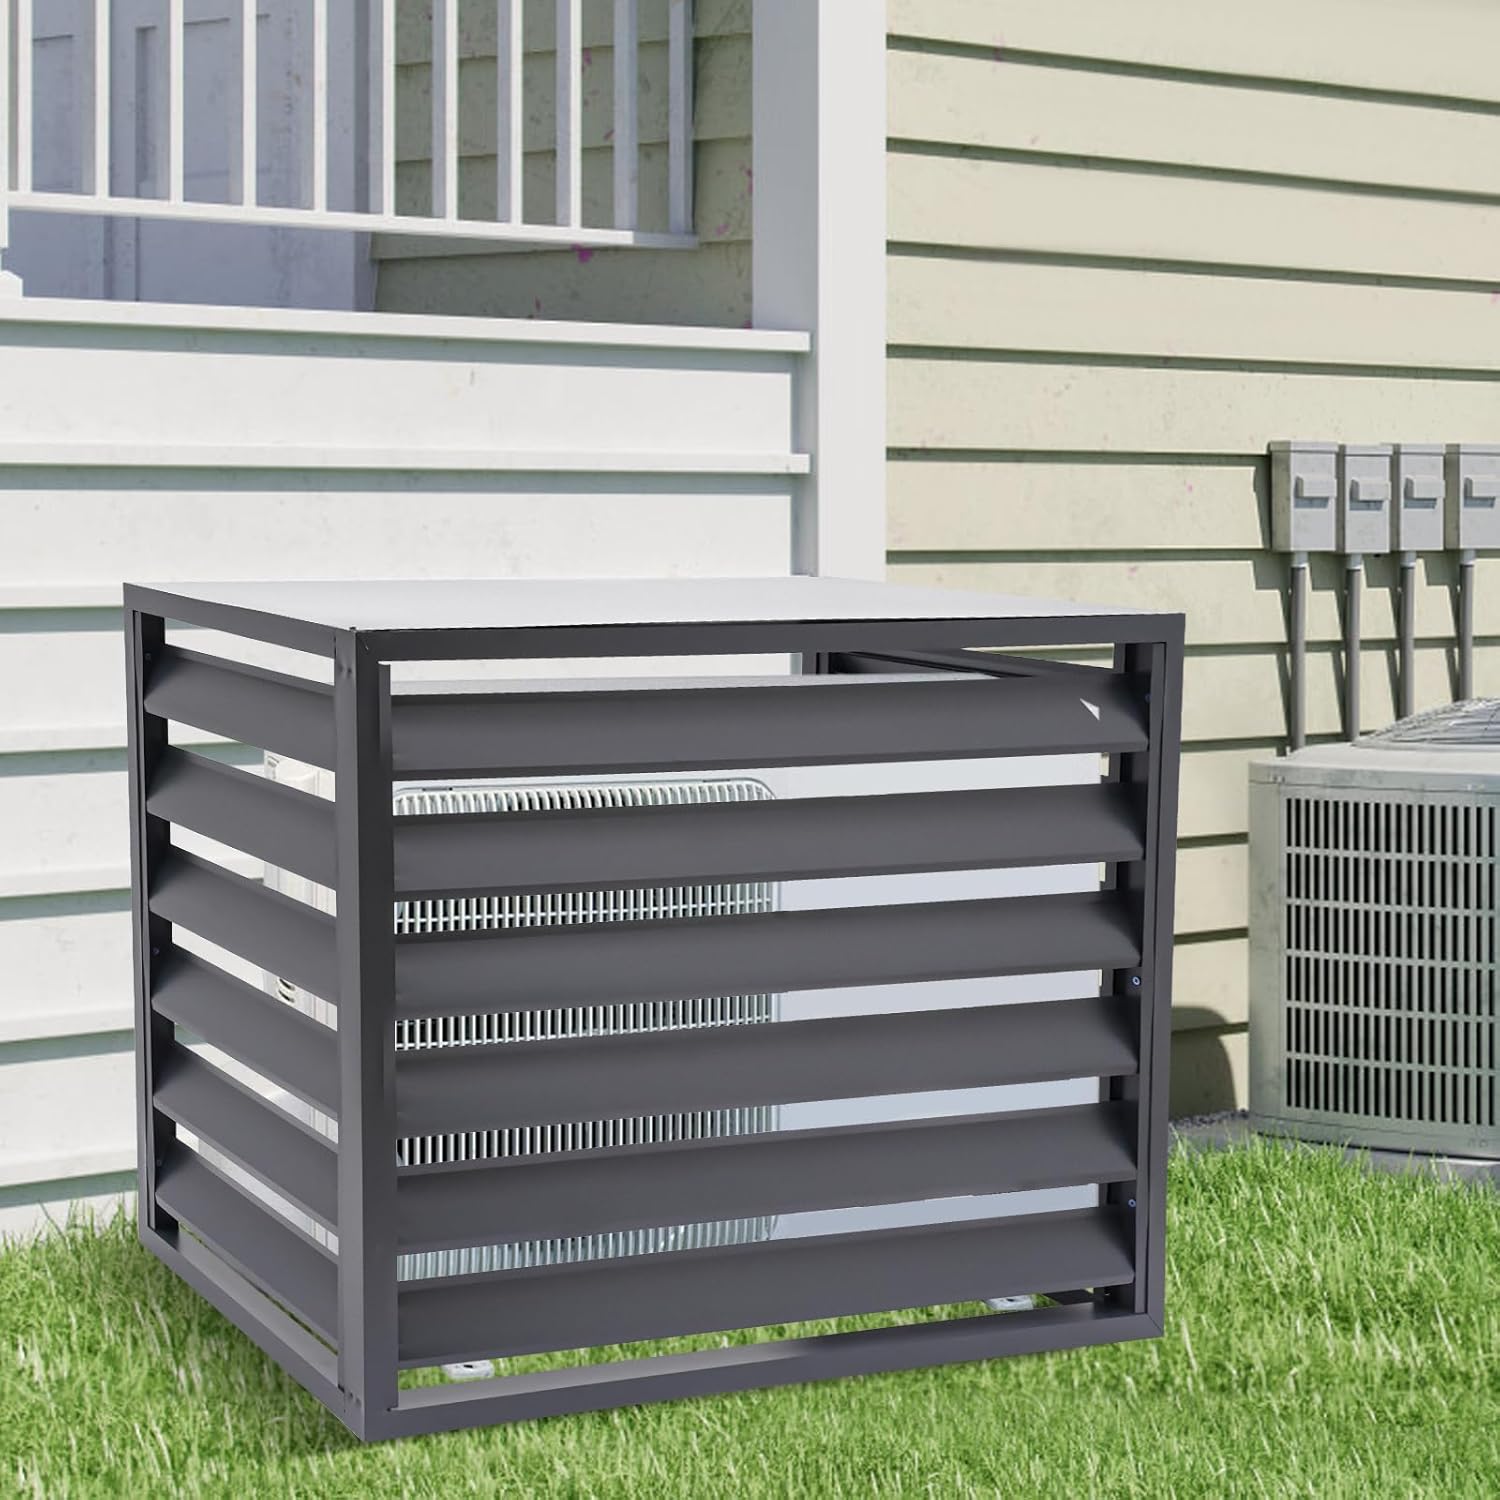
Figura 5.3: Fence covering a ground-level AC unit.

Figura 5.4: Fence in a garden setting.
6. Cura e manutenzione
To ensure the longevity and appearance of your DYRABREST Air Conditioner Fence, follow these maintenance guidelines:
- Pulizia: Wipe down the fence regularly with a soft cloth and mild soap and water solution. Avoid abrasive cleaners or harsh chemicals that could damage the finish.
- Ispezione: Controllare periodicamente tutte le viti e i collegamenti per assicurarsi che siano ben serrati. Serrare nuovamente se necessario.
- Danno: If any part of the fence becomes damaged, contact customer support for assistance.
7. Risoluzione Dei Problemi
- Instabilità: If the fence feels unstable, ensure it is placed on a level surface and all assembly screws are fully tightened.
- Reduced Airflow to AC Unit: Verify that the fence is positioned with adequate clearance from the AC unit's vents to allow for proper air circulation. The louvered design is intended to maintain airflow.
- Graffi/ammaccature: Minor cosmetic damage can be touched up with appropriate outdoor-grade paint if desired. For significant damage, consider replacing the affected panel.
8. Specifiche
| Numero di modello | A256 |
| Materiale | Lega di alluminio |
| Colore | Grigio scuro |
| External Product Dimensions (L x W x H) | 39.37" x 19.69" x 27.56" (100 cm x 50 cm x 70 cm) |
| Internal Product Dimensions (L x W x H) | 36.22" x 18.11" x 26.38" (92 cm x 46 cm x 67 cm) |
| Assemblaggio richiesto | SÌ |
| Numero di pezzi | 1 (unassembled unit) |
9. Assistenza clienti
For any questions, missing parts, or assistance with your DYRABREST Air Conditioner Fence, please contact the retailer or manufacturer directly. Refer to your purchase documentation for specific contact information.