
1. Introduzione
This manual provides essential instructions for the safe and efficient operation, installation, and maintenance of your Sunster 8 kW Diesel Auxiliary Heater. This heater is designed to provide warmth for various applications, including cars, trucks, ships, buses, and caravans, operating on both 12V and 24V systems. Please read this manual thoroughly before installation and use.

Figura 1.1: Sunster 8 kW Diesel Auxiliary Heater with all included components. This image displays the main heater unit, remote control, LCD display, silencer, fuel filter, exhaust pipe, air intake pipe, scalable air outlet pipe, DC battery power cable, and various installation accessories.
2. Informazioni sulla sicurezza
La tua sicurezza è fondamentale. Rispetta tutte le avvertenze e le istruzioni per prevenire lesioni o danni.
- Installazione professionale consigliata: For optimal safety and performance, professional installation of this diesel heater is strongly recommended.
- Sfiato di scarico: The exhaust must always be vented outdoors to prevent carbon monoxide poisoning. Never operate the heater in an enclosed space without proper ventilation.
- Protezione contro il surriscaldamento: The unit features built-in protection against overheating (≥536°F/280°C).
- Sicurezza elettrica: Includes protection against short circuit, over-current, over-voltage, and reverse connection. Ensure correct wiring during installation.
- Gestione del carburante: Use only diesel fuel. Exercise caution when handling fuel. Do not refuel while the heater is operating or hot.
- Liquidazione: Maintain adequate clearance around the heater for proper airflow and to prevent fire hazards.

Figura 2.1: Enhanced Safety Features. This image highlights the visible fuel tank capacity, secure terminal design, increased foot stand for stability, and upgraded hot air outlet duct, all contributing to safer operation.
3. Prodotto finitoview
The Sunster 8 kW Diesel Auxiliary Heater is an all-in-one heating solution featuring an automatic voltage circuit compatible with both 12V and 24V systems. It includes an intelligent LCD control panel and a remote control for convenient operation. The heater is designed for rapid heating and efficient fuel consumption.
3.1 Caratteristiche principali
- Elevato potere riscaldante: 8 kW maximum combustion power.
- Doppio volumetage Compatibilità: Volume automaticotage circuit for 12V and 24V systems.
- Opzioni di controllo: Intelligent LCD panel and remote control for easy management.
- Efficienza del carburante: Low fuel consumption, approximately 0.16-0.45 L/h.
- Integrated Fuel Tank: 5L (1.3 Gallon) visible fuel tank.
- Protezioni di sicurezza: Overheating, short circuit, over-current, over-voltage protezione contro la connessione inversa.
- Riscaldamento rapido: Capable of reaching 35°C from 10°C in approximately 10 minutes.
3.2 Identificazione dei componenti

Figura 3.1: Product Information Diagram. This diagram labels key components of the heater: 1. Hot Air Outlet, 2. Smart LCD switch, 3. Leak-proof fuel tank cap, 4. 5L fuel tank, 5. Carrying handle, 6. Air Inlet, 7. Power input interface, 8. Exhaust outlet.
4. Configurazione e installazione
The Sunster 8 kW Diesel Auxiliary Heater is designed for relatively rapid assembly. However, due to the nature of diesel heating systems, professional installation is recommended to ensure safety and proper function.
4.1 Disimballaggio e ispezione
- Disimballare con cura tutti i componenti dalla scatola.
- Verificare che tutti gli articoli elencati nella sezione "Contenuto della scatola" siano presenti e non danneggiati.
- Report any missing or damaged parts to the seller immediately.
4.2 Cosa c'è nella scatola
- 1 riscaldatore diesel tutto in uno (con LCD)
- 1 cavo di alimentazione per batteria CC
- 1 silenziatore
- 1 x filtro dell'olio
- 1 x tubo di scarico
- 1 x tubo di aspirazione dell'aria
- 1 x telecomando
- 1 x Scalable Air Outlet Pipe (6ft)
- 1 x Set of Installation Kit
- 1 x Manuale
4.3 Fasi di installazione (linee guida generali)
The following are general steps. Refer to the detailed installation kit instructions for specific mounting and connection procedures.
- Montaggio: Securely mount the heater unit using the provided bottom bracket and installation kit. Ensure the heater is on a stable, level surface.
- Sistema di scarico: Connect the exhaust pipe to the exhaust outlet (8) and route it safely outside the vehicle/enclosure. Install the silencer as desired. Ensure no exhaust gases can enter the heated space.
- Presa d'aria: Connect the air intake pipe to the air inlet (6). Ensure it draws clean air and is free from obstructions.
- Uscita aria calda: Attach the scalable air outlet pipe to the hot air outlet (1) and direct the heated air as needed.
- Collegamento del carburante: Fill the 5L fuel tank (4) with diesel fuel. Ensure the leak-proof fuel tank cap (3) is securely fastened.
- Collegamento elettrico: Connect the DC battery power cable to the power input interface (7). The heater is adaptable to both 12V and 24V environments. For AC power (110-240V), an appropriate power adapter (not included) is required.

Figura 4.1: Rapid Assembly. This image illustrates the connection of the flexible and stretchable air outlet pipe and the silencer to the main heater unit, highlighting the bottom bracket for stability.

Figura 4.2: Vol. adattabiletage Environment. This image shows the heater's compatibility with AC 110-240V outlets and DC 12V/24V vehicle battery power, demonstrating flexible wiring options for versatile switching.
5. Istruzioni per l'uso
The Sunster diesel heater can be operated using its intelligent LCD control panel or the included remote control.
5.1 Pannello di controllo LCD
The color LCD screen provides real-time information and allows for various settings adjustments.
- Accensione/spegnimento: Premere il pulsante di accensione per accendere o spegnere il riscaldatore.
- Regolazione temperatura/marcia: Use the up/down arrows to adjust the desired temperature or heating power level.
- Funzione di temporizzazione 24 ore: Set a timer for the heater to automatically turn on or off.
- Cambio lingua: The LCD supports multiple languages, including German, English, and Russian. Refer to the LCD menu for language selection.
- Codici di errore: The LCD will display error codes if a fault occurs. Consult the troubleshooting section for common issues.
5.2 telecomando
Il telecomando consente un comodo utilizzo a distanza.
- Accensione/spegnimento: Use the designated button to power the heater on or off.
- Regolazione della temperatura: Adjust the temperature settings using the remote's controls.
- Preriscaldamento: The remote can be used to pre-heat your vehicle before entry.

Figura 5.1: Intelligent LCD Panel & Remote Control. This image details the color LCD screen with its 24-hour timing function, temperature/gear regulation, and language switching capabilities, alongside the remote control.
5.3 Consumo di carburante
The heater is designed for efficient operation, consuming approximately 0.16 to 0.45 liters of diesel per hour, depending on the heat setting. The 5-liter fuel tank provides extended operation time.
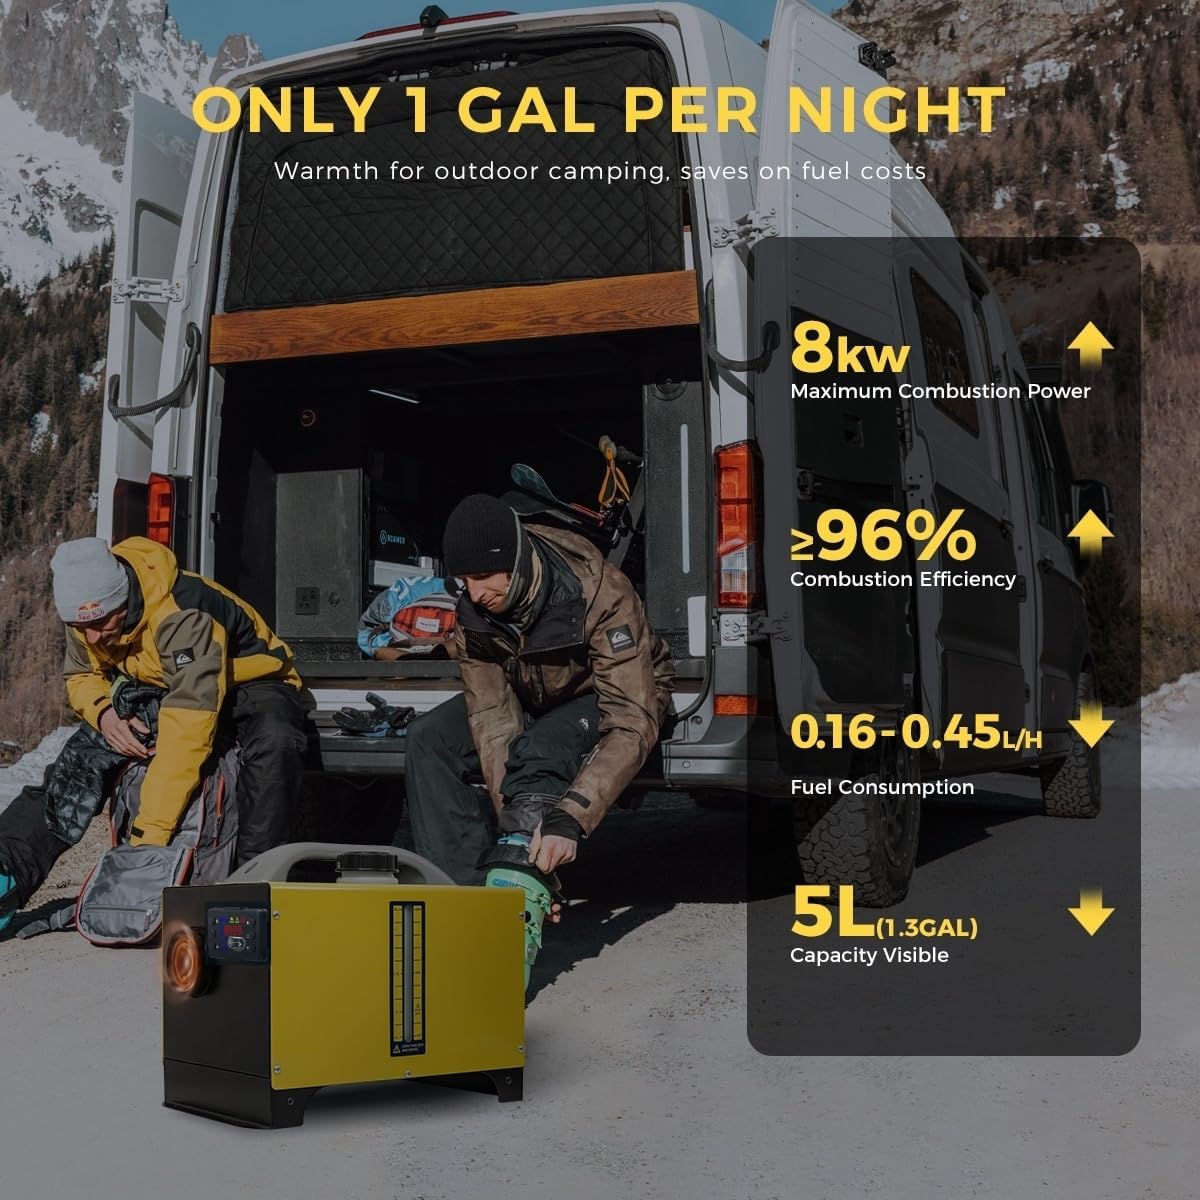
Figura 5.2: Fuel Efficiency and Heating Power. This image highlights the 8 kW maximum combustion power, over 96% combustion efficiency, 0.16-0.45 L/h fuel consumption, and the 5L (1.3 Gallon) visible fuel tank capacity.
6. Manutenzione
Regular maintenance ensures the longevity and safe operation of your Sunster diesel heater.
- Controllo del filtro del carburante: Periodically inspect and clean or replace the fuel filter to ensure a clean fuel supply.
- Ispezione del sistema di scarico: Regularly check the exhaust pipe for blockages, leaks, or damage. Ensure it remains securely vented outdoors.
- Presa d'aria e uscita: Keep the air intake and hot air outlet free from dust, debris, and obstructions. Clean as needed.
- Pulizia generale: Pulisci l'esterno del riscaldatore con un pannoamp panno. Non usare detergenti abrasivi o solventi.
- Collegamenti elettrici: Controllare periodicamente tutti i collegamenti elettrici per verificarne la tenuta e l'assenza di segni di corrosione.
- Serbatoio carburante: Ensure the fuel tank is clean and free of contaminants. Avoid running the tank completely dry to prevent air entering the fuel lines.
7. Risoluzione Dei Problemi
In caso di problemi con il riscaldatore, consultare i seguenti passaggi comuni per la risoluzione dei problemi. Per problemi persistenti, contattare l'assistenza clienti.
7.1 Problemi comuni e soluzioni
- Heater Does Not Turn On:
- Check power connections and ensure the battery voltage is correct (12V or 24V).
- Verify the power cable is securely connected to the heater and power source.
- Check for blown fuses in the power circuit.
- Nessuna emissione di calore:
- Assicurarsi che ci sia abbastanza carburante diesel nel serbatoio.
- Controllare che il filtro del carburante non sia ostruito.
- Inspect the air intake and exhaust for obstructions.
- Verificare che la temperatura impostata sia superiore alla temperatura ambiente.
- Rumore o fumo insolito:
- Spegnere immediatamente il riscaldamento.
- Controllare che il sistema di scarico non presenti perdite o ostruzioni.
- Inspect the air intake for foreign objects.
- If the issue persists, discontinue use and seek professional assistance.
- LCD Displays Error Code:
- Consult the heater's specific error code list (if provided in the included manual) to identify the problem.
- Common error codes relate to low voltage, overheating, or fuel supply issues.
8. Specifiche
| Attributo | Valore |
|---|---|
| Marca | Sunster |
| Numero di modello | Codice articolo: SKUW025013 |
| Potenza di riscaldamento | 8 kW |
| Voltage Compatibilità | 12V / 24V (Automatic Circuit) |
| Tipo di carburante | Diesel |
| Capacità del serbatoio del carburante | 5 litri (1.3 galloni) |
| Consumo di carburante | 0.16 - 0.45 L/h |
| Peso dell'articolo | 22.6 libbre |
| Dimensioni del pacco | 17.87 x 14.21 x 11.61 pollici |
| Metodo di controllo | LCD Panel, Remote Control |
| Caratteristiche di sicurezza | Overheating, Short Circuit, Over-current, Over-voltage, Protezione da connessione inversa |
9. Garanzia e supporto
For information regarding warranty coverage, technical support, or replacement parts, please refer to the documentation included with your purchase or contact the seller directly. Keep your proof of purchase for warranty claims.