
1. Introduzione
Thank you for choosing the Gevi Electric Burr Coffee Grinder. This manual provides essential information for the safe and efficient operation, maintenance, and troubleshooting of your new appliance. Please read it thoroughly before first use and keep it for future reference.
2. Importanti istruzioni di sicurezza
- Leggere tutte le istruzioni prima di utilizzare l'apparecchio.
- Non immergere l'apparecchio, il cavo o la spina in acqua o altri liquidi.
- Scollegare dalla presa quando non in uso, prima di montare o smontare componenti e prima di pulirlo.
- Evitare il contatto con le parti in movimento.
- Non utilizzare alcun apparecchio con un cavo o una spina danneggiati, o dopo che l'apparecchio non funziona correttamente o è caduto o è stato danneggiato in qualsiasi modo.
- L'uso di accessori non consigliati o venduti dal produttore può causare incendi, scosse elettriche o lesioni.
- Non utilizzare all'aperto.
- Non lasciare che il cavo penda dal bordo del tavolo o del bancone o che tocchi superfici calde.
- Controllare la tramoggia dei chicchi per la presenza di corpi estranei prima dell'uso.
- Questo apparecchio è destinato esclusivamente all'uso domestico.
3. Prodotto finitoview
The Gevi Electric Burr Coffee Grinder is designed for precision grinding, offering 35 settings for various brewing methods. It features a digital display for easy control and an anti-static design for mess-free operation.

Figure 1: Gevi Electric Burr Coffee Grinder with its main components visible.
Componenti:
- Contenitore per fagioli (capacità 8.5 oz)
- Burro superiore
- Grinds Container (4.6 oz capacity)
- Digital Control Panel (Cup Selection, Time Selection, Start/Stop)
- Portafilter Cradle (compatible with 51mm and 58mm portafilters)
- Spazzola per la pulizia
- Cucchiaino da caffè
4. Impostazione
- Disimballare il Grinder: Rimuovere con cautela tutto il materiale di imballaggio e assicurarsi che tutti i componenti siano presenti.
- Componenti puliti: Wash the bean hopper, grinds container, and lids with warm, soapy water. Rinse thoroughly and dry completely before assembly.
- Installa Bean Hopper: Place the bean hopper onto the top of the grinder base. Rotate it clockwise until it locks securely into place.
- Aggiungere i chicchi di caffè: Fill the bean hopper with your desired amount of whole coffee beans. Do not overfill.
- Coperchio sicuro: Posizionare saldamente il coperchio del contenitore dei chicchi sulla parte superiore del contenitore stesso.

Figure 2: Filling the bean hopper with coffee beans.
5. Funzionamento
5.1 Selezione delle impostazioni di macinatura
The Gevi grinder offers 35 precise grind settings, allowing you to customize your coffee for various brewing methods. Rotate the bean hopper to adjust the grind size:
- Settings 1-10 (Espresso): For very fine grounds suitable for espresso machines.
- Settings 11-25 (Drip/Pour Over): For medium grounds ideal for drip coffee makers and pour-over brewing.
- Settings 26-35 (French Press): For coarse grounds best for French press and cold brew methods.

Figure 3: Grind setting dial on the bean hopper.
Video 1: Demonstrating the Gevi Integrated Burr Coffee Grinder with its 35 grind settings.
5.2 Pannello di controllo digitale
The digital display and control buttons allow for precise control over the grinding process.
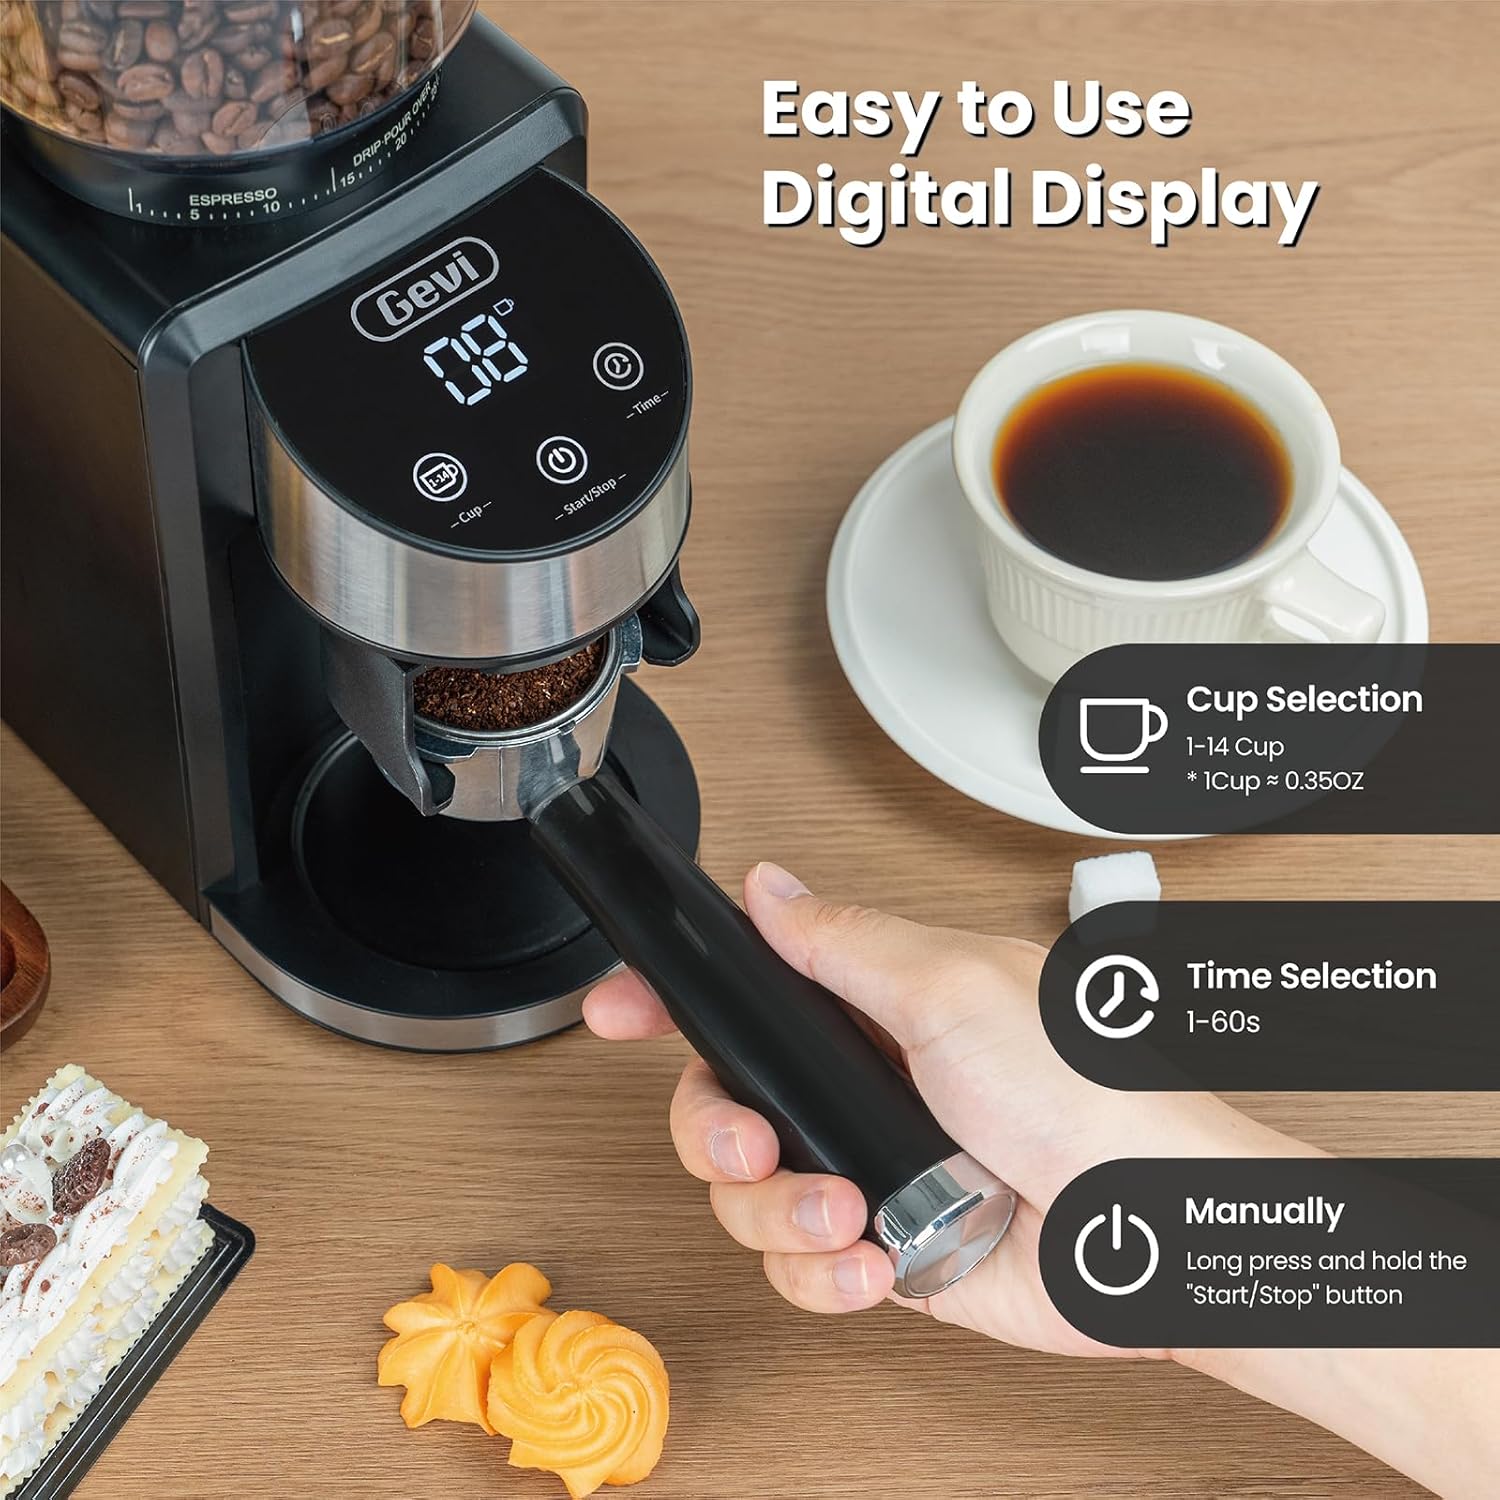
Figure 4: Digital control panel for cup and time selection.
- Cup Selection (1-14 cups): Press the 'Cup' button to select the desired number of cups. The grinder will automatically grind the appropriate amount of coffee.
- Time Selection (1-60 seconds): Press the 'Time' button to set the grinding duration in seconds. This allows for precise control over the amount of coffee ground.
- Avvio/Arresto: Press the 'Start/Stop' button to begin or end the grinding process. You can also long-press this button for manual grinding.
5.3 Using the Portafilter Cradle
The grinder includes a portafilter cradle for direct grinding into your espresso machine's portafilter.

Figure 5: Portafilter cradle for direct grinding.
- Select the appropriate portafilter cradle (51mm or 58mm) for your portafilter.
- Inserisci il tuo portafiltro nella base.
- Place the portafilter with cradle under the grinding chute.
- Select your desired grind setting and cup/time, then press Start/Stop to begin grinding.
6. Manutenzione
Regular cleaning ensures optimal performance and extends the life of your grinder. The anti-static design helps minimize mess.
6.1 Pulizia giornaliera
- Scollegare il macinino: Prima di pulire il macinacaffè, assicurarsi sempre che sia scollegato dalla presa di corrente.
- Rimuovere la tramoggia dei chicchi: Rotate the bean hopper counter-clockwise until it stops, then lift it off. Empty any remaining beans into an airtight container to preserve freshness.
- Rimuovere la fresa superiore: Lift the upper conical burr straight out from the grinding chamber.
- Pulisci le sbavature: Utilizzare la spazzola di pulizia in dotazione per rimuovere i fondi di caffè dalle macine superiori e inferiori.
- Clean Grinds Container: Empty and wash the grinds container and its lid with warm, soapy water. Rinse and dry thoroughly.
- Pulisci l'esterno: Pulisci l'esterno del macinino con l'adamp panno. Non usare detergenti abrasivi.
- Rimontare: Once all parts are dry, reassemble the grinder by reversing the removal steps.
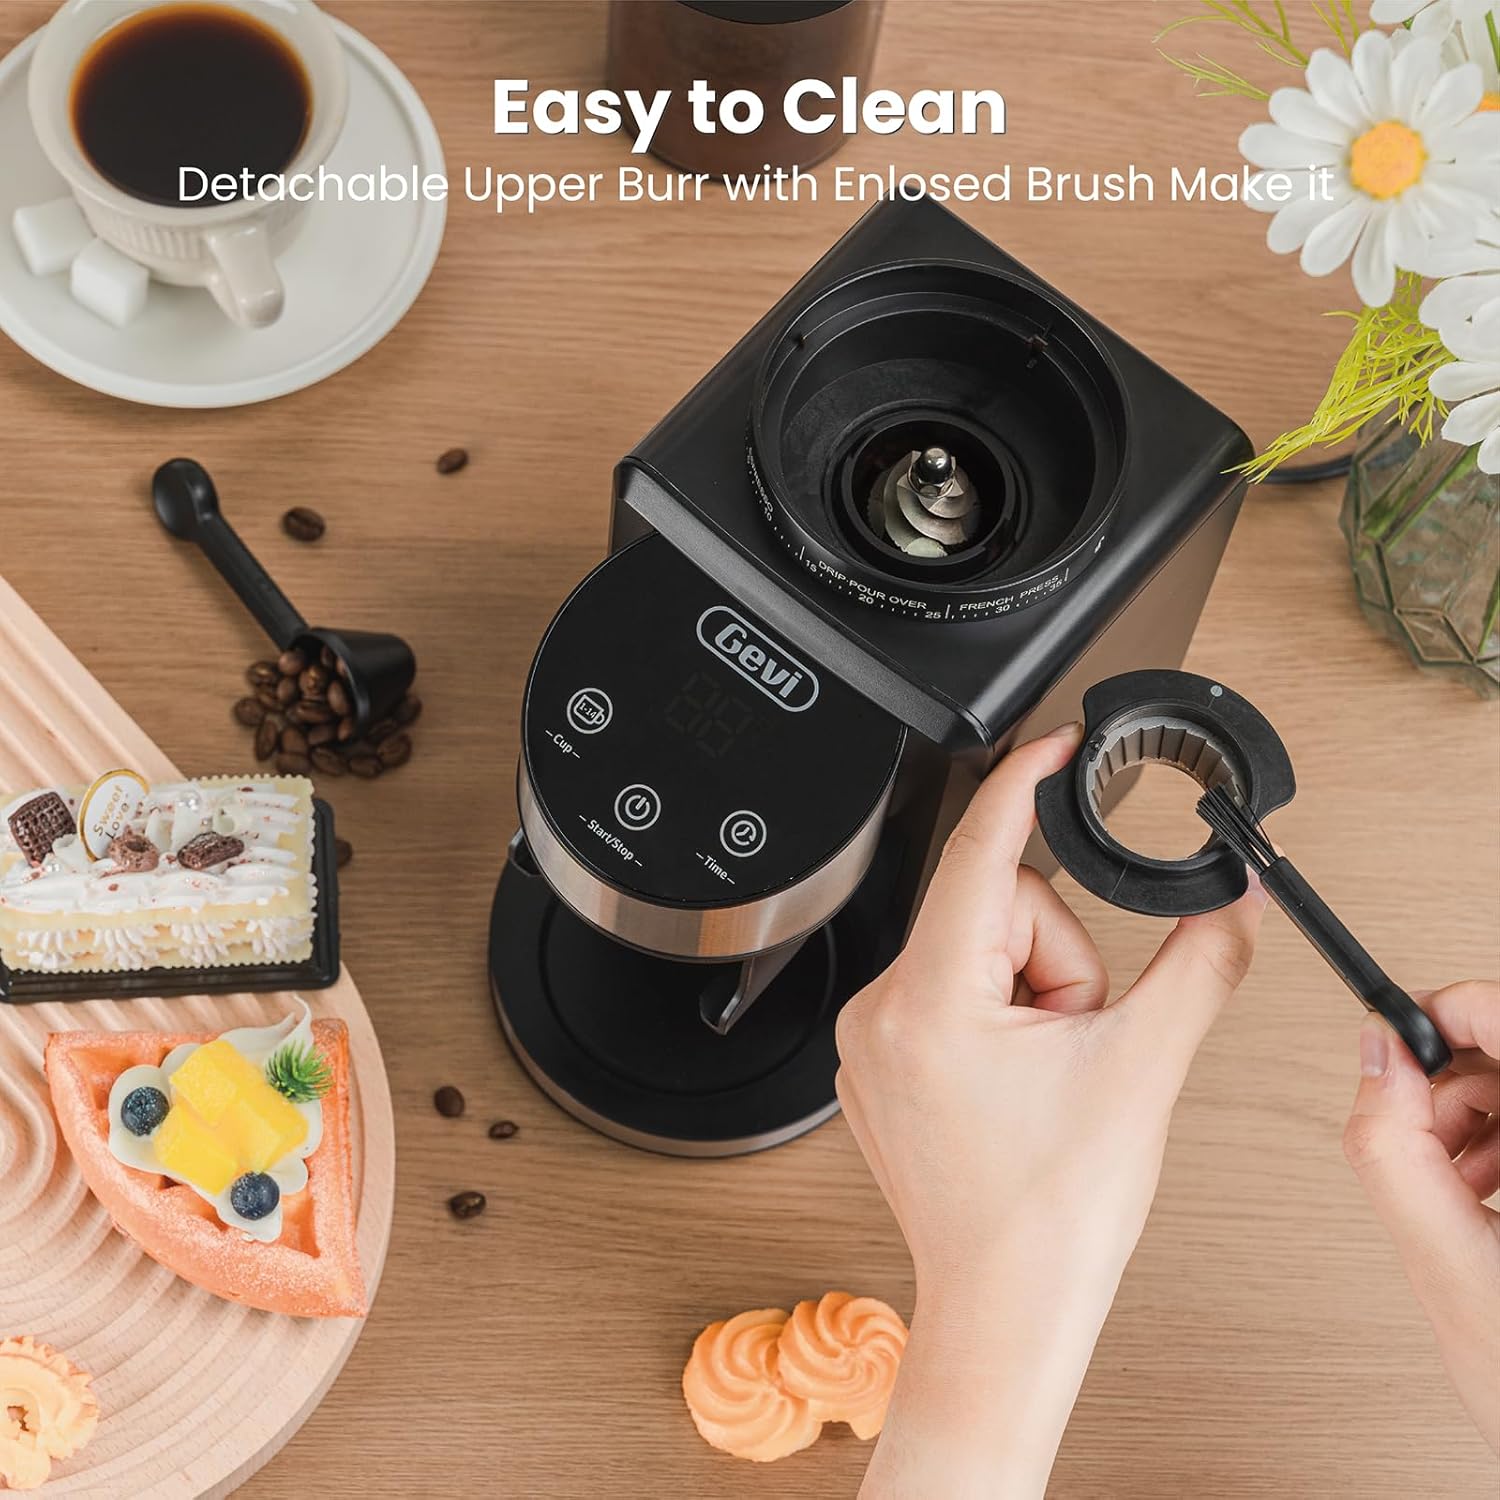
Figure 6: Detachable upper burr for easy cleaning.

Figure 7: Anti-static design for a cleaner grinding experience.
6.2 Cleaning Clogged Coffee Grounds
If you experience clogging, particularly with oily or dark roast beans, follow these steps:
Video 2: Instructions on how to clean clogged coffee grounds from the Gevi Coffee Grinder.
- Scollegare il macinino: Staccare dall'alimentazione.
- Rimuovere la tramoggia dei chicchi e la macina superiore: Follow steps from Daily Cleaning.
- Clear Lower Burr: Use the cleaning brush to carefully dislodge any compacted coffee grounds around the lower burr.
- Tap the Grinder: Gently tap the back side of the grinder to help dislodge any remaining grounds from the chute into the grinds container.
- Riassemblare e testare: Reassemble the grinder and run a small amount of beans through it to ensure proper function.
7. Risoluzione Dei Problemi
If you encounter issues with your Gevi Electric Burr Coffee Grinder, refer to the following common problems and solutions:
- Il macinino non si accende:
- Assicurarsi che il cavo di alimentazione sia collegato saldamente a una presa funzionante.
- Check that the bean hopper is correctly installed and locked into place. The grinder has a safety mechanism that prevents operation if the hopper is not secured.
- Verify that the lid on the bean hopper is properly closed.
- No coffee grinding or inconsistent grind:
- Check if the bean hopper is empty.
- Inspect the burrs for any blockages or foreign objects. Clean the burrs as described in the Maintenance section.
- Ensure the grind setting is appropriate for the type of beans and desired fineness. Very fine settings with oily beans can sometimes cause clogging.
- La smerigliatrice si ferma durante il funzionamento:
- The grinder may have an overheating protection feature. Allow it to cool down for a period before attempting to use it again.
- Check for clogs in the grinding chamber or chute.
- Eccessiva elettricità statica o confusione:
- While the grinder has an anti-static design, some static can still occur depending on environmental conditions and bean type. Ensure the grinds container is fully inserted.
- Lightly misting beans with water before grinding can help reduce static.
8. Specifiche
| Caratteristica | Specificazione |
|---|---|
| Marca | gevi |
| Modello | B0F31Z2HT7 |
| Colore | Nero |
| Materiale | Plastica, acciaio inossidabile |
| Peso dell'articolo | 5.92 libbre |
| Dimensioni (L x P x A) | 7.8 cm L x 4.72 cm P x 11.85 cm A |
| Capacità tramoggia fagioli | 8.5 once (circa 240 g) |
| Grinds Container Capacity | Circa 130 g |
| Impostazioni di macinatura | 35 (Espresso, Drip, French Press) |
| Selezione Coppa | 1-14 tazze |
| Selezione del tempo | 1-60 secondi |
| Cosatage | 200 watt |
| Voltage | 120 Volt |
| Codice UPC | 767791886878 |
9. Garanzia e supporto
Gevi is committed to delivering high-quality products. For warranty information, technical support, or any inquiries regarding your Gevi Electric Burr Coffee Grinder, please refer to the warranty card included with your product or contact Gevi customer service directly. Keep your purchase receipt as proof of purchase.