
1. Introduzione
The Flywoo Flylens 75 HD O4 PRO V1.3 2S Whoop FPV Drone is a compact and high-performance drone designed for both indoor and outdoor cinematic flying. It features advanced image transmission, a shock-absorbing gimbal for stable video, and a lightweight yet durable carbon fiber frame. This manual provides essential information for the safe and effective operation, setup, maintenance, and troubleshooting of your Flylens 75 drone.
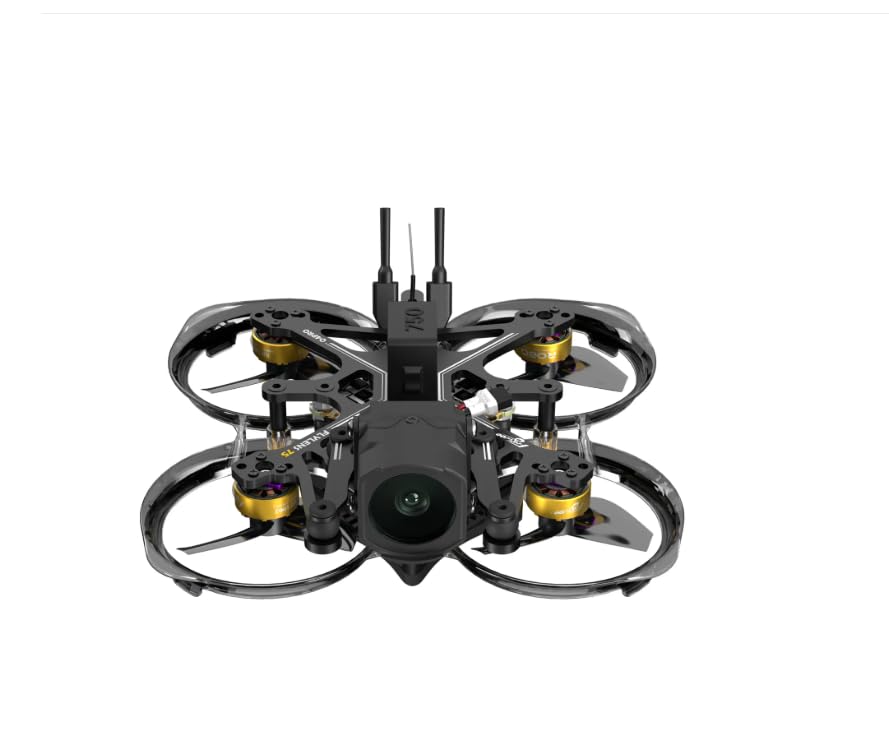
This image displays the Flywoo Flylens 75 HD O4 PRO FPV drone from a top-down perspective. The drone features a compact, black carbon fiber frame with integrated propeller ducts for protection. Four gold-colored motors are visible, each driving a propeller. The central body houses the camera at the front, and two antennas extend upwards from the rear, indicating its FPV capabilities.
2. Caratteristiche principali
- O4 Image Transmission: Captures stunning 4K 60fps video with exceptional clarity and precision.
- CNC Shock Absorption Gimbal: Features a three-point shock absorption system to eliminate vibrations and the 'jelly effect', ensuring smooth and steady video footage.
- Compact, Lightweight Design: Constructed with lightweight carbon fiber and PC materials for enhanced durability, flexibility, and easy maneuverability.
- Reverse Thrust Power System: Improves flight agility and battery efficiency.
- Quick-Release Battery Mount: Allows for easy and tool-free battery swaps, compatible with 550mAh, 750mAh, and 1000mAh batteries.
- Sistema di alimentazione ad alte prestazioni: Equipped with ROBO 1003 14800KV motors and 3-blade 1611-3 propellers for responsive control and stable flight.
- GOKU F405 Flight Controller: Advanced flight controller with F405 BGA chip, 12A ESC, 5 UART ports, I2C support, built-in 2.4G receiver, and 8MB black box.
3. Cosa c'è nella scatola?
Carefully unpack your Flylens 75 drone and verify all components are present:
- 1x Flylens 75 HD O4 PRO 2S Drone
- 1x USB Data Cable (90° Type-C)
- 1x 550mAh Battery Mount
- 1x 750mAh Battery Mount
- 1x 1000mAh Battery Mount
- 8x 1611-3 Propellers
- 1x Cacciavite
- 1x set di hardware
4. Guida all'installazione
4.1 Ispezione iniziale
Before first use, carefully inspect the drone for any signs of damage during shipping. Ensure all wires are securely connected and there are no loose parts.
4.2 Installazione della batteria
- Select the appropriate battery mount for your chosen battery (550mAh, 750mAh, or 1000mAh).
- Slide the battery into the mount.
- Utilize the quick-release system to securely attach the battery and mount to the drone. Ensure it clicks into place.
- Connect the battery's XT30 connector to the drone's power port.
4.3 Installazione dell'elica
The drone comes with 8 propellers (4 spares). Install them according to the motor rotation direction. Ensure the propellers are firmly seated on the motor shafts.
4.4 Binding with ELRS Receiver
Your drone is equipped with an ELRS 2.4G receiver. Refer to your ELRS radio transmitter's manual for specific binding procedures. Generally, this involves putting both the drone (by cycling power multiple times) and the transmitter into binding mode until a solid LED indicates a successful connection.
4.5 Software e firmware
It is recommended to check for the latest firmware updates for the GOKU F405 Flight Controller and the O4 PRO Air Unit. Connect the drone to a computer using the provided USB Data Cable and use the appropriate software (e.g., Betaflight Configurator for the flight controller) to manage firmware and settings. Always back up your configuration before updating.
5. Istruzioni per l'uso
5.1 Lista di controllo pre-volo
- Ensure batteries (drone and remote) are fully charged.
- Controllare che le eliche non siano danneggiate e assicurarsi che siano fissate saldamente.
- Verifica che tutte le connessioni siano sicure.
- Verificare che l'area di volo sia libera da ostacoli e persone.
- Check FPV feed clarity and signal strength.
5.2 Controlli di volo
Familiarize yourself with the controls on your FPV radio transmitter. Standard FPV controls typically include:
- Throttle: Controlla l'altitudine (levetta sinistra, verticale).
- Imbardata: Rotates the drone horizontally (left stick, horizontal).
- Pece: Tilts the drone forward/backward (right stick, vertical).
- roll: Tilts the drone left/right (right stick, horizontal).
Prima di cimentarsi in manovre complesse, esercitatevi in un'area sicura e aperta.
5.3 Funzionamento della fotocamera
The integrated O4 PRO camera captures 4K 60fps video. Control recording and camera settings via your DJI O4 Air Unit interface, typically accessible through your FPV goggles. Ensure sufficient storage is available on the air unit for recordings.
6. Manutenzione
6.1 Pulizia
Regularly clean the drone, especially after flights in dusty or dirty environments. Use a soft brush or compressed air to remove debris from motors, propellers, and the frame. Avoid using liquids directly on electronic components.
6.2 Sostituzione dell'elica
Inspect propellers before and after each flight for cracks, bends, or nicks. Damaged propellers can cause instability and reduce flight efficiency. Replace them promptly using the spare propellers and screwdriver provided.
6.3 Frame and Motor Inspection
Periodically check the carbon fiber frame for any signs of stress or damage. Ensure all screws are tight. Inspect motors for smooth rotation and any signs of wear or debris accumulation.
6.4 Conservazione
Store the drone in a cool, dry place away from direct sunlight. Remove batteries if storing for extended periods. Transport the drone in a protective case to prevent damage.
7. Risoluzione Dei Problemi
| Problema | Possibile causa | Soluzione |
|---|---|---|
| Il drone non si accende | Batteria non collegata, batteria scarica, cavo di alimentazione difettoso. | Ensure battery is fully charged and securely connected. Check XT30UP connector for damage. |
| Nessun feed video FPV | O4 Air Unit not powered, antenna disconnected, incorrect channel/frequency. | Verify O4 Air Unit is powered. Check antenna connection. Ensure goggles are on the correct channel. |
| Volo instabile / Vibrazioni | Damaged propellers, loose motors, gimbal issue, incorrect flight controller settings. | Replace damaged propellers. Check motor screws. Inspect CNC gimbal for debris. Review flight controller settings in Betaflight. |
| Drone not responding to remote | Not bound, remote battery low, receiver issue. | Re-bind the drone to the remote. Charge remote battery. Check receiver connections. |
8. Specifiche
| Componente | Dettaglio |
|---|---|
| Modello | Flylens 75 HD O4 PRO 2S |
| Telaio | Flylens 75 HD O4 PRO Frame Kit (Carbon Fiber & PC) |
| Controllore di volo | GOKU F405 HD 1-2S ELRS AIO V2 |
| Trasmissione | O4 PRO Air Unit |
| Telecamera | O4 PRO (4K 60fps) |
| Eliche | 1611-3 40mm 3-Blade |
| Motori | ROBO 1003 14800KV |
| Antenna | Flywoo 5.8G 3dBi Brass Antenna UFL |
| Peso | 75.3 g (circa 2.66 once) |
| Tecnologia di connettività | ELRS 2.4G |
8.1 Battery Compatibility & Flight Performance
| Capacità della batteria | Take-off Thrust | Tempo di volo approssimativo | Velocità massima |
|---|---|---|---|
| 550mAh | 34% | 3 minuto | 55 km/h |
| 750mAh | 36% | 4 minuto | 55 km/h |
| 1000mAh | 38% | 5 minuto | 55 km/h |
9. Recommended Accessories (Sold Separately)
- Flywoo O4 PRO ND Filter Set: Enhances clarity and reduces glare in bright lighting conditions for improved video quality.
- Flywoo XT30UP Connector Cable: An upgraded connector designed to prevent cable breakage and offer easier plug/unplug functionality.
10. Garanzia e supporto
For warranty information and technical support, please refer to the official Flywoo webo contattare il rivenditore autorizzato. Conservare la prova d'acquisto per eventuali reclami in garanzia.