1. Introduzione
This manual provides detailed instructions for the setup, operation, maintenance, and troubleshooting of your NIMO Mini PC Desktop, Model DNB1. Please read this manual thoroughly before using the device to ensure proper functionality and to maximize your user experience. Keep this manual for future reference.

Image 1.1: The NIMO Mini PC Desktop DNB1, a compact and powerful computing device.
2. Cosa c'è nella scatola
Carefully unpack your NIMO Mini PC Desktop and verify that all items listed below are included:
- NIMO Mini PC Desktop (DNB1)
- Manuale dell'utente (questo documento)
- Staffa di fissaggio
- Adattatore di alimentazione

Image 2.1: Contents of the NIMO Mini PC Desktop packaging, including the Mini PC, user manual, VESA mount, and power adapter.
3. Prodotto finitoview
The NIMO Mini PC Desktop DNB1 is designed for versatility and performance. Familiarize yourself with its various ports and features.
3.1. Front and Rear Panel Interfaces

Immagine 3.1: Dettagliata view of the NIMO Mini PC Desktop DNB1's interfaces, including USB, HDMI, LAN, Type-C, and power ports.
- Porta DC-IN: Si collega all'alimentatore.
- Porte USB 3.2 di tipo A (x3): Per collegare periferiche come tastiere, mouse e dispositivi di archiviazione esterni.
- Porte HDMI 2.0 (x2): For connecting to displays, supporting up to 4K resolution.
- Porta LAN (Gigabit Ethernet): Per la connessione di rete cablata.
- Porta audio: Per collegare cuffie o altoparlanti esterni.
- Type-C Port (Multifunction): Supports data transfer and display output.
- Lettore di schede SD: Per leggere e scrivere su schede di memoria SD.
- Pulsante di accensione: Per accendere o spegnere il dispositivo.
- Pulsante di reset: Per riavviare il dispositivo.
4. Guida all'installazione
Follow these steps to set up your NIMO Mini PC Desktop.
4.1. Connessione iniziale
- Connetti le periferiche: Connect your keyboard, mouse, and any other USB devices to the available USB 3.2 ports.
- Collega display: Connect your monitor(s) to the HDMI 2.0 ports. The Mini PC supports up to three 4K displays simultaneously.
- Connetti rete (facoltativo): Per una connessione Internet cablata, collega un cavo Ethernet alla porta LAN. Per una connessione wireless, assicurati che la tua rete Wi-Fi sia disponibile durante la configurazione iniziale.
- Connetti alimentazione: Plug the power adapter into the DC-IN port on the Mini PC, then plug the adapter into a power outlet.
4.2. Installazione con montaggio VESA
Il supporto VESA incluso consente di fissare il Mini PC sul retro di un monitor compatibile o a una parete, risparmiando spazio sulla scrivania.
- Attach the VESA bracket to the back of your monitor using the provided screws. Ensure the monitor has VESA mounting holes (typically 75x75mm or 100x100mm).
- Slide the NIMO Mini PC Desktop onto the mounted bracket until it clicks securely into place.
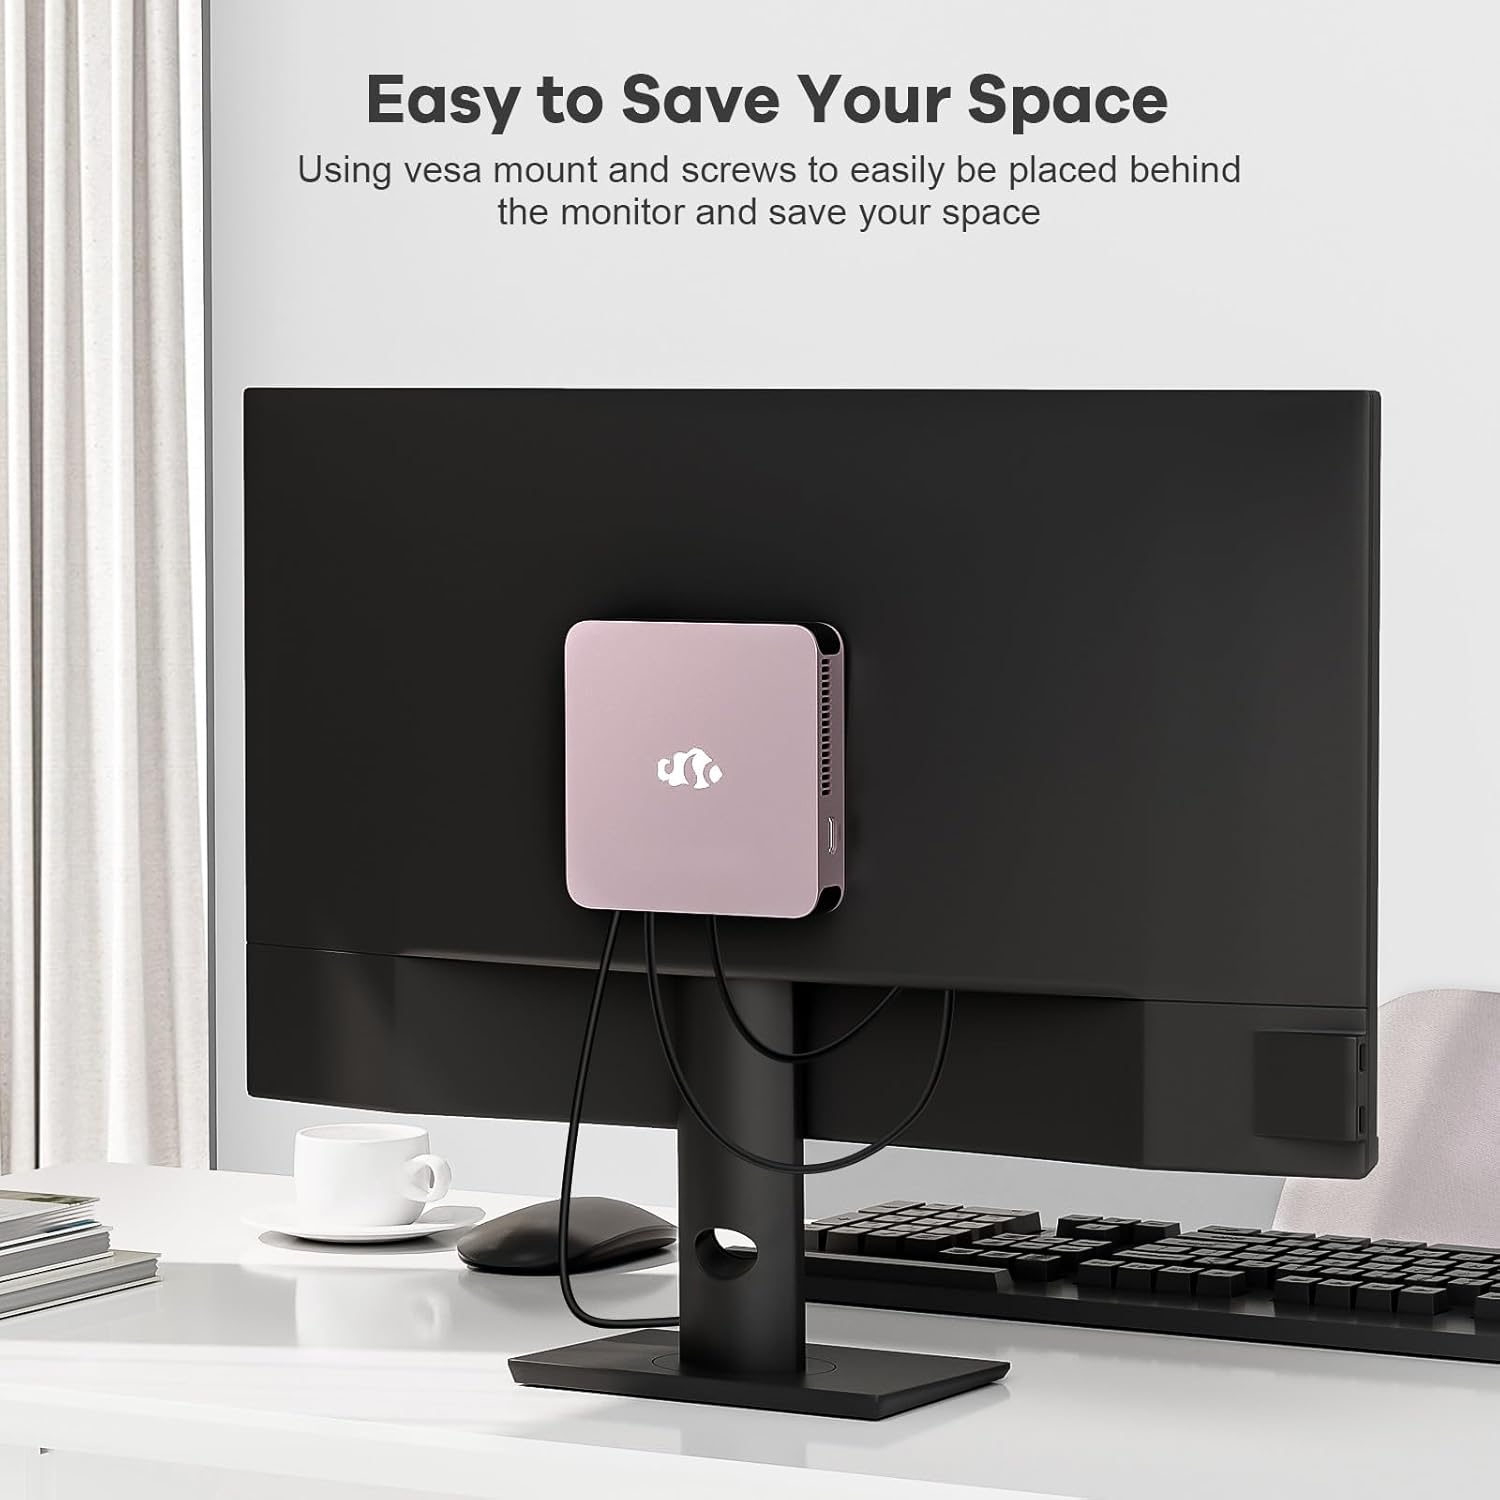
Image 4.1: The NIMO Mini PC Desktop DNB1 mounted on the back of a monitor using the VESA bracket, demonstrating space-saving placement.
5. Istruzioni per l'uso
5.1. Accensione/Spegnimento
- Per accendere: Press the Power Button once. The power indicator light will illuminate.
- Per spegnere: From the operating system, select 'Shut Down'. Alternatively, press and hold the Power Button for 5-7 seconds to force a shutdown (use only when necessary).
5.2. Avvio iniziale e installazione di Windows 11
Upon first power-on, the system will guide you through the Windows 11 setup process. Follow the on-screen prompts to configure language, region, network, and user accounts.
5.3. Connessione alle reti
- Connessione cablata: If an Ethernet cable is connected to the LAN port, the system will automatically detect and connect to the wired network.
- Connessione wireless (WiFi 6): Access the network settings in Windows 11, select your desired WiFi network, and enter the password.
- Bluetooth Connection (Bluetooth 5.2): Enable Bluetooth in Windows 11 settings, search for devices, and pair with your Bluetooth peripherals.
5.4. Utilizzo di più display
The NIMO Mini PC supports up to three 4K displays. Connect your monitors to the available HDMI and Type-C ports. Windows 11 display settings allow you to extend, duplicate, or show only on one display.

Image 5.1: The NIMO Mini PC Desktop DNB1 supporting a triple monitor 4K display setup, enhancing productivity and multimedia experiences.
6. Manutenzione
Una corretta manutenzione garantisce la longevità e le prestazioni ottimali del tuo Mini PC.
- Pulizia: Use a soft, dry cloth to clean the exterior of the Mini PC. For dust in vents, use compressed air. Do not use liquid cleaners directly on the device.
- Ventilazione: Ensure the ventilation openings are not blocked to prevent overheating. Operate the device in a well-ventilated area.
- Aggiornamenti software: Aggiorna regolarmente il sistema operativo Windows e i driver per mantenere la sicurezza e le prestazioni.
- Backup dei dati: Eseguire periodicamente il backup dei dati importanti su un'unità esterna o su un archivio cloud.
7. Risoluzione Dei Problemi
Questa sezione affronta i problemi più comuni che potresti incontrare.
7.1. Nessun potere
- Assicurarsi che l'adattatore di alimentazione sia collegato saldamente sia al Mini PC sia a una presa di corrente funzionante.
- Verificare che la presa di corrente funzioni collegandovi un altro dispositivo.
- Controllare che l'adattatore di alimentazione non presenti danni visibili.
7.2. Nessuna uscita di visualizzazione
- Confirm that the monitor is powered on and set to the correct input source (HDMI, Type-C).
- Verificare che il cavo HDMI o Type-C sia collegato saldamente sia al Mini PC sia al monitor.
- Se disponibile, provare un cavo di visualizzazione o un monitor diverso.
7.3. Nessuna connessione Internet
- Wired: Assicurati che il cavo Ethernet sia collegato correttamente e che il router/modem funzioni.
- Senza fili: Check WiFi settings in Windows 11, ensure WiFi is enabled, and you are connected to the correct network with the correct password. Restart your router/modem if necessary.
7.4. Le periferiche non rispondono
- Prova a collegare la periferica a una porta USB diversa.
- Assicurarsi che i driver della periferica siano installati e aggiornati.
- Se possibile, testare la periferica su un altro computer.
8. Specifiche
Detailed technical specifications for the NIMO Mini PC Desktop DNB1.
| Caratteristica | Specificazione |
|---|---|
| Modello | DNB1 |
| Processore | Intel N100 di 12a generazione (fino a 3.4 GHz) |
| Core/Thread | 4 core / 4 thread |
| Grafica | Grafica Intel UHD |
| Memoria RAM | 16 GB DDR5 |
| Magazzinaggio | SSD PCIe da 512 GB |
| Risoluzione massima dello schermo | 3840x2160 pixel (4K) |
| Uscita di visualizzazione | 2x HDMI 2.0, 1x Type-C (supports triple display) |
| Porte USB | 3x USB 3.2 Type-A, 1x USB Type-C |
| Rete | Gigabit Ethernet (LAN), WiFi 6 |
| Bluetooth | Bluetooth 5.2 |
| Sistema operativo | Finestre 11 |
| Peso dell'articolo | 1.76 libbre |
| Fonte di alimentazione | DC |

Image 8.1: Summary of key features including Intel 12th Gen N100 processor, 4K Ultra HD support, Bluetooth 5.2, LPDDR5, WiFi 6, and PCIe SSD.
9. Garanzia e supporto
NIMO is committed to providing excellent customer service and product reliability.
- Politica di ritorno: You may request a return or exchange within 90 days of purchase.
- Supporto tecnico: The NIMO Mini PC Desktop comes with 2 years of technical support. If you encounter any issues, please contact our dedicated customer support team for assistance.
For support, please refer to the contact information provided with your purchase or visit the official NIMO websito.