
VIKIO HOME VK-RB12-30-T
VIKIO HOME Range Hood Insert
Model: VK-RB12-30-T
Manuale di istruzioni per l'utente
1. Introduzione e oltreview
Thank you for choosing the VIKIO HOME Range Hood Insert. This manual provides essential information for the safe and efficient installation, operation, and maintenance of your new range hood. Please read this manual thoroughly before installation and retain it for future reference.

Figure 1: VIKIO HOME Range Hood Insert (Model VK-RB12-30-T)
2. Informazioni sulla sicurezza
Always follow basic safety precautions when using electrical appliances to reduce the risk of fire, electric shock, or injury. This appliance is intended for household use only. Do not attempt to repair or replace any part of your range hood unless specifically recommended in this manual. All other servicing should be referred to a qualified technician.
- Ensure the power supply is disconnected before installation, cleaning, or servicing.
- È necessaria una corretta messa a terra.
- Non utilizzare la cappa da cucina con un cavo o una spina danneggiati.
- Maintain proper ventilation in the room when the range hood is used simultaneously with appliances burning gas or other fuels.
- Pulire regolarmente i filtri antigrasso per prevenire incendi dovuti al grasso.
3. Elenco delle parti
Verificare che tutti i componenti siano presenti prima di iniziare l'installazione:
- Range Hood Insert Unit
- Ducting (if applicable for ducted installation)
- Charcoal Filters (for ductless conversion)
- Installation Hardware (screws, anchors, brackets)
- Manuale d'uso

Figure 2: Included components for the range hood insert.
4. Installazione e configurazione
The VIKIO HOME Range Hood can be installed in both ducted and ductless configurations. Ensure you have the necessary tools and follow local building codes.
4.1 Passaggi di pre-installazione
- Measure your cabinet opening to ensure it accommodates the 30-inch insert. Refer to the specifications section for exact dimensions.
- Prepare the cabinet for installation, ensuring adequate support for the range hood's weight.
- For ducted installation, ensure the ductwork is properly sized and routed. For ductless, ensure charcoal filters are installed.
4.2 Montaggio della cappa
Carefully lift the range hood into the prepared cabinet opening. Secure it using the provided mounting screws and brackets. Ensure it is level and firmly attached.
Video: Range Hood Insert/Built-in-Installation Demonstration. This video provides a visual guide for installing the range hood insert into your cabinet.
4.3 Collegamento elettrico
Connect the range hood to a grounded electrical outlet. Ensure the voltage matches the product specifications (110 Volts).

Figure 3: Connecting the range hood to power.
5. Istruzioni per l'uso
Your VIKIO HOME Range Hood features both touch and gesture controls for ease of use.
5.1 Pannello di controllo Sopraview

Figure 4: Gesture and Touch Control Panel.
Il pannello di controllo comprende:
- Accensione/spegnimento: Toccare l'icona di accensione per accendere o spegnere l'unità.
- Controllo della luce: Touch the light bulb icon to turn the LED lights on or off. The 4000K LED lights provide clear illumination for your cooking area.
- Controllo della velocità della ventola: Select from 3 fan speeds (Low, Medium, High) using the fan speed icons. The 980 CFM motor efficiently removes smoke and odors.
- Controllo gestuale: Wave your hand in front of the sensor to activate or adjust settings. This feature offers 25% higher sensitivity for convenient operation, especially with dirty hands.

Figure 5: Bright LED lighting for enhanced visibility.
5.2 Modalità di ventilazione
The range hood supports both ducted and ductless ventilation. For heavy cooking tasks, ducted mode is recommended. For light to moderate tasks, ductless mode is suitable.

Figure 6: Ducted vs. Ductless Ventilation.
6. Manutenzione
Una manutenzione regolare garantisce prestazioni ottimali e longevità della cappa.
6.1 Pulizia dei filtri antigrasso
The stainless steel baffle filters are dishwasher-safe and easy to remove. Clean them regularly (monthly or more frequently depending on cooking habits) to prevent grease buildup and maintain efficient air filtration.
- Turn off and unplug the range hood.
- Locate the filter latches and release the filters.
- Place filters in the dishwasher or wash by hand with hot, soapy water.
- Lasciare asciugare completamente i filtri prima di reinstallarli.
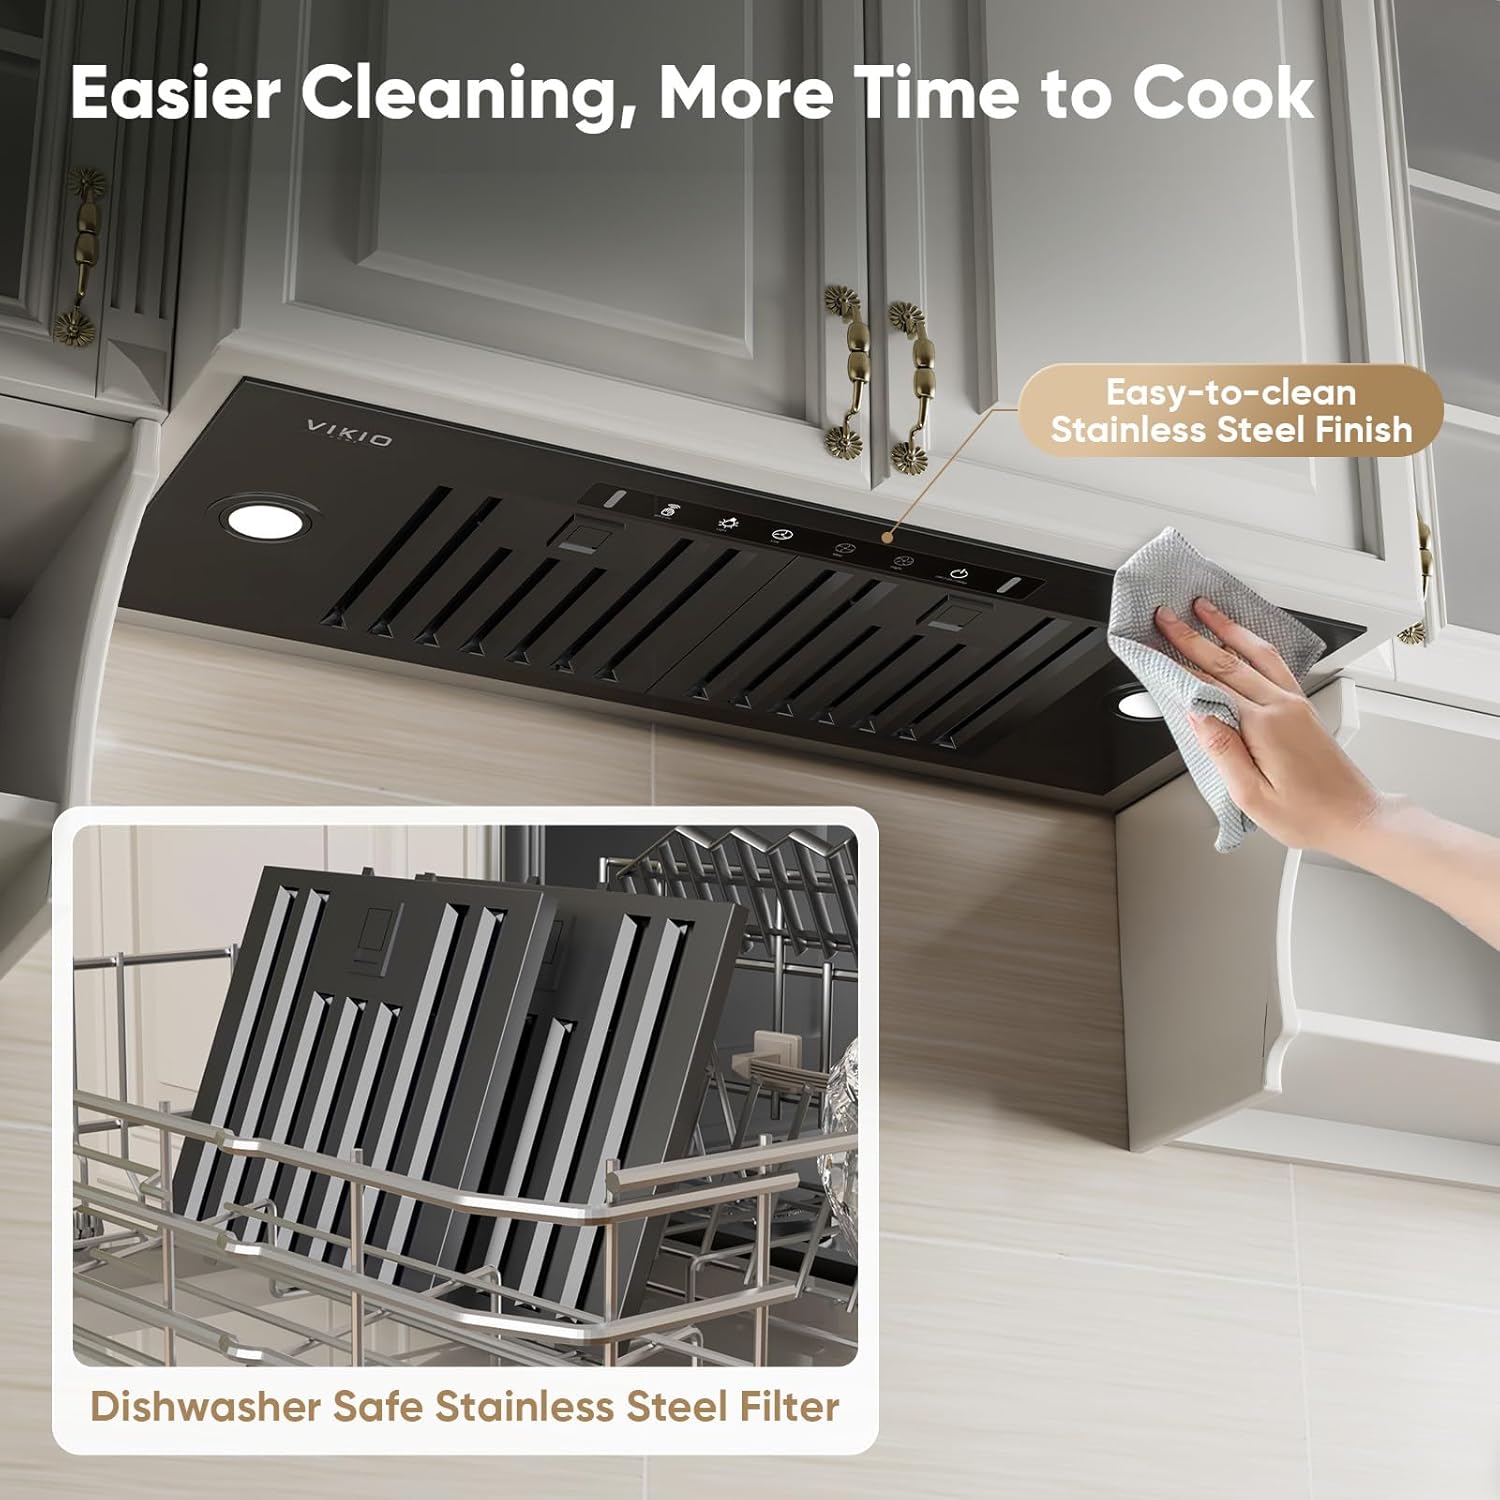
Figure 7: Easy-to-clean stainless steel filters.
6.2 Pulizia delle superfici esterne
Wipe exterior stainless steel surfaces with a soft cloth and a non-abrasive stainless steel cleaner. Avoid harsh chemicals or abrasive pads that can scratch the finish.
6.3 Sostituzione dei filtri al carbone (modalità senza condotti)
If using the range hood in ductless mode, charcoal filters should be replaced every 3-6 months, depending on usage. Refer to the product's accessory guide for compatible replacement filters.
7. Risoluzione Dei Problemi
If you encounter issues with your range hood, consult the following table before contacting customer service.
| Problema | Possibile causa | Soluzione |
|---|---|---|
| La cappa non funziona | Nessuna alimentazione | Controllare che il cavo di alimentazione sia collegato e che l'interruttore automatico sia acceso. |
| Scarse prestazioni di aspirazione | Clogged grease filters or improper ducting | Clean or replace grease filters. Check ductwork for obstructions or proper sealing. |
| Rumore eccessivo | Loose parts, improper installation, or ducting issues | Ensure all screws are tightened. Verify proper installation and check ductwork for kinks or restrictions. |
| Le luci non funzionano | Bulb failure or electrical issue | Replace LED bulbs if necessary. Check electrical connections. |
8. Specifiche
| Caratteristica | Dettaglio |
|---|---|
| Numero di modello | VK-RB12-30-T |
| Capacità del flusso d'aria | 980 piedi cubi al minuto (CFM) |
| Materiale | Acciaio inossidabile |
| Livello di rumore | As low as 35 dBA (low speed), under 65 dBA (high speed) |
| Tipo di montaggio | Inserisci supporto |
| Tipo di controlli | Touch & Gesture Control |
| Voltage | 110 Volt |
| Numero di velocità | 3 |
| Peso dell'articolo | 14.8 libbre |
| Tipo di sorgente luminosa | LED (4000K, 3W) |
| Tipo di filtro | Deflettore (lavabile in lavastoviglie) |
| Tipo di ventilazione | Convertibile canalizzato/senza condotti |
| Dimensioni del prodotto (L x P x A) | 11.77 x 27.71 x 13.66 pollici |

Figure 8: Product Dimensions and Installation Guide.
9. Garanzia e supporto
VIKIO HOME offers a comprehensive warranty for this product. For detailed warranty information, please refer to the warranty card included in your product packaging or visit the official VIKIO HOME website. For any questions, concerns, or to request free replacements for accessories like filters and lights, please contact our professional and friendly customer service team. Contact information can be found on our websito o sulla confezione del prodotto.
Ask a question about this manual
Ask about setup, troubleshooting, compatibility, parts, safety, or missing instructions. Manuals+ will review the question and use this page’s manual context to help answer it.