
1. Introduzione
The LONGER Ray5 mini is a compact and portable laser engraving machine designed for hobbyists, DIY enthusiasts, and small business owners. It features a 3.5W laser module capable of engraving and cutting a wide range of materials with high precision. This manual provides essential information for the safe and effective use of your device.
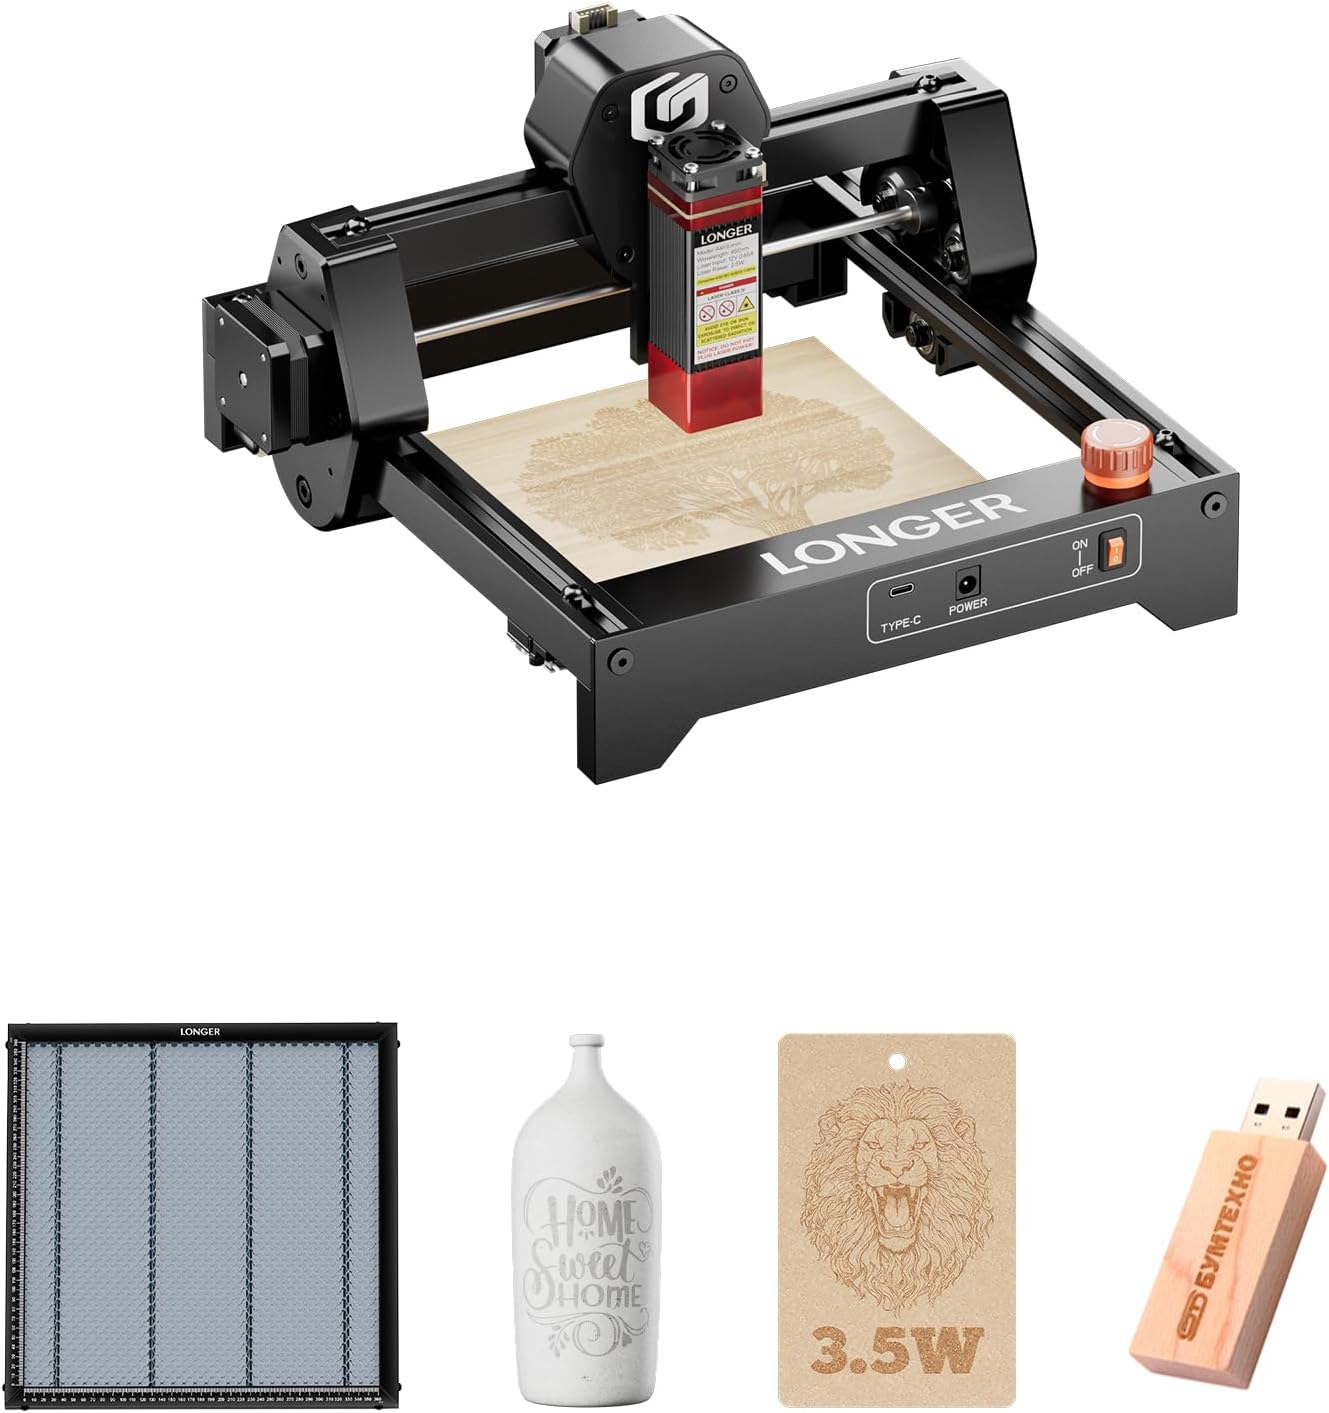
Figure 1: LONGER Ray5 mini Laser Engraver 3.5W. This image displays the compact laser engraving machine with its laser module positioned over a piece of wood, ready for engraving.
2. Precauzioni di sicurezza
Operating a laser engraver involves potential hazards. Adhere strictly to the following safety guidelines to prevent injury or damage:
- Protezione degli occhi: Always wear the provided laser safety glasses (IPL 200nm-2000nm) when the laser is active. Never look directly at the laser beam.
- Ventilazione: Utilizzare la macchina in un'area ben ventilata per dissipare i fumi e il fumo prodotti durante l'incisione.
- Rischio di incendio: Tenere un estintore a portata di mano. Non lasciare la macchina incustodita durante il funzionamento, soprattutto quando si incidono materiali infiammabili.
- Arresto di emergenza: Familiarizzare con il pulsante di arresto di emergenza e con la sua posizione.
- Compatibilità dei materiali: Only engrave materials suitable for diode lasers. Avoid highly reflective materials or PVC, which can produce toxic fumes.

Figure 2: Safety features of the LONGER Ray5 mini. This image highlights the emergency stop button, the acrylic laser cover, and the included laser safety glasses, emphasizing the importance of eye protection during operation.
3. Contenuto della confezione
Upon unboxing your LONGER Ray5 mini, verify that all components are present:
- LONGER Ray5 mini Laser Engraver unit
- Modulo laser (3.5 W)
- Adattatore di alimentazione
- Cavo da USB-A a USB-C
- Occhiali di sicurezza laser
- Focus Block (Acrylic)
- Small Wrench (8mm & 10mm)
- Spazzola per la pulizia
- Guida rapida

Figure 3: Included accessories for the LONGER Ray5 mini. This image shows the laser engraver unit alongside its accessories, including safety glasses, power adapter, USB cable, wrench, brush, and focus block.
Video di unboxing e ispezione iniziale
Video 1: Longer Ray5 mini laser engraver. This video demonstrates the unboxing process, showing how to remove items from the box and check for missing components. It also covers the initial assembly of the laser module and cable connections.
4. Impostazione
4.1 Installazione del modulo laser
- Carefully insert the laser module into its designated slot on the X-axis carriage.
- Tighten the thumb screws to secure the laser module in place.
- Connect the laser module's cable to the corresponding port on the main unit.
4.2 Power Connection and Initial Checks
- Plug the DC power adapter into the machine's power input.
- Ensure all terminal connections are plugged in tightly.
- Turn on the emergency stop switch (rotate clockwise to release).
- Flip the rocker switch to the 'ON' position.
4.3 Messa a fuoco del laser
Accurate focusing is crucial for optimal engraving and cutting results:
- Place the material to be engraved on the working surface.
- Position the acrylic focus block directly under the laser module, resting on the material.
- Loosen the thumb screw on the side of the laser module.
- Gently lower the laser module until its bottom edge touches the top of the focus block.
- Tighten the thumb screw to secure the laser module.
- Remove the focus block. Your laser is now focused for the material.
4.4 Software Installation (LightBurn / LaserGRBL)
The LONGER Ray5 mini is compatible with LightBurn and LaserGRBL software. Download the latest versions from their official websiti.
- Bruciatura della luce: Visita lightburnsoftware.com to download the trial or full version.
- LaserGRBL: Visita www.lasergrbl.com to download the free software.
- Install the CH340 driver if prompted by the software or if the device is not recognized.
5. Istruzioni per l'uso
5.1 Collegamento all'incisore
- Connect the LONGER Ray5 mini to your computer using the provided USB-A to USB-C cable.
- Apri il software scelto (LightBurn o LaserGRBL).
- In the software, select the correct COM port for your engraver and establish a connection.
5.2 Preparazione del progetto
- Importa l'immagine o il design desiderato file nel software.
- Adjust the size and position of your design to fit your material.
- Set the coordinate system to absolute coordinates for precise placement.
5.3 Setting Engraving Parameters
Parameters like speed, power, and line interval will vary based on material and desired effect. Refer to your software's documentation for detailed guidance.
- Access the 'Cut/Layers' or 'Engraving Settings' menu in your software.
- Adjust the engraving speed (e.g., up to 12,000mm/min).
- Set the laser power (e.g., 2.5W or 3.5W module, adjust percentagE).
- Configure other settings such as line interval, image mode (dithering, grayscale), and air assist (if applicable).
5.4 Starting the Engraving Process
- Perform a 'Frame' or 'Border' test to ensure the design fits within your material.
- Ensure you are wearing your laser safety glasses.
- Click 'Start' or 'Run' in the software to begin engraving.
- Monitor the engraving process closely.
Engraving Demonstration Video
Video 2: Longer Ray5 mini laser engraver. This video demonstrates the software setup, parameter modification, and the actual engraving process on a piece of wood.
Creative Engraving Examples

Figura 4: Esamples of customized gifts created with the LONGER Ray5 mini. This image showcases various engraved items such as leather keychains, metallic painted tumblers, wooden signs, painted metal, food, rubber, paper, ceramic cups, and glass.
Video 3: Butterfly engraving with Longer Ray5 mini. This short video demonstrates the cutting capability of the Ray5 mini on paper to create intricate butterfly designs.
6. Manutenzione
6.1 Pulizia
- Regularly clean the laser lens with a soft, lint-free cloth and lens cleaning solution.
- Use the provided brush to remove dust and debris from the machine's rails and moving parts.
6.2 Checking for Loose Components
- Periodically inspect the X-axis and Y-axis belts for proper tension.
- Check the eccentric nuts on the wheels; if loose, adjust them using the provided wrench to ensure smooth movement of the laser module.
6.3 Honeycomb Working Table
The Longer honeycomb working table (if included in your package) offers effective desk and material protection, efficient heat dissipation, and cleaner cuts. Ensure it is clean and properly positioned for optimal results.

Figure 5: LONGER Ray5 mini with honeycomb panel. This image shows the laser engraver positioned on a honeycomb panel, which helps protect the work surface and improve cutting quality by allowing smoke and debris to pass through.
7. Risoluzione Dei Problemi
- Il laser non funziona: Check power connections, USB connection, and ensure the emergency stop button is disengaged. Verify laser module is correctly installed.
- Scarsa qualità dell'incisione: Re-focus the laser. Adjust speed and power settings in the software. Ensure material is flat and stable.
- Macchina non connessa: Verify USB cable is securely connected. Reinstall CH340 drivers. Check COM port selection in software.
- Skipping/Misalignment: Check for loose belts or eccentric nuts. Ensure the work area is clear of obstructions.
8. Specifiche
- Dimensioni del prodotto: 11.28 x 11.5 x 6.5 pollici
- Numero modello articolo: ray5 mini
- Potenza laser: 3.5W (Advanced Package)
- Velocità di incisione: Fino a 12,000 mm/min
- Dimensioni del punto laser: 0.04 mm x 0.04 mm
- Area di lavoro: 400 x 400mm (with honeycomb panel)
- Peso dell'articolo: 5.51 libbre
- Produttore: PIÙ LUNGO
- Materiali compatibili: Wood, Metal, Acrylic, Leather, Paper, Fabric, etc.
9. Garanzia e supporto
LONGER provides professional customer service and technical support. For any product issues or inquiries, please contact the support team.
- Telefono supporto tecnico: +1 888-575-9099
- Support Hours (Mon-Fri): 9:00am–6:00pm (EST, UTC-5)
- Support Hours (Sun-Thu): 8:30pm–7:00am (EST, UTC-5)

Figure 6: LONGER customer support. This image shows a customer service representative, highlighting the availability of professional support.