1. Introduzione
Grazie per l'acquistoasing the G Keni Elegant CD Player Alarm Clock Radio. This device combines a top-loading CD player, FM radio, Bluetooth speaker, MP3/USB music player, and an alarm clock with a wireless charging station. It is designed to provide versatile audio entertainment and convenience for your home. Please read this manual thoroughly before use to ensure proper operation and to maximize your experience with the product.
2. Cosa c'è nella scatola
- 1x G Keni Elegant CD Player Alarm Clock Radio (Model LC-10W)
- 1x Manuale del proprietario
- Cavo di alimentazione AC 1x
- 1x Remote Control (2*AAA dry batteries NOT INCLUDED)
3. Prodotto finitoview
Familiarize yourself with the main components and controls of your G Keni device.

Figura 3.1: Fronte view of the G Keni CD Player Alarm Clock with a smartphone charging wirelessly on top and the remote control.
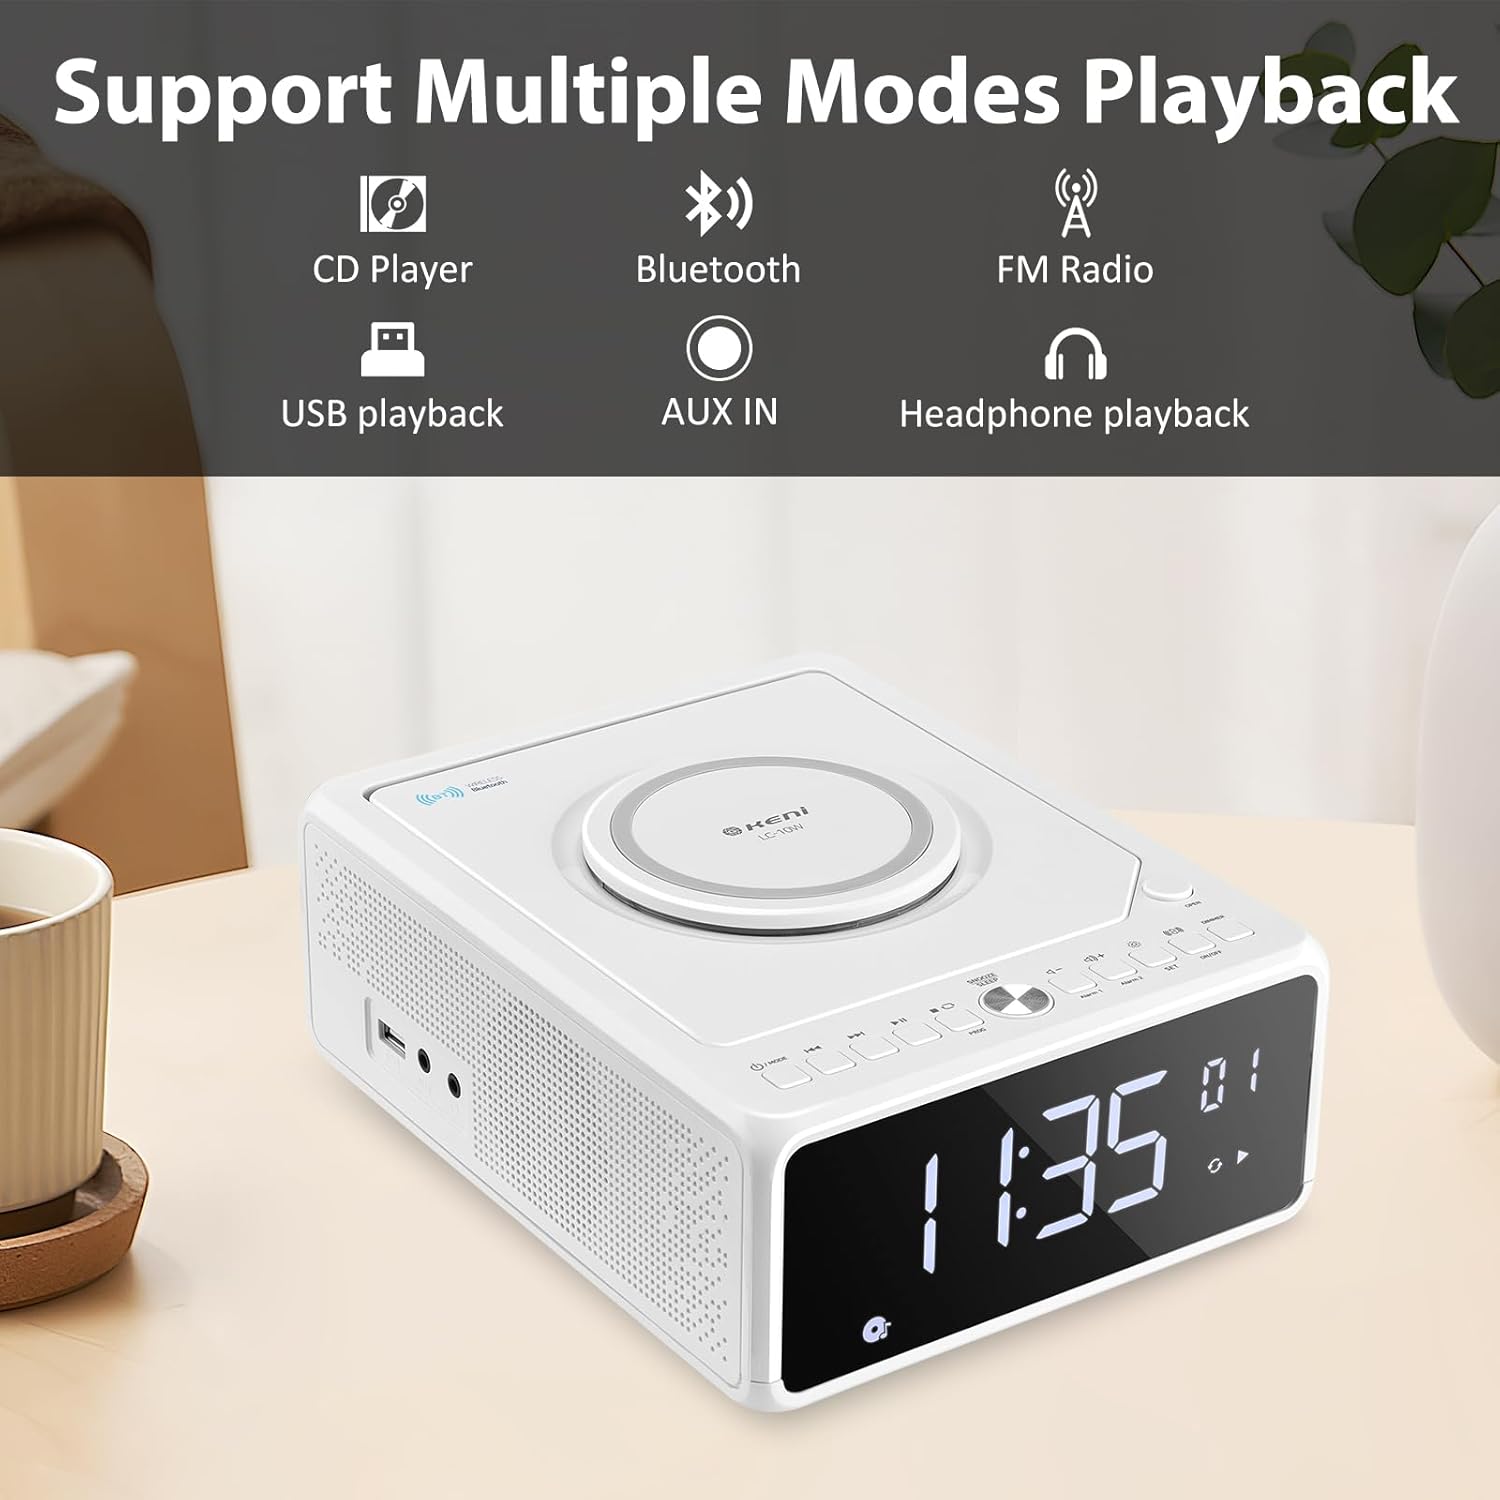
Figura 3.2: Oltreview of supported playback modes: CD Player, Bluetooth, FM Radio, USB playback, AUX IN, and Headphone playback.
3.1 Front Panel & Display
- Ampio display LED: Shows time, FM frequency, mode, and alarm status.
- Pulsanti di controllo: Power, Mode, Set, Volume, Skip/Tune, Alarm 1/2, Snooze/Dimmer.
3.2 Pannello superiore
- Scomparto CD: Top-loading mechanism for CDs.
- Pad di ricarica wireless: Per smartphone compatibili.
3.3 Rear/Side Panels
- Ingresso alimentazione CA: Si collega all'alimentatore.
- Antenna FM: Extendable wire antenna for radio reception.
- Porta USB: For MP3/WMA playback from USB drives.
- Ingresso AUX: Jack da 3.5 mm per dispositivi audio esterni.
- Uscita cuffie: Jack da 3.5 mm per l'ascolto privato.
- Vano batteria: For backup batteries (2*AAA, not included) to retain time settings during power outages.
4. Impostazione
4.1 Collegamento di alimentazione
- Insert 2 AAA batteries (not included) into the battery compartment on the bottom of the unit. These batteries serve as a backup for time settings during power interruptions.
- Connect the AC power cord to the AC input on the back of the unit, then plug the other end into a standard wall outlet (100V-240V).
- L'unità si accenderà e il display si illuminerà.
4.2 Impostazione dell'ora
- Premere e tenere premuto il tasto IMPOSTATO button until the hour digits begin to blink.
- Premere il tasto Forward (▶▶I) or Rewind (I◀◀) button to adjust the hour. Ensure the correct AM/PM indicator is selected if using 12-hour format.
- Premere il tasto IMPOSTATO button again. The minute digits will begin to blink.
- Premere il tasto Forward (▶▶I) or Rewind (I◀◀) pulsante per regolare i minuti.
- Premere il tasto IMPOSTATO ancora una volta per confermare e salvare l'ora.
- Per passare dal formato 12 ore a quello 24 ore, premere il tasto Forward (▶▶I) button while the hour digits are blinking during time setting.
4.3 Antenna FM
For optimal FM radio reception, fully extend the wire antenna located on the back of the unit. Adjust its position for the best signal.
5. Istruzioni per l'uso
5.1 Riproduzione CD

Figure 5.1: Inserting a CD into the top-loading compartment.
- Aprire il coperchio del vano CD nella parte superiore dell'unità.
- Place a CD (CD, CD-R/RW, MP3, audio-book) onto the spindle with the label side facing up.
- Chiudere il coperchio del vano CD.
- Premere il tasto MODALITÀ button until 'CD' mode is selected. The unit will begin playing automatically.
- Utilizzare il Riproduci/Pausa (▶II) per mettere in pausa o riprendere la riproduzione.
- Utilizzare il Forward (▶▶I) or Rewind (I◀◀) buttons to skip tracks. Press and hold to fast forward or rewind within a track.
- Regolare il volume utilizzando il Volume+ or vol- pulsanti.
5.2 Associazione Bluetooth
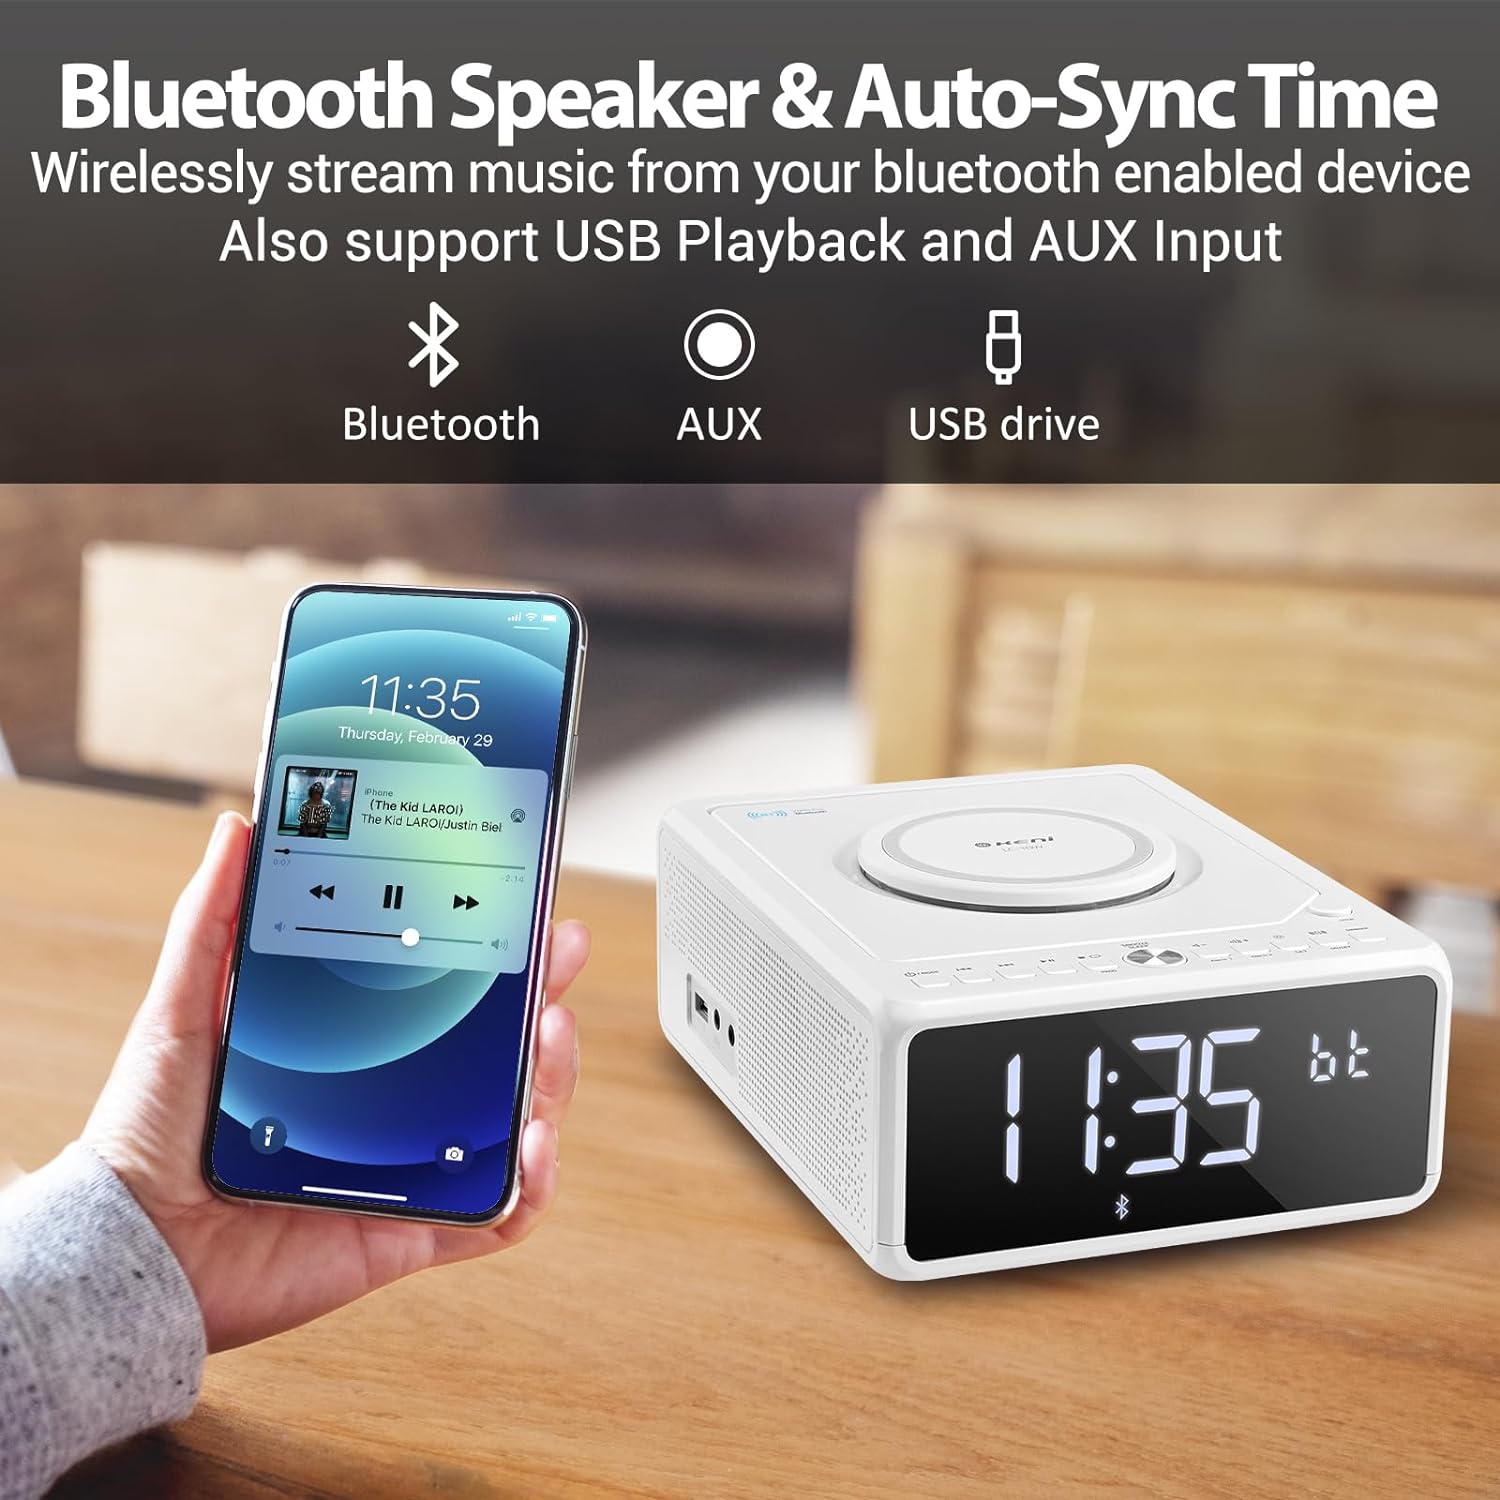
Figure 5.2: Streaming music from a smartphone via Bluetooth.
- Premere il tasto MODALITÀ button until 'BT' (Bluetooth) mode is selected. The display will show 'BT' and blink, indicating it's in pairing mode.
- Sul tuo smartphone o altro dispositivo abilitato Bluetooth, attiva il Bluetooth e cerca i dispositivi disponibili.
- Select 'G Keni' from the list of devices.
- Once paired, the 'BT' indicator on the display will stop blinking and remain solid. You can now stream audio from your device.
5.3 Funzionamento della radio FM

Figure 5.3: Enjoying FM radio with the G Keni unit.
- Premere il tasto MODALITÀ pulsante fino a selezionare la modalità 'FM'.
- Scansione automatica: Premere e tenere premuto il tasto Riproduci/Pausa (▶II) pulsante per eseguire la scansione automatica e salvare le stazioni FM disponibili.
- Sintonizzazione manuale: Premere il tasto Forward (▶▶I) or Rewind (I◀◀) pulsanti per sintonizzarsi manualmente su una frequenza specifica.
- Stazioni preimpostate: Utilizzare il CH+ or CH- buttons on the remote control to navigate through saved preset stations.
5.4 Riproduzione USB
- Inserire una chiavetta USB contenente audio MP3/WMA files nella porta USB.
- Premere il tasto MODALITÀ button until 'USB' mode is selected. The unit will automatically detect and begin playing audio files.
- Utilizzare il Riproduci/Pausa (▶II), Forward (▶▶I), E Rewind (I◀◀) pulsanti per controllare la riproduzione.
5.5 Ingresso AUX
- Collegare un dispositivo audio esterno (ad esempio un lettore MP3, uno smartphone) alla porta AUX IN utilizzando un cavo audio da 3.5 mm (non incluso).
- Premere il tasto MODALITÀ pulsante fino a selezionare la modalità 'AUX'.
- Controlla la riproduzione dal tuo dispositivo esterno collegato.
5.6 Funzioni della sveglia

Figure 5.4: The alarm clock on a bedside table, also showing wireless charging.
The unit features dual alarms (Alarm 1 and Alarm 2).
- Impostazione dell'ora della sveglia:
un. Tenere premuto il ALLARME 1 or ALLARME 2 pulsante finché le cifre delle ore non lampeggiano.
B. Utilizzare il Forward (▶▶I) or Rewind (I◀◀) buttons to set the desired hour.
c. Premere il tasto ALLARME 1 or ALLARME 2 button again. The minute digits will blink.
D. Utilizzare il Forward (▶▶I) or Rewind (I◀◀) buttons to set the desired minutes.
e. premi il ALLARME 1 or ALLARME 2 nuovamente il pulsante per confermare l'orario della sveglia. - Selezione della sorgente dell'allarme:
a. After setting the alarm time, the display will show options for the alarm sound (e.g., BB for Buzzer, TUNE for Radio, CD, USB, BT for Bluetooth).
B. Utilizzare il Forward (▶▶I) or Rewind (I◀◀) pulsanti per selezionare la sorgente di allarme preferita.
c. Premere il tasto ALLARME 1 or ALLARME 2 button to confirm the alarm source. - Setting Alarm Volume:
a. After selecting the alarm source, 'V' will blink on the display.
B. Utilizzare il Forward (▶▶I) or Rewind (I◀◀) pulsanti per regolare il volume della sveglia.
c. Premere il tasto ALLARME 1 or ALLARME 2 button to confirm the alarm volume. - Attivazione/disattivazione degli allarmi: Premere brevemente il tasto ALLARME 1 or ALLARME 2 pulsante per attivare o disattivare la sveglia. Quando è attiva, sul display apparirà un'icona di sveglia.
5.7 Snooze e timer di spegnimento
- Posticipa: Quando suona un allarme, premere il tasto SNOOZE/DIMMER button to temporarily silence the alarm for 9 minutes. The alarm will sound again after 9 minutes. This can be repeated within an hour.
- Sveglia: While playing audio (Radio, CD, USB, Bluetooth), press the SONNO button on the remote control repeatedly to cycle through sleep timer options (e.g., 10, 20, 30, 60, 90 minutes, or OFF). The unit will automatically turn off after the selected duration.
5.8 Luminosità dello schermo
Premere il tasto SNOOZE/DIMMER pulsante (o DIMENSIONATORE button on the remote) repeatedly to adjust the brightness of the LED display. There are 5 levels of dimmable settings, including an option to turn the display off completely.
5.9 Ricarica wireless

Figure 5.5: A smartphone being charged wirelessly on the unit's charging pad.
Place your Qi-enabled smartphone directly onto the wireless charging pad located on the top of the unit. Ensure the phone is centered for optimal charging. The unit supports fast wireless charging (Max 7.5W for iOS, 10W for Android).
5.10 Utilizzo del telecomando
The included remote control provides convenient access to all functions. Insert 2 AAA batteries (not included) into the remote before use. Buttons on the remote mirror most functions available on the unit's front panel, including Power, Mode, Volume, Skip/Tune, Alarm settings, Snooze, Sleep, and Dimmer.
6. Manutenzione
- Pulizia: Pulire l'unità con un panno morbido e asciutto. Non utilizzare detergenti abrasivi o solventi.
- Cura del CD: Maneggiare i CD tenendoli per i bordi. Mantenerli puliti e privi di graffi.
- Posizionamento: Place the unit on a stable, flat surface away from direct sunlight, heat sources, and moisture. Ensure adequate ventilation.
7. Risoluzione Dei Problemi
If you encounter issues with your G Keni device, please refer to the following common problems and solutions:
| Problema | Possibile causa | Soluzione |
|---|---|---|
| L'unità non si accende. | Cavo di alimentazione non collegato correttamente. | Assicurarsi che il cavo di alimentazione CA sia collegato saldamente sia all'unità sia a una presa a muro funzionante. |
| Il CD salta o non viene riprodotto. | Il CD è sporco, graffiato o inserito in modo errato. | Clean the CD with a soft, lint-free cloth. Ensure the CD is placed correctly in the compartment. Try a different CD. |
| Scarsa ricezione radio FM. | Antenna not extended or positioned poorly. | Fully extend the FM wire antenna and adjust its position for better signal. |
| Il dispositivo Bluetooth non si associa. | Unit not in BT mode or device too far. | Ensure the unit is in 'BT' mode and blinking. Keep your Bluetooth device within 10 meters (33 feet) of the unit. Restart both devices. |
| La ricarica wireless non funziona. | Phone not Qi-enabled, misaligned, or case too thick. | Ensure your phone supports Qi wireless charging. Realign the phone on the charging pad. Remove thick phone cases. |
| Alarm did not sound. | Allarme non attivato o impostato in modo errato. | Verify that the alarm is set and activated (alarm icon visible on display). Check alarm time and volume settings. |
8. Specifiche
- Numero modello: LC-10W
- Dimensioni del prodotto: 8.46 x 6.69 x 3.15 pollici
- Peso dell'articolo: 2.6 libbre
- Tecnologia di connettività: Ausiliario, Bluetooth, USB
- Tipo di altoparlante: Doppio altoparlante
- Potenza in ingresso: CA 100V-240V
- Uscita di ricarica wireless: Max 7.5W (iOS), Max 10W (Android)
- Gamma di frequenza FM: Frequenza 87.5-108 MHz
9. Garanzia e supporto
G Keni provides a one-year warranty for this product from the date of purchase. This warranty covers manufacturing defects and workmanship. It does not cover damage caused by misuse, accidents, unauthorized modifications, or normal wear and tear.
For technical assistance, warranty claims, or customer service inquiries, please contact G Keni customer support. Refer to the contact information provided on the product packaging or the official G Keni websito per i dettagli di supporto più aggiornati.