SCULPFUN C1
SCULPFUN C1 Mini 3W Laser Engraving Machine User Manual
Modello: C1
1. Introduzione
The SCULPFUN C1 Mini Laser Engraving Machine is a compact and portable 3W laser engraver designed for high-precision engraving on various materials. Featuring an ultra-fine 0.04mm laser spot, it is ideal for detailed photo engravings and intricate designs. This machine is pre-assembled for immediate use, making it suitable for beginners and creative professionals alike. Its robust safety features and broad software compatibility ensure a reliable and versatile engraving experience.
2. Importanti istruzioni di sicurezza
- Sicurezza laser: Always wear the provided protective glasses when the laser is operating. Never look directly at the laser beam.
- Ventilazione: Operate the machine in a well-ventilated area to dissipate smoke and fumes produced during engraving.
- Rischio di incendio: Do not leave the machine unattended during operation, especially when engraving flammable materials. Keep a fire extinguisher nearby.
- Bambini e animali domestici: Keep children and pets away from the engraving machine during operation.
- Arresto di emergenza: Familiarizzare con la posizione dell'interruttore di alimentazione per un rapido spegnimento in caso di emergenza.
- Magnetic Protective Cover: Ensure the magnetic protective cover is correctly installed to filter harmful wavelengths (100–500 nm).
- Interruttore d'arresto: The machine is equipped with X and Y axis limit switches for precise positioning and safe operation.
3. Contenuto della confezione
Verificare che tutti gli articoli siano presenti nel pacco:
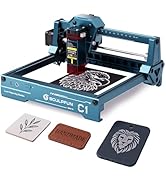
Image: Contents of the SCULPFUN C1 Mini Laser Engraver package.
- C1 Body
- Testa laser
- Metal Protective Plate
- Acrylic Focusing Sheet
- Manuale d'uso
- Adattatore di alimentazione
- Strumenti di riparazione
- Cavo dati
- Occhiali protettivi
- Metal Business Card (sample)
- Kraft Paper (sample)
- Compensato (sample)
- Panno per la pulizia
4. Prodotto finitoview
The SCULPFUN C1 features a compact design with clearly labeled ports and safety mechanisms.

Image: SCULPFUN C1 Mini Laser Engraver with key components and dimensions labeled.
Componenti chiave:
- Testa laser: The core component for engraving, featuring a 3W single-beam laser.
- X and Y Axis: Movement system for precise laser positioning.
- Interruttore d'arresto: Located on X and Y axes for automatic reset and safety.
- Magnetic Protective Cover: Red, removable cover over the laser head to filter harmful light and aid in smoke evacuation.
- Porta di alimentazione: Collega l'alimentatore.
- Porta dati: Connects to your computer for software control.
- Interruttore di alimentazione: Accende/spegne il dispositivo.
- Spia luminosa: Shows the device's operational status.
5. Guida all'installazione
The SCULPFUN C1 Mini is designed for quick and easy setup, being largely pre-assembled.
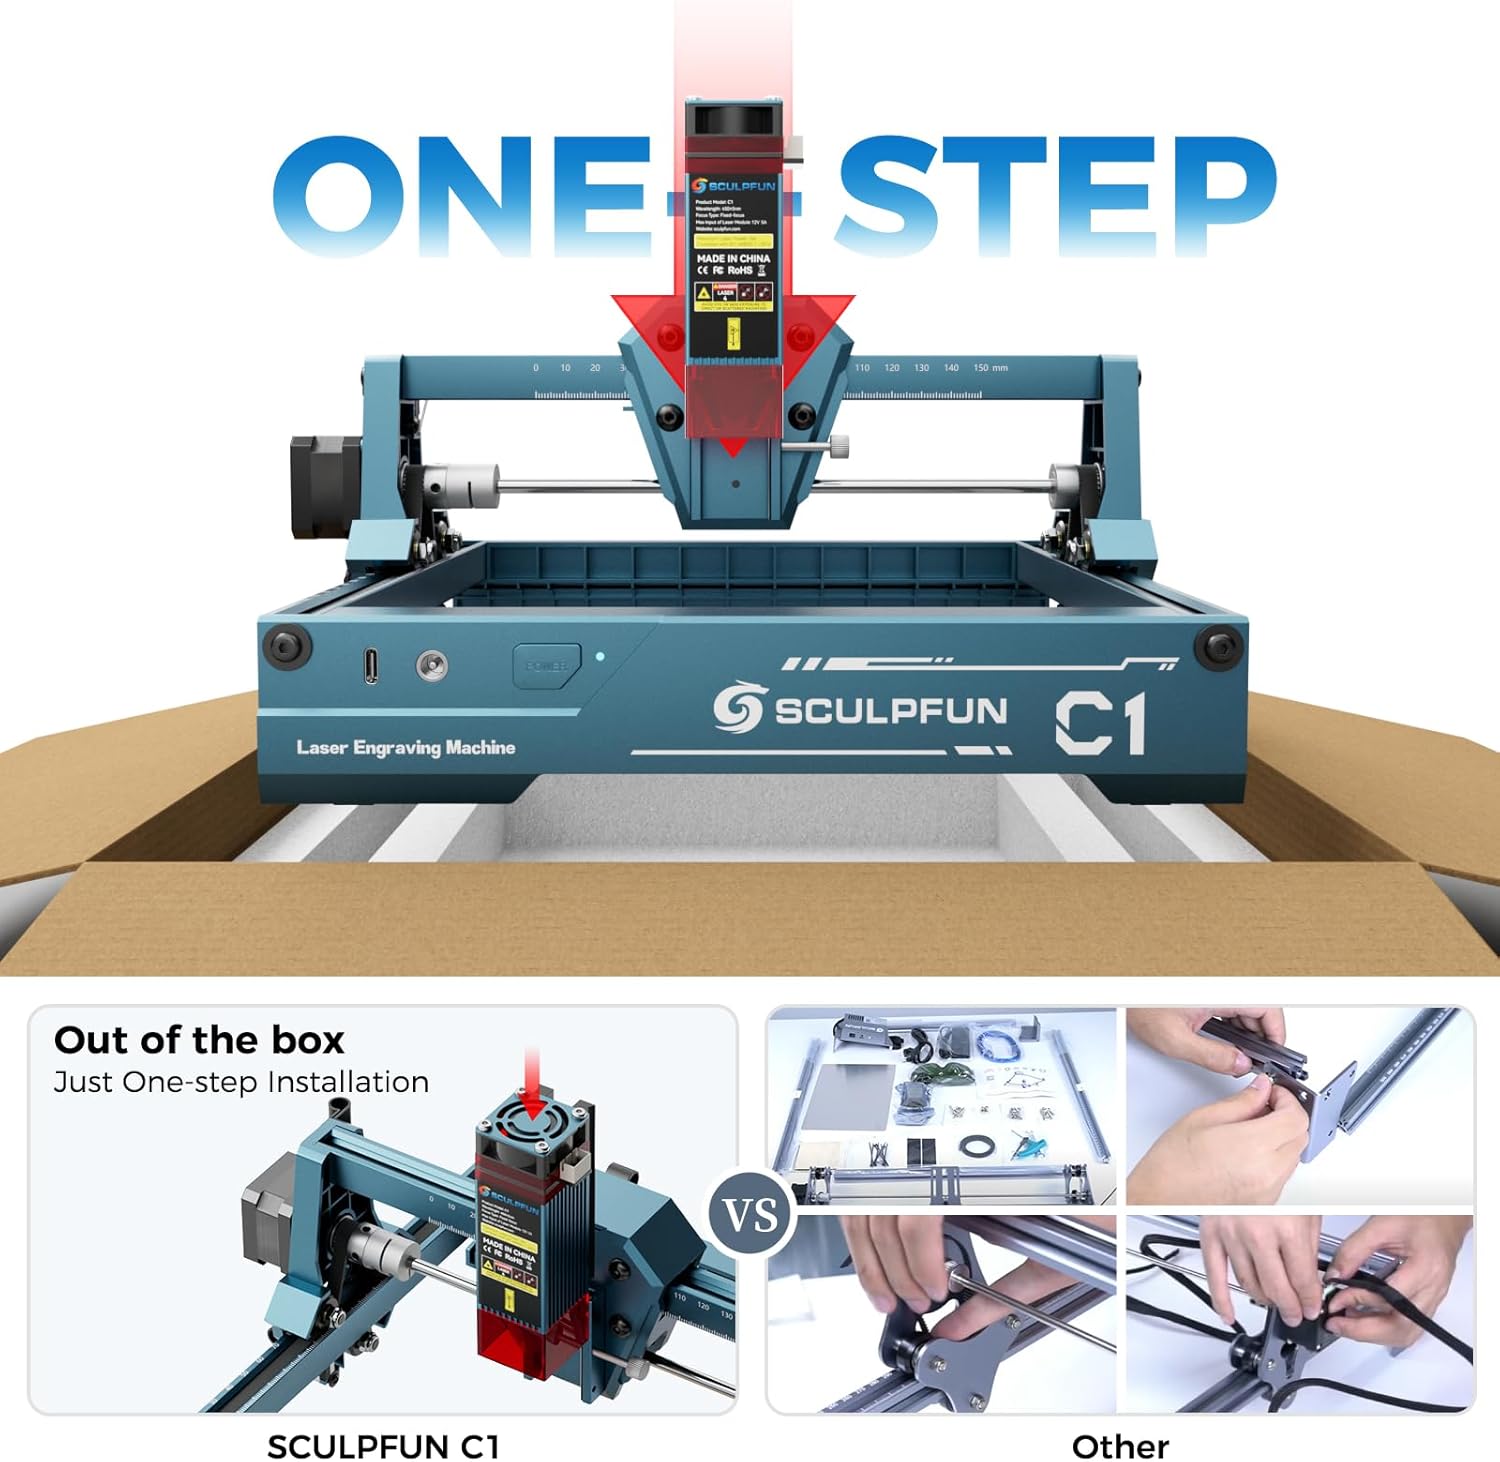
Image: The SCULPFUN C1 Mini is ready to use out of the box with minimal assembly.
- Disimballare: Carefully remove the SCULPFUN C1 Mini from its packaging.
- Posizionamento: Posizionare la macchina su una superficie stabile e piana, in un'area ben ventilata.
- Connetti alimentazione: Plug the power adapter into the Power Port on the machine, then into a suitable power outlet.
- Connetti dati: Connect the data cable from the Data Port on the machine to your computer.
- Installa il software: Install the recommended engraving software (LightBurn or LaserGRBL) on your computer. Refer to the software's documentation for installation instructions.
- Indossare occhiali protettivi: Always put on your protective glasses before turning on the machine.
6. Istruzioni per l'uso
6.1 Compatibilità software
The SCULPFUN C1 Mini is compatible with popular laser engraving software:
- Bruciatura della luce: Professional laser control software (additional purchase may be required).
- LaserGRBL: Free and open-source software with an easy-to-use interface.
Both software options are compatible with Windows and macOS operating systems. Supported image formats include JPG, PNG, BMP, GIF, SVG, and AI.

Image: Software compatibility and supported file formats for the SCULPFUN C1 Mini.
6.2 Processo di incisione
- Preparare il materiale: Place your material (e.g., wood, acrylic, paper) within the engraving area (150 x 130 mm). Ensure it is flat and secured.
- Metti a fuoco il laser: Use the acrylic focusing sheet to set the correct focal length for optimal engraving quality.
- Progettazione del carico: Open your chosen software (LightBurn or LaserGRBL) and load your desired image or design.
- Regola impostazioni: Configure engraving parameters such as speed, power, and line interval (recommended 0.04–0.06 mm for ultra-fine details).
- Inizia l'incisione: Initiate the engraving process from the software. Monitor the machine closely.

Image: Demonstrating the 0.04mm ultra-fine laser spot for high-precision engraving.
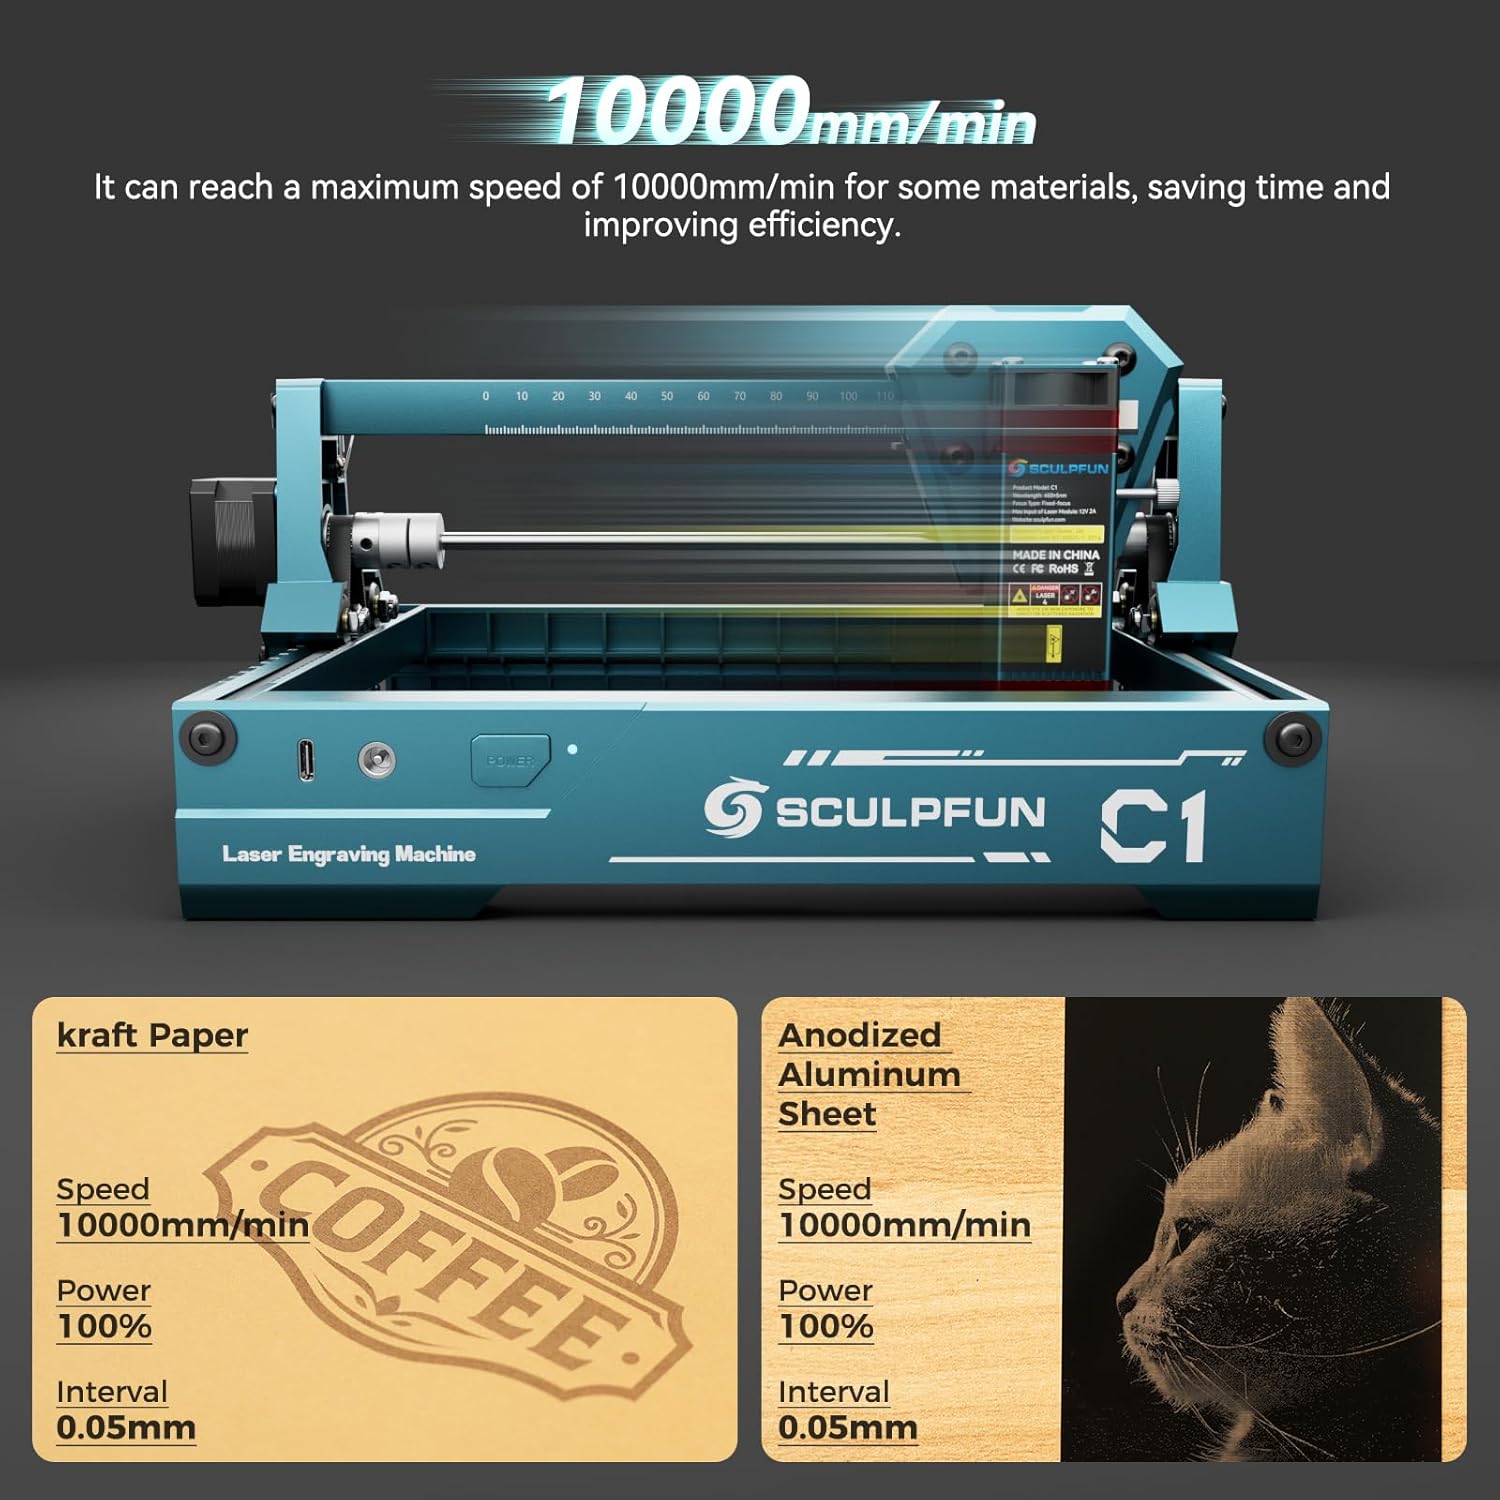
Image: High-speed engraving capabilities of the SCULPFUN C1 Mini.
Image: Optimized engraving area of 150 x 130 mm.
7. Manutenzione
- Pulisci la lente laser: Regularly clean the laser lens using the provided cleaning cloth to ensure optimal performance and prevent smoke residue buildup. The smoke exhaust outlet helps keep the lens clean during operation.
- Controllare le connessioni: Periodically inspect all cable connections for security.
- Mantenere l'area pulita: Maintain a clean working environment around the machine to prevent dust and debris from affecting its operation.

Image: Magnetic protective cover and smoke exhaust system for lens maintenance.
8. Risoluzione Dei Problemi
| Problema | Possibile causa | Soluzione |
|---|---|---|
| Il laser non si accende | Power cable loose, software not connected, laser head not properly seated. | Check power and data connections. Ensure software is connected and laser head is securely in place. |
| Scarsa qualità dell'incisione | Incorrect focal length, dirty lens, incorrect power/speed settings, material not flat. | Adjust focal length. Clean the laser lens. Optimize power and speed settings for the material. Ensure material is flat. |
| La macchina non si muove | Data cable loose, software error, limit switch engaged. | Verify data cable connection. Restart software and machine. Check if any limit switches are triggered. |
| Rumore insolito durante il funzionamento | Loose components, debris in moving parts. | Inspect for loose screws or foreign objects. Ensure smooth movement of axes. |
9. Specifiche
| Caratteristica | Dettaglio |
|---|---|
| Modello | C1 (CARC1) |
| Potenza laser | 3W (single-beam) |
| Precisione dell'incisione | 0.04 mm ultra-fine spot |
| Recommended Line Interval | 0.04–0.06 millimetri |
| Area di incisione | 150 x 130 millimetri |
| Velocità massima di incisione | 10000 mm/min |
| Dimensioni del prodotto (circa) | 290 mm (L) x 250 mm (D) x 140 mm (H) |
| Peso | 1.05 kg |
| Fonte di alimentazione | AC |
| Compatibilità software | LightBurn, LaserGRBL |
| Compatibilità del sistema operativo | Windows, macOS |
| Formati di immagine supportati | JPG, PNG, BMP, GIF, SVG, AI |
10. Garanzia e supporto
Per informazioni sulla garanzia, supporto tecnico o richieste di assistenza, fare riferimento al sito ufficiale SCULPFUN websito o contattare il rivenditore. Conservare la ricevuta d'acquisto come prova d'acquisto per eventuali reclami in garanzia.
Ask a question about this manual
Ask about setup, troubleshooting, compatibility, parts, safety, or missing instructions. Manuals+ will review the question and use this page’s manual context to help answer it.